Exsys EX-6114 User manual

Vers. 1.0 / 04.02.21
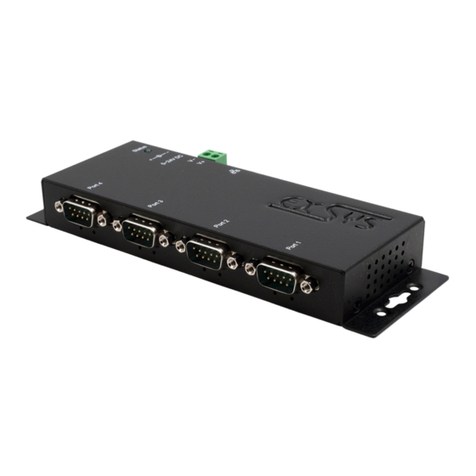
Ethernet to 4x Serial RS-232
EX-6114
Ethernet a 4x Seriele RS-232
Manual
Manuale

2
Italiano EX-6114
1. Descrizione······································································································· 3
2. Contenuto ········································································································ 3
3. Struttura, Connessioni & LED‘s···········································································4-5
3.1 Struttura······················································································································ 4
3.2 Connessione & LED‘s·································································································4-5
4. Installazione Hardware ·····················································································5-6
5. Configurazione del Device Server ········································································· 6
6. VCOM Admin Utility ························································································ 7-11
7. Pulizia ········································································································12
8. Dati Tecnici ··································································································12
9. Disegno Tecnico ·····························································································13
Indice
Index
© Copyright 2021 by EXSYS Vertriebs GmbH. All Rights Reserved
1. Description ······································································································13
2. Extent of Delivery······························································································13
3. Layout, Connections & LED’s········································································· 14-15
3.1 Layout ······················································································································ 14
3.2 Connections & LED‘s······························································································· 14-15
4. Hardware Installation····················································································· 16-17
5. Configuration of the Device Server ········································································16
6. VCOM Admin Utility ······················································································ 17-21
7. Cleaning··········································································································22
8. Technical Information·························································································22
9. Technical Drawing·····························································································22

3
EX-6114 English
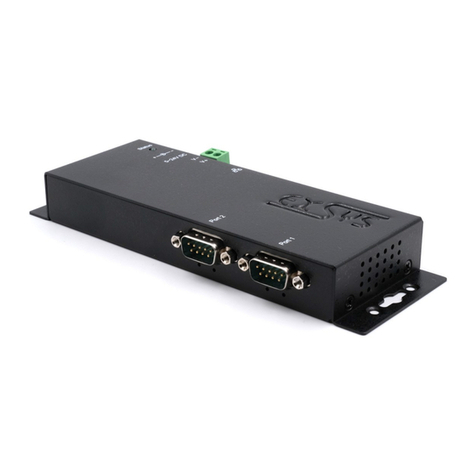
L'EX-6114 è un dispositivo server seriale RS-232 multiprotocollo. Progettato per
collegare quattro dispositivi seriali RS-232, come per esempio: POS, lettori di codi-
ci a barre, sensori, misuratori, controller CNC e PLC a una rete Ethernet basata su
IP. I dispositivi seriali sono così collegati alla rete e sono quindi disponibili per la
condivisione su Internet, con congurazione remota utilizzando i protocolli di rete
estesi come server TCP, client TCP, UDP, VCOM, Telnet seriale, RFC2217, master
slave a coppia remota, Modbus RTU. Per essere retrocompatibile con il dispositivo
seriale legacy che esegue il software applicativo della porta COM esistente.
EX-6114 fornisce un driver di reindirizzamento della porta COM virtuale (VCOM)
che migra perfettamente l'applicazione seriale senza modicare il software. Inoltre,
i dispositivi seriali con modalità master-slave di coppia remota possono comunicare
tra loro tramite la modalità peer-to-peer senza la necessità di un PC intermedio o di
un software di conversione.
Caratteristiche :
4x porte RS-232 tramite RJ45 Ethernet 10/100Mbps Bis 921.6 Kbps Baud Rate
Protocolli di rete: TCP Server, TCP Client, UDP, VCOM, Serial Telnet, RFC2217, Remote-Pair
-Master-Slave, Modbus Server, Modbus Client e SNMP
Congurazione: utilità di amministrazione VCOM basata su Windows e browser web
Supporta la protezione ESD 15KV per tutti i segnali seriali
Supporta 5 V tramite porta seriale
Certicazione:
Prima di installare la EX-6114 nella tua rete, dovresti prima controllare il contenuto della consegna:
EX-6114
Alimentatore (12V/3A)
Manuale
Driver su CD
1. Descrizione
2. Contenuto
© Copyright 2021 by EXSYS Vertriebs GmbH. All Rights Reserved
4
Italiano EX-6114
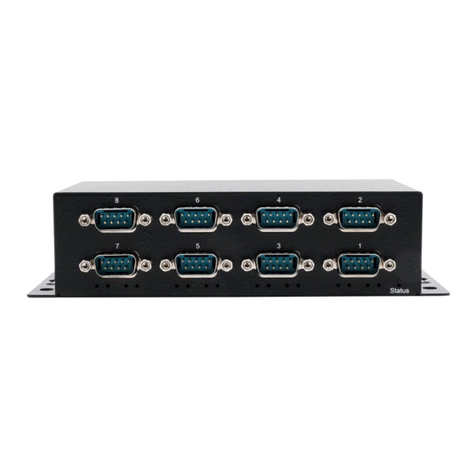
3.1 Struttura
3. Struttura, Connessioni & LED‘s
© Copyright 2021 by EXSYS Vertriebs GmbH. All Rights Reserved
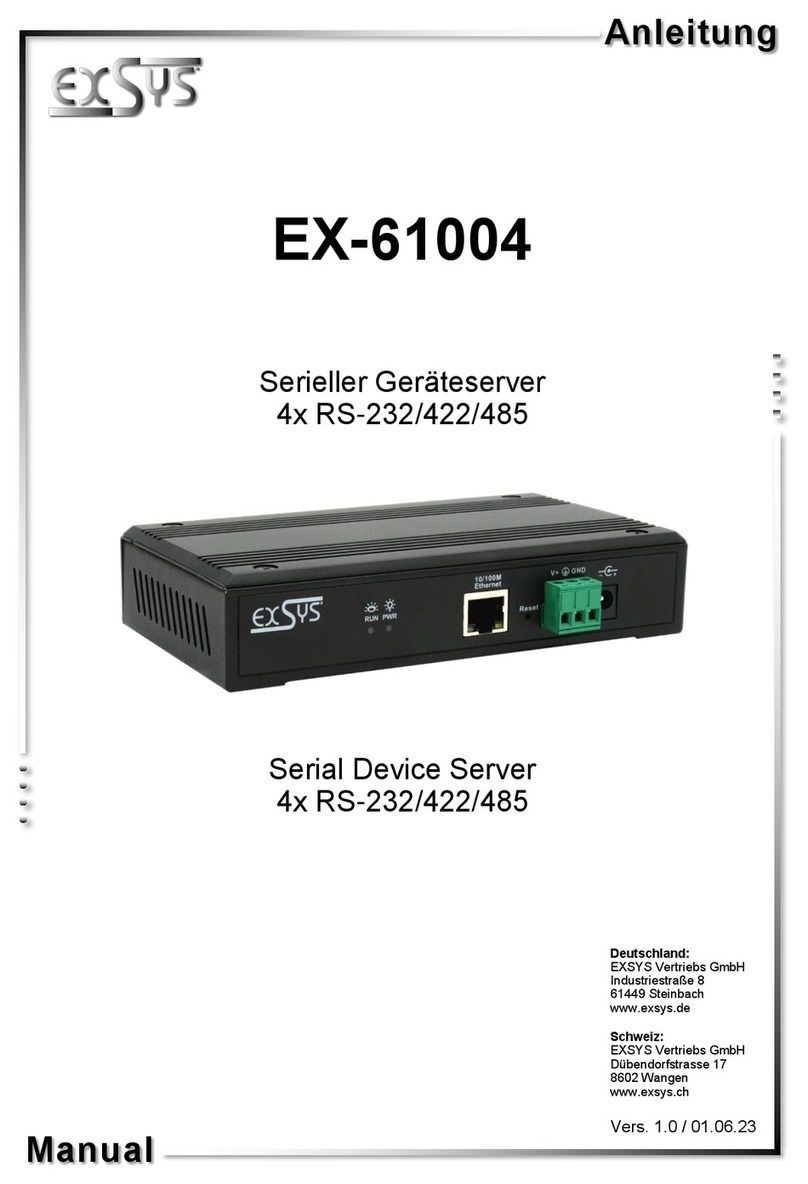
Status LED
4x Seriali 9 Pin D-SUB Maschio
Attacco RJ45 5-24V DC Attacco per
Alimentazione
Power/ACT LED
PoE LED
TXD LEDRXD LED
Tasto Reset
3.2 Connessioni & LED‘s
Connettore RJ45 :
RJ45
Pin Signal Pin Signal Pin Signal
1BI_DA+ 4BI_DC+ 7BI_DD+
2BI_DA- 5BI_DC- 8BI_DD-
3BI_DB+ 6BI_DB-
Connettore DB 9M:
Seriale 9 Pin D-SUB Maschio
Pin Signal Pin Signal Pin Signal
1DCD 4DTR 7RTS
2RXD 5GROUND 8CTS
3TXD 6DSR 9(Power)
Davanti:
Dietro:
5-24V T-Block
Alimentazione
Opzionale

5
EX-6114 English
3. Struttura, Connessioni & LED‘s
3.2 Connessioni & LED‘s
© Copyright 2021 by EXSYS Vertriebs GmbH. All Rights Reserved
LED‘s:
Fori per installazione a parete
Nome LED Colore Funzione LED
Power/Act LED
(RJ45) VERDE Sempre acceso: RJ45 è alimentato
Lampeggiante: trasmissione dati sulla rete
Spento: non c'è alimentazione al RJ45
PoE LED
(RJ45) ARANCIO Sempre acceso: Prelievo dell'alimentazione dal cavo
LAN (solo modello PoE)
Off: L'alimentazione PoE non viene assorbita
Status LED
VERDE Lampeggiante: Il dispositivo è stata avviata
(occorrono ca. 25-30 secondi per l‘accensione)
Spento: l'unità non è ancora stata avviata
TXD LED
(rechts) VERDE Lampeggiante: L'interfaccia seriale invia i dati
Spento: L'interfaccia seriale non invia alcun dato
RXD LED
(links) VERDE Lampeggiante: L'interfaccia seriale riceve i dati
Spento: L'interfaccia seriale non sta ricevendo dati
4. Installazione Hardware
Si prega di osservare le seguenti istruzioni di installazione. Poiché ci sono grandi differenze tra i
PC, possiamo solo darvi una guida generale per il collegamento dell'EX-6114. In caso di doman-
de, fare riferimento alle istruzioni per l'uso del proprio computer.
1. Installare l'EX-6114 su una guida di montaggio utilizzando il kit guida DIN opzionale o su una
parete.

6
Italiano EX-6114
© Copyright 2021 by EXSYS Vertriebs GmbH. All Rights Reserved
4. Installazione Hardware
3. Ora usa un cavo Ethernet e collegalo alla porta RJ45 dell'EX-6114 e l'altra estremità a un PC o
uno switch.
4. Ora collega i tuoi dispositivi seriali ai connettori D-SUB a 9 pin dell'EX-6114.
5. Collegare ora l'alimentatore 5V incluso nell'estensione di fornitura alla presa 5V prevista a tale
scopo sull'EX-6114.
6. Attendere circa 25-30 secondi finché il LED di stato non inizia a lampeggiare. Non appena
questo LED lampeggia, il dispositivo è pronto per il funzionamento.
5. Configurazione del Device Server
Impostazione di fabbrica :
L'EX-6114 viene fornito con le seguenti impostazioni di fabbrica :
Login User Name: admin
Password: system
IP Address: DHCP (Assegnato automaticamente )
Network Operation Mode: VCOM Mode
Serial Interface: RS-232
Se si desidera ripristinare l'EX-6114 alle "impostazioni di fabbrica", tenere premuto l'interruttore di
ripristino per circa 3-5 secondi.
Il LED di stato si spegne e ricomincia a lampeggiare dopo pochi secondi.
Tenete presente che le impostazioni dopo il ripristino non sono identiche alle impostazioni di
fabbrica! Se hai ripristinato l'EX-6114 alle "impostazioni di fabbrica", avrai le seguenti impostazioni
nel dispositivo:
Login User Name: admin
Password: system
IP Address: Statisch 192.168.2.1
Network Operation Mode: TCP Server Mode
Serial Interface: RS-232

7
EX-6114 English
© Copyright 2021 by EXSYS Vertriebs GmbH. All Rights Reserved
6. VCOM Admin Utility
Poiché EX-6114 è stato spedito con la modalità DHCP abilitata, è necessario un indirizzo IP per
configurarlo. Per impostazione predefinita, EX-6114 riceve automaticamente un indirizzo IP da un
server DHCP (ad es. Il router). Se non è connesso a un server DHCP, utilizzare l'indirizzo IP
predefinito: 192.168.2.1. Per determinare l'indirizzo IP, è necessario installare l'utilità di amminist-
razione VCOM fornita (vspsetup.exe). Il programma di installazione si trova nella seguente cartella
sul CD del driver compreso nella fornitura.
Importante! Eseguire il programma di installazione facendo clic con il pulsante destro del
mouse su "Esegui come amministratore"!
1. Determinare l'indirizzo IP: avviare l'utilità di amministrazione VCOM (fare clic con il
pulsante destro del mouse sul collegamento all'utilità di amministrazione VCOM sul desk-
top di Windows e avviarla con "Esegui come amministratore").
Fare clic su Gestione dispositivo remoto> AGGIUNGI Dispositivo> Cerca
Dopo aver trovato l'EX-6114, fare clic su Annulla per interrompere la ricerca. Fare clic su OK per
aggiungere EX-6114.

8
Italiano EX-6114
© Copyright 2021 by EXSYS Vertriebs GmbH. All Rights Reserved
6. VCOM Admin Utility
2. Assegnazione delle porte COM: Per creare la porta COM virtuale e assegnarla al disposi-
tivo seriale, fare clic su Mappatura COM> Aggiungi COM> OK
Per modificare il numero della porta COM, fare clic su COM Mapping> Modifica COM
Ora è stata aggiunta la COM1-COM4!

9
EX-6114 English
© Copyright 2021 by EXSYS Vertriebs GmbH. All Rights Reserved
6. VCOM Admin Utility
Si prega di verificare se le porte COM sono state aggiunte in Gestione dispositivi! Le seguenti voci
dovrebbero ora essere visibili in Gestione dispositivi:
3. Modifica delle impostazioni dell'interfaccia seriale: se si modificano le impostazioni
dell'interfaccia seriale su valori diversi da quelli predefiniti (ad es.Descrizione dispositivo, Pass-
word, ...), è necessario prima accedere al Device Server (la password predefinita per questo è
"sistema").
Fare clic su Gestione dispositivo remoto> Accedi

10
Italiano EX-6114
© Copyright 2021 by EXSYS Vertriebs GmbH. All Rights Reserved
6. VCOM Admin Utility
Dopo aver effettuato l'accesso, fare clic su Gestione dispositivo remoto e quindi fare doppio clic sul
server del dispositivo selezionato nell'elenco.
Doppio click
Clicca su Remote Device Management > (Doppio click sulla voce selezionata nell'elenco) > Basic
> Device Description > OK
Doppioclick

11
EX-6114 English
© Copyright 2021 by EXSYS Vertriebs GmbH. All Rights Reserved
6. VCOM Admin Utility
4. Modifica della modalità operativa della porta: se si modifica la modalità operativa della porta in
altre modalità (ad es. Modbus, UDP, client TCP, ...) rispetto alla modalità VCOM predefinita, è
necessario utilizzare invece il browser web. Per aprire il menu di configurazione Web, fare clic su
Gestione dispositivo remoto> (selezionare "Elemento server dispositivo")> Apri nel browser e im-
mettere le seguenti credenziali:
User Name: admin
Password: system
Clicca su Port Config > Port 1 > Operation Mode > Apply > Save & Restore

12
Italiano EX-6114
7. Pulizia
Per pulire il dispositivo, utilizzare solo un panno asciutto e non sfilacciato e rimuovere lo sporco
con una leggera pressione. Nell'area dei collegamenti, assicurarsi che non rimangano fibre di
tessuto nelle presea.
Non utilizzare mai un panno umido o bagnato per la pulizia!
8. Dati Tecnici
Trasferimento dati: Da 50 fino a 921.6 Kbps Baud Rate
Attacchi: 4x 9 Pin D-SUB seriale maschio, 1x RJ45 attacco Ethernet ,
1x 12V DC femmina, 1x Morsettiera 5-24V
Sistema Hardware: Ethernet 10/100 Mbit/s
VCOM Admin Utility: Windows XP/ Vista/ 7/ 8.x/ 10/ Server 20xx
Sistema Operativo: Tutto tramite IP e numero di porta (porta presa di controllo diretto)
Temperatura di esercizio: da 0° fino a 60° Celsius
Temperatura di donservazione: da -20° bis 75° Celsius
Rel. Umidità: dal 5% al 95%
Classe di protezione: IP30
Alimentazione: +12/3A o +5-24V
Dimensione: 179,00 x 59,50 x 23,00 mm
Peso: 691g
9. Disegno Tecnico
© Copyright 2021 by EXSYS Vertriebs GmbH. All Rights Reserved
13
EX-6114 English
© Copyright 2021 by EXSYS Vertriebs GmbH. All Rights Reserved
The EX-6114 is a multi-protocol RS-232 serial device server. Which is designed to connect four
RS-232 serial devices, including POS, barcode readers, sensors, meters, CNC controllers and
PLCs to an IP-based Ethernet network. The serial devices are thus connected to the network and
are thus available for sharing on the Internet, with remote configuration using the extensive net-
work protocols such as TCP server, TCP client, UDP, VCOM, serial Telnet, RFC2217, remote pair
master slave, Modbus RTU. To be backward compatible with the legacy serial device running the
existing COM port application software, EX-6114 provides a virtual COM port redirection driver
(VCOM) that perfectly migrates your serial application without modifying the software. In addition,
serial devices with remote pair master-slave mode can communicate with each other via peer-to-
peer mode without the need for an intermediate PC or conversion software.
Features:
4x RS-232 Port via RJ45 Ethernet 10/100Mbps
Up to 921.6 Kbps Baud Rate
Network Protocols: TCP Server, TCP Client, UDP, VCOM, Serial Telnet, RFC2217, Remote-
Pair-Master-Slave, Modbus Server, Modbus Client and SNMP
Configuration: Windows-based VCOM-Administrator-Utility and Web-Browser
Support 15KV ESD-Protection for all serial Signals
Support 5V over serial Connector
Certificate for
Before you integrate the EX-6114 into your network, you should first check the contents of the
delivery:
EX-6114
Power Supply (12V/3A)
Manual
Driver CD
1. Description
2. Extent of Delivery

14
English EX-6114
3.1 Layout
3. Layout, Connections & LED’s
© Copyright 2021 by EXSYS Vertriebs GmbH. All Rights Reserved
3.2 Connections & LED‘s
RJ45 Port:
RJ45 Port
Pin Signal Pin Signal Pin Signal
1BI_DA+ 4BI_DC+ 7BI_DD+
2BI_DA- 5BI_DC- 8BI_DD-
3BI_DB+ 6BI_DB-
DB 9M:
Serial 9 Pin D-SUB Connector
Pin Signal Pin Signal Pin Signal
1DCD 4DTR 7RTS
2RXD 5GROUND 8CTS
3TXD 6DSR 9(Power)
Front:
Status LED
4x Seriell 9 Pin D-SUB Stecker
RJ45 Port 5-24V DC Connector for
included Power Supply
Power/ACT LED
PoE LED
TXD LEDRXD LED
Reset Button
Back:
5-24V T-Block
for optional
Power Supply

15
EX-6114 English
© Copyright 2021 by EXSYS Vertriebs GmbH. All Rights Reserved
3. Layout, Connections & LED’s
3.2 Connections & LED‘s
LED‘s:
LED Name Color LED Function
Power/Act LED
(RJ45) Green Steady on: Power is On
Blinking: Transferring data on the Network
Off: Power is Off
PoE LED
(RJ45) Orange Steady on: Extracting the power from LAN cable (PoE model
only)
Off: LAN cable PoE Power is not extracted
Status LED
Green Blinking: The unit has booted
(25 ~ 30 seconds required from power up)
Off: The unit is not booted yet
TXD LED
(right) Green Blinking: The Serial Port is sending out data
Off: The Serial Port is not sending out any data
RXD LED
(left) Green Blinking: The Serial Port is receiving data
Off: The Serial Port is not receiving any data
4. Hardware Installation
Please observe the following installation instructions. Because there are big differences between
PC's, we can only give you a general guide for connecting the EX-6114. If you have any questions,
please refer to the operating instructions of your computer system.
1. Install the EX-6114 on a mounting rail by using the optional DIN rail kit or on a wall.
Holes for Wall Installation

16
English EX-6114
4. Hardware Installation
2. Now use an Ethernet cable and connect it to the RJ45 port of the EX-6114 and the other end to a
PC or a switch.
3. Now connect your serial devices to the 9 pin D-SUB connectors of the EX-6114.
4. Now connect the 5V power supply which is included in the extend of delivery to the 5V socket
provided for this purpose on the EX-6114. Wait about 25-30 seconds until the status LED starts to
blink. As soon as this LED flashes, the device is ready for operation.
© Copyright 2021 by EXSYS Vertriebs GmbH. All Rights Reserved
5. Configuration of the Device Server
Factory Settings:
The EX-6114 is delivered with the following factory settings:
Login User Name: admin
Password: system
IP Address: DHCP (Assigned Automatically)
Network Operation Mode: VCOM Mode
Serial Interface: RS-232
If you want to reset the EX-6114 to "Factory Settings", then press and hold the reset button for
approx. 3-5 seconds. The status LED goes out and starts flashing again a few seconds later.
Please note that the settings after the reset are not identical to the factory settings! When you have
reset the EX-6114 to "Factory Settings", you will have the following settings in the device:
Login User Name: admin
Password: system
IP Address: Static 192.168.2.1
Network Operation Mode: TCP Server Mode
Serial Interface: RS-232

17
EX-6114 English
© Copyright 2021 by EXSYS Vertriebs GmbH. All Rights Reserved
6. VCOM Admin Utility
Since the EX-6114 was shipped with DHCP mode enabled, an IP address is required to configure
it. By default, the EX-6114 automatically receives an IP address from a DHCP server (e.g. your
router). If it is not connected to a DHCP server, use the default IP address: 192.168.2.1. To deter-
mine the IP address, you must install the VCOM Admin Utility (vspsetup.exe) that comes with the
device. The installation program is located on the driver CD included in the scope of delivery in the
following folder.
Attention! Please run the installation program with right click "Run as administrator!
1. Get the IP address: Start the VCOM Admin Utility (right-click on the VCOM Admin Utility
shortcut on the Windows desktop and start this with „Run as Administrator“).
Click Remote Device Management > ADD Device > Search
After the EX-6114 was found, click Cancel to abort the search. Click OK, to add the EX-6114.

18
English EX-6114
© Copyright 2021 by EXSYS Vertriebs GmbH. All Rights Reserved
6. VCOM Admin Utility
2. Assignment of COM-Ports: To create the virtual COM-Port and assign it to the serial device,
click COM Mapping > Add COM > OK
To change the COM-Port number, click COM Mapping > Modify COM
The COM1-COM4 has now been added!

19
EX-6114 English
© Copyright 2021 by EXSYS Vertriebs GmbH. All Rights Reserved
6. VCOM Admin Utility
Please check if the COM-Port has been added in the device manager! The following entry should
now be visible in the device manager:
3. Changing the settings of the serial interface: If you change the settings of the serial inter-
face to values other than the default values (e.g. Device Description, Password, ...), you must first
log in to the Device Server (the default password for this is "system").
Click Remote Device Management > Login

20
English EX-6114
6. VCOM Admin Utility
© Copyright 2021 by EXSYS Vertriebs GmbH. All Rights Reserved
After you are logged in, click Remote Device Management and then double-click the selected de-
vice server in the list.
double click
Click Remote Device Management > (double-click on the selected element in the list) > Basic >
Device Description > OK
double click
Other manuals for EX-6114
1
Table of contents
Languages:
Other Exsys Server manuals

Exsys
Exsys EX-6114PoE User manual

Exsys
Exsys EX-6121 User manual

Exsys
Exsys EX-6118 User manual

Exsys
Exsys EX-6112PoE User manual

Exsys
Exsys EX-6002PoE User manual

Exsys
Exsys EX-61001 User manual

Exsys
Exsys EX-6121PoE User manual

Exsys
Exsys EX-6118PoE User manual

Exsys
Exsys EX-6131 User manual

Exsys
Exsys EX-61002 Series User manual
Popular Server manuals by other brands

GRASS VALLEY
GRASS VALLEY K2 SOLO - quick start guide

Fujitsu
Fujitsu FUTRO S940 operating manual

HP
HP AB500A - Integrated Lights-Out Advanced Technology brief

FieldServer
FieldServer SlotServer PS56-BAS Series Configuration manual

IBM
IBM xSeries 455 installation guide

HP
HP Integrity rx2660 User's & service guide