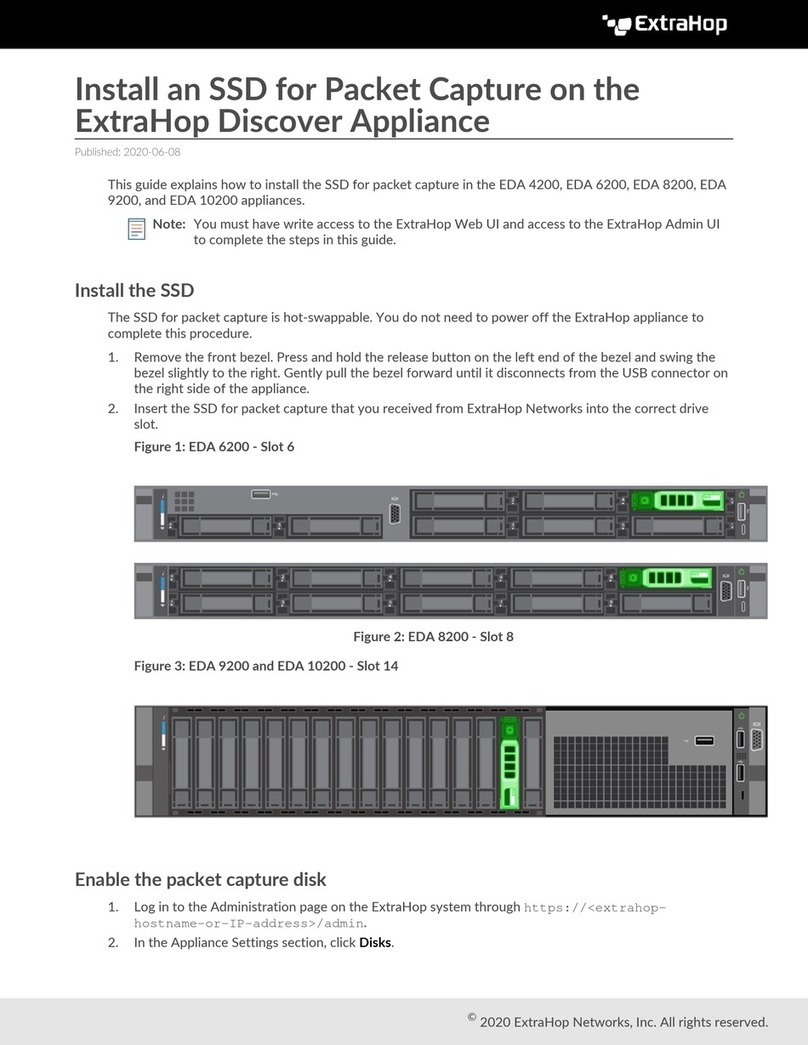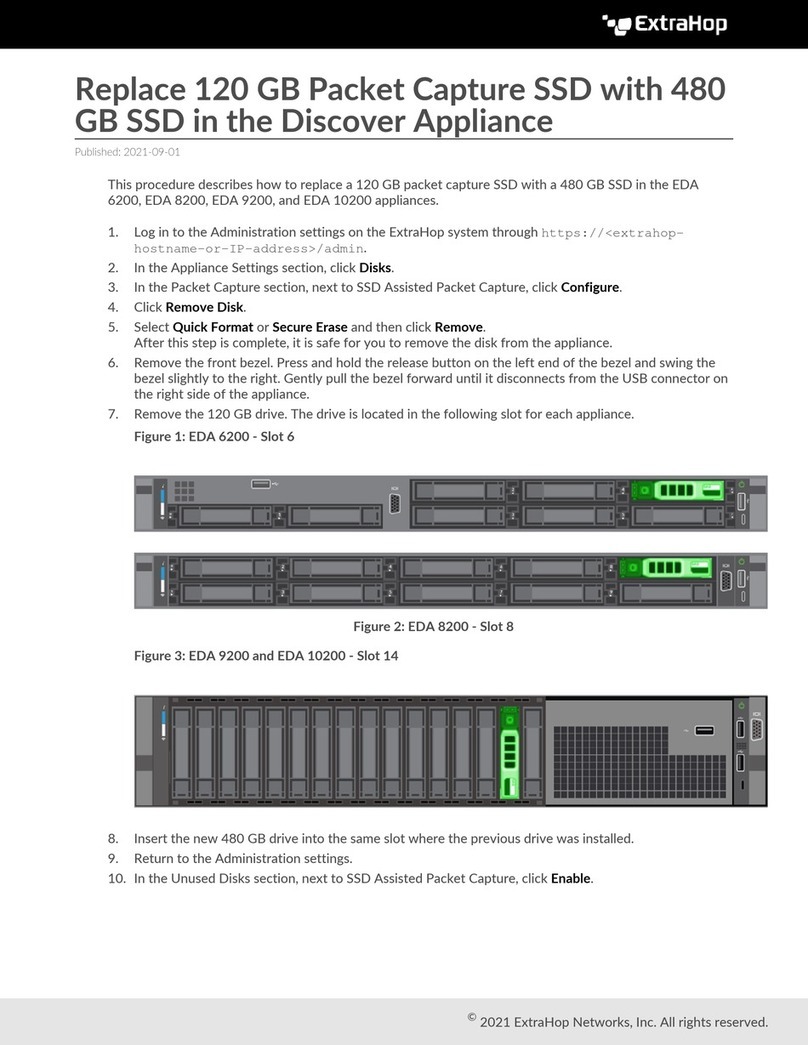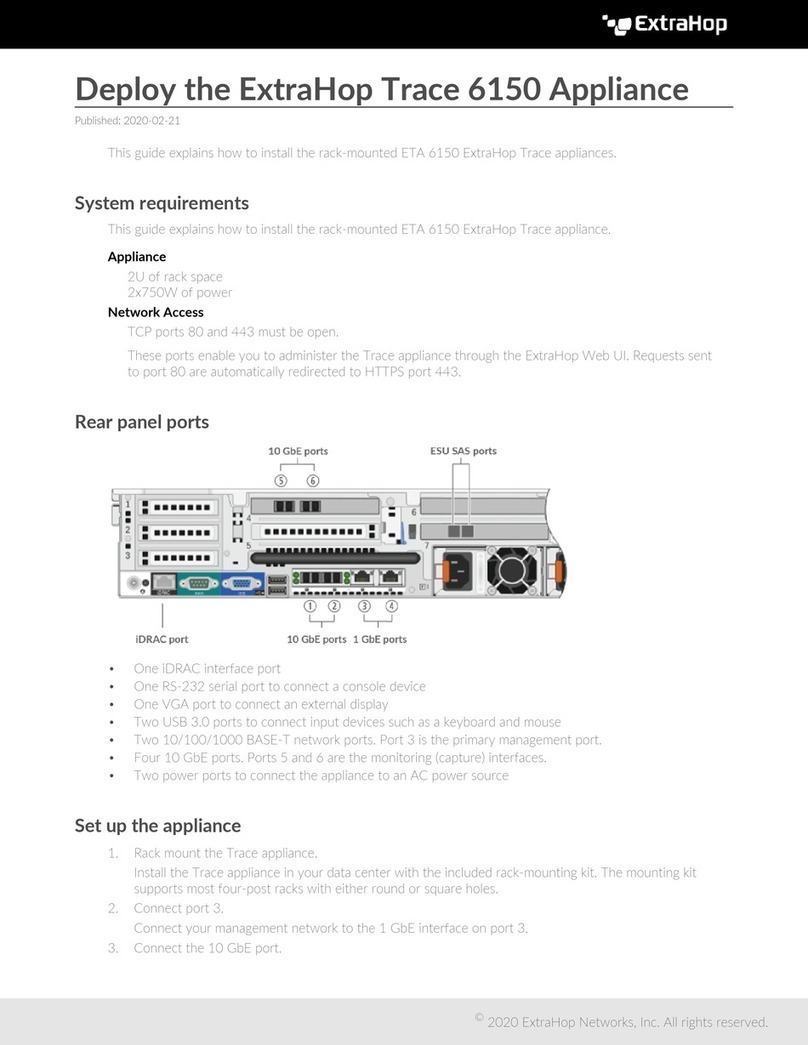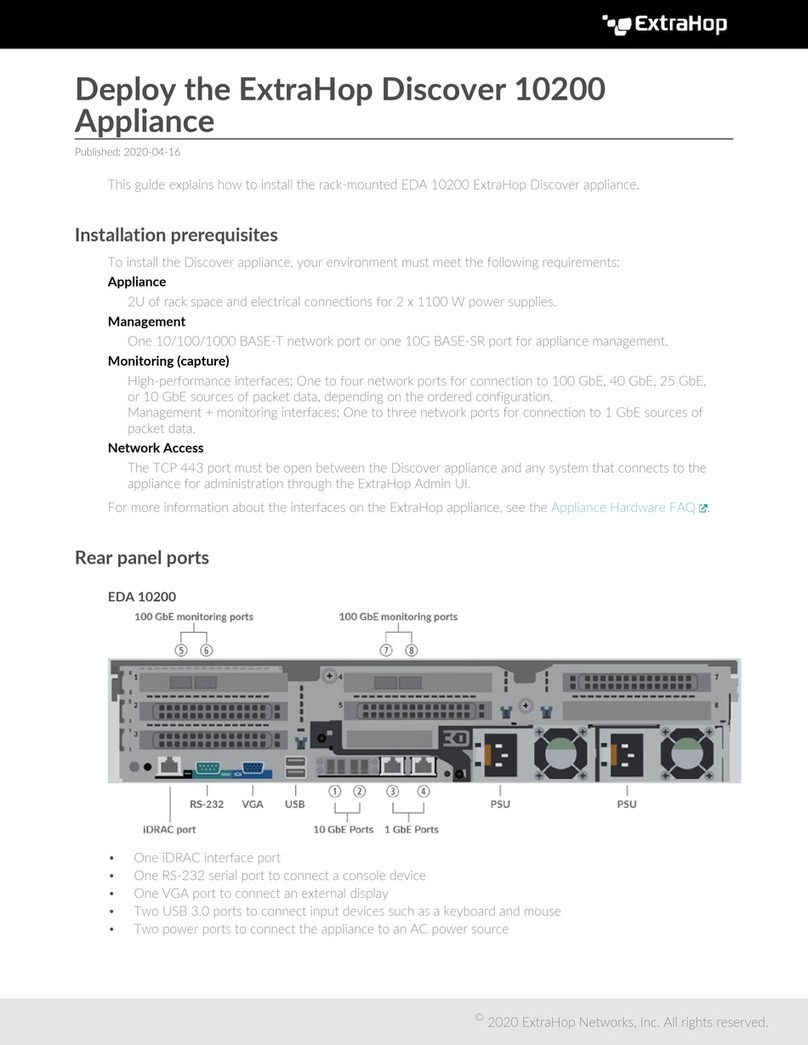
Deploy the ExtraHop Trace 8250 Appliance 3
5. Install the front bezel.
You must install the front bezel if you want to configure the appliance through the LCD display.
Insert the USB connector on the right side of the bezel into the USB port on the front of the appliance.
Press and hold the release button on the left end of the bezel and push the bezel flush with the
appliance until it snaps into place.
6. Connect the power cords.
Connect the two supplied power cords to the power supplies on the back of the appliance.
7. Optional: Connect any extended storage units. For information about configuring extended storage
units, see Add storage capacity to the ExtraHop Trace appliance .
Note: By default, the ETA 8250 can achieve up to 10 Gbps throughput. At least one extended
storage unit (ESU) must be attached to the ETA 8250 to support 25 Gbps throughput.
8. Connect the two supplied power cords to the power supplies on the back of the appliance, and then
plug the cords into a power outlet. If the appliance does not power on automatically, press the power
button on the front-right of the appliance.
Configure the management IP address
DHCP is enabled by default on the ExtraHop system. When you power on the system, interface 3 attempts
to acquire an IP address through DHCP. If successful, the IP address appears on the home screen of the
LCD.
If your network does not support DHCP, you can configure a static IP address through the LCD menu on
the front panel or through the command-line interface (CLI).
Important: For deployments that include a Discover appliance that is connected to a Command
appliance, we strongly recommend configuring a unique hostname . If the IP address
on the Discover appliance is changed, the Command appliance can re-establish
connection easily to the Discover appliance by hostname.
Configure a static IP address through the LCD
Complete the following steps to manually configure an IP address through the front panel LCD controls.
1. Make sure that the default management interface is connected to the network and the link status is
active.
2. Press the select button (#) to begin.
3. Press the down arrow button to select Network, and then press the select button.
4. Press the down arrow to DHCP and then press the select button.
5. Press the down arrow to select No, and then press the select button to disable DHCP.
6. Press the down arrow to select Set static IP, and then press the select button.
7. Press the left or right arrows to select the first digit to change, and then press the up or down arrows
to change the digit to the desired number. Repeat this step for each digit you need to change. After
you configure the desired IP address, press the select button.
8. On the Network mask screen, press the left or right arrows to select the first digit to change, and
then press the up or down arrows to change the digit to the desired number. Repeat this step for each
digit you need to change. After you configure the desired network mask, press the select button.
9. On the Default gateway screen, press the left or right arrows to select the first digit to change, and
then press the up or down arrows to change the digit to the desired number. Repeat this step for each
digit you need to change. After you configure the desired default gateway, press the select button.
10. Confirm your modified network settings on the Settings saved screen, and then press any button
to return to the Network Menu.

