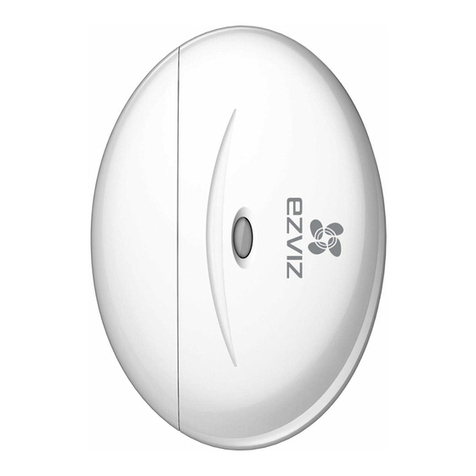
Ezviz T1 User manual

T1
UD01519B


COPYRIGHT ©2016 Hangzhou Hikvision Digital Technology Co., Ltd. or its subsidiaries.
ALL RIGHTS RESERVED.
About this Manual
The Manual includes instructions for using and managing the product. Pictures, charts,
images and all other information hereinafter are for description and explanation only. The
information contained in the Manual is subject to change, without notice, due to firmware
updates or other reasons. Please find the latest version in the ™ website
(http://www.ezvizlife.com).
Any and all information, including, among others, wordings, pictures, graphs are the
properties of Hangzhou Hikvision Digital Technology Co., Ltd. or its subsidiaries (hereinafter
referred to be “Hikvision”). This user manual (hereinafter referred to be “the Manual”)
cannot be reproduced, changed, translated, or distributed, partially or wholly, by any
means, without the prior written permission of Hikvision. Unless otherwise stipulated,
Hikvision does not make any warranties, guarantees or representations, express or
implied, regarding to the Manual.
Trademarks Acknowledgement
™, ™, and other Hikvision’s trademarks and logos are the properties of
Hikvision in various jurisdictions. Other trademarks and logos mentioned below are the
properties of their respective owners.
Legal Disclaimer
TO THE MAXIMUM EXTENT PERMITTED BY APPLICABLE LAW, THE PRODUCT DESCRIBED,
WITH ITS HARDWARE, SOFTWARE AND FIRMWARE, IS PROVIDED “AS IS”, WITH ALL
FAULTS AND ERRORS, AND HIKVISION MAKES NO WARRANTIES, EXPRESS OR IMPLIED,
INCLUDING WITHOUT LIMITATION, MERCHANTABILITY, SATISFACTORY QUALITY, FITNESS FOR
A PARTICULAR PURPOSE, AND NON-INFRINGEMENT OF THIRD PARTY. IN NO EVENT WILL
HIKVISION, ITS DIRECTORS, OFFICERS, EMPLOYEES, OR AGENTS BE LIABLE TO YOU FOR
ANY SPECIAL, CONSEQUENTIAL, INCIDENTAL, OR INDIRECT DAMAGES, INCLUDING, AMONG
OTHERS, DAMAGES FOR LOSS OF BUSINESS PROFITS, BUSINESS INTERRUPTION, OR LOSS
OF DATA OR DOCUMENTATION, IN CONNECTION WITH THE USE OF THIS PRODUCT, EVEN IF
HIKVISION HAS BEEN ADVISED OF THE POSSIBILITY OF SUCH DAMAGES.
TO THE MAXIMUM EXTENT PERMITTED BY APPLICABLE LAW, IN NO EVENT SHALL
HIKVISION’S TOTAL LIABILITY FOR ALL DAMAGES EXCEED THE PURCHASE PRICE THE
PRODUCT.

HIKVISION does not undertake any liability for personal injury or property damage, as the
result of product interruption or service termination cause by: a) improper installation or
usage other than as requested; b) the protection of national or public interests; c) Force
Majeure; d) yourself or the third party, including not limitation, using any third party’s
products, software, applications, and among others.
REGARDING TO THE PRODUCT WITH INTERNET ACCESS, THE USE OF PRODUCT SHALL BE
WHOLLY AT YOUR OWN RISKS. HIKVISION SHALL NOT TAKE ANY RESPONSIBILITES FOR
ABNORMAL OPERATION, PRIVACY LEAKAGE OR OTHER DAMAGES RESULTING FROM CYBER
ATTACK, HACKER ATTACK, VIRUS INSPECTION, OR OTHER INTERNET SECURITY RISKS;
HOWEVER, HIKVISION WILL PROVIDE TIMELY TECHNICAL SUPPORT IF REQUIRED.
The purpose of the Products is to provide an adequate warning in the event of illegal
encroachment in certain area; however, the proper installation of the Products will not
eliminate, but only reduce, that accidents will not occur or that there will be no personal
injury or property loss as a result. You are highly recommended to raise your vigilance and
strengthen the safety awareness in the daily life.
SURVEILLANCE LAWS VARY BY JURISDICTION. PLEASE CHECK ALL RELEVANT LAWS IN
YOUR JURISDICTION BEFORE USING THIS PRODUCT IN ORDER TO ENSURE THAT YOUR USE
CONFORMS TO THE APPLICABLE LAW. YOU FUTHER AGREE THAT THIS PRODUCT IS ONLY
FOR CIVIL USE, AND HIKVISION SHALL NOT BE LIABLE IN THE EVENT THAT THIS PRODUCT
IS USED WITH ILLEGITIMATE PURPOSES, SUCH AS THIRD PARTY RIGHTS INFRINGEMENT,
MEDICAL TREATMENT, SAFETY EQUIPMENT OR OTHER SITUATIONS WHERE THE
PRODUCT FAILURE COULD LEAD TO DEATH OR PERSONAL INJURY, OR WEAPON OF MASS
DESTRUCTION, CHEMINCAL AND BIOLOGICAL WEAPON, NUCLEAR EXPLOSION, AND ANY
UNSAFE NUCLEAR ENERGY USES OR ANTI-HUMANITY USAGES. YOU SHOULD UNDERTAKE
ALL RESPONSIBILITIES FOR LOSSES OR DAMAGES RESULTING FROM THE ABOVE USAGES
WHATSOEVER.
IN THE EVENT OF ANY CONFLICTS BETWEEN THE ABOVE AND THE APPLICABLE LAW, THE
LATER PREVAILS.

Regulatory Information
EU Conformity Statement
This product and - if applicable - the supplied accessories too
are marked with "CE" and comply therefore with the applicable
harmonized European standards listed under the the Radio
Equipment Directive 2014/53/EU, the EMC Directive 2014/30/EU,
the RoHS Directive 2011/65/EU.
2012/19/EU (WEEE directive): Products marked with this symbol
cannot be disposed of as unsorted municipal waste in the
European Union. For proper recycling, return this product to your
local supplier upon the purchase of equivalent new equipment, or
dispose of it at designated collection points. For more information
see: www.recyclethis.info.
2006/66/EC (battery directive): This product contains a battery
that cannot be disposed of as unsorted municipal waste in the
European Union. See the product documentation for specific
battery information. The battery is marked with this symbol,
which may include lettering to indicate cadmium (Cd), lead (Pb),
or mercury (Hg). For proper recycling, return the battery to your
supplier or to a designated collection point. For more information
see: www.recyclethis.info.
Safety Instruction
CAUTION: THE PRODUCT IS BUILT IN A REPLACEABLE BATTERY. RISK OF
EXPLOSION IF BATTERY IS REPLACED BY AN INCORRECT TYPE. DISPOSE OF
USED BATTERIES ACCORDING TO THE INSTRUCTIONS.


1
Operations
Step 1 Battery Installation
1. Open the detector’s battery cover according to the arrow in the
figure below.
2. Pull out the insulation sheet from the battery slot.
3. Replace the battery cover.
Insulation Sheet

2
Step 2 Adding T1 to Internet Alarm Hub
T1 should be used cooperating with an Internet Alarm Hub (such
as A1, should be purchased separately).
• Option 1 (Recommended) Adding by EZVIZ App
1. Installing the EZVIZ App
- Connect your mobile phone to Wi-Fi.
- Download and install the EZVIZ app by searching “EZVIZ” in App
Store (iOS version) and Google PlayTM (Android version).
- Start the app and register for an EZVIZ user account.
2. Adding T1
Log in the EZVIZ app and scan the device QR code to add it to the
Internet Alarm Hub.
……
……
……

3
• Option 2 Adding by Operating Internet Alarm Hub
1. Enable the “Adding Detectors Mode” of your Internet Alarm Hub.
Refer to Quick Start Guide of your Internet Alarm Hub for details.
2. Take T1 close to the Internet Alarm Hub (within 50cm) and press
the button on the back of T1 to send the adding request.
3. The Internet Alarm Hub issues a voice prompt of the device type
and serial No. indicating T1 is added.
Internet Alarm Hub
Within 50 cm
Setting Button

4
Step 3 Installing T1
1. Selecting the Installation Position
You are recommended to install the detector at a corner of living
room. Make sure the detector is 1.8m to 2.5m away from the
ground.
The detection range is shown in the two figures on the right side.
Top View
Side View
12 m
100°
2.1 m
0 m 12 m8 m
4 m

5
• Installation Suggestions
Detecting Range Installation Height Tilt Angle Pet Immune
6x6 m 2.1 m 18° X
8x8 m 2.1 m 13° X
10x10 m 2.1 m 8° X
12x12 m 2.1 m 0°
• If you have a pet at home, the detector should be installed parallel
with the installation surface and meet the following requirements.
The detector should be 2.1m to
2.5m away from the ground.
The pet's weight should be less
than 25 kg (55 lb) .
False alarm may be triggered
when your pet climbes up onto
the couch and fridge.
False alarm may be triggered if
you have several pets.

6
2. Installing the Base
Fix the base on the selected position with the foam sticker or the
screws.
Make sure the installation surface is flat and clean.
Fixing by Foam Sticker
- Paste the foam sticker onto the back of the base.
- Stick the base to the installation surface.
Fixing by Screws
- Drill two screw holes according to the base.
- Align the holes on the base with the drilled holes.
- Push the screws into the screw holes to secure the base with wall.

7
3. Installing the Detector
1) Fix the angle bar to the base by pushing the bar into the hole
on the base.
2) Align the groove on the T1 with the hook on the angle bar.
3) Hook the T1 to the angle bar and pull down the T1 to secure it.
1
2
4) Adjust the detection angle as desired.
4. Testing (Optional)
You can test the detection angle after the installation.
Hold down the Setting Button on the back of T1 for 3 seconds
to switch T1 to the Testing mode. Walk in the detection area to
trigger the alarm.
T1 automatically returns to the normal mode after 2 minutes.
See page 73-77 for maintenance and appedix information.

8
Betrieb
Schritt 1 Einsetzen der Batterie
1. Öffnen Sie die Batterieabdeckung des Melders wie durch den Pfeil
in der Abbildung angedeutet.
2. Ziehen Sie die Isolierfolie vom Batteriefach ab.
3. Bringen Sie die Batterieabdeckung wieder an.
Isolierfolie

9
Schritt 2 Hinzufügen des T1 zum Internet-Alarm-Hub
Der T1 sollte in Verbindung mit einem Internet-Alarm-Hub (z.B.
A1; separat zu erwerben) benutzt werden.
• Option 1 (empfohlen) Hinzufügen per EZVIZ App
1. EZVIS App installieren
- Smartphone mit dem Wi-Fi-Netz verbinden.
- Laden Sie die EZVISZ App herunter und installieren Sie sie,
indem Sie "EZVIZ" im App Store (iOS-Version) oder bei Google
PlayTM (Android-Version) suchen.
- Die App starten und ein EZVIZ-Anwenderkonto erstellen.
2. T1 hinzufügen
Melden Sie sich bei der EZVIZ App an und scannen Sie den
QR-Code des Geräts, um es zum Internet-Alarm-Hub hinzuzufügen.
……
……
……

10
• Option 2 Hinzufügen mittels Internet-Alarm-Hub
1. Aktivieren Sie den "Adding Detectors"-Modus am Internet-
Alarm-Hub. Einzelheiten enthält die Schnellstartanleitung zum
Internet-Alarm-Hub.
2. Bringen Sie den T1 in die Nähe des Internet-Alarm-Hub (weniger
als 50cm) und drücken Sie dann die Taste auf der Rückseite des
T1, um die Verbindung herzustellen.
3. Der Internet-Alarm-Hub gibt eine Voice Guide-Bestätigung
bezüglich Meldertyp und Seriennummer aus. Damit ist der Melder
hinzugefügt.
Internet-Alarm-Hub
Max. 50 cm
Einstelltaste

11
Schritt 3 Installieren des T1
1. Montageort wählen
Der Melder sollte vorzugsweise in der Ecke des Wohnzimmers
installiert werden. Achten Sie darauf, den Melder in 1,8 - 2,5m
Höhe anzubringen.
Die beiden Abbildungen rechts veranschaulichen den Detektions-
bereich. Draufsicht
Seitenansicht
12 m
100°
2,1 m
0 m 12 m8 m
4 m

12
• Installationsvorschläge
Detektionsbereich Montagehöhe Neigungs-
winkel
Kleintieremp-
findlichkeit
6x6 m 2,1 m 18° X
8x8 m 2,1 m 13° X
10x10 m 2,1 m 8° X
12x12 m 2,1 m 0°
• Falls Sie ein Haustier haben, sollte der Melder parallel zur Montage-
fläche angebracht werden und folgende Anforderungen erfüllen:
Achten Sie darauf, den Melder in 2,1m
bis 2,5m Höhe anzubringen. Das Gewicht des Haustiers sollte
maximal 25 kg betragen.
Falls Ihr Haustier auf die Couch
oder den Kühlschrank klettert,
kann Fehlalarm ausgelöst wer-
den.
Fehlalarm kann auch ausgelöst
werden, wenn Sie mehrere Haus-
tieren haben.

13
2. Montage des Sockels
Befestigen Sie den Sockel mit Hilfe des Schaumstoffaufklebers
oder der Schrauben an der gewünschten Stelle.
Achten Sie darauf, dass die Montageoberfläche flach und sauber ist.
Montage mittels Schaumstoffaufkleber
- Bringen Sie den Schaumstoffaufkleber an der Sockelrückseite an.
- Kleben Sie den Sockel auf die Montageoberfläche.
Montage mittels Schrauben
- Bohren Sie die Befestigungslöcher für den Sockel.
- Richten Sie die Löcher im Sockel mit den Bohrlöchern aus.
- Befestigen Sie den Sockel mit Hilfe der Schrauben an der Wand.

14
3. Montage des Melders
1. Bringen Sie das Winkelstück am Sockel an, indem Sie es in die
entsprechende Aussparung im Sockel drücken.
2. Richten Sie die Kerbe am T1 mit der Markierung mit der
Markierung am Winkelstück aus.
3. Haken Sie den T1 in das Winkelstück ein und drücken Sie ihn
nach unten, um ihn zu fixieren.
4. Stellen Sie den gewünschten Detektionswinkel ein.
4. Test (optional)
Sie können den Detektionswinkel nach erfolgter Montage testen.
Dazu drücken und halten Sie die Einstelltaste auf der Rückseite des T1
für drei Sekunden, um das Gerät in den Testmodus zu bringen. Bewe-
gen Sie sich nun im Detektionsbereich, um einen Alarm auszulösen.
Der T1 kehrt nach zwei Minuten im Testmodus automatisch wieder
in den normalen Betriebszustand zurück.
Siehe Seite 73-77 für Instandhaltungs- und Anhangsinformationen.
1
2
Other manuals for T1
4
Table of contents
Languages:
Other Ezviz Security Sensor manuals
Popular Security Sensor manuals by other brands

Datalogic
Datalogic S65-PA-5-M13 instruction manual

UbiTech
UbiTech LoRa Custos WWDLW Series user manual

ring
ring Motion Detector 2nd Generation Z-Wave Technical manual

Essence Smartcare
Essence Smartcare Care@Home MDsense user guide

MSA
MSA Dyna-Glide User instructions

Greenlee
Greenlee GT-11 instruction manual