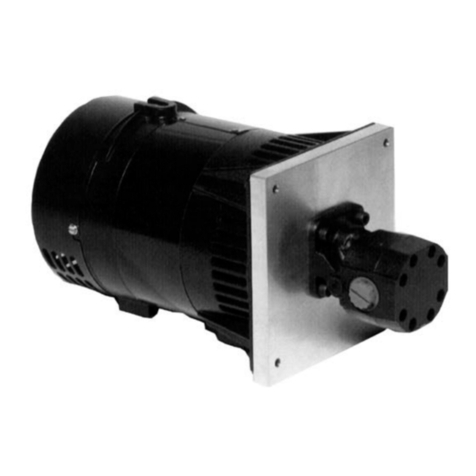
Fabco Power HYDRO 300XR-6 User manual

Setting the Standard in Mobile Power
Instruction Manual for Model
HYDRO
300XR-6
Hydraulic Generator
Manufacturing of: Vehicle Mounted Generators • Hydraulic Generators
P.O. Box 582 • Chester, NY 10918 • 845-469-9151 • Fax: 845-469-7871 • Web Site/E-mail: www.fabcopower.com

Fabco Power Instruction Manual
• Page 2 •
GENERAL INFORMATION
MODEL: HYDRO 300XR-6
GENERATOR............ BRUSHLESS
GENERATOR............ 3600 (60 Hz)
GENERATOR VOLTAGE............ 120 or 120/240
MOTOR STARTING............ 300% SURGE
VOLTAGE REGULATOR............ INHERENT
OUTPUT............ 3000 WATTS CONTINUOUS
4000 WATTS PEAK AT
100°F OIL TEMPERATURE
HYDRAULIC MOTOR............ GEAR TYPE WITH BUILT IN
FLOW CONTROL
FLOW CONTROL PRESSURE COMPENSATION
BY-PASS TYPE
MAXIMUM SPEED............ 4200RPM
(3600 RPM IDEAL)
MOTOR SHAFT............ ½ inch
PORT SIZE
INLET............ 3/4 - 8 S.A.E.
RETURN............ 7/8 - 10 S.A.E.
CASE DRAIN PORT............ 7/16 - 4 S.A.E.

Fabco Power Instruction Manual
• Page 3 •
RECOMMENDATIONS
MODEL: HYDRO 300XR-6
HIGH PRESSURE LINE........................ ½ inch
LOW PRESSURE LINE.......................... ¾ inch
FLOW RATE .......................................... 6 to 25 GPM
(6 GPM IDEAL)
FOR BEST RESULTS KEEP HYDRAULIC OIL
TEMPERATURE BETWEEN 80°F AND 120°F.
DO NOT EXCEED 175°F.
AN OIL COOLER IS RECOMMENDED.
MAXIMUM BACK PRESSURE ............. 150 PSI
WILL OPERATE ON ANY 2500 PSI OPEN CIRCUIT
OR CLOSED LOOP SYSTEMS.
RECOMMEND FILTER ........................ 10m
RECOMMEND HYDRAULIC OIL ....... DEXTRON III A.T.F.
INSTALLATION TIPS
Excessive pressure in your return line will damage the hydraulic motor seal. High back pressure can be caused by
“spikes” sent back through the return from other equipment on a common return line. Another potential problem
can develop if several pieces of equipment are connected to one “common” return line causing a high back
pressure (150 PSI is the maximum). We recommend you run the return line from the generator back to the
cooling tank with a separate line.
You can either run the 3/4 inch return line back to the tank or leave the 3/4 inch line connected to a common
return and run a separate 3/8 inch line from the case drain (located at the bottom of the hydraulic motor) directly
back to the tank. Either way you completely eliminate any problem of excessive return line pressure damaging
your hydraulic motor.

Fabco Power Instruction Manual
• Page 4 •
Initial Installation and Start-Up
Be sure you set the hydraulic flow (GPM) to the generator at
Approximately 62.5 HZ or 3750 RPM with NO electrical load
on the generator.
By using this setting you will have approximately 60HZ
(cycles) or 3600 RPM when you are running at full rated load.
One way this can be accomplished is by using a Photo
Tachometer on our generator coupling or generator
cooling fan.
A Photo Tachometer is an inexpensive tool that can be
purchased at McMasters, Grainger, Sears or any other electrical
supplier.

Fabco Power Instruction Manual
• Page 5 •
TECHNICAL INFORMATION
These self-excited and self-regulating generators, although overall dimensions have been reduced to a minimum,
are designed for high-level electrical performance and the maximum in operating reliability.
PRELIMINARY CHECKS: Before touching the machines, perform a thorough and in depth visual
inspection, checking that components are correctly connected up and
that no cables or terminals are broken or loose.
STARTING UP:Make sure, when starting up, that cooling air intake and discharge openings
are free and unblocked. We also recommend (when the machine operates
in a dusty environment) do periodic checks to make sure it is properly
ventilated
THE IMPORTANCE OF SPEED:Frequency and voltage depend directly on rotation speed. This must be
kept as constantly as possible on its nominal value no matter what the
load. Drive motor speed control systems generally have a small drop in
speed between no load and loaded conditions. We therefore
recommend setting no load speed 3÷4% above nominal speed.
CHECKING VOLTAGE:All the machines are regulated during factory testing. If voltage
readings differ from the value indicated on the name plate, this maybe
caused by a mistaken reading or by a different rotation speed and we
recommend regulating motor speed in order to have nominal RPM
under loaded conditions.
CHECKING THE DIODES: For the ohmmeter test it is best to disconnect the diode from its circuit.
Measure continuity in one direction only. The test can also be made
without disconnecting the diode form the circuit, using a 12V battery
and a 45 watt light bulb (automobile light) as shown in the illustration.
The light should turn totally on only in one direction, as shown below.
WINDING RESISTANCE AT 20° C
ROOM TEMPERATURE
Size Stator ΩRotor ΩExciter Ω
3.5 0.7 9.22 4.0
4.0 0.7 9.28 4.0
5.0 0.54 2.97 2.24
6.0 0.54 2.97 2.24
8.0 0.49 2.85 4.41
12.0 0.250 5.65 0.60

Fabco Power Instruction Manual
• Page 6 •
ELECTRICAL CONNECTIONS
120/240 VOLT
OPERATION
25 AMP
OVERLOAD
SELF RE-SETTING
GROUND SCREW ON
GENERATOR FRAME.
USE GREEN WIRE
FOR GROUND IF
USING GFCI OUTLETS
120
U2 V2
V1 W1
CONNECT NEUTRAL
TO GROUND IF USING
GFCI OUTLETS NEUTRAL
(WHITE)
240
120
RED OR
BLACK WIRE
RED OR
BLACK WIRE
U2
V1
V2
W1
NEUTRAL
(WHITE)
JUMPER
(BLACK)
HOT LEAD
(BLACK)
120 VOLT
FULL POWER
OPERATION
GROUND SCREW ON
GENERATOR FRAME.
USE GREEN WIRE
FOR GROUND IF
USING GFCI OUTLETS
120
TERMINAL BLOCK
TERMINAL BLOCK
30 AMP
OVERLOAD
SELF RE-SETTING

Fabco Power Instruction Manual
• Page 7 •
PARTS BREAKDOWN
HYDRO300XR-6
No. PART # DESCRIPTION
1 572262 Louvered Panel
2 572264 Frame For Stator
3 572182 Drive End Bell
3 a 572265 Screen
4 572235 Front Bearing
5 572184 Fan
6 572266 Rotor
8 572064 Rear Bearing
13 572186 User Terminal Board
15 572260 Cover
17 572288 Capacitor 31.5 mfd/w Tie Wraps
19 572189 Diodes
20 572615 Pump Mount
21 572066 Coupling 24mm
22 572067 Spider
23 572068 Coupling ½
24 572324 Motor w/Flow Control
25 572128 Rails
26 572154 Mounts
27 572253 Flow Control Cartridge (6 GPM) restrictive
28 572261 Stud Cover PART # OPTIONAL CONTROL PANEL
29 572263 Rubber Cup 572227 Complete Control Panel
30 572272 Fan Ring 572228 Control Box (Shell)
572072 Seal For Hydraulic Motor 572052 Volt Meter
572274 Generator Complete 572054 Receptacle 120 Volt
572159 Voltage Indicating Light 572100 Waterproof Recpt. Cover
572158 Overload Protection Device 572226 GFI Outlet 120 Volt

Fabco Power Instruction Manual
• Page 8 •
TROUBLE SHOOTING
PROBLEMS CAUSES REMEDIES
ALTERNATOR EXCITATION
FAILURE 1.
Low Speed
2. Faulty capacitor
3. Faulty winding
1. Check RPM and set at nominal
value.
2. Check and replace.
3. Check that winding resistance is
as shown in the tables.
HIGH NO-LOAD VOLTAGE
1. Speed too high.
2. Capacitor with high capacity.
1. Check and adjust RPM’s
2. Check and replace
LOW NO-LOAD VOLTAGE
1. Speed too low.
2. Faulty rotary diodes.
3. Breakdown in windings.
4. Capacitor with high capacity.
1. Check and adjust RPM’s
2. Check and replace.
3. Check winding resistance, as
per tables.
4. Check and replace.
PROPER NO-LOAD BUT LOW
LOADED VOLTAGE
1. Low loaded speed.
2. Load too large.
3. Rotary diodes short-circuited
1. Check and regulate RPM.
2. Check and change.
3. Check and replace.
UNSTABLE VOLTAGE
1. Loose contacts.
2. Uneven rotation.
1. Check connections.
2. Check for uniform rotation
speed.
NOISY GENERATOR
1. Broken bearings.
2. Poor couplings.
1. Replace.
2. Check and repair.

Fabco Power Instruction Manual
• Page 9 •
FIXED DISPLACEMENT
TYPE GEAR PUMP
5 6
4
7
3
2
1
TYPICAL HYDRAULIC SCHEMATIC
8
1. HYDRAULIC PUMP
2. PRESSURE RELIEF VALVE
3. CONTROL VALVE
4. PRIORITY FLOW CONTROL*
5. GENERATOR HYRAULIC MOTOR
6. CASE DRAIN LINE**
9 7. RETURN LINE FILTER
8. OIL COOLER
9. HYDRAULIC FLUID RESERVOIR
* Some units may be equipped with integral priority flow control, refer
to specific model number.
** External case drain line may be required on some units refer to
specific model number.
When external case drain is required it should be unobstructed direct
return to reservoir with a minimum I.D. no less than that of case
drain port on generator motor.
FOR SPECIFIC INSTALLATION RECOMMENDATIONS CONSULT FACTORY

Fabco Power Instruction Manual
• Page 10 •
BRUSHLESS GENERATOR
WIRING

Fabco Power Instruction Manual
• Page 11 •
HYDRAULIC MOTOR
HOSE HOOK-UP
Fabco Power

Fabco Power Instruction Manual
• Page 12 •

Fabco Power Instruction Manual
• Page 13 •
Table of contents
Other Fabco Power Portable Generator manuals

Fabco Power
Fabco Power HYDRO 800EP11 User manual

Fabco Power
Fabco Power HYDRO 500X-50 User manual

Fabco Power
Fabco Power HYDRO 500E-50HZ User manual

Fabco Power
Fabco Power Hydro 400X-6 User manual

Fabco Power
Fabco Power HYDRO 350X-50HZ User manual

Fabco Power
Fabco Power HYDRO 300C User manual

Fabco Power
Fabco Power HYDRO 300XR User manual

Fabco Power
Fabco Power HYDRO 350X6 User manual

Fabco Power
Fabco Power HYDRO 300X User manual

Fabco Power
Fabco Power HYDRO 300CX-4.5-60HZ-G User manual