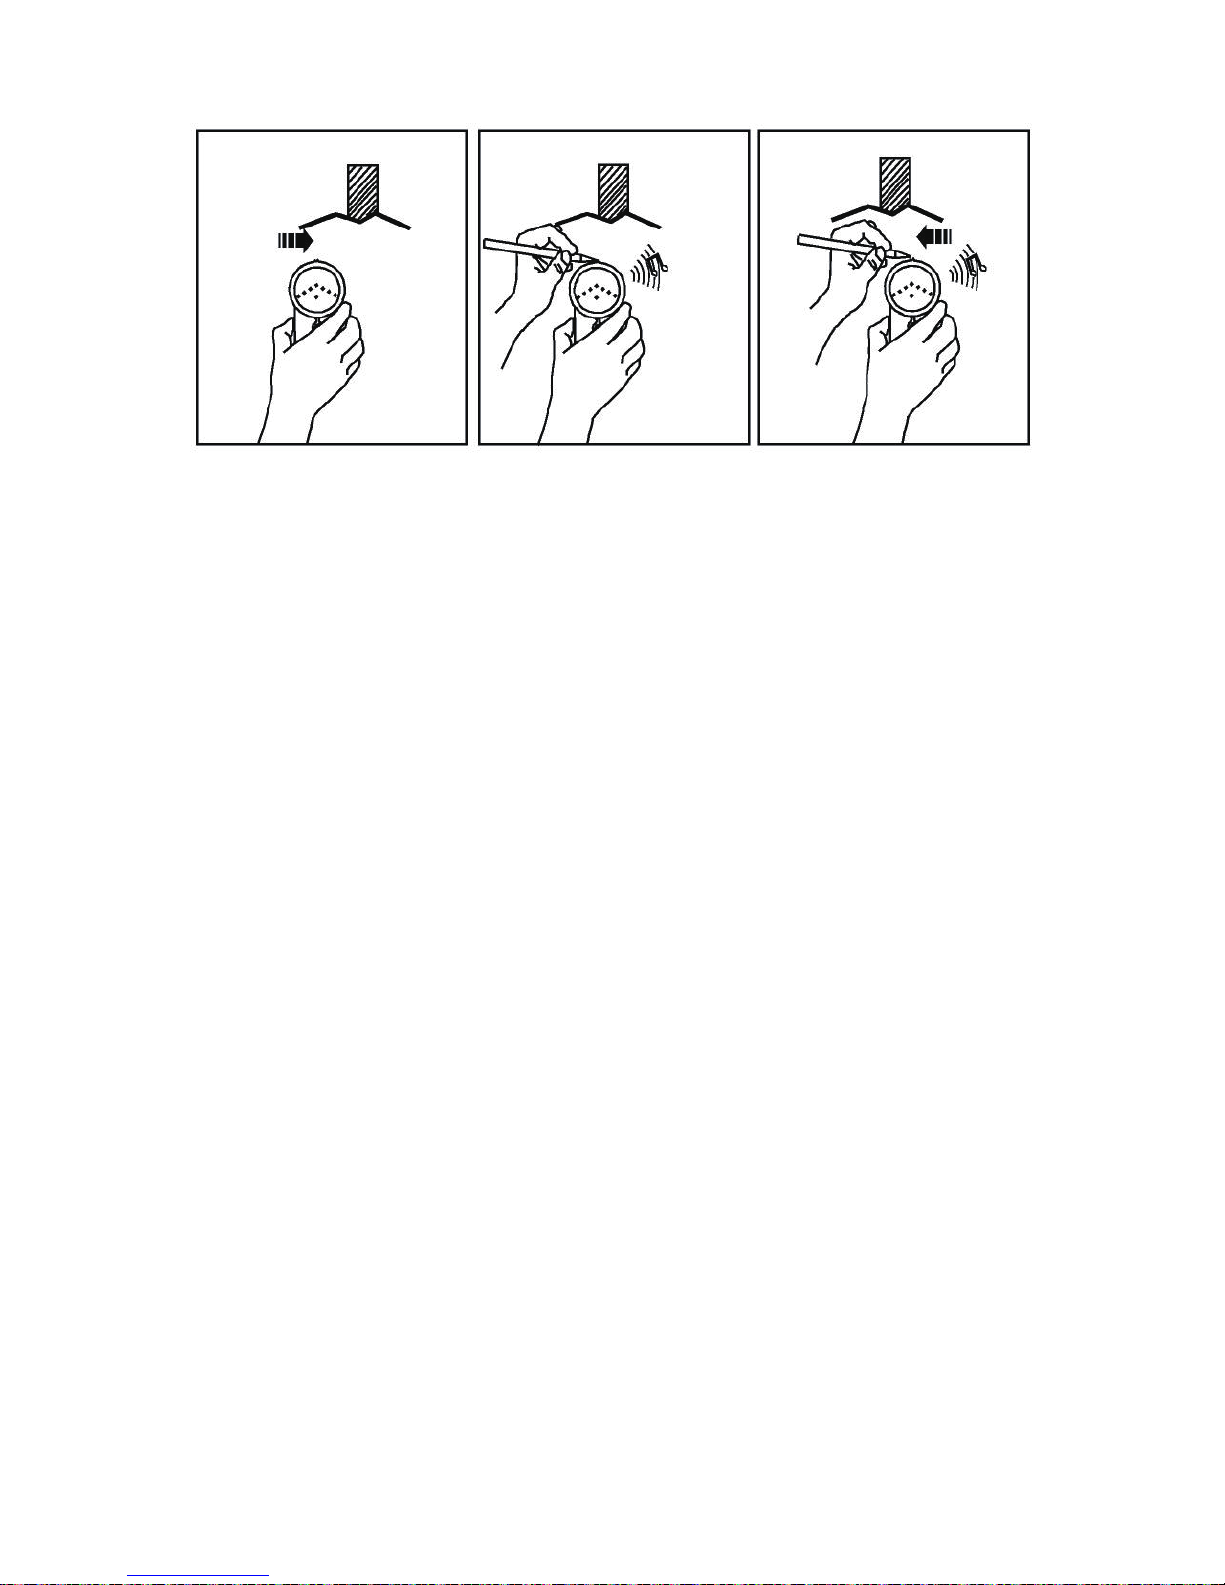
b. Continue moving sideways across wall until all the
signal LEDs and the buzzer turn off, then reverse
direction and locate opposing edge by using the
same procedure. When the LED lights and buzzer
sounds continuously stop moving and mark a spot in
the detectors groove on the walls surface (fig 3), the
midpoint between two marks is the centre of the stud.
Note
1. Stud detection can be carried out on standard
plasterboard walls. However, it may not function on
some types of foil backed or metallic fabric surfaces.
2. If the detector is placed over a wall batten or stud when
performing a calibration, the detector will not work correctly.
3. The surface of wall along which you want to detect
should be flat and dry.
4. We recommend that you also carry out a metal detection
scan to ensure that the detected batten or stud is not a
metal pipe. Please note that some small securing
screws or nails or metal objects may be detected.
5. Keep your other hand away from the detector when
carrying out a scan.
6. Wall studs will be approximately 40cm to 60cm apart
with a width of about 3.8cm.
7. If two studs are adjacent the unit may not detect them
accurately.
8. After you release the TEST button, the detector must
perform a calibration sequence again before use.
9. Do not move the detector too quickly as the RED
signal LEDs will not light sequentially.
6