manuals.online logo
Brands
  1. Home
  2. •
  3. Brands
  4. •
  5. Falcon
  6. •
  7. Range
  8. •
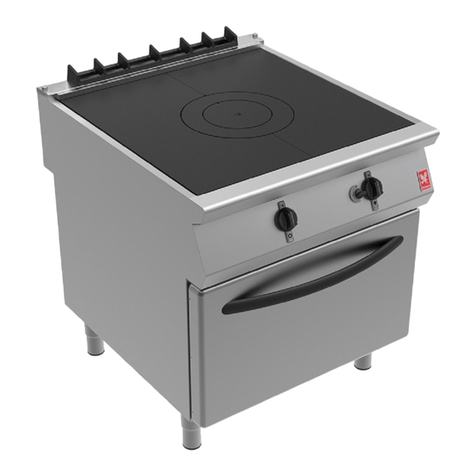
  9. Falcon Dominator G2101 User manual

Falcon Dominator G2101 User manual

RZZ 331 Ref. 1
DOMINATOR
GAS RANGE APPLIANCES
Refer to Section 1 for models covered by this doc ment
USERS INSTRUCTIONS
SECTION 1 - GENERAL DESCRIPTION
SECTION 2 - LIGHTING and OPERATIONS
SECTION 3 - USING THE APPLIANCE
SECTION 4 - CLEANING and MAINTENANCE
These appliances have been CE-marked on the basis of compliance with the Gas Appliance Directive
for the Co ntries, Gas Types and Press res as stated on the Data Plate.
These appliances MUST BE installed by a competent pe son in compliance with the INSTALLATION AND
SERVICING INSTRUCTIONS and National Regulations in fo ce at the time. Pa ticula attention MUST be paid
to the following:
Gas Safety ( Installation & Use) Reg lations
Health and Safety at Work Act
Fu the mo e, if a need a ises to conve t the appliance fo use with anothe gas, a competent pe son must be
consulted. Those pa ts which have been p otected by the manufactu e MUST NOT be adjusted by the Use .
Use s should be conve sant with the app op iate p ovisions of the Fi e P ecautions Act and the equi ements of
the Gas Safety Regulations. in pa ticula the need fo egula se vicing by a competent pe son to ensu e the
continued safe and efficient pe fo mance of the Appliance.
WARNING - TO PREVENT SHOCKS, ALL APPLIANCES WHETHER
GAS OR ELECTRIC, MUST BE EARTHED.
Upon eceipt of the Use 's Inst uction manual, the installe should inst uct the esponsible pe son(s) of the
co ect ope ation and maintenance of the Appliance.
This equipment is ONLY FOR PROFESSIONAL USE, and shall be ope ated by QUALIFIED pe sons. It is the
esponsibility of the Supe viso o equivalent to ensu e that use s wea SUITABLE PROTECTIVE CLOTHING
and to d aw attention to the fact that, some pa ts will, by necessity, become VERY HOT and will cause bu ns if
touched accidentally.
Falcon Foodservice Eq ipment
HEAD OFFICE AND WORKS
PO Box 37, Found y Loan, La be t.
Sti lingshi e. Scotland. FK5 4PL
AFE SERVICE CONTACT -
PHONE - 01438 751 111 FAX - 01438 369 900
Off position
Maximum flame
setting (High)
Low flame
setting (Simme )
Rea Indicato F ont Indicato
Off position
Pilot ignition
Maximum
flame setting
Low flame
setting (Simme )
SECTION 1 - GENERAL DESCRIPTION
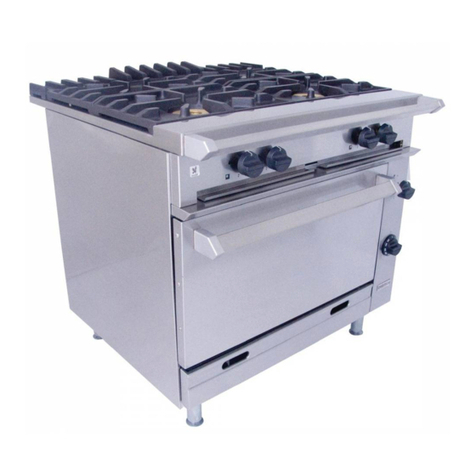
This g oup of p oducts consists of the following
appliances.
G2101 and G2107 OT
Six B rner Open Top Ranges
G2161 and G2167 OT
Fo r B rner Open Top Ranges
G2107 SB Solid Top Range
G2121 OT Six B rner Open Top Boiling Table
G2124 Fo r B rner Open Top Boiling Table
G2127 SB Solid Top Boiling Table
G2117 General P rpose Oven
All models a e fitted with flame failu e devices to shut
off gas supply to bu ne s if flames a e extinguished.
The ovens a e the mostatically cont olled.
Controls
All taps a e the safety type with fixed HIGH and LOW
settings. The ope ation sequences of the taps a e
shown in Figu e 1.
Fig re 1 - Open Top Gas Tap
Hob B rner Indication
Each tap may be identified with the co esponding
bu ne as illust ated below -.
Solid Top
The solid hotplate is composed of two filling plates, a
ing and cent e bullseye. A double- ing bu ne is
located below hotplate and is ope ated by a cont ol
knob on facia panel indicated by symbol shown in
Figu e 2.
Fig re 2 - Solid Top Gas Tap
Oven Thermostat
The oven is the mostatically cont olled. This cont ol is
identified by the symbol illust ated below.
Note
Spa k ignition button is located below oven
compa tment.
Oven doo s must be opened to gain access to device.
SECTION 2 - LIGHTING and OPERATIONS
Open Top
1. P ess and tu n knob to full flame position.
2. Light bu ne using tape o match and continue to
p ess knob fo a fu the 20 seconds befo e elease.
3. Bu ne should emain lit; if bu ne goes out etu n
to Step 1 and epeat ignition p ocedu e.
4. When bu ne emains lit, tu n knob to equi ed
position.
To Sh t the Open Top OFF
Tu n knob to OFF position.
Solid Top
1. Ensu e mains gas is tu ned on.
2. Remove bullseye castings f om solid top hob.
3. Tu n cont ol anti-clockwise to pilot ignition position
and push knob in.
4. Holding knob in fully, apply tape to pilot and
obse ve pilot lights.
5. When pilot is lit, continue to hold knob in fully fo
20 seconds then elease. If pilot is extinguished,
wait th ee minutes and epeat f om Step 3.
6. Having established pilot condition, tu n knob
anti-clockwise to FULL FLAME position. This will
light main bu ne .
7. Fo LOW FLAME ope ation, tu n knob fu the
anti-clockwise to LOW FLAME position.
8. Replace bullseye castings.
To Sh t the Solid Top OFF
1. Tu n to pilot position, eady fo next ope ation.
2. To extinguish completely, tu n to OFF position.
Food
Prod ct
Vol-au-vents
(medium) 80 1.1 230 2&4 10 16
Sultana scones
(
1
/
2
") 80 4.5 240 2&4 9 14
C oissants
(55g) 36 2 200 2&4 12 20
B ead olls
(75g) 48 3.6 230 2&4 10 17
Quiche lo aine
(8" dia - 680g) 12 8.2 195 2&4 35 60
Yo kshi e
Pudding 72 2.7 240 3&5 18 32
Sponge
(slab) 4 5.5 200 2&4 12 24
Baked jacket
potatoes 72 26.5 220 2&4 70 110
Total
Quantity
Total
Weight (kg)
Tempe atu e
Setting (
o
C)
Runne
Positions
Changeove
Time (mins)
Total Cook
Time (mins)
Oven
1. Open oven doo s.
2. Tu n the mostat knob to maximum setting and
push in. This will establish a flow of gas to oven
bu ne .
3. Continue to p ess knob in and at the same time,
push piezo ignito button situated below oven
compa tment to p ovide a spa k at oven bu ne .
4. Having established bu ne flame, maintain
p essu e on knob fo a fu the 20 seconds befo e
elease.
5. Bu ne should emain lit. Should bu ne fail to
emain lit, wait 2 to 3 minutes then etu n to Step 2
and epeat ignition p ocedu e.
6. When bu ne emains lit, tu n the mostat to
equi ed position.
To Sh t the Oven OFF
To extinguish bu ne , tu n the mostat cont ol knob to
OFF position.
SECTION 3 - COOKING HINTS
Open Top
Open top bu ne s a e ated at 4.5kW nett.
Boost bu ne (5.3kW) positions a e indicated he e fo
models - G2101, G2121, G2161 and G2124.
The pan suppo ts will safely accommodate pans f om
125mm diamete . It is ecommended howeve , that
pans la ge than 300mm diamete be heated upon
the ea bu ne s.
Solid Top
It is no mal p actice to leave the single bu ne full on
fo the whole of the time the hotplate is in use.
As much of the heat is concent ated in the cent e,
tape ing away towa ds the edges, this a ea should be
used fo apid boiling. The pan then moved away f om
main heat sou ce to simme at desi ed intensity.
Hints on Using Solid Hotplate
Getting the best out of this type of heat sou ce is
la gely a matte of expe ience coupled with the needs
of a pa ticula task in hand. Fo ce tain applications,
such as heating a pot quickly, it will be found
expedient to emove cent e ing and place pot di ectly
ove bu ne . If it is necessa y to heat the enti e
su face, the ing must be in position. In the inte ests
of fuel economy, it is ecommended that the solid top
should not be left unattended with gas on FULL
setting. If it is necessa y to keep the top hot fo any
length of time, the cont ol should be tu ned down to
low flame setting.
Do not at any time leave the gas on without a pot
whilst the cent e ing is emoved - such p actice
simply wastes gas.
The hottest a ea of the plate is at the cent e and
towa ds the ea . The f ont and sides a e coole .
Oven
Tempe atu e is automatically cont olled by the
the mostat.
Grid Shelves
Two cooking shelves a e supplied which can be
suppo ted in any of five diffe ent positions within the
oven. When two shelves a e being used, these
should be positioned so that at least one single shelf
space is left between them. Always push shelves into
oven until the stops hit the f ont of the suppo ts.
Tray Sizes
Each shelf will accomodate a 2/1 gast ono m t ay.
Single t ays o dishes should be placed cent ally.
T ays must not be allowed to ove hang the shelf in
any di ection as this will adve sely affect heat
ci culation.
Pre-Heat Time
Allow at least 45 minutes f om lighting a cold oven
befo e loading with food to be cooked. Put food in
quickly and close the doo s fi mly.
Oven Cooking Chart
This info mation is p ovided as guidance only and all
figu es a e app oximate. Due to the natu al heat
g adient in this type of oven, it will be necessa y to
inte change p oducts on the uppe and lowe cooking
shelves du ing the cooking pe iod.
The changeove timing va ies depending on p oduct
type , weight and tempe atu e.
Flame Senso
Po ts
Slots
SECTION 4 - CLEANING and MAINTENANCE
All su faces a e easie to clean if spillage is emoved
befo e it becomes bu nt on and if unit is cleaned daily.
Stainless Steel S rfaces
These su faces should be cleaned with hot wate and
dete gent then d ied and polished with a soft cloth.
Cleaning agents containing bleach, ab asives o
caustic chemicals will damage o stain the stainless
steel su faces and must not be used.
Vitreo s Enamel S rfaces
App oved cleaning agents which have the ma k of the
Vit eous Enamel Development Cent e a e
ecommended.
It is advisable to clean daily afte use. Wipe clean the
vit eous enamel su faces while they a e still wa m
using a soft cloth and hot soapy wate . Badly stained,
emovable pa ts should be soaked in hot wate with
an app oved dete gent. If the pa ts a e not emovable
f om the unit the application of wa m wate with
app oved dete gent using nylon o scotch cleaning
pads will give good esults.
Solid Top
The hob fillings can be lifted off the ange fo cleaning
with wa m soapy wate , only using ab asives such as
nylon cleaning pads fo ext eme ove spill. Remove
all accumulated deb is which may be gathe ed in the
bu ne t ay and the ledge which suppo ts the fillings.
Warning
Since the fillings a e ve y heavy, ca e should be taken
when handling them.
Open Top
Remove pan suppo ts and bu ne head f om unit.
Wash all pa ts with hot soapy wate . Afte washing,
d y all pa ts well and ensu e all wate is emoved f om
inside the bu ne head. Wipe out hob a ea and d ip
t ays befo e eplacing all pa ts in eve se o de .
Ensu e that all bu ne pa ts a e located co ectly.
Oven
To Clean The Oven
Clean while oven is wa m but not hot. The enamelled
base plate lifts out. The unne s can be emoved,
(g ip at the bottom, lift upwa ds until the lowe ends
come out of the b ackets, pull outwa d towa ds cent e
of oven, then lowe ). Two oven d ip t ays a e p ovided
and these a e simply emoved without distu bing
bu ne , by sliding them out f om the f ont.
CLEANING INSTRUCTIONS for
OPEN TOP BURNERS
The following inst uctions should be followed when :
a) A spillage has occu ed on the bu ne .
b) The bu ne fails to light o stay alight.
c) At the end of each day o cooking pe iod.
Ca tion
Pa ts may be hot the efo e p otection to avoid bu ns
should be used.
1. Remove the pan suppo t.
2. Remove the bu ne head by lifting upwa d.
Fig re 3
3. Tho oughly clean with soap and wate . Ensu e that
all bu ne po ts a e clean and f ee f om food o
cleaning mate ial deb is.
Important
Stubbo n deb is lodged in po ts (See Figu e 4) can be
emoved using a non-metallic implement such as a
cocktail stick. The slots in the base should be f eed of
deb is using a soft b ush.
D y bu ne with a lint-f ee cloth and blow th ough the
po ts to ensu e the e is no blockage.
Fig re 4
4. Clean any spillage f om bu ne base, ensu ing all
food and cleaning mate ial deb is is emoved.
D y bu ne base tho oughly, taking ca e not to
damage the flame senso .
Fig re 5
Important
Do not allow any spillage o cleaning mate ial deb is
ente the la ge hole in the bu ne base.
Fig re 6
5. Replace bu ne head upon bu ne base and ensu e
the head location pips sit within the bu ne base
notches. When bu ne head is p ope ly located, it
will not otate.
Pips
Notch
Fig re 7
6. Light the bu ne to check that it ope ates co ectly.
Note
This p ocess should be followed p io to calling fo a
Se vice Enginee . Failu e due to lack of p ope
cleaning is not cove ed by wa anty.

This manual suits for next models

8

Other Falcon Range manuals

Falcon Nexus 110 Dual Fuel Instruction Manual

Falcon

Falcon Nexus 110 Dual Fuel Instruction Manual

Falcon 900S Dual Fuel User manual

Falcon

Falcon 900S Dual Fuel User manual

Falcon i91104C Manual

Falcon

Falcon i91104C Manual

Falcon Dominator Plus E3101P/D User manual

Falcon

Falcon Dominator Plus E3101P/D User manual

Falcon Toledo 90 Dual Fuel User manual

Falcon

Falcon Toledo 90 Dual Fuel User manual

Falcon G9081 Manual

Falcon

Falcon G9081 Manual

Falcon G350/2 Quick guide

Falcon

Falcon G350/2 Quick guide

Falcon Classic 90 Gas Operation manual

Falcon

Falcon Classic 90 Gas Operation manual

Falcon Classic 110 gas User manual

Falcon

Falcon Classic 110 gas User manual

Falcon Elise 110 Dual Fuel Instruction Manual

Falcon

Falcon Elise 110 Dual Fuel Instruction Manual

Falcon G1006BX Installation instructions

Falcon

Falcon G1006BX Installation instructions

Falcon Classic 90 Gas Instruction Manual

Falcon

Falcon Classic 90 Gas Instruction Manual

Falcon 1000 Mercury Dual Fuel Instruction Manual

Falcon

Falcon 1000 Mercury Dual Fuel Instruction Manual

Falcon G350/1 User guide

Falcon

Falcon G350/1 User guide

Falcon Professional 90 Fuel Instruction Manual

Falcon

Falcon Professional 90 Fuel Instruction Manual

Falcon Classic Deluxe Instruction Manual

Falcon

Falcon Classic Deluxe Instruction Manual

Falcon Elise SE 110 Dual Fuel Instruction Manual

Falcon

Falcon Elise SE 110 Dual Fuel Instruction Manual

Falcon Dominator Plus G3151 User manual

Falcon

Falcon Dominator Plus G3151 User manual

Falcon U110138 - 03 Instruction Manual

Falcon

Falcon U110138 - 03 Instruction Manual

Falcon 1092 Deluxe Dual Fuel Instruction Manual

Falcon

Falcon 1092 Deluxe Dual Fuel Instruction Manual

Falcon G1006FX User manual

Falcon

Falcon G1006FX User manual

Falcon Elan series Operation manual

Falcon

Falcon Elan series Operation manual

Falcon Dominator Plus G3101 User manual

Falcon

Falcon Dominator Plus G3101 User manual

Falcon Dominator Plus User manual

Falcon

Falcon Dominator Plus User manual

Popular Range manuals by other brands

Whirlpool SF3000EY Use & care guide

Whirlpool

Whirlpool SF3000EY Use & care guide

KitchenAid KERS205TWH3 installation instructions

KitchenAid

KitchenAid KERS205TWH3 installation instructions

Frigidaire FEF326FQ - Electric Coil Range Use & care manual

Frigidaire

Frigidaire FEF326FQ - Electric Coil Range Use & care manual

Dacor DR30DH use and care manual

Dacor

Dacor DR30DH use and care manual

ANDI AXC900FWT Instruction guide

ANDI

ANDI AXC900FWT Instruction guide

Frigidaire FFGF3015L M Specifications

Frigidaire

Frigidaire FFGF3015L M Specifications

Verona VCLFSGG 365 D Series installation instructions

Verona

Verona VCLFSGG 365 D Series installation instructions

Thermador PRG304EG Care and use manual

Thermador

Thermador PRG304EG Care and use manual

Miele H 346 operating instructions

Miele

Miele H 346 operating instructions

Whirlpool SF216LXS installation instructions

Whirlpool

Whirlpool SF216LXS installation instructions

Kenmore 970-3368 Series Use & care guide

Kenmore

Kenmore 970-3368 Series Use & care guide

Thermador RDF30 Care & use manual

Thermador

Thermador RDF30 Care & use manual

Estate TEP340TQ0 Use & care guide

Estate

Estate TEP340TQ0 Use & care guide

GE PGS908DEP4WW installation instructions

GE

GE PGS908DEP4WW installation instructions

Frigidaire FFGF3015LM Product specifications

Frigidaire

Frigidaire FFGF3015LM Product specifications

Frigidaire CFEF272DC3 Use & care manual

Frigidaire

Frigidaire CFEF272DC3 Use & care manual

GE JB645STSS owner's manual

GE

GE JB645STSS owner's manual

KitchenAid KGRS807SBL - 30 Inch Gas Range parts list

KitchenAid

KitchenAid KGRS807SBL - 30 Inch Gas Range parts list

manuals.online logo
manuals.online logoBrands
  • About & Mission
  • Contact us
  • Privacy Policy
  • Terms and Conditions

Copyright 2025 Manuals.Online. All Rights Reserved.