manuals.online logo
Brands
  1. Home
  2. •
  3. Brands
  4. •
  5. Faller
  6. •
  7. Toy
  8. •
  9. Faller 161652 User manual

Faller 161652 User manual

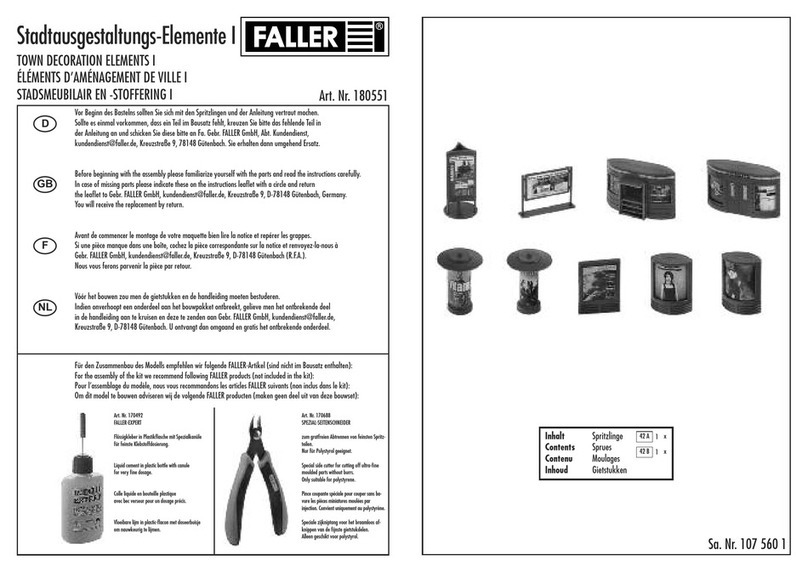
Sa. Nr. 161 652 1
BAUSTE EN-SET
CONSTRUCTION SITE SET
SET DE CHANTIERS
BOUWP AATSSET Art. Nr. 161652
Vor Beginn des Bastelns sollten Sie sich mit den Spritzlingen und der Anleitung vertraut machen.
Sollte es einmal vorkommen, dass ein Teil im Bausatz fehlt, kreuzen Sie bitte das fehlende Teil in
der Anleitung an und schicken Sie diese bitte an Fa. Gebr. FA ER GmbH, Abt. Kundendienst,
[email protected], Kreuzstraße 9, 78148 Gütenbach. Sie erhalten dann umgehend Ersatz.
Before beginning with the assembly please familiarize yourself with the parts and read the instructions carefully.
In case of missing parts please indicate these on the instructions leaflet with a circle and return
the leaflet to Gebr. FA ER GmbH, [email protected], Kreuzstraße 9, D-78148 Gütenbach, Germany.
You will receive the replacement by return.
Avant de commencer le montage de votre maquette bien lire la notice et repérer les grappes.
Si une pièce manque dans une boîte, cochez la pièce correspondante sur la notice et renvoyez-la-nous à
Gebr. FA ER GmbH, [email protected], Kreuzstraße 9, D-78148 Gütenbach (R.F.A.).
Nous vous ferons parvenir la pièce par retour.
Vóór het bouwen zou men de gietstukken en de handleiding moeten bestuderen.
Indien onverhoopt een onderdeel aan het bouwpakket ontbreekt, gelieve men het ontbrekende deel
in de handleiding aan te kruisen en deze te zenden aan Gebr. FA ER GmbH, [email protected],
Kreuzstraße 9, D-78148 Gütenbach. U ontvangt dan omgaand en gratis het ontbrekende onderdeel.
D
F
GB
NL
Art. Nr. 170688
SPEZIA -SEITENSCHNEIDER
zum gratfreien Abtrennen von feinsten Spritztei-
len.
Nur für Polystyrol geeignet.
Special side cutter for cutting off ultra-fine moul-
ded parts without burrs.
Only suitable for polystyrene.
Pince coupante spéciale pour couper sans bavure
les pièces miniatures moulées par
injection. Convient uniquement au polystyrène.
Speciale zijkniptang voor het braamloos afknip-
pen van de fijnste gietstukdelen.
Alleen geschikt voor polystyrol.
Für den Zusammenbau des Modells empfehlen wir folgende FA ER-Artikel (sind nicht im Bausatz enthalten):
For the assembly of the kit we recommend following FA ER products (not included in the kit):
Pour l’assemblage du modèle, nous vous recommandons les articles FA ER suivants (non inclus dans le kit):
Om dit model te bouwen adviseren wij de volgende FA ER producten (maken geen deel uit van deze bouwset):
Art. Nr. 170492
FA ER-EXPERT
Flüssigkleber in Plastikflasche mit Spezialkanüle
für feinste Klebstoffdosierung.
iquid cement in plastic bottle with canule
for very fine dosage.
Colle liquide en bouteille plastique
avec bec verseur pour un dosage précis.
Vloeibare lijm in plastic-flacon met doseerbuisje om
nauwkeurig te lijmen.
Inhalt Spritzlinge
Contents Sprues
Contenu Moulages
Inhoud Gietstukken
1 A 1x
1 B 1x
2
2 x 2 x 4 x
4 x
ABC
DEFG
1/1 Deco 4
Deco 3 Deco 2
Deco 5
1/3
1/1
1/2
1/4 1/5
1/5
1/4 1/3
A
B
Deco 6 =
Variante A
Deco 7=
Variante B
4 x 4 x
F
Inhalt Tüte Contents bag
Contenu sachet Inhoud zakje
Sekundenkleber verwenden.
Use instant modelling cement.
Utilisez la colle rapide.
Gebruik secondenlijm.
3
HI
JK
1/6
Deco 8
Deco 1
1/5
1/7
1/5
H
I
8 x
Sekundenkleber verwenden.
Use instant modelling cement.
Utilisez la colle rapide.
Gebruik secondenlijm.
Inhalt Tüte Contents bag
Contenu sachet Inhoud zakje
4
gelb
yellow
jaune
geel
gelb
yellow
jaune
geel
braun
brown
brun
bruin
braun
brown
brun
bruin
schwarz
black
noir
zwart
schwarz, black, noir, zwart
rot, red, rouge, rood
gelb, yellow, jaune, geel
grün, green, vert, groen
+ = schwarz, black, noir, zwart
RT = rot, red, rouge, rood
GE = gelb, yellow, jaune, geel
GN = grün, green, vert, groen
rot
red
rouge
rood
Lesen Sie vor Beginn der Arbeiten diese Anleitung
ausführlich und genau durch. Arbeiten Sie Schritt
für Schritt, sauber und korrekt, damit das
Ergebnis zu Ihrer Zufriedenheit ausfällt.
Sollte ein Teil des Car Systems Grund zur Beanstandung
geben, wenden Sie sich bitte vertrauensvoll an
die FA ER Service-Abteilung. Wir werden um
eine reibungslose Abwicklung bemüht sein.
Ampelmontage + Einbau in die Anlage
Fügen Sie bitte die einzelnen Teile der Steckampel
der Montage-Skizze (1) entsprechend zusammen.
Der Einbau der Ampel in die Anlage erfolgt analog
der Einbau-Skizze (2).
Einbau der Stopp-Stellen
Am besten befestigen Sie die Stopp-Stellen mit
zwei Schrauben der Montage-Skizze (3)
entsprechend unter der Anlage. Damit Sie die Stopp-
Stellen leichter auf den Mittelpunkt montieren
können, bohren Sie von oben ein 2 mm breites
Positionsloch in die Straße. Achten Sie bitte exakt
auf die Einhaltung der Maßangaben.
Anschluß der Traffic-Light-Control, Funktions-
prüfung und Justierung
Nach der Verbindung aller Funktionselemente mit
der Traffic- ight-Control und nach Anschluß des
Geräts an einen Trafo (12-16 V, Gleich- oder
Wechselstrom) führen Sie bitte eine Funktions-
prüfung durch. Sämtliche Ampelbeleuchtungsteile
müssen bei richtigem Anschluß im Ampelphasen-
ablauf wechselnd aufleuchten. Ist dies nicht der
Fall, prüfen Sie bitte den exakten Anschluß der
einzelnen Kabel nach, wie unter den Punkten
»Anschluß der Ampeln und Stopp-Stellen«
beschrieben ist. Beachten Sie bitte auch die einzelnen
Punkte in der nachfolgend aufgeführten
Auflistung »Störfälle«.
Die Ampelanlage funktioniert nur bei Verwendung
von Car System Fahrzeugen, die mit einem Reed-
sensor (SRK) bestückt sind.
Über diesen Sensor wird auf der Stopp-Stelle die
Akkuspannung zum Motor im Fahrzeug unterbrochen
bzw. wieder hergestellt.
Die Schaltablauffolge sämtlicher Ampeln können
Sie selbst nachjustieren. Dazu drehen das Regulierungs-
rad im Trimmpotentiometer P1 entweder nach
links (langsamer) oder nach rechts (schneller).
Störfälle
Gesamtanlage funktioniert nicht:
-Trafo prüfen
-Trafoanschluß prüfen
Ampelbeleuchtung funktioniert nicht:
-Anschluß der einzelnen Kabel prüfen.
- ED defekt; austauschen.
Ersatz erhalten Sie über unsere Service-Abteilung.
Stopp-Stelle funktioniert nicht:
-Anschluß der einzelnen Kabel prüfen.
-Prüfen Sie den Reedsensor (SRK) im Fahrzeug auf Funktion,
indem Sie das Car System Fahrzeug über eine zweite Spule testen.
Notfalls Reedsensor austauschen.
-Sind die Einbaumaße exakt eingehalten worden?
Nachmessen und gegebenenfalls Einbau korrigieren.
Traffic- ight-Control funktioniert nicht, z.B. ichtablauffolgen
untereinander stimmen nicht:
-Ampelschaltgerät ausbauen und zur Überprüfung an
die Service-Abteilung einsenden.
Sollte nach Überprüfung der Anschlüsse, der Trafospannung, der
Einbaumontage und des Reedsensors im Car System Fahrzeug die
Stopp-Stelle nicht einwandfrei funktionieren, so vertauschen Sie die
Kabelanschlüsse an der Traffic- ight-Control, damit die Polarisierung
des Magnetfeldes vertauscht wird (Nord- und Südpol) und der für
eine exakte Schaltfunktion notwendige Nordpol nach oben kommt.
123
Fahrdraht
Fahrdrahtlage
Stoppspulenposition
Ampel-
position
Before beginning the construction work, please
read through these instructions carefully and
thouroughly. Take the work slowly, step by step,
making sure that everything is to your satisfation
before proceeding.
Should any part of the Car System give cause for
complaint, please do not hesitate to contact the
FA ER service department. We will do our best to
make everxthing run smoothly.
Installation of traffic light and fitting in the layout
Please assemble the individual parts of the traffic
light post according to the assembly sketch (1).
Fitting the traffic light into the layout is done in
accordance with sketch (2).
Fitting of the stop-sections
It is best to fix the stop sections using two screws
under the layout as shown in sketch (3).
To make it easier for the stop section to be mounted
centrally, drill a small locating hole 2 mm diameter,
from above in the roadway.
Make sure to keep exactly to the measurements shown.
Connection of the Traffic-Light-Control,
testing the operation, ad ustments.
After all the various elements have been
connected to the Traffic- ight-Control, and
the subsequent connection of the switchgear to a
suitable transformer (with a 12-16 V A. C. or D. C.
supply), then test everything to make sure it is
working properly. When correctly connected, teh
individual lights should change according to the
traffic light phase. If this is not the case, then check
to make sure that the individual wires are correctly
connected as described in the section
»Connection of the traffic lights and stop-sections.«
Please also take note of the individual points in the
following »trouble-shooting« or fault finding list.
The traffic lights will only work when using vehicles
from the Car System which have been fitted with a
magnetic reed contact switch (SRK). It is this contact
switch interrupts the power to the motor from the
batteries in the vehicle.
You can readjust the switching sequence of all traffic lights.
To do this you have to turn the control wheel of the trim
potentiometer.
Turning it to the left results in a slower sequence,
turning it to the right makes the sequence faster.
Fault Finding
The whole apparatures does not work:
-check the transformator
-check the transformator connection.
The traffic lights do not light up:
-check the individual wiring connections.
- ED defekt; exchange. Spares are available from our service-department.
Stop-sections does not work:
-check the connections of the individual wires.
-check the connection of the reed switch (SRK) in the vehicle by testing it
over a second coil. If necessary change the reed contact.
-Is everything correctly mounted ? Ensure that the correct measurements
have been observed, and adjust them if necessary.
Traffic- ight-Control does not work, i. e. The traffic light sequence is incorrect:
-Remove the switch control mechanism and send it to the service department
for checking.
If after checking the connections of the transformer, the assembly and the reed
contact switches in the vehicle, the stop-section does not work properly, then
exchange the wire connections on the Traffic- ight-Control so that the polarity of
the magnetic field is reversed (North- and South pole) and the North pole that i
required for the switching operation to function correctly comes to the surface.
123
Contact wire
Contact wire position
Stop coil position
Traffic-
light
position
Avant de commencer les travaux, lisez attentivement
les instructinons de montage et effectuez les
travaux avec soin, en procédant pas à pas, afin
que vous soyez satisfait du résultant.
Au cas où une pièce du Car System donnerait lieu à
des réclamations, adressez-vous en toute confiance
au service après-vente FA ER. Nous nous
efforcerons de vous donner satisfaction dans les
meilleurs délais.
Montage du feu rouge + montage dans l’installation
Veuillez assembler les différentes pièces du feu
rouge conformément au schéma de montage (1).
Pour monter le feu rouge dans l’installation, procédez
selon le schéma de montage (2).
Montage des positions stop
Nous vous recommandons de fixer les positions
stop sous l’installation à l’aide de deux vis confor-
mément au schéma de montage (3). Afin que vous
puissiez monter plus facilement les positions stop
au point central, percez d’un haut un trou de
positionnement de 2 mm dans ke circuit.
Veuillez respecter scrupuleusement les cotes.
Branchement du Commande de feu de signalisation,
contrôle de fonctionnement, réglage
Après le branchement de tous les éléments
fonctionnels sur l’interrupteur de feux rouges et le
branchement de l’appareil sur un transformateur
(12-16 V, courant continu ou courant alternatif),
vérifiez le bon fonctionnement de l’installation.
Si le branchement est correct, tous les éléments
lumineux des feux doivent s’allumer alternativement
en phase.
Si cela n’est pas le cas, vérifiez le branchement des
fils comme décrit au paragraphe »Branchement
des feux rouges et des positions stop«. Veuillez
également noter les différents points dans le liste
»Cas de panne« ci-après.
es feux rouges ne fonctionnement qu’en assoction
avec des véhicules du Car System équipés d’un
contact à lame souple. Ce contact coupe ou rétablit
le courant alimentant le moteur du véhicule sur
la position stop.
Il est possible de régler la fréquence de changement de
couleur. Pour cela, tourner le potentiomètre vers la gauche
(plus lente), vers la droite (plus rapide).
Cas de panne
’ensemble de l’installation ne fonctionne pas:
-vérifiez le transformateur
-vérifiez le branchement du transformateur
es feux ne fonctionnent pas:
-vérifiez le branchement des différents fils
-la ED ne s’allume pas; à remplacer. Commandez une ED de rechange
auprès de notre service après-vente.
a position stop ne fonctionne pas:
-vérifiez le branchement des différents fils
-vérifiez le bon fonctionnement du contact à lame
souple dans le véhicule à l’aide d’une deuxième bobine; remplacez le contact
à lame souple le cas échéant-est-ce que vous avez respecté scrupulement
toutes les cotes de montage ? remesurez et corrigez le montage si nécessaire.
Commande de feu de signalisation ne fonctionne pas, par exemple la séquence
des feux n’est pas correcte:
-démontez l’interrupteur et envoyez-le au servive après-vente pour vérification.
Si la position stop ne fonctionne toujours pas après vérification méticuleuse des
branchements, de la tension du transformateur, du montage et du contact à
lame souple dans le véhicule du Car System, permutez alors le Commande de
feu de signalisation du contrôle de fonctionnement de feux rouges pourinver-
ser la polarité du champ magnétique (pôle nord et pôle sud) de manière que
le pôle nord responsable de la fonction de commutation se trouve en haut.
123
Fil de contact
Position fil de contact
Position bobine stop
Position
feu
Lees voordat u met het werk begint de hand-
leiding geheel en aandachtig door:
Werk stap voor stap, weloverwogen en
nauwkeurig, zodat u tevreden kunt zi n met
het resultaat.
Als u over een deel van het Car Systeem klachten
heeft, wendt u zich dan gerust tot de FA ER service-
afdeling. Wij zullen voor een soepele afwikkeling
zorg dragen.
Montage + inbouw van de verkeerslichten
Steek de verschillende delen volgens tek.1 in
elkaar. De inbouw van de verkeerslichten wordt
zoals op tek. 2 uitgevoerd.
Inbouw van de stopplaatsen
De stopplaatsen kunt u het best met twee schroefjes
onder de baan bevestigen zoals in tek. 3 is aangegeven.
Om de stopplaatsen gemakkelijker op het middelpunt te
kunnen monteren, boort u van bovenaf een 2 mm
die fixeergat in het wegdek.
et erop, dat de gegeven maten precies worden aangehouden.
Aansluiting van het Traffic-Light-Control,
controle op werking, afstelling
Nadat alle functie-elementen zijn aangesloten op
het schakelapparaat en na aansluiting hiervan op
een trafo (12 - 16 V gelijk- of wisselstrom)
controleert u de werking. Als alle verkeerslichten
goed zijn aangesloten, moeten zij in fasen
afwisselend branden. Gebeurt dat niet, dan moet
de juiste aansluiting van elke draad worden gecontroleerd,
zoals dat onder de punten »aansluiting
van de verkeerslichten en stopplaatsen« is beschreven.
et op de afzonderlijke punten van de hierna genoemde
»storingen«.
De verkeerslichtinstallatie functioneert alleen bij
het gebruik van voertuigen, die van een
Reedcontact (SRK) zijn voorzien.
Via dit maak - en breek-contact wordt op de stopplaats
de accuspanning naar de motor in het voertuig
onderbroken resp. »gemaakt«.
De tijdsduur van de schakelingen van de verkeerslichten
kunt u zelf afstellen. Daarvoor draait u het regulerings-
wieltje in de trimpotentiometer P1 naar links (langzamer)
of rechts (sneller).
Storingen
De verkeerslichtinstallatie werkt niet:
-trafo controleren
-trafo-aansluiting controleren
De lampjes van de verkeerslichten branden niet:
-aansluiting van elke draad controleren (goed contact?)
- ED (lichtdiode) defect; vervangen. Via onze service-afdeling
kunt u een nieuwe krijgen.
Stoplaats functioneert niet:
-aansluiting van elke draad controleren (goed contact?)
-controleer de werking van het Reedcontact van de auto door
het testen
ervan via een tweede spoel. Eventueel Reedcontact vervangen.
-zijn de inbouwmaten precies aangehouden?
Namente en eventueel corrigeren.
Traffic- ight-Control functioneert niet, b. v. de onderlinge
lichtwisseling van de lampjes klopt niet:
-schakleapparaat verwijderen en ter controle aan onze
service-afdeling sturen.
Indien na controle van de aansluitingen, de trafospanning,
de inbouwmontage en het Reedcontact is het Car Systeem voertuig,
de stopplaats niet onberispelijk functioneert, dan verwisslet u de
aansluitingen van de draden aan de Traffic- ight-Control.
Daardoor wordt de polariteit van het magnetisch veld omgekeerd
(noord- en zuidpool) en komt de voor een correcte schakelfunctie
noodzakelijke noordpool aan de bovenzijde te liggen.
123
Rijdraad
Rijdraadlengte
Stopspoelpositie
Stoplicht-
positie

Other Faller Toy manuals

Faller Mountain Chalet 232507 User manual

Faller

Faller Mountain Chalet 232507 User manual

Faller 130194 User manual

Faller

Faller 130194 User manual

Faller Bungalow User manual

Faller

Faller Bungalow User manual

Faller 232511 User manual

Faller

Faller 232511 User manual

Faller 239004/2 User manual

Faller

Faller 239004/2 User manual

Faller CANAL BRIDGE User manual

Faller

Faller CANAL BRIDGE User manual

Faller 180499 User manual

Faller

Faller 180499 User manual

Faller 119 User manual

Faller

Faller 119 User manual

Faller POSTE 1 SIGNAL TOWER User manual

Faller

Faller POSTE 1 SIGNAL TOWER User manual

Faller 222205 User manual

Faller

Faller 222205 User manual

Faller 130222 User manual

Faller

Faller 130222 User manual

Faller 222214 User manual

Faller

Faller 222214 User manual

Faller 282705 User manual

Faller

Faller 282705 User manual

Faller Chiemgau Alpine Chalet User manual

Faller

Faller Chiemgau Alpine Chalet User manual

Faller 130168 User manual

Faller

Faller 130168 User manual

Faller BLACK FOREST MILL User manual

Faller

Faller BLACK FOREST MILL User manual

Faller 190499/3 User manual

Faller

Faller 190499/3 User manual

Faller SET OF FUNFAIR CARAVANS II User manual

Faller

Faller SET OF FUNFAIR CARAVANS II User manual

Faller 232522 User manual

Faller

Faller 232522 User manual

Faller 140478 User manual

Faller

Faller 140478 User manual

Faller 130401 User manual

Faller

Faller 130401 User manual

Faller 282708 User manual

Faller

Faller 282708 User manual

Faller FAIRGROUND BARRIERS AND SIGNS User manual

Faller

Faller FAIRGROUND BARRIERS AND SIGNS User manual

Faller Florist's Shop User manual

Faller

Faller Florist's Shop User manual

Popular Toy manuals by other brands

ROBBE AIRBULL 3129 Assembly and operating instructions

ROBBE

ROBBE AIRBULL 3129 Assembly and operating instructions

Topmodel CZ Ventus 2cx De luxe instructions

Topmodel CZ

Topmodel CZ Ventus 2cx De luxe instructions

Miniature Aircraft USA X-Cell Whiplash Assembly instructions

Miniature Aircraft USA

Miniature Aircraft USA X-Cell Whiplash Assembly instructions

Helios Rivos operating instructions

Helios

Helios Rivos operating instructions

Lionel Madison TrainSounds Baggage Car owner's manual

Lionel

Lionel Madison TrainSounds Baggage Car owner's manual

M.T.H. Premier AC4400CW Operator's manual

M.T.H.

M.T.H. Premier AC4400CW Operator's manual

Warlord Games Antares C3M4 Combat Drone Assembly instructions

Warlord Games

Warlord Games Antares C3M4 Combat Drone Assembly instructions

Little Tikes lil' ocean explorers manual

Little Tikes

Little Tikes lil' ocean explorers manual

Smoby 311049 manual

Smoby

Smoby 311049 manual

Lionel O-27 Santa Fe FT Passenger set owner's manual

Lionel

Lionel O-27 Santa Fe FT Passenger set owner's manual

LEGO 70224 instructions

LEGO

LEGO 70224 instructions

LEGO 75915 JurassicWorld Assembly guide

LEGO

LEGO 75915 JurassicWorld Assembly guide

TTCOMBAT TABLETOP SCENICS TTSCW-EES-102 manual

TTCOMBAT

TTCOMBAT TABLETOP SCENICS TTSCW-EES-102 manual

Kinderfeets Cargo Bike user manual

Kinderfeets

Kinderfeets Cargo Bike user manual

Mattel Barbie BDF34 instructions

Mattel

Mattel Barbie BDF34 instructions

Seagull Models ANGEL GLIDER 2000 Assembly manual

Seagull Models

Seagull Models ANGEL GLIDER 2000 Assembly manual

Eduard Sd.Kfz.251/1 Ausf. B quick start guide

Eduard

Eduard Sd.Kfz.251/1 Ausf. B quick start guide

Hasbro TOYBOX TOOLS my LiTTLE PONY C0119 playbook

Hasbro

Hasbro TOYBOX TOOLS my LiTTLE PONY C0119 playbook

manuals.online logo
manuals.online logoBrands
  • About & Mission
  • Contact us
  • Privacy Policy
  • Terms and Conditions

Copyright 2025 Manuals.Online. All Rights Reserved.