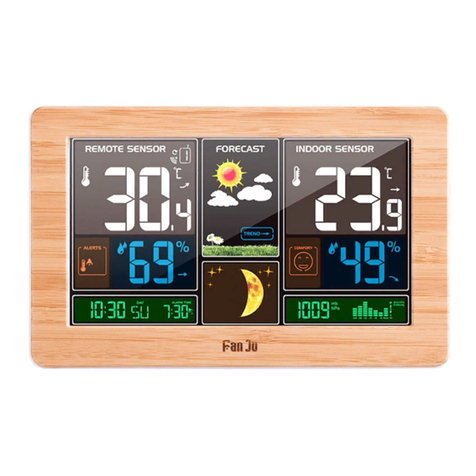
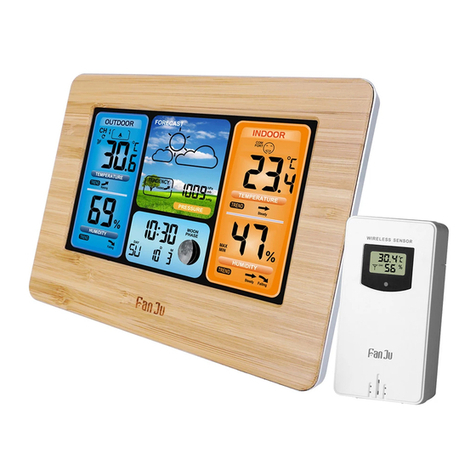
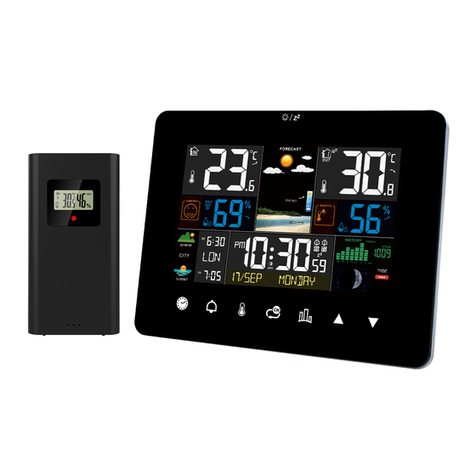
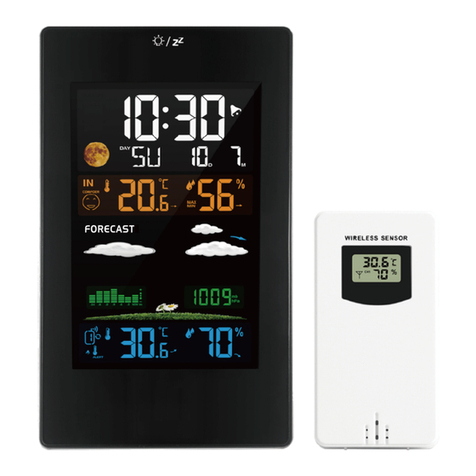
FanJu FJ3365 User manual

P2EN
DE
FR
IT
ES
RU
P14
P27
P40
P52
P65

FJ3365-Norcc
M
a
nua
l
EN -Weather Station
1. WEATHER STATION FEATURES
:
1.1 Main Station
►The weather forecasting function
►Date and weekday display;
►Time in optional 12/24 hour format
►Daily Alarm Function
►Automatic snooze function
►Moon phase display
►USB Charger Output Socket
►3 Levels brightness backlight with USB power cable
►The trend display of Temperature, Humidity and Barometric
►Temperature:
— Temperature alternatively in °C or °F.
— Indoor temperature measurement ranges: 15°F (-9.9°C) to 122°F (50°C)
— Outdoor temperature measurement ranges: -4°F (-20°C) to 140°F (60°C)
— Outdoor thermometer and frost alert
►Humidity: Indoor & Outdoor measurable range: 20%RH ~ 95%RH
►Barometric pressure:
— Barometric pressure measurement ranges: 17.72 inHg (600 hPa/mb) to
32.50 inHg(1100 hPa/mb)
— Pressure alternatively in inHg or mb/ hPa/mmHg
►Minimum/Maximum display for humidity and temperature
1.2 Remote Sensor
Wireless Outdoor Sensor:
— Wall Mount or Table Stand
— 433.92MHz RF transmitting frequency
— 200 feet transmission range in an open area
2

FJ3365-Norcc
M
a
nua
l
1.3 Power Supply:
Weather Station:
Battery: 2 x AA (Not included) or USB power cable (Included)
Wireless Outdoor
Sensor: Battery:2 x
AA (Not included)
3

FJ3365-Norcc
M
a
nua
l
1.4 Weather Station Appearance
Part A – Weather Station Front
A1: Time A11: Barometric Pressure
A2: Week A12: Barometric Pressure recording
A3: Date A13: Lunar Phases
A4: Alarm Icon A14: Outdoor Humidity
A5: Indoor Icon A15: Outdoor Min/Max Humidity
A6: Outdoor Icon A16: Frost Alert Icon
A7: Indoor Temperature A17: Outdoor Min/Max Temperature
A8: Indoor Min/Max Temperature A18: Outdoor Temperature Alert Icon
A9: Indoor Humidity A19: Outdoor Temperature
A10: Indoor Min/Max Humidity
Part B – Weather Station Back
B1: SNOOZE/LIGHT Button B6: MODE Button
B2: ALERT Button B7: USB Cable input socket
B3: RESET Button B8: - Button
B4: ALARM Button B9: Battery Compartment
B5: + Button
4

FJ3365-Norcc
M
a
nua
l
Part C – Wireless Outdoor Sensor:
C1: LCD display – Temperature C4: “°C/°F” switch button
C2: LCD display – Humidity C5: “TX” reset button
C3: Transmit signal LED C6: Battery compartment
5

FJ3365-Norcc
M
a
nua
l
2 INITIAL OPERATION AND NOTES
2.1 Initial Operation
Open the weather station battery compartment, insert 2 x AA batteries
observing polarity [ “+” and “ –“ marks]
Remove the battery compartment on the Wireless Remote Sensor, insert
2 x AA batteries observing the correct polarity (+ and - marks) and close
the battery compartment.
When the power is connected all the icons on the LCD display will light up
for 3 seconds, you will hear a beep tone and the weather station will start to
detect the indoor temperature and humidity
The weather station will start to make a connection to the outdoor remote
sensor. This operation takes about 3
minutes and is displayed by a flashing reception RF icon “ ”in the “Remote
Sensor” display area on the receiver.
2.2 Notes for Customer before Use
If weather station failed to receive transmission from outdoor sensor (“- -
”display on the main station LCD), press and hold “-” button for 3
s
econds to
receive transmission manually. RF icon “ ” flashes on
t
he LCD and the
weather
station to re-receive the data from outdoor sensor. Or open the sensor battery
compartment, press the TX button to connect the sensor and station again.
3 TIME, TIME ZONE AND CALENDAR SETTING
3.1 Manual Time Setting
Press the “MODE” button, can switch the display calendar, second or alarm
time
Press and hold down the “MODE” button for 3 seconds, the 12/24 hour mode
display starts to flash. Now use“+” and
“-” buttons to set the correct 12/24 hour mode.
6

FJ3365-Norcc
M
a
nua
l
Press “MODE” to confirm your setting, the °C or °F format display starts to
flash. Now use “+” and “-” buttons to select
Press “MODE” to confirm your setting, the air pressure unit (near the
moonphase) format display starts to flash. Now use “+” and “-” buttons to
select
Press “MODE” to confirm your setting, the Hour display starts to flash. Now
use “+” and “-” buttons to set the correct hour.
Press “MODE” to confirm your setting, the Minute displays starts to flash.
Now use“+” and “-” buttons to set the correct minute.
Press “MODE” button to confirm your setting, the Month and Date icon
display starts to flash. Now use “+” and “-”
buttons to set the date display on Month/Date or Date/Month.
Press “MODE” button to confirm your setting, the Year display starts to flash.
Now use “+” and “-” buttons to set the correct year.
Press “MODE” button to confirm your setting, the Month display starts to flash.
Now use “+” and “-” buttons to set the
correct month.
Press “MODE” button to confirm your setting, the Date display starts to flash.
Now use “+” and “-” buttons to set the correct date.
Press “MODE” button to confirm your setting, the week display language
starts to flash. Now use “+” and “-” buttons to set the correct language .
Press “MODE” to confirm your setting and to end the setting procedures.
F.Y
.I.:
After 20 seconds without pressing any button, the clock switches
automatically from Set Mode to Normal Time Mode.
The time zone must be set correctly according to the weather station area,
or when the time signal is received, the time will be incorrect
4 DAILY ALARM AND SNOOZE FUNCTION SETTING
7

FJ3365-Norcc
M
a
nua
l
4.1 Setting the Daily Alarm
Press once “ALARM” button, can switch the alarm ON or OFF.
Press and hold down “ALARM”button for 2 seconds until Alarm Time hour
display starts to flash. Use the “+” and “-”
buttons to set the required hour.
Press “ALARM” button to confirm your setting, the Minute display starts to
flash. Use the “+” and “-” buttons to set the required minute.
Press “ALARM” button to confirm your setting and to end the setting
procedure
F.Y
.I.:
After 20 seconds without pressing any button the clock switches
automatically from setting mode to Normal clock mode.
4.2 Switching ON/OFF the alarm signal
When alarm is ring, press any button except the “SNOOZE/LIGHT”
button to stop the alarm signal. It is not necessary to reactivate the alarm.
It switches itself automatically to the alarm time which has already been set.
4.3 Snooze Function:
Press the “SNOOZE/LIGHT” button the alarm signal sounds to get to
SNOOZE mode. The alarm signal sounds again after approx. 5 minutes.
5 WEATHER FORECAST AND BAROMETRIC
5.1 Weather Forecast
The weather station calculates a weather forecast for about the next 8 hours
based on the barometric pressure trend. Of course this forecast can‘t
compare to that of professional weather services supported by satellites
and high performance computers, but merely provides an
a
pproximate
indication of current developments. Please take the weather forecast from
your local weather forecasting service into account as well as the forecast
from your weather station. If there are discrepancies between the information
8

FJ3365-Norcc
M
a
nua
l
from your device and from the local weather forecasting service, please take
the advice of the latter as authoritative.
The weather station displays the following weather icon for next 8 hours
weather forecast not current weather:
sunny
slightly
cloudy
cloudy
rainy
Heavy
rainy
Snowy
5.2 Barometric Pressure Display
The current barometric pressure is automatically shown on the Weather
Station once it starts receiving readings.
Press and hold the
“
MODE
”
button for 2 seconds to enter setting, and
then follow it until the pressure units will be flashing display, Use the “+” and
“-” button to set the pressure unit to display in the "hPa/mb" or "inHg".
If the barometric pressure reading is below the minimum range, then
LLLL will be displayed. If the barometric pressure reading is above the
maximum range, then HHHHwill be displayed.
5.3 Barometric Trend Display
The weather station can display the barometric pressure trend.
You may see the following displays next to
the weather forecast icon:
The barometric pressure will rise.
The barometric pressure will remain constant.
The barometric pressure will fall.
6. LUNAR PHASES AND TIDE INDICATOR:
The Moon icon and tide indicator of the Weather Station will also display 12
different Moon phase and 3 kinds of tide phases according to the set calendar.
9

FJ3365-Norcc
M
a
nua
l
New
moon
Waxing
half-moon
Half-
moon
Waxing
full
moon
Full
moon
Waning
full
moon
Half-
moon
Waning
half-moon
7. TEMPERATURE, HUMIDITY AND COMFORT DISPLAY
7.1 °C or °F temperature display
The temperature is displayed either in °C or °F. Press “MODE” for 3 seconds
start to setting and follow it, until the °C
or °F format display starts to flash, now use “+” and “-” buttons to select
7.2 Current Temperature and Temperature Trend Display
After you insert the batteries, the weather station measures the current
temperature. The trend display shows a neutral temperature course .
The further course of the trend display is determined as follows:
If, after an hour, the temperature is more than 1°C higher than the value
measured first, then a positive course is displayed .
If, after an hour, the temperature is more than 1°C lower than the value
measured first, then a negative course is displayed .
If the temperature does not change within an hour, then the upward or
downward pointing arrow becomes a horizontal arrow. The measured
temperature is then taken as the neutral value from which further prognoses
are made.
7.3 Outdoor Temperature & Frost Alert Settings
Press and hold down the
“
ALERT
”
button for 2 seconds until the icon for the
Temperature Alert” starts to flash
The icon of Hi limit of the Temperature alarm starts to flash. Use the “+”
and “-” buttons to set the required
maximum temperature. Press
“
ALERT
”
to confirm your setting.
The icon of the Lo limit of the Temperature alarm starts to flash. Use the
10

FJ3365-Norcc
M
a
nua
l
“+” and “-” buttons to set the required minimum temperature. Press
“
ALERT
”
button to confirm your setting and to end the setting procedure
F.Y
.I.:
Before entering the setup, you must select the remote channel, different
channels can set different temperature alarm range
7.4 Activating and Deactivating Temperature & Frost Alert
Press
“
ALERT
”
button to activate or deactivate the remote temperature
alert, When the remote temperature alarm is activated, the temperature alarm
icon is displayed in the remote sensor bar
When the remote channel temperature value exceeds the set temperature
range, will activate the alarm, the weather station will every minute
continuous alarm 5 times, at the same time, temperature alarm in alarm icon
" " flashes, If the alarm activates the temperature that is currently
displayed on the channel, its temperature value and alarm upper limit icon
“ "or lower limit icon" " also flashes
When the temperature of REMOTE SENSOR is +30°F to + 37°F or –1°C to +
3°C, the frost alarm will be activated,
symbol " " flashing.
F.Y
.I.:
When the temperature is higher than the upper limit of the alarm
temperature setting, the activation of the upper limit alarm, symbol " " flashing,
When the temperature is lower than the lower limit of the alarm
temperature, the lower limit alarm is activated, and the symbol " "
flashes
7.5 Current Humidity and Humidity Trend Display
After you insert the batteries, the weather station measures the current
relative humidity. The trend display shows a neutral relative humidity course
. The further course of the trend display is determined as follows:
11

FJ3365-Norcc
M
a
nua
l
If, after an hour, the relative humidity is more than 5% higher than the
value measured first, then a positive
course is displayed .
If, after an hour, the relative humidity is more than 5% lower than the
value measured first, then a negative course is displayed .
If the relative humidity does not change within an hour, the upward or
downward pointing arrow becomes a horizontal arrow. The measured relative
humidity is then taken as the neutral value from which further prognoses are
made.
7.6 Maximum/Minimum Temperature and Humidity
To view indoor/outdoor maximum, minimum temperature and humidity data,
please check the Hi / Lo data near the each unit.
F.Y.I.:
If the temperature reading is below
ranges
, the LL.L will be
displayed.
If
the temperature reading is
above
ranges
, the HH.H will be
d
is
p
la
y
e
d
.
7.7 Remote Sensor Transmission:
The weather station automatically starts receiving transmission from outdoor
thermo sensor for outdoor temperature
& humidity after batteries inserted.
The outdoor sensor will automatically transmit temperature and humidity
signal to the Weather Station after batteries inserted.
If Weather Station failed to receive transmission from outdoor sensor (“- -
”display on the LCD), press and hold “-”
button for 3
s
econds to receive transmission manually. RF icon “ ” flashes
on
t
he LCD,The Weather Station to receive the outdoor sensor.
F.Y
.I.:
When the wireless sensor set up different channels, the
weather
station
12

FJ3365-Norcc
M
a
nua
l
"REMOTE SENSOR" also want to switch to the same channel. When there is
no wireless sensor signal transmission on the channel, "--" will be displayed
in the channel of the
weather station
8. BACKLIGHT
If the product is powered by batteries, touch the
"
SNOOZE/LIGHT
"
field.
Backlight lit 15 seconds.
When the power supply of the product is inserted into the USB power cable,
the battery will automatically disconnect
the power supply, and the backlight will always be bright. Press the
“
SNOOZE/LIGHT
”
button to adjust the brightness of the backlight. Users can
choose according to the personal preferences of different brightness backlight
or turn off
the backlight. Turn off backlight when you can touch the "
SNOOZE/LIGHT
"
field to light the backlight 15 second.
9. LOW BATTERY:
If the battery icon “ ” appears the batteries in the outdoor sensor should be
replaced as soon as possible
13

FJ3365-Norcc
M
a
nua
l
DE - Wetterstation
1. WETTERSTATION EIGENSCHAFTEN
:
1.1 Hauptstation
►Die Wettervorhersagefunktion
►Datums- und Wochentagsanzeige
►Uhrzeit im optionalen 12/24-Stunden-Format
►Tägliche Alarmfunktion
►Automatische Schlummerfunktion
►Mondphasenanzeige
►USB-Ladegerät-Ausgangsbuchse
►Hintergrundbeleuchtung mit 3 Helligkeitsstufen und USB-Netzkabel
►Die Trendanzeige von Temperatur, Luftfeuchtigkeit und Luftdruck
►Temperatur:
— Temperatur wahlweise in ° C oder ° F
— Innentemperaturmessbereiche: 15 ° F (-9,9 ° C) bis 122 ° F
(50 ° C)
— Außentemperaturmessbereiche: -4 ° F (-20 ° C) bis 140 ° F
(60 ° C)
— Außenthermometer und Frostalarm
►Luftfeuchtigkeit: Messbereich für Innen und Außen: 20% RH ~
95% RH
►Luftdruck:
— Luftdruckmessbereiche: 17,72 inHg (600 hPa / mb) bis 32,50
inHg (1100 hPa / mb)
— Pressure alternatively in inHg or mb/ hPa/mmHg
►Druck wahlweise in inHg oder mb/ hPa / mmHg
1.2 Fernbedienungssensor
►Drahtloser Außensensor:
14

FJ3365-Norcc
M
a
nua
l
— Wandhalterung oder Tischständer
— 433,92 MHz HF-Sendefrequenz
— 200 Fuß Übertragungsreichweite in einem offenen Bereich
1.3 Stromversorgung:
►Wetterstation:
Batterie: 2 x AA (nicht im Lieferumfang enthalten) oder USB-
Stromkabel (im Lieferumfang enthalten)
►Drahtloser Außensensor:
Batterie: 2 x AA (nicht enthalten)
15

FJ3365-Norcc
M
a
nua
l
1.4 Aussehen der Wetterstation
Part A – Weather Station Front
A1: Zeit A11: Luftdruck
A2: Woche A12:Luftdruckaufzeichnung
A3: Datum A13: Mondphasen
A4: Alarmsymbol A14: Außenluftfeuchtigkeit
A5: Innensymbol A15: Min / Max-Luftfeuchtigkeit im Freien
A6: Outdoor-Symbol A16: Frostwarnsymbol
A7: Innentemperatur A17: Min / Max-Außentemperatur
A8: Min / Max-Innentemperatur A18: Außentemperatur-Alarmsymbol
A9: Innenluftfeuchtigkeit A19: Außentemperatur
A10: Indoor Min / Max Luftfeuchtigkeit
Part B – Weather Station Back
B1: SNOOZE / LIGHT-Taste B6: MODE-Taste
B2: ALERT-Taste B7: USB-Kabel-Eingangsbuchse
B3: RESET-Taste B8: - Taste
B4: ALARM-Taste B9: Batteriefach
B5: + Taste
16

FJ3365-Norcc
M
a
nua
l
Part C – Wireless Outdoor Sensor:
C1: LCD-Anzeige - Temperatur C4: mschalttaste „° C / °F“
C2: LCD-Anzeige - Luftfeuchtigkeit C5: Reset-Taste „TX“
C3: Sendesignal-LED C6: Batteriefach
17

FJ3365-Norcc
M
a
nua
l
2 INBETRIEBNAHME UND HINWEISE
2.1 Initial Operation
Öffnen Sie das Batteriefach der Wetterstation, legen Sie 2 x AA-Batterien
ein und achten Sie dabei auf die Polarität ["+" und "-" Zeichen "]
Entfernen Sie das Batteriefach des Funk-Fernbedienungssensors, legen
Sie 2 x AA-Batterien ein, achten Sie auf die richtige Polarität (+ und -) und
schließen Sie das Batteriefach.
Wenn die Stromversorgung angeschlossen ist, leuchten alle Symbole
auf dem LCD-Display 3 Sekunden lang auf. Sie hören einen Piepton
und die Wetterstation beginnt, die Innentemperatur und -feuchtigkeit zu
erfassen
Die Wetterstation stellt eine Verbindung zum Außenfernbedienungssensor
her. Dieser Vorgang dauert ca. 3 Sekunden Minuten und wird durch ein
blinkendes RF-Empfangssymbol " " im Anzeigebereich "Remote Sensor"
am Empfänger angezeigt.
2.2 Hinweise für den Kunden vor Gebrauch
Außensensor empfangen konnte (Anzeige „- -“auf dem LCD-Display der
Hauptstation), halten Sie die Taste „-“3 Sekunden lang gedrückt, um die
Übertragung manuell zu empfangen. Das RF-Symbol “ ” blinkt auf dem
LCD und dem Wetterstation, um die Daten vom Außensensor erneut zu
empfangen. Oder öffnen Sie das Batteriefach des Sensors und drücken Sie die
TX-Taste, um den Sensor und die Station erneut zu verbinden.
3 ZEIT- UND KALENDER-EINSTELLUNG
3.1 Manuelle Zeiteinstellung
Drücken Sie die Taste “MODE”, um den Anzeigekalender, die Sekunden oder
die Weckzeit umzuschalten
Halten Sie die Taste “MODE” 3 Sekunden lang gedrückt. Die 12/24-Stunden-
Modusanzeige beginnt zu blinken. Verwenden Sie nun "+" und“-”Tasten
zum Einstellen des korrekten 12/24-Stunden-Modus.
18

FJ3365-Norcc
M
a
nua
l
Drücken Sie “MODE”, um Ihre Einstellung zu bestätigen. Die Anzeige im °C-
oder °F-Format beginnt zu blinken. Verwenden Sie nun die Tasten "+" und "-
", um wählen
Drücken Sie “MODE”, um Ihre Einstellung zu bestätigen. Die Anzeige des
Luftdruckeinheitsformats (in der Nähe der Mondphase) beginnt zu blinken.
Verwenden Sie nun die Tasten "+" und "-" zur Auswahl
Drücken Sie “MODE”, um Ihre Einstellung zu bestätigen. Die Stundenanzeige
beginnt zu blinken. Stellen Sie nun mit den Tasten "+" und “-”die richtige
Stunde ein.
Drücken Sie “MODE”, um Ihre Einstellung zu bestätigen. Die Minutenanzeige
beginnt zu blinken. Stellen Sie nun mit den Tasten "+" und “-”die richtige
Minute ein.
Drücken Sie die Taste “MODE”, um Ihre Einstellung zu bestätigen. Das
Symbol für Monat und Datum beginnt zu blinken. Verwenden Sie jetzt "+" und
"-" Tasten zum Einstellen der Datumsanzeige für Monat / Datum oder Datum /
Monat.
Drücken Sie die Taste “MODE”, um Ihre Einstellung zu bestätigen. Die
Jahresanzeige beginnt zu blinken. Stellen Sie nun mit den Tasten “+”und
“-”das richtige Jahr ein
Drücken Sie die Taste “MODE”, um Ihre Einstellung zu bestätigen. Die
Monatsanzeige beginnt zu blinken. Stellen Sie nun mit den Tasten “+”und
“-”den richtigen Monat ein..
Drücken Sie die Taste “MODE”, um Ihre Einstellung zu bestätigen. Die
Datumsanzeige beginnt zu blinken. Stellen Sie nun mit den Tasten “+”und
“-”dasrichtige Datum ein.
Drücken Sie die Taste “MODE”, um Ihre Einstellung zu bestätigen. Die
Sprache der Wochenanzeige beginnt zu blinken. Verwenden Sie nun die
19

FJ3365-Norcc
M
a
nua
l
Tasten "+" und "-", um die richtige Sprache einzustellen .
Drücken Sie“MODE”, um Ihre Einstellung zu bestätigen und den
Einstellvorgang zu beenden.
F.Y
.I.:
Nach 20 Sekunden ohne Drücken einer Taste wechselt die Uhr automatisch
vom Einstellungsmodus in den Normalzeitmodus.
Die Zeitzone muss entsprechend dem Gebiet der Wetterstation richtig
eingestellt sein. Andernfalls ist die Zeit beim Empfang des Zeitsignals
falsch
4 TÄGLICHE EINSTELLUNG DER ALARM- UND SNOOZE-
FUNKTION
4.1 Einstellen des täglichen Alarms
Drücken Sie einmal die Taste “ALARM”, um den Alarm ein- oder
auszuschalten.
Halten Sie die Taste „ALARM“2 Sekunden lang gedrückt, bis die
Stundenanzeige der Alarmzeit zu blinken beginnt. Stellen Sie mit den Tasten
"+" und "-" die gewünschte Stunde ein.
Drücken Sie die Taste “ALARM”, um Ihre Einstellung zu bestätigen. Die
Minutenanzeige beginnt zu blinken. Stellen Sie mit den Tasten "+" und "-" die
gewünschte Minute ein.
Drücken Sie die Taste “ALARM”, um Ihre Einstellung zu bestätigen und
den Einstellvorgang zu beenden
F.Y
.I.:
Nach 20 Sekunden ohne Drücken einer Taste wechselt die Uhr automatisch
vom Einstellmodus in den normalen Uhrmodus.
4.2 Ein- / Ausschalten des Alarmsignals
Wenn der Alarm ertönt, drücken Sie eine beliebige Taste außer der
Taste „SNOOZE / LIGHT“, um das Alarmsignal zu stoppen. Es ist
nicht erforderlich, den Alarm erneut zu aktivieren. Es schaltet sich
automatisch auf die bereits eingestellte Weckzeit um..
20
Table of contents
Languages:
Other FanJu Weather Station manuals
Popular Weather Station manuals by other brands

Oregon Scientific
Oregon Scientific BAR628HG user manual

La Crosse Technology
La Crosse Technology WS-7391U instruction manual

Terdens
Terdens 2161 Manual User

Oregon Scientific
Oregon Scientific EB313HGN user manual

Levenhuk
Levenhuk Wezzer PLUS LP20 user manual

Oregon Scientific
Oregon Scientific TREVISO BAR986HGA user manual