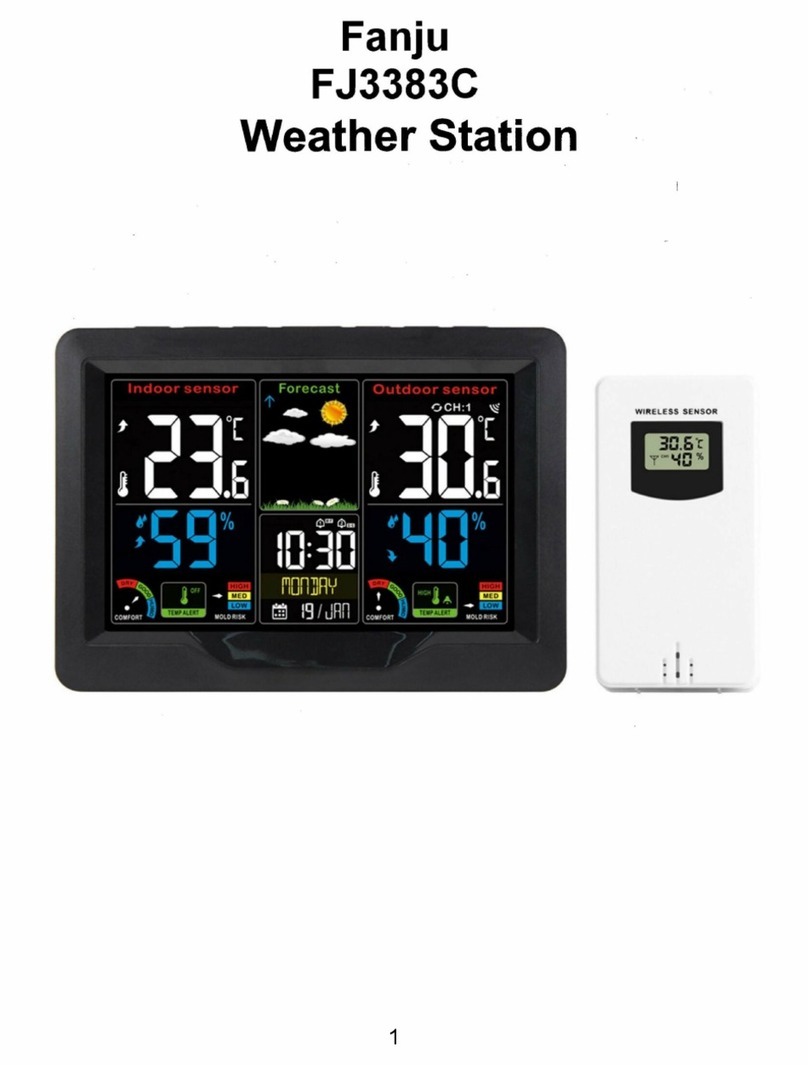
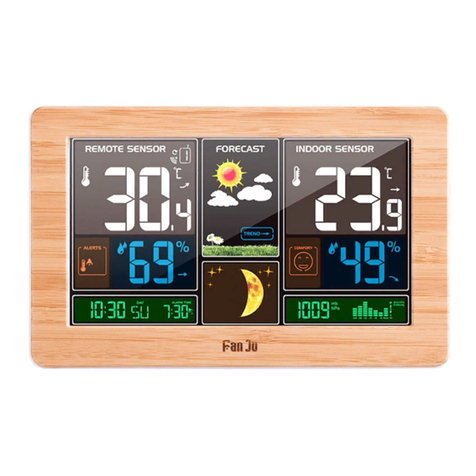
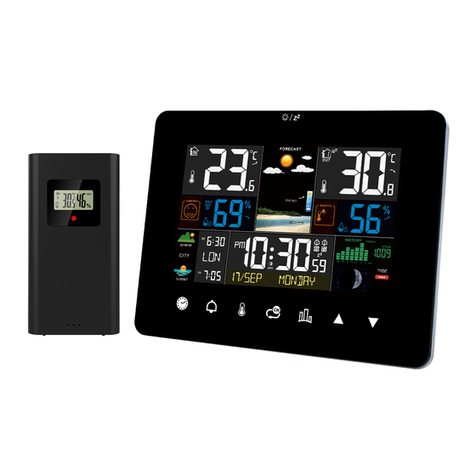
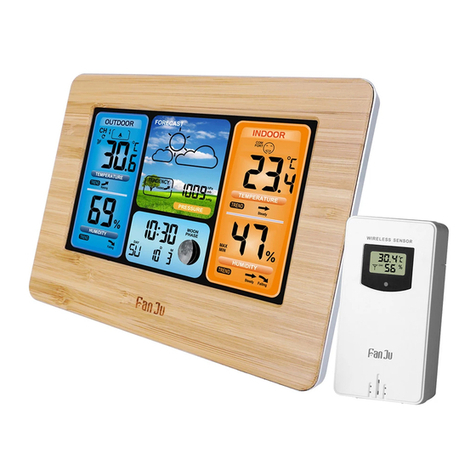
FanJu FJ3389B-NORCC User manual

WEATHER STATION
WITH BAROMETER
User Manual
EN
DE
FR
IT
ES
RU
P2
P13
P26
P39
P52
P65

FJ3389B-NORCC Manual
EN - User Manual
1. WEATHER STATION FEATURES
1.1 Main Station
►The weather forecasting function
►Perpetual Calendar Up to Year 2099
►Day of week in 7 languages user selectable: English, German, Italian,
French, Spanish, Netherlands and Danish
►Time in optional 12/24 hour format.
►Daily Alarm Function
►Automatic snooze function (OFF or 5~60min)
►The moon phase display
►Barometric pressure:
— Barometric pressure measurement ranges: 600hPa/mb (17.72inHg)
to 1100hPa/mb (32.50inHg)
— Pressure alternatively in hPa/mb or inHg
►Humidity: Indoor & Outdoor measurable range: 20%RH ~ 95%RH
►Temperature:
— Indoor temperature measurement ranges: -9.9°C (15°F) to 50°C
(122°F)
— Outdoor temperature measurement ranges: -40°C (-40°F) to 70°C
(158°F)
— Temperature alternatively in °C or °F.
— Outdoor thermometer and frost alert
►Minimum/maximum display for air humidity and temperature
►4 different brightness backlight with power adapter
1.2 Remote Sensor
— Wall Mount or Table Stand
— One Wireless Thermo Sensor Included
— 433.92MHz RF transmitting frequency
— 60 meters transmission range in an open area
1.3 Power Supply
►Weather Station:
Battery: 2 x LR6 AA or USB Power
►Wireless Outdoor Sensor:
Battery:2 x LR6 AA
2

FJ3389B-NORCC Manual
1.4 Weather Station
Part A-Positive LCD
A2: Time A9: Weather Forecasting
A3: Moon Phase A10: The trend of 24 hours of pressure
A4: Calendar or Alarm time A11: Barometric Pressure
A5: Week A12: Number of RF channels
A6: Indoor comfort A13: Outdoor Temperature Alert
A7: Indoor Humidity A14: Outdoor Temperature
A8: Indoor Temperature A15: Outdoor Humidity

FJ3389B-NORCC Manual
Part B – Back button and power
B1: “SNOOZE/LIGHT” touch field
B2: Keypad
B3: Battery compartment
B4: Support frame
B5: Power supply socket
B6: Mains adapter
Part C –Wireless Remote Sensor:
C1: LCD display – Temperature
C2: LCD display – Humidity
C3: Transmit signal LED
C4: “°C/°F” button
C5: “TX” button
C6: “CHANNEL 1 or 2 or 3” switch
C7: Battery compartment
4

FJ3389B-NORCC Manual
2 INITIAL OPERATION AND NOTES
2.1 Initial Operation
►Open Weather Station battery compartment cover
►Insert 2 x AA batteries observing polarity [ “+” and “ –“ marks]
►When you insert the batteries, all the icon on the LCD display will briefly
light up for 3 seconds, and you will hear a beep tone, and detect indoor
temperature & humidity.
►The Weather Station will now start to make a connection to the outdoor
remote sensor. This operation takes about 3 minutes and is displayed by a
flashing reception RF antenna symbol in the “OUTDOOR” display area on
the receiver.
►This now, replace Wireless Outdoor Sensor battery compartment cover,
Open Weather Station battery compartment cover, Insert 2 x AA batteries
observing polarity [ “+” and “–“ marks]
►After receiver has created a connection to the outdoor remote sensor, it
will then enters the clock mode.
2.2 Notes for Customer before Use
►If weather station failed to receive transmission from outdoor sensor (“-
-”display on the main station LCD), press and hold “▼” button for 3 seconds
to receive transmission manually. RF icon “ ” flashes on the LCD and the
weather station to re-receive the data from outdoor sensor. Or open the
sensor battery compartment, press the TX button to connect the sensor and
station again.
3 TIME AND CALENDAR SETTING
3.1 Manual Time Setting
►Press once “ ”button, can switch the display calendar or second.
►Press and hold down the “ ” button for 2 seconds, the unit of
temperature display starts to flash. Now use the “▲” and “▼” button to set
the temperature of the unit, the unit of temperature can be set to “°C” or
“°F”
►Press “ ” to confirm your setting, the unit of pressure display starts to
flash. Now use the “▲” and “▼” button to set the pressure of the unit,the
unit of t pressure can be set to “hPa” or “inHg”
5

FJ3389B-NORCC Manual
►Press “ ” to confirm your setting, the 12/24 hour mode display starts to
flash. Now use “▲” and “▼”buttons to set the correct 12/24 hour mode.
►Press “ ” to confirm your setting, the Hour display starts to flash. Now
use “▲” and “▼” buttons to set the correct hour.
►Press “ ” to confirm your setting, the Minute displays starts to flash. Now
use“▲” and “▼”buttonstoset the correct minute.
►Press “ ” button to confirm your setting, the Month and Date icon display
starts to flash. Now use “▲” and “▼”buttons to set the date display on
Month/Date or Date/Month.
►Press “ ” button to confirm your setting, the Year display 2014 starts to
flash. Now use “▲” and “▼”buttons to set the correct year.
►Press “ ” button to confirm your setting, the Month display starts to flash.
Now use “▲” and “▼”buttons to set the correct month.
►Press “ ” button to confirm your setting, the Date display starts to flash.
Now use “▲” and “▼”buttons to set the correct date.
►Press “ ” button to confirm your setting, the language selection for the
Weekday displays starts to flash. Now use “▲” and “▼” buttons to select a
language.
Langu
age
Sund
ay
Mon
day
Tues
day
Wednes
day
Thurs
day
Frid
ay
Satur
day
Germa
n, GE
SO MO DI MI DO FR SA
English
,EN
SU
MO
TU
WE
TH
FR
SA
French
, FR
DI
LU
MA
ME
JE
VE
SA
Italian,
IT
DO LU MA ME GI VE SA
Spanis
h, SP
DO
LU
MA
MI
JU
VI
SA
Dutch,
DU
ZO
MA
DI
WO
DO
VR
ZA
Danish
, DA
SO MA TI ON TO FR LO
6

FJ3389B-NORCC Manual
►Press“ ” to confirm your setting and to end the setting procedures, enter
the clock mode.
F.Y.I.:
►After 20 seconds without pressing any button, the clock switches
automatically from Set Mode to Normal Time Mode.
►There are 7 languages of Weekday: English, German, Italian, French,
Spanish, Dutch and Danish.
4 DAILY ALARM AND SNOOZE FUNCTION SETTING
4.1 Setting the Daily Alarm
►Press once “ ”button, the display conversion to alarm activation mode,
In this mode, press the “ ”button again to activate the alarm function,
which is displayed as "ON", while the alarm icon " " is displayed。Also, in
this mode the alarm has been activated, and then press “ ”button, you can
turn off the alarm function, the display show "OFF" and the alarm icon " "
does not show
►Press and hold down “ ”button for 2 seconds until Alarm Time hour
display of the Alarm time starts to flash. Use the “▲” and “▼” buttons to
set the required hour.
►Press “ ” button to confirm your setting, The Minute display of the Alarm
time starts to flash. Use the “▲” and “▼”buttons to set the required
minute.
►Press “ ” button to confirm your setting, the snooze time of the Alarm
starts to flash. Use the “▲” and “▼”buttons to set the minute of snooze
you need.
►Press “ ” button to confirm your setting and to end the setting
procedure.
F.Y.I.:
►After 20 seconds without pressing any button the clock switches
automatically from setting mode to Normal clock mode.
►The alarm will sound for 2 minutes if you do not deactivate it by pressing
7

FJ3389B-NORCC Manual
any button. In this case the alarm will be repeated automatically after 24
hours.
►Rising alarm sound (crescendo, duration: 2 minutes) changes the volume
4 times whilst the alarm signal is heard.
►The snooze time setting range: 5 ~ 60MIN, OFF, when set to OFF, means
no snooze function. Snooze time unit is minutes.
4.2 Switching off the alarm signal
►The alarm sound when the trigger, press any button except the “ ”
button or press hold the “ ” button for 2 seconds to stop the alarm
signal.
4.3 Snooze Function:
►Touch the “ ” field or press the “ ” button the alarm signal
sounds to get to SNOOZE mode. After waiting for snooze time, the alarm
signal will ring again.
►In snooze mode, press any button except the “ ” button or press hold
the “ ” button for 2 seconds to exit the snooze mode.
F.Y.I.:
When the snooze function is set to OFF, the alarm sound when the trigger,
press “” does not have this snooze function.
5 WEATHER FORECAST AND BAROMETRIC
5.1 Weather Forecast
►The weather station calculates a weather forecast for about the next 12
hours based on the barometric pressure trend. Of course this forecast can‘t
compare to that of professional weather services supported by satellites
and high performance computers, but merely provides an approximate
indication of current developments. Please take the weather forecast from
your local weather forecasting service into account as well as the forecast
from your weather station. If there are discrepancies between the
information from your device and from the local weather forecasting
service, please take the advice of the latter as authoritative.
►The weather station displays the following weather icon:
8

FJ3389B-NORCC Manual
sunny slightly cloudy
cloudy rainy Heavy rainy
Snowy
5.2 Barometric Pressure Display
►The current barometric pressure is automatically shown on the Weather
Station once it starts receiving readings.
The barometric pressure can be displayed in either mb/hPa or inHg. The
units can be selected by press button “ HPA/INHG”
►If the barometric pressure reading is below the minimum range, then
LLLL will be displayed. If the barometric pressure reading is above the
maximum range, then HHHH will be displayed.
5.3 Barometric Trend Display
►The weather station can display the barometric pressure trend.
►You may see the following displays:
The barometric pressure will rise.
The barometric pressure will remain constant.
The barometric pressure will fall.
6. LUNAR PHASES AND TIDE INDICATOR:
►The weather station has a display which automatically displays the
current lunar phase
7. TEMPERATURE, HUMIDITY AND COMFORT DISPLAY
7.1 Comfort display
►Indoor comfort level is calculated according to the indoor temperature and
humidity, a total of 5 levels.
Comfortable too cold or too hot
9

FJ3389B-NORCC Manual
7.2 Current Temperature and Temperature Trend Display
►The current indoor temperature/humidity/barometric pressure and the
temperature/humidity trend (indoors) are shown in the LCD display.
►After successfully connecting with the outdoor sensor, the weather station
can display the outdoor temperature/humidity and the
temperature/humidity trend (outdoor)
►You may see the following displays:
The temperature/humidity is rising.
The temperature/humidity is remaining constant.
The temperature/humidity is falling.
7.3 RF Transmission Procedure
►The weather station automatically starts receiving transmission from
outdoor sensor for outdoor temperature & humidity after batteries inserted.
►The outdoor sensor will automatically transmit temperature and humidity
signal to the Weather Station after batteries inserted.
►If Weather Station failed to receive transmission from outdoor sensor (“-
-”display on the LCD), press and hold “▼” button for 3 seconds to receive
transmission manually. RF icon “ ” flashes on the LCD,The Weather
Station to receive the outdoor sensor.
7.4 Maximum/Minimum Temperature and Humidity
►To toggle indoor/outdoor maximum, minimum temperature and humidity
data, press the “MEMORY” button:
Once to show the maximum temperature and humidity values.
Twice to sow the minimum temperature and humidity values
Three times to return to the current temperature and humidity levels
►To reset the maximum and minimum temperature and humidity, press and
hold down the “MEMORY” button about 2 seconds. This will reset all
minimum and maximum data recorded to the current displayed values.
F.Y.I.:
►If the temperature reading is below ranges, the LL.L will be displayed. If
the temperature reading is above ranges, the HH.H will be displayed.
7.5 Outdoor Temperature Alert Setting
►Press and hold down the “ ” button for 2 seconds until the icon for the
10

FJ3389B-NORCC Manual
Temperature Alert” starts to flash
►The icon of Upper limit of the Temperature alarm starts to flash. Use the
“▲” and “▼” buttons to set the required maximum temperature. Press “ ”
to confirm your setting.
►The icon of the Lower limit of the Temperature alarm starts to flash. Use
the “▲” and “▼” buttons to set the required minimum temperature. Press
“” button to confirm your setting and to end the setting procedure
7.6 Activating and Deactivating Temperature & Frost Alert
►Press “ ” button to activate or deactivate the remote temperature alert,
When the remote temperature alarm is activated, the temperature alarm
icon is displayed in the remote sensor bar
►When the remote channel temperature value exceeds the set temperature
range, will activate the alarm, the weather station will every minute
continuous alarm 5 times, at the same time, temperature alarm in alarm icon
“” flashes, its temperature value and alarm upper limit icon “Hi” or lower
limit icon “Lo” also flashes
►When the temperature of outdoor sensor is –1°C (+30°F) to + 3°C (+ 37°F),
the frost alarm will be activated, the frost alert icon “ ” flashing.
F.Y.I.:
►When the temperature is higher than the upper limit of the alarm
temperature setting, the activation of the upper limit alarm, symbol “Hi”
flashing,
►When the temperature is lower than the lower limit of the alarm
temperature, the lower limit alarm is activated, and the symbol “Lo” flashes
8. BACKLIGHT
►If the product is powered by batteries, touch the “ ” field or press the
“” button. Backlight lit 15 seconds.
►When the power supply of the product is inserted into the power supply
adapter, the battery will automatically disconnect the power supply, and the
backlight will always be bright. Press the button to adjust the brightness
of the backlight, you can adjust the 4 state: 3 different brightness backlight
and close the backlight. When the backlight brightness is not at the
11

FJ3389B-NORCC Manual
maximum brightness, touch the “ ” field or press the “ ” button.
Backlight turns to maximum brightness of 15 seconds.
9. LOW BATTERY
►If the battery icon “ ” appears the batteries in the outdoor sensor should
be replaced as soon as possible.
12

FJ3389B-NORCC Manual
DE – Benutzerhandbuch
1.1 Hauptbahnhof
►Die Wettervorhersagefunktion
►Ewiger Kalender bis zum Jahr 2099
►Wochentag in 7 Sprachen wählbar: Englisch, Deutsch, Italienisch,
Französisch, Spanisch, Niederländisch und Dänisch
►Uhrzeit im optionalen 12/24-Stunden-Format.
►Tägliche Alarmfunktion
►Automatische Schlummerfunktion (AUS oder 5 ~ 60 Minuten)
►Die Mondphasenanzeige
►Luftdruck:
— Luftdruckmessbereiche: 600 hPa / mb (17,72 inHg) bis 1100 hPa /
mb (32,50 inHg)
— Druck wahlweise in hPa / mb oder inHg
►Luftfeuchtigkeit: Messbereich innen und außen: 20% rF ~ 95% rF
►Temperatur:
— Innentemperaturmessbereiche: -9,9 ° C bis 50 ° C
— Außentemperaturmessbereiche: -40 ° C bis 70 ° C
— Temperatur wahlweise in ° C oder ° F.
— Außenthermometer und Frostalarm
►Minimal- / Maximalanzeige für Luftfeuchtigkeit und Temperatur
►4 verschiedene Helligkeit Hintergrundbeleuchtung mit Netzteil
1.2 Fernbedienungssensor
— Wandhalterung oder Tischständer
— Ein kabelloser Thermosensor im Lieferumfang enthalten
— 433,92 MHz HF-Sendefrequenz
— 60 Meter Sendereichweite auf freiem Feld
1.3 Netzteil
►Wetterstation:
Batterie: 2 x LR6 AA oder USB Power
►Drahtloser Außensensor:
Batterie: 2 x LR6 AA
13

FJ3389B-NORCC Manual
1.4 Aussehen der Wetterstation
Part A-Positive LCD
A2: Zeit A9: Wettervorhersage
A3: Mondphase A10: Der Trend von 24 Stunden Druck
A4: Kalender oder Weckzeit A11: Luftdruck
A5: Woche A12: Anzahl der HF-Kanäle
A6: Innenkomfort A13: Außentemperaturalarm
A7: Innenluftfeuchtigkeit A14: Außentemperatur
A8: Indoor Temperature A15: Außenluftfeuchtigkeit

FJ3389B-NORCC Manual
Part B – Zurück-Taste und Stromversorgung
B1: “SNOOZE / LIGHT ”-Tastfeld
B2: Tastatur
B3: Batteriefach
B4: Stützrahmen
B5: Steckdose
B6: Netzadapter
Part C –Drahtloser Fernbedienungssensor:
C1: LCD-Anzeige - Temperatur
C2: LCD-Anzeige - Luftfeuchtigkeit
C3: Sendesignal-LED
C4: Taste “° C / ° F”
C5: Taste "TX"
C6: Schalter “CHANNEL 1 oder 2 oder 3“
C7: Batteriefach
15

FJ3389B-NORCC Manual
2 BETRIEB UND HINWEISE
2.1 Erstinbetriebnahme
►Öffnen Sie den Batteriefachdeckel der Wetterstation
►Legen Sie 2 AA-Batterien ein und achten Sie dabei auf die Polarität [“+”
und “-“].
►Wenn Sie die Batterien einlegen, leuchten alle Symbole auf dem
LCD-Display 3 Sekunden lang kurz auf, und Sie hören einen Piepton und
erkennen Innentemperatur und -feuchtigkeit.
►Die Wetterstation beginnt nun, eine Verbindung zum
Außenfernbedienungssensor herzustellen. Dieser Vorgang dauert ca. 3
Minuten und wird durch ein blinkendes Symbol für die
HF-Empfangsantenne im Anzeigebereich „OUTDOOR“ des Empfängers
angezeigt.
►Ersetzen Sie jetzt die Abdeckung des Batteriefachs des
Wireless-Außensensors, öffnen Sie die Abdeckung des Batteriefachs der
Wetterstation und legen Sie 2 AA-Batterien ein.
►Nachdem der Empfänger eine Verbindung zum
Außenfernbedienungssensor hergestellt hat, wechselt er in den
Uhrmodus.
2.2 Hinweise für den Kunden vor Gebrauch
►Wenn die Wetterstation keine Übertragung vom Außensensor empfangen
konnte (Anzeige “- -“auf dem LCD-Display der Hauptstation), halten Sie die
Taste “▼“ 3 Sekunden lang gedrückt, um die Übertragung manuell zu
empfangen. Das RF-Symbol “”blinkt auf dem LCD und der Wetterstation,
um die Daten vom Außensensor erneut zu empfangen. Oder öffnen Sie das
Batteriefach des Sensors und drücken Sie die TX-Taste, um den Sensor und
die Station erneut zu verbinden.
3 ZEIT- UND KALENDER-EINSTELLUNG
3.1 Manuelle Zeiteinstellung
►Drücken Sie einmal die Taste “ ”, um den Anzeigekalender oder die
Sekunde zu wechseln..
16

FJ3389B-NORCC Manual
►Halten Sie die Taste “ ” 2 Sekunden lang gedrückt. Die Anzeige der
Temperatureinheit beginnt zu blinken. Verwenden Sie nun die Tasten “▲”
und “▼”, um die Temperatur des Geräts einzustellen. Die
Temperatureinheit kann auf “° C”oder “° F”eingestellt werden.
►Drücken Sie “”, um Ihre Einstellung zu bestätigen. Die Anzeige der
Druckeinheit beginnt zu blinken. Verwenden Sie nun die Tasten “▲” und
“▼”, um den Druck des Geräts einzustellen. Die Einheit des Drucks kann
auf “hPa”oder “inHg”eingestellt werden.
►Dr ücken Sie “”, um Ihre Einstellung zu bestätigen. Die
12/24-Stunden-Modusanzeige beginnt zu blinken. Verwenden Sie nun die
Tasten “▲” und “▼”, um den richtigen 12/24-Stunden-Modus einzustellen.
►Drücken Sie “”, um Ihre Einstellung zu bestätigen. Die Stundenanzeige
beginnt zu blinken. Stellen Sie nun mit den Tasten “▲” und “▼” die
richtige Stunde ein.
►Drücken Sie “”, um Ihre Einstellung zu bestätigen. Die Minutenanzeige
beginnt zu blinken. Stellen Sie nun mit den Tasten “▲” und “▼” die
richtige Minute ein.
►Drücken Sie die Taste “”, um Ihre Einstellung zu bestätigen. Das
Symbol für Monat und Datum beginnt zu blinken. Verwenden Sie nun die
Tasten “▲” und “▼”, um die Datumsanzeige auf Monat / Datum oder
Datum / Monat einzustellen.
►Drücken Sie die Taste “”, um Ihre Einstellung zu bestätigen. Die
Jahresanzeige 2014 beginnt zu blinken. Stellen Sie nun mit den Tasten
“▲” und “▼” das richtige Jahr ein.
►Drücken Sie die Taste “”, um Ihre Einstellung zu bestätigen. Die
Monatsanzeige beginnt zu blinken. Stellen Sie nun mit den Tasten “▲”
und “▼” den richtigen Monat ein.
►Drücken Sie die Taste “”, um Ihre Einstellung zu bestätigen. Die
Datumsanzeige beginnt zu blinken. Stellen Sie nun mit den Tasten “▲”
17

FJ3389B-NORCC Manual
und “▼” das richtige Datum ein.
►Drücken Sie die Taste “”, um Ihre Einstellung zu bestätigen. Die
Sprachauswahl f ür die Wochentagsanzeigen beginnt zu blinken.
Verwenden Sie nun die Tasten “▲” und “▼”, um eine Sprache
auszuwählen.
Langu
age
Sund
ay
Mon
day
Tues
day
Wednes
day
Thurs
day
Frid
ay
Satur
day
Germa
n, GE SO MO DI MI DO FR SA
English
, EN
SU
MO
TU
WE
TH
FR
SA
French
, FR
DI
LU
MA
ME
JE
VE
SA
Italian,
IT DO LU MA ME GI VE SA
Spanis
h, SP
DO
LU
MA
MI
JU
VI
SA
Dutch,
DU
ZO
MA
DI
WO
DO
VR
ZA
Danish
, DA SO MA TI ON TO FR LO
►Dr ücken Sie “ ” , um Ihre Einstellung zu bestätigen und den
Einstellungsvorgang zu beenden. Rufen Sie den Uhrmodus auf.
F.Y.I.:
►Nach 20 Sekunden ohne Dr ücken einer Taste wechselt die Uhr
automatisch vom Einstellungsmodus in den Normalzeitmoduse.
►Es gibt 7 Wochentagssprachen: Englisch, Deutsch, Italienisch,
Französisch, Spanisch, Niederländisch und Dänisch.
4 Tägliche Einstellung der Alarm- und Schlummerfunktion
4.1 Einstellen des täglichen Alarms
►Dr ücken Sie einmal die Taste " ", um die Anzeige in den
18

FJ3389B-NORCC Manual
Alarmaktivierungsmodus umzuwandeln. Drücken Sie in diesem Modus
erneut die Taste " ", um die Alarmfunktion zu aktivieren, die als "EIN"
angezeigt wird, während das Alarmsymbol " " angezeigt wird. In diesem
Modus wurde auch der Alarm aktiviert. Drücken Sie dann die Taste ““.
Sie können die Alarmfunktion ausschalten. Auf dem Display wird „OFF
“angezeigt und das Alarmsymbol ““wird nicht angezeigt
►Halten Sie die Taste “”2 Sekunden lang gedr ückt, bis die
Stundenanzeige der Alarmzeit zu blinken beginnt. Stellen Sie mit den
Tasten “▲” und “▼” die gewünschte Stunde ein.
►Drücken Sie die Taste “”, um Ihre Einstellung zu bestätigen. Die
Minutenanzeige der Weckzeit beginnt zu blinken. Verwenden Sie die
Tasten “▲” und “▼”, um die gewünschte Minute einzustellen.
►Drücken Sie die Taste “”, um Ihre Einstellung zu bestätigen. Die
Schlummerzeit des Alarms beginnt zu blinken. Verwenden Sie die Tasten
“▲” und “▼”, um die gewünschte Schlummerminute einzustellen.
►Drücken Sie die Taste “”, um Ihre Einstellung zu bestätigen und den
Einstellvorgang zu beenden.
F.Y.I.:
►Nach 20 Sekunden ohne Dr ücken einer Taste wechselt die Uhr
automatisch vom Einstellmodus in den normalen Uhrmodus.
►Der Alarm ertönt 2 Minuten lang, wenn Sie ihn nicht durch Drücken einer
beliebigen Taste deaktivieren. In diesem Fall wird der Alarm nach 24
Stunden automatisch wiederholt.
►Steigender Alarmton (Crescendo, Dauer: 2 Minuten) ändert die Lautstärke
viermal, während das Alarmsignal ertönt.
►Einstellbereich für die Schlummerzeit: 5 ~ 60MIN, AUS, wenn auf AUS
gestellt, bedeutet dies, dass keine Schlummerfunktion vorhanden ist. Die
19

FJ3389B-NORCC Manual
Einheit für die Schlummerzeit ist Minuten.
4.2 Alarm ausschalten
►Der Alarm ertönt, wenn der Auslöser eine beliebige Taste außer der
Taste “”drückt oder die Taste “” 2 Sekunden lang gedrü
ckt hält, um das Alarmsignal zu stoppen
4.3 Schlummerfunktion:
►Berühren Sie das Feld “ “ oder drücken Sie die Taste “ “,
um in den SNOOZE-Modus zu gelangen. Nach dem Warten auf die
Schlummerzeit ertönt das Alarmsignal erneut.
►Drücken Sie im Schlummermodus eine beliebige Taste außer der Taste
““oder halten Sie die Taste “ “ 2 Sekunden lang gedrückt,
um den Schlummermodus zu beenden.
F.Y.I.:
Wenn die Schlummerfunktion auf AUS gestellt ist, ertönt der Alarm, wenn
der Auslöser ““drückt. Diese Schlummerfunktion ist nicht verfügbar.
5 WETTERVORSCHAU UND BAROMETRISCH
5.1 Wettervorhersage
►Die Wetterstation berechnet basierend auf dem Luftdrucktrend eine
Wettervorhersage für die nächsten 12 Stunden. Natürlich kann diese
Prognose nicht mit derjenigen professioneller Wetterdienste verglichen
werden, die von Satelliten und Hochleistungscomputern unterst ützt
werden, sondern liefert lediglich einen ungefähren Hinweis auf die aktuelle
Entwicklung. Bitte ber ücksichtigen Sie die Wettervorhersage Ihres
örtlichen Wetterdienstes sowie die Vorhersage Ihrer Wetterstation. Wenn
es Abweichungen zwischen den Informationen Ihres Geräts und denen
des örtlichen Wettervorhersagedienstes gibt, wenden Sie sich bitte an
diesen.
►Die Wetterstation zeigt das folgende Wettersymbol an:
20
Table of contents
Languages:
Other FanJu Weather Station manuals
Popular Weather Station manuals by other brands

ADE
ADE WS 1711 operating instructions

WAREMA
WAREMA EWFS Weather station eco Operating and installation instructions

Auriol
Auriol z29592 Operation and safety notes

Auriol
Auriol 296289 Operation and safety notes

Hyundai
Hyundai WS 2266 instruction manual

La Crosse Technology
La Crosse Technology WS-2210 Operation manual

La Crosse Technology
La Crosse Technology WS-811561 manual

Ventus
Ventus W177 owner's manual

National Geographic
National Geographic VA Colour RC instruction manual

Instant Transmission
Instant Transmission MA 10410 instruction manual

Lutron Electronics
Lutron Electronics PHB-318 Operation manual

Oregon Scientific
Oregon Scientific Alizé BAR266 user manual