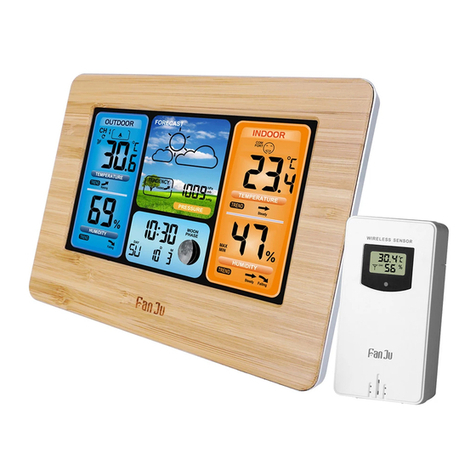
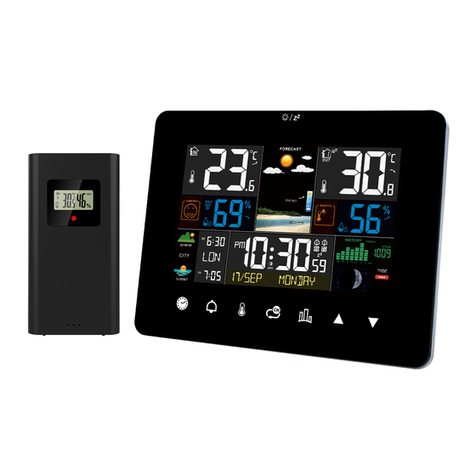
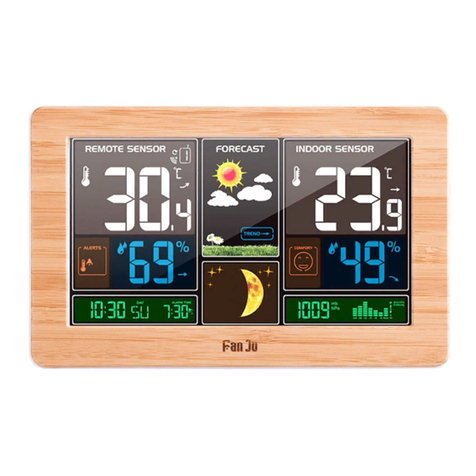
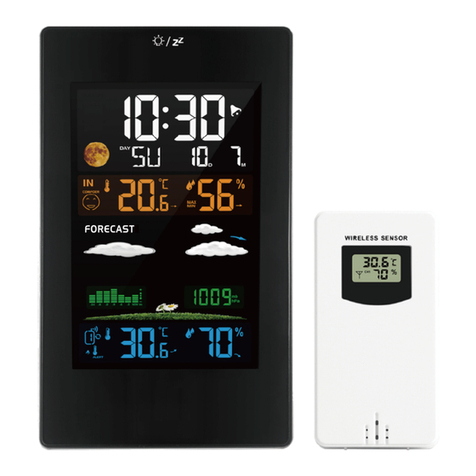
FanJu FJ3383C User manual

Fanju
FJ3383C
Weather Station
1

EN
-Weather Station
~
Perpetual Calendar Up to Year 2099
~
Day of week in 7languages user selectable: English, German,
Italian, French, Spanish, Netherlands and Danish
~
Time in optional 12/24 hour format
~
Two Daily Alarm Function
~
Automatic snooze function (OFF or
5-60min)
~
Humidity: Indoor &Outdoor measurable range: 20%
RH
-
95%RH
~
Temperature:
-Indoor temperature measurement ranges: -9°C (15°F) to
50°C (122°F)
-Outdoor temperature measurement ranges: -40°C (-40°F)
to 70°C (158°F)
-Temperature alternatively in °C or of.
-Outdoor thermometer and frost alert
~
Minimum/maximum display for air humidity and temperature
~
Three level display mold risk and comfort level
~
Wireless Outdoor Sensor:
-Wall Mount or Table Stand
-One Wireless Thermo Sensor Included
-433.92MHz
RF
transmitting frequency
-60 meters transmission range in an open area
~
The weather forecasting function
~
Power Supply:
Weather Station:
Battery: 2 x LR6
AA
USB power cable input: DC5V
Wireless Outdoor Sensor:
Battery:2 xLR6
AA
2

Part A-Pas·tive CD
A1: Weather forecast
A3: Alarm 1icon
AS:
Week
A7: Alert of IndoorTemperature
A9: Date
A
11:
Comfort Index of Outdoor
A13: Mold Risk of Outdoor
A1S: Outdoor Humidity
A17: OutdoorTemperature
A2: Indoortemperature
A4:lndoor
Humidity
A6: Comfort Index of Indoor
A8: Mold Risk of Indoor
A10: Month
A12: Alert of OutdoorTemperature
A14: Time
A16: Alarm 2icon
A18: Outdoor wireless channel
3

B 0
81:
82:
83:
84:
85:
"01**-,,
button
"a"
button
"I"
button
"'~"I·
.,Z
">t::f..
.....
"button
"c!!)"button
@
9J
-----------'
86: " " button
87: " " button
88: Support frame
89: DC-POWER input jack
810: 8attery compartment
4

C
1:
LCD display -Temperature
C2: LCD display -Humidity
C3: Transmit signal LED
C4:
IlOCrF"
button
C5: "TX" button
C6: Battery compartment
5

~
According to the appearance of the weather station, insert the USB power cable
into the B9.
~
Open Weather Station battery compartment cover
~
Insert 2 x
AA
batteries observing polarity ["+" and "-"marks]
~
When you insert the batteries, all the icon
on
the LCD display will briefly light
up
for 3seconds, and you will hear abeep tone, and detect indoor temperature &
humidity.
~
Open Wireless Outdoor Sensor battery compartment cover and insert 2 x
AA
batteries
~
The Weather Station will now start to make aconnection to the outdoor remote
sensor. This operation takes about 3minutes and
is
displayed by aflashing
reception RF antenna symbol in the "Outdoor Sensor" display area on the receiver.
~
Press
and
hold down
the"
i:)
I
*"
button for 2seconds, enter the button BEEP
sound settings, now
Lise
"."
and
"."
buttons to set BEEP
in
ON
or
OFF.
~
Press IIi:)1
..
»:-"
to confirm your setting, the temperature unit "oC" or
"OF"
display
starts to flash. Press
the"."
and"."
button to choose the desired temperature
unit
~
Press IIi:)
1·»:-"
to confirm your setting, the unit of "12Hr" or "24Hr" display starts
to flash. Now use
the"."
and"."
button to select desired hour format
~
Press IIi:)
1-»:""
to confirm your setting, the Hour display starts to flash. Now use
"
."
and"."
buttons to set the correct hour.
~
Press IIi:)1
1
*."
to confirm your setting, the Minute displays starts to flash. Now
use"."
and"."
buttons to set the correct minute.
~
Press "i:)I
..
»:·"
button to confirm your setting, the language selection for the
Weekday displays starts to flash. Now use
"."
and
"."
buttons to select a
language.
6

Francais DIMANCHE UNDI MARDI MERCREDI
WEUDI
WENDREDI SAMEDI
Italian DOMENICA UNEDI MARTEDI MERCOLEDI
K310VEDI
WENERDI
SABATO
Espanal DOMINGO UNES MARTES MIERCOLES UUEVES
WIRNl~S
SABADO
Nederlands
~ONDAG
MAANDAG
plNSDAG
WOENSDAG PONDERDAG rvRIJDAG 7ATERDAG
Dansk SONDAG MONDAG IrIRSDAG PNSDAG IrORSDAG REDAG ORDAG
~
Press
,,(1)
1·*·"
button to confirm your setting, the Year display starts to flash.
Now
use"
....
"
and"
T"
buttons to set the correct year.
~
Press"
(1)
1
..
*·"
button to confirm your setting, the Month display starts to flash.
Now use "
....
"and
"T"
buttons to set the correct month.
~
Press"
(1)
1*·"
button to confirm your setting, the Date display starts to flash.
Now
use"
....
"
and"
T"
buttons to set the correct date.
~
Press
,,(1)
I
..
*,",,,
button to confirm your setting, the weather forecast display
starts to flash.
Use"
....
"
and
"T"
buttons to select the current weather.
~
Press
,,(1)
1·*·"
to confirm your setting
and
to end the setting procedures, enter
the clock mode
~
During the setting process, it can press the ZZ" button to exit the setting
mode directly.
~
~
Press and hold down
"~,,
button more than 3seconds until Alarm 1Time hour
display of the Alarm 1time starts to flash. Use
the"
....
"
and"
T"
buttons to set the
required hour.
~
Press
"~I"~·,,
button to confirm your setting, The Minute display of the Alarm 1
time starts to flash. Use
the"
....
"
and
"T"
buttons to set the required minute.
..w..1
1Ii
'#
~
Press
"-¥-
I·~';""
button to confirm your setting, The Repeat icon "M-F" of the
Alarm 1time starts to flash. Use the
"A"
and
"T"
buttons to set the alarm repeat
in
"M
-F"
or "5-5" or
"M
-F" and
"5-5".
~
Press
"~I"'~"',,
button to confirm your setting, the snooze time of the Alarm1
starts to flash. Use
the"
A"
and
"T"
buttons to set the minute of snooze you need.
~
Press
,,~
I·~"
button to confirm your setting, it will start the setting for Alarm
2,
it
is
the same
as
Alarm 1setting, follow the setting to set Alarm
2.
7

~
Press
,,~
I~~·"
button to confirm your setting and to end the setting procedure.
~
During the alarm time setting process, press the
,,~~~
/
ZZ"
button to exit the
setting mode directly.
F.Y.I.:
~
When alarm is repeatedly set to M-F, the alarm function will
be
activated from Monday to Friday, the
Saturday and Sunday will be invalid. When alarm
is
repeatedly set to 5-5, and the alarm function will
be activated
on
Saturday and Sunday and will expire from Monday to. Friday. When the alarm is
repeatedly set to display both
M-F
and
5-5,
the alarm function will be activated every day.
~
The snooze time setting range: 5 - 60MIN and
OFF.
When set to
OFF,
it means turn off snooze
function.
~
Press button can switch the display ALARM1time or ALARM2 time. When
in
the ALARM1or ALARM2 display mode, press the
"~I"~·,,
button to turn the
alarm ON or OFF.
~
When alarm 1or alarm 2is turn ON,
the·(jl.
or
.$.
icon is displayed
~
When alarm 1or alarm 2turn OFF, the
.(j).,
or
-$,
icon disappears.
",'f-<
..
/.
.,2
~
When alarm rings, press any buttons except
the"
>r:::I-
.....
"button or press and
hold
the"
..
:(;t
..
/
zZ"
button for more than 2seconds to stop the alarm signal.
~
Press the I
ZZ"
button
as
the alarm signal sounds to get to SNOOZE mode.
The alarm signal sounds again after you snooze setting.
"~"I··7Z
~
In
snooze mode, press any buttons except the "
,,\:I~
..
.
1:.,"
button or press the
"
..
:(;t
..
/
zZ"
button more than 2seconds to exit the snooze mode.
F.
Y.I.:
~
When the snooze function
is
set to
OFF,
the
ZZ"
icon position does not have this snooze
8

function when alarm rings.
~
Indoor temperature measuring range: -9°C (15°F)
,...,
+50°C (+122°F), LL.L °CCF)
will displayed if value lower than -9°C (15°F). HH.H
°C(OF)
will displayed if value
higher than +50°C (+122°F).
~
Outdoor temperature measuring range: 40°C (-40°F)
,...,
+lO°C (+158°F),
LL.L °CCF) will displayed if value lower than -40°C (-40°F), HH.H
°C(OF)
will
displayed if value higher than +lO°C (+158°F).
~
Indoor and outdoor humidity measuring range: 20%RH
,...,
95%RH, 19%RH will
displayed if value lower than 20%RH, 96%RH will displayed if value higher than
95%RH.
~
When the weather station successfully receives signals from the wireless sensor,
the temperature and humidity of the outdoor sensor are displayed
on
the
"Outdoor
Sensor"
column of the weather station.
~
The weather station can connect up to 3channel wireless sensor registration, the
use of multiple wireless sensor, the wireless sensor channel cannot choose the
same channel at the same time (a total of
1,2,3
channels can choose)
~
Please press "d"button to select same channel
as
your outdoor sensor.
CH
1:
Outdoor sensor channel 1
CH
2:
Outdoor sensor channel 2
CH
3:
Outdoor sensor channel 3
eCH:
channel 1,2,3 cycle display
~
If the Weather Station failed to receive transmission from outdoor sensor
("
...."
display
on
the LCD), press and hold "d"button for 3seconds to receive
transmission manually. RF icon
"~,,
flashes
on
the LCD
-,
the weather station start
to receive the data from outdoor sensor.
~
The current indoor temperature/humidity and the temperature/humidity trend
(indoors) are shown in the LCD display.
9

~
After successfully connecting with the remote sensor, the weather station can
display the remote temperature/humidity
and
the temperature/humidity trend
(remote)
~
You may see the following displays:
,:
The temperature/humidity
is
rising.
~:
The temperature/humidity
is
falling.
No display: The temperature/humidity
is
remaining constant.
~
To
toggle indoor/outdoor maximum, minimum temperature
and
humidity data,
press
the"
T"
button:
Once to show the maximum temperature and humidity values.
Twice to sow the minimum temperature and humidity values
Three times to return to the current temperature and humidity levels
~
To
reset the maximum
and
minimum temperature and humidity, press
and
hold
down
the"
T"
button about 2seconds. This will reset
all
minimum and maximum
data recorded to the current displayed values.
F.
Y.I.:
~
If
the temperature reading is below ranges, the LL.L will
be
displayed.
If
the temperature reading
is
above ranges, the HH.H will be displayed.
~
If
the humidity reading
is
below ranges, the 19%RH will be displayed.
If
the humidity reading is above
ranges, the 96%RH will
be
displayed.
~
Press and hold down the button for 2seconds until the icon for the Outdoor
Temperature starts to flash
~
The upper limit of the Outdoor temperature alert starts to flash. Use
the"
."
and
"T"
buttons to set the required maximum temperature. Press
"-1)1*,,
to
confirm your setting.
~
The lower limit of the Outdoor temperature alert starts to flash. Use
the"
."
and
"T"
buttons to
set
the required maximum temperature. Press
"-1)1*,,
to
confirm your setting.
~
The upper limit of the Indoor temperature alert starts to flash. Use
the"."
and
10

"~"
buttons to set the required maximum temperature. Press ,,(fl*" to
confirm your setting.
~
The lower limit of the Indoor temperature alert starts to flash. Use
the"
A"
and
"~"
buttons to set the required minimum temperature. Press ,,(fI*"button to
confirm your setting and to end the setting procedure
~
When setting the upper and lower limit alerts for outdoor temperature, press the
"~,,
button to switch the alert settings for setting the upper and lower outdoor
temperature limits of different channels.
~
Press the button to view the temperature alarm data setting and press the
,,(fl"~"
button to turn ON/OFF the alert function of the currently displayed
temperature alert item:
Press
x1:
The upper limit setting value and mode (on or off) of the outdoor
temperature alarm are displayed.
Press x2: The lower limit setting value and mode (on or off) of the outdoor
temperature alarm are displayed.
Press x3: The upper limit setting value and mode (on
or
off) of the indoor
temperature alarm are displayed.
Press x4: The lower limit setting value
and
mode (on or off) of the indoor
temperature alarm are displayed.
Press x5: Return to the normal time display
~
When the upper or lower limit temperature alert
is
turn ON, the corresponding
indoor or outdoor upper or lower temperature alert icon "HIGH" or "LOW"
is
displayed
in
the "TEMP ALERT" column with
~
icon. When the upper or lower
limit temperature alert
is
turn
OFF,
the corresponding temperature alert icon will
be displayed OFF
in
the "TEMP ALERT" column.
~
When viewing the outdoor upper or lower temperature alarm item, you can press
the"
C!)"
button to switch between the items of different channels, and then
press the
,,(f
I"~"
button to activate or deactivate the temperature alarm
function of different channels.
~
When the temperature value exceeds the set temperature range, the weather
station will start continuous beeps 5times per minute.
At
the same time,
11

temperature alert in alert icon
,,~,
flashes, temperature value and alarm upper
limit icon "HIGH" or lower limit icon "LOW" also flashes.
~
In
this alert mode, press any button to stop the alarm sound, and the warning
is
still displayed.
~
When the temperature of outdoor sensor
is
-1°G
(+30°F) to +
3°e
(+
37°F), the
frost alarm will be activated, the frost alert icon
".Ice"
flashing.
~
The comfort display based
on
the indoor or outdoor humidity to determine comfort
level. The weather station will display one of 4indicators:
DRY,
GOOD, HUMID
and Not applicable (no arrow displayed)
~
The moldy risk display based
on
the indoor or outdoor humidity to determine
moldy risk level. The weather station will display one of 4indicators: HIGH, MED,
LOW and no risk (no arrow displayed).
~
If the "Indoor sensor" column
is
displaying the battery icon
"I~ddt",
you
need to
replace the weather station's battery
as
soon
as
possible,
~
If the "Outdoor sensor" column
is
to display the battery icon
"0",
you
need to
replace the wireless sensor battery of your channel
as
soon
as
possible based
on
the channel display.
~
The weather station calculates aweather forecast for about the next 12 hours
based
on
the barometric pressure trend. Of course this forecast can't compare to
that of professional weather services supported by satellites and high
performance cQmputers, but merely provides
an
approximate indication of current
developments. Please take the weather forecast from your local weather
forecasting service into account
as
well
as
the forecast from your weather station.
If there are discrepancies between the information from your device and from the
local weather forecasting service, please take the advice of the latter
as
authoritative.
12

~
The weather station displays the following weather icon:
sunny slightly
cloudy cloudy rainy stormy Snowy
~
The Snowy iconwill only appear ifthe outdoor temperature is below
_4°C
(+25°F)
and the forecast would be rainy or stormy, By default, according to the temperature
of CH1, when there
is
no signal
in
CH1, it
is
calculated according to the temperature
of CH2. When there
is
no signal
in
CH1
and
CH2, it
is
calculated according to the
temperature of CH3.
~
After the weather station needs 7-10 days of air pressure calibration, the weather
forecast will tend to be stable with
an
accuracy rate of
700/0-75°/0.
~
The weather station can display the barometric pressure trend.
~
You
may see the following displays:
l'
:The barometric pressure will rise.
~o
display: The barometric pressure will remain constant.
~:
The barometric pressure will fall.
~
If the product
is
powered by batteries, press the ZZ" button. Backlight lit 10
seconds.
~
When the power supply of the product
is
inserted into the USB power supply cable,
the battery will automatically disconnect the power supply, and the backlight will
always be bright. Press the
<:f
r*
button to adjust the brightness of the
backlight, you can adjust the 4state: 3different brightness backlight and close the
backlight. When the backlight brightness
is
not at the maximum brightness, press
the
","~
..
/ZZ" button. Backlight turns to maximum brightness of 10 seconds.
13
Other FanJu Weather Station manuals
Popular Weather Station manuals by other brands

Hyundai
Hyundai WS 2331 instruction manual

Logia
Logia LOWSC710B manual

La Crosse Technology
La Crosse Technology WS-9250U-IT instruction manual

BALDR
BALDR HG01 user manual

La Crosse Technology
La Crosse Technology Wireless Temperature Station instruction manual

Eschenbach Optik
Eschenbach Optik 53134 instruction manual