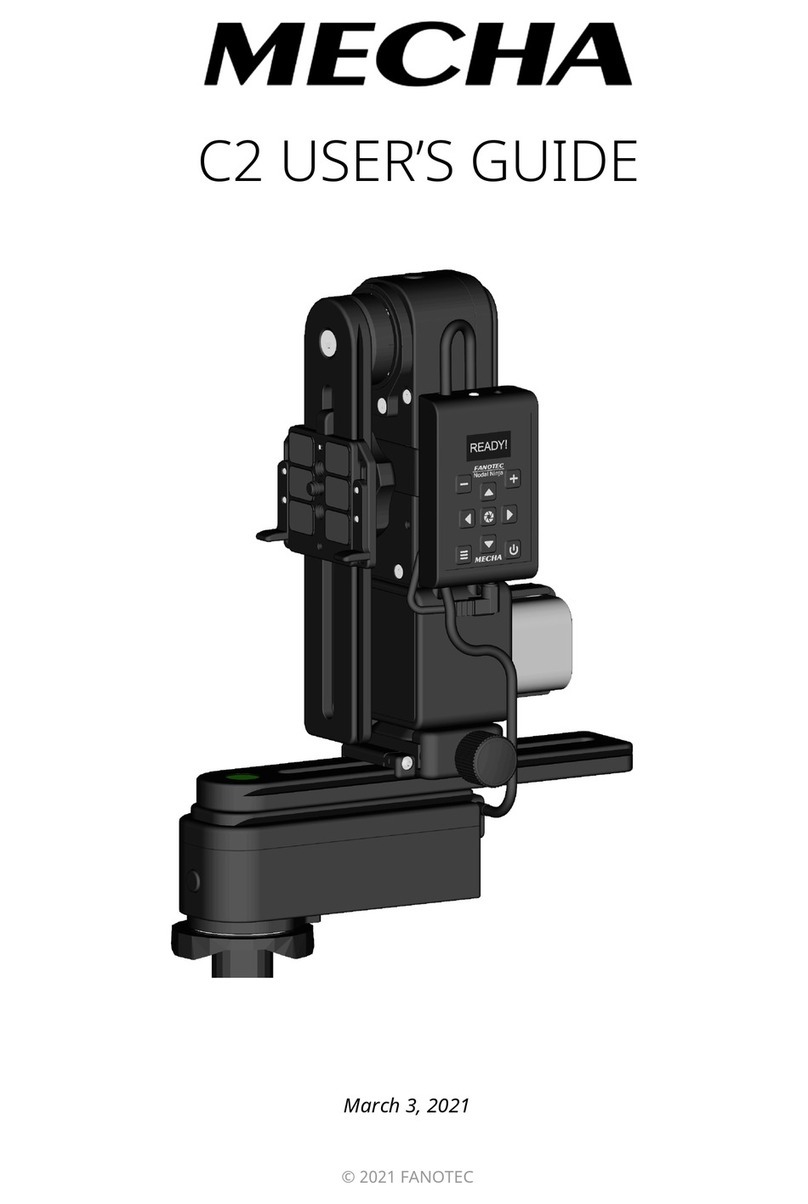
Fanotec MECHA C1 User manual

i
MECHA User’s Guide v.06
© 2021 FANOTEC
March 29, 2021
C1 USER’S GUIDE

ii
MECHA User’s Guide v.06
© 2021 FANOTEC
Contents
WARNINGS...............................................................................7
Introduction.......................................................... 8
What is MECHA?......................................................................8
MECHA C1 Presentation.........................................................9
About Buttons .......................................................................10
About UI vs. Codes or Buttons ............................................10
About the User Interface .....................................................11
Splitting Lights ‒ Set MECHA in AP, STA, AP+STA Mode..............11
Table of Equivalences: LEDs ‒ Characters ....................................12
About the Firmware (FW) Update.......................................13
MECHA Single Axis
Before First Use...................................................16
Power on and Test – MECHA Single Axis.......................................16
Check the Battery Level...................................................................17
Simple Rotations..............................................................................18
Quick Panoramas Using MECHA’s Buttons..................................19
Firmware Update Using a Hot-spot....................................20
Test Using MECHA’s Buttons.............................21
Set the Rotator Using MECHA’s Buttons ......................................21
Panorama with Automatic Shooting Pattern Using only
the MECHA’s Buttons ‒ Single Axis ....................................23
How to Access the UI..........................................25
Access the User Interface (UI) with a Smartphone ..........25

iii
MECHA User’s Guide v.06
© 2021 FANOTEC
Access the User Interface (UI) on Your Computer
Connected to a Wireless Network ......................................25
Test Using the UI.................................................28
Set the Rotator on Conguration Page.........................................28
UI Test – 131, 132 Codes..................................................................29
User Interface (UI)..............................................31
UI Controls.............................................................................31
Conguration Page.............................................41
Default mode....................................................................................41
STA Mode ..........................................................................................43
Fixed Settings ...................................................................................43
Rotator Settings ...............................................................................45
Buzzer PWM and Start Page...........................................................45
IR Settings and more.......................................................................45
Reverse Direction of Rotations.......................................................47
Camera Settings...............................................................................47
Arrow Buttons ..................................................................................48
Safety Interval ..................................................................................49
Favorite Codes..................................................................................49
More from Server, zLM, Firmware .................................................49
Technical Details ‒ IP Addresses, FW ............................................50
Backup and Restore Data ...............................................................50
Other Updating Methods...................................51
Firmware Update Using a Smartphone:
Method 2................................................................................51
Presets for MECHA Single Axis..........................52
MECHA MSA.........................................................55

iv
MECHA User’s Guide v.06
© 2021 FANOTEC
MECHA Dual Axis Combo – DAC
Before First Use ‒ MECHA DAC ........................57
Power on and Test – MECHA DAC..................................................60
Simple Rotations – MECHA DAC.....................................................61
Parked, Level and Raised Positions ...............................................63
Check if Two MECHAs are Paired ...................................................64
DAC Firmware Update Using a Hot-spot .........65
Pairing Using MECHA’s Buttons .......................66
zLM 2 ‒ Automatic Pairing Using Two Buttons.................66
DAC Test Using MECHA’s Buttons ...................68
DAC Test Without Camera - 1312 Parked Position............68
DAC Test Without Camera - 1313 Level Position...............69
DAC Test Without Camera - 1321 Raised Position ............69
Panorama with Camera Mounted ......................................70
Panorama with Automatic Shooting Pattern Using only
the MECHA’s Buttons ‒ DAC................................................70
DAC Test Using the UI ........................................72
UI Test ‒ 1312, 1313, 1321 Codes ...................................................73
How to Change the SSID Password..................74
Working with Presets .........................................75
Programming a Preset Using Parameters.........................75
How to Create Your Own Presets Using the UI.................78
Default Presets.................................................................................78
Loading a Preset ..............................................................................79
Modifying a Preset...........................................................................82
Saving a Preset.................................................................................82
Preset Power Code ..........................................................................83

v
MECHA User’s Guide v.06
© 2021 FANOTEC
MECHA’s Simple Scripting (MSS) ............................................... 84
Panorama of 3 Rows + Nadir + Zenith (MSS)........................................ 84
Shooting Panorama Made Easy for Dual Axis...................................... 86
MSS Script Explained ............................................................................... 87
What Needs to be Changed, sometimes, in Real Situations .............. 90
Using Pause in MSS Script ...................................................................... 91
Let's Take a more Dense Approach with more Photos toward
Gigapixel Imagery.................................................................................... 92
Rewind after each ROW .......................................................................... 93
Shooting in Horizontal Zigzag Pattern.................................................. 93
Script for 2 Focal Lengths - MECHA Dual Axis ...................................... 94
Download more Presets from Server........................................ 95
How to Set Both MECHA and Smartphone to Have
Internet Access......................................................... 96
Other Pairing Methods ........................................... 98
zLM ‒ Automatic Pairing Using Buttons ................................... 98
Pairing PIN for more than 2 MECHAs.......................................100
Temporary Pairing......................................................................100
Automatic Pairing Using the UI ................................................101
How to Unpair MECHAs .........................................103
MECHA’s Current Codes ........................................104
Current Codes list .......................................................................105
Appendix
MECHA’s S (Shots) Language................................114
Panorama of 3 Rows + Nadir + Zenith ‒ EXAMPLE 1 (SL).................. 116
Panorama of 3 Rows + Nadir + Zenith ‒ EXAMPLE 2 (SL).................. 116
Panorama Using Loop in Script ‒ EXAMPLE 3 (SL) ............................ 119
Panorama with Extra Shots and Pause ‒ EXAMPLE 4 (SL)................ 119

6
MECHA User’s Guide v.06
© 2021 FANOTEC
MECHA User’s Guide
Copyright © 2021 by Fanotec International Limited
www.nodalninja.com
www.fanotec.com
All rights reserved. No part of this guide may be reproduced or transmitted
in any form by any means, electronic, mechanical, photocopying, recording,
or otherwise, without the prior written permission of the publisher. For
information on getting permission for reprints and excerpts, contact
How to use this User’s Guide
Welcome to the MECHA C1 User’s Guide!
If you have never used MECHA before, we recommend that you read the
introduction first, to get an overview of how it works and what you can do
with it. Then read the MECHA Single Axis part and practice according to the
instructions.
Once you are familiar with the MECHA Single Axis, if you are interested in
MECHA Dual Axis, you can continue with the second part.
Even if you are an experienced user, please pay attention to the warnings.
If you find the firmware update and other operations difficult, you can
Let’s get started!

7
MECHA User’s Guide v.06
© 2021 FANOTEC
WARNINGS
WARNINGS to Dual Axis MECHA Users
●Test MECHA WITHOUT a camera mounted first!
●Please test for camera clearance before running any program.
●Test any preset supplied or adjusted WITHOUT a camera mounted FIRST,
especially when the clearance is not enough.
●CHECK for clearance with shutter cable attached!
●ONLY use a coiled cable for dual axis that can be stretched to about 1m.
●Use short cable with extreme caution.
●The power button, P, can always be used as an emergency stop, except
for the speed calibration procedure (123123<).
●If the movement is not as expected, or there is any danger for the
moving parts to hit something, please press P, the power button of
MECHA, to stop the movement immediately.

8
MECHA User’s Guide v.06
© 2021 FANOTEC
Introduction
What is MECHA?
In short, MECHA is a wireless
controlled motor that can rotate and
trigger a camera or other devices.
In general, MECHA can rotate
anything that can benefit from a
controlled rotation, not only cameras
directly or mounted on a panoramic
or ball-head, but also turn tables
holding objects to be photographed
or filmed, as well as lights or stands
for presentations.
MECHA can be mounted on a tripod and on any other stand that has a
mounting screw.
It can rotate along with anything mounted on it, or can rotate only the object
mounted on it. The rotations/moves can be pre-programmed and launched
using its buttons, or can be wireless launched via its web interface from any
device that can run a web browser.
For example, its commands can have equivalent simple QR codes. At an
exhibition, scanning a QR code can rotate the featured object at a certain
angle without the need to touch the object or the stand. Series of rotations
can be pre-programmed and launched wireless by the visitors or by the
host.
It also has support for IR remote - just as the camera has its remote, or a TV
set has one - and support for wired remote.
The built in battery lasts for one day after a full charge, and can be charged
even while it is in use, from a power bank or outlet adapter, thus allowing
the non-stop run.
As it uses Wi-Fi for connection, it can be accessed directly with a phone or via
a Wi-Fi network, even through Internet, thus the commands can be sent
from a few meters away, or from anywhere in the world, with a device
connected to the Internet.
This is a short description of MECHA, a long one could be a dozen, if not
hundreds of pages.

9
MECHA User’s Guide v.06
© 2021 FANOTEC
MECHA allows both simple and complex operations to be performed, even
the most complex ones can be reduced to something as simple as pressing
one or two buttons. This is due to its feature that allows very complex
sequences to be assigned to one button or to a code.
The ways for programming MECHA range from just asking for MECHA to be
programmed remotely by manufacturer, to using its web interface, or
exchanging programs with other MECHA users. Each way has its own levels
of complexity, from very easy to the most powerful. For example, the web
interface can be used to download a preset from server and use it directly,
or to download, and modify, then use it. To program presets from scratch,
support provided by experts or advanced users can make even
programming from scratch easy, considering a starting script that can then
be extended and made as complex as needed.
In this user guide, we will focus first on using MECHA to automate the
movements of a panoramic head on a single axis, like Fanotec R1, or dual
axis, like Nodal Ninja 3 and alike, reducing the panorama shooting to a
simple press of a button, or two, regardless of its complexity, and to do that
without flaws, again and again.
MECHA consists of two parts: a motorized rotator (abbreviated E), and a
controller (abbreviated C), and in this guide we are particularly interested in
the controller.
MECHA C1 Presentation
MECHA C1 controller has six buttons, three ports and a cable connector that
connects the controller to a motorized rotator, such as E1.
It also has one LED under the power button, P, and five LEDs under the
battery symbol.
Programmable
Buttons
Power
Button
Left / Right
Buttons
Power / Status LED
Indicator

10
MECHA User’s Guide v.06
© 2021 FANOTEC
About Buttons
The numerical buttons – 1,2, and 3– are used to enter some numeric
selections, or to enter specific codes.
About UI vs. Codes or Buttons
MECHA can be controlled mainly in two ways: using the web User Interface
(abbreviated UI) and using its own buttons.
Always start by powering up MECHA, by pressing and holding the power
button, P, for 3 to 5 seconds. A beep will be heard and the LEDs will light
up.
Although MECHA can be controlled via its own buttons, sometimes, for more
complex tasks, or to assign complex tasks to a single button, the UI can be
used.
But, before diving in assigning complex tasks to buttons, it is worth
mentioning that MECHA has a unique set of features ‒ zLM, which stands for
P
The power button is used to power ON/OFF MECHA, to confirm or
cancel some operations, and it is also the equivalent of the
number 0 (zero) when power codes are entered.
1
This button comes pre-programmed with 4 shots around. It can
also be used to enter the number 1, or to execute the favorite
code 1 by long pressing it.
2
This button comes pre-programmed with 6 shots around. It can
also be used to enter the number 2, or to execute the favorite
code 2 by long pressing it.
3
This button comes pre-programmed with 8 shots around. It can
also be used to enter the number 3, or to execute the favorite
code 3 by long pressing it.
<
>
The left and right buttons are used to rotate the system manu-
ally to the left and to the right, respectively, and also to specify
the direction when launching a preset using the controller but-
tons, as terminator for codes (similar to the Enter key).

11
MECHA User’s Guide v.06
© 2021 FANOTEC
zero Learning MECHA ‒ that are specifically designed to allow the use of
MECHA without learning something new.
The zLM makes possible this scenario: User calling to or chatting with
Support and tell:
U: "I want my MECHA to shoot a panorama 10 shots around, 3 rows, nadir and
zenith."
S: "Please press P, then >, the right button."
And MECHA will do just that.
This will be explained in more details in the dedicated zLM chapter.
Many tasks, both simple and complex, can be performed either using the UI
or the buttons.
About the User Interface
To access the UI of MECHA, a device with an Internet browser needs to be
used. The simplest and handy, really handy, will be a smartphone.
MECHA uses wireless connection, abbreviated Wi-Fi.
It can be set as AP (Access Point), or STA (Station), or even both: AP+STA, as
well as no Wi-Fi, in which case the control is possible only by buttons.
The desired mode can be set as default in MECHA's Configuration page
(more on that later) or by a short press of a button when MECHA expects
this, and this is when the LEDs blink alternately: -=-=-= (splitting lights).
Splitting Lights ‒ Set MECHA in AP, STA, AP+STA
Mode
During this period:
pressing 1will set MECHA in
AP mode
pressing 2will set MECHA in
STA mode
pressing 3will set MECHA in
AP+STA mode

12
MECHA User’s Guide v.06
© 2021 FANOTEC
When MECHA is in AP or AP+STA mode, it broadcasts a SSID with a specific
name - the default name contains the word "MECHA" in it - to which the
smartphone can be connected using a password, which is 12345678 by
default.
Once the smartphone is connected to MECHA SSID, the MECHA UI can be
accessed in browser at 192.168.8.1
When MECHA is in STA or AP+STA mode, it can also connect to the SSID of a
particular network, other than MECHA’s own SSID, and as a result the User
Interface of MECHA can also be accessed at the address given in that
particular network, like this: 192.168.1.100
As a note, the particular network can be managed by the smartphone itself,
if on smartphone a hot-spot is enabled and MECHA can connect to it (more
on that later).
If, for any reasons, the address of the MECHA UI cannot be known, MECHA
has a way to show the address of the UI, if one of these codes is entered
using MECHA’s buttons:
● 321< will show on LEDs the last part of the UI address, like .100
● 323< will show on LEDs the full UI address, like 192.168.1.100
Table of Equivalences: LEDs ‒ Characters
The conventions of how the numbers and symbols are shown on LEDs are
featured in this table.
! . : 1 2 3 4 5 6 7 8 9 0 AB C D E F

13
MECHA User’s Guide v.06
© 2021 FANOTEC
About the Firmware (FW) Update
To benefit from all features implemented in MECHA, it is recommended to
update its firmware to the latest version available.
There are a couple of ways to update the firmware, and the easiest is via the
Internet.
To check and perform the update, on the UI there is an [Update] button.
If MECHA is not connected to a Wi-Fi with Internet access, it will ask for a
SSID name and password, just like a guest in your house will ask if there is a
Wi-Fi available, to be able to check something on Internet, a Wi-Fi the guest
will connect the phone to. The same way, MECHA will use that Wi-Fi in order
to download and perform the update.
MECHA is in the idle status after it is powered up, as long as it doesn't
execute any preset.
If MECHA is OFF, pressing the power button, P, for 3 to 5 seconds, will turn
it ON and, depending on the configuration, it can take up to 35 seconds until
the start sequence ends and MECHA reaches the idle status. This time frame
will be reduced in the future firmware releases.
When MECHA is idle, some codes can be entered to perform specific tasks
and tests without using the User Interface. This is useful if you don't know
how to use the User Interface yet, or you don't want to use the User
Interface.
For example, 131> will perform a test panorama of 6 shots around, 60° apart,
in clockwise rotation (CW), while
131< will perform a test panorama of 6 shots around, 60° apart, in counter-
clockwise rotation (CCW).
These tests can be used for shooting an actual panorama with a fish-eye lens
on ring type panorama head, like R1, mounted on MECHA.
132> will perform a test panorama of 12 shots around, 30° apart, in
clockwise rotation, twice as much as the previous codes, and for counter
clockwise rotation, 132< can be used.
These tests can also be used for shooting a real panorama with a 18-55mm
kit lens on a panoramic head, like NN3, mounted on MECHA.
NOTE. Whenever you enter codes, press the buttons consecutively,
one at a time.

14
MECHA User’s Guide v.06
© 2021 FANOTEC
In the case of using only one MECHA, a cylindrical panorama can be shoot
automatically, and if the tilting is done manually, even a spherical panorama
can be made using the code again for each row, after manual tilting.
When two MECHAs are used, if they are wireless connected in DAC, the
entire spherical panorama can be done automatically, without the need for
manual tilting, using
1313> 1312> 1321> for CW, or 1313< 1312< 1321< for CCW.
These codes will shoot a multi-row panorama plus nadir and zenith, the
difference being the start position. The most used is 1313>.
These 4-digit codes must be entered on the horizontal MECHA, the lower
one, when it is idle, in MECHA DAC.
Often, in this guide, we will use the term preset, which means a set of
instructions and configurations, that can be saved and used when needed,
to perform specific operations much faster. For example, some presets
contain all the information that MECHA needs to execute a whole panorama.
You can create your own presets or download presets from server.

15
MECHA User’s Guide v.06 ‒ Single Axis
© 2021 FANOTEC
Part 1
MECHA Single
Axis

16
MECHA User’s Guide v.06 ‒ Single Axis
© 2021 FANOTEC
Before First Use
Before using MECHA, we recommend that you do specific checks and tests.
●First, if you have an R1 or an NN3, mount them on MECHA as shown in
the images below:
Power on and Test – MECHA Single Axis
📹https://youtu.be/qRZDfC1-YZ8
Power ON and test - MECHA Single Axis
Power on MECHA by pressing the power button, P, for 3 to 5
seconds (long press). It may take about 35-45 seconds to start.

17
MECHA User’s Guide v.06 ‒ Single Axis
© 2021 FANOTEC
The long press of the power button is only necessary at power on/off. In
all other cases, use a normal press.
Assuming that MECHA is mounted as shown in the image above, without
the camera, let's perform two test rotations.
For a rotation of 90° to the left:
○Press <then quickly press 2.
For a rotation in the opposite direction, to go back to the starting position:
○Press >then quickly press 2.
For a test panorama, press the following buttons:
○131>
Now you already know how to power MECHA on and off and perform two
simple rotations and a test panorama.
We recommend that you perform the above operations a few more times to
familiarize yourself with long and normal button presses, then move on to
the next section.
Check the Battery Level
○If no LED lights up, or only a red LED lights
up, the battery may be discharged, and it is
recommended to use a 5V-2A charger to
charge it. It may take 3 to 5 hours to charge
the battery.
○Otherwise, if the LEDs light up normally, as
shown in the Power ON and test... video,
after 30-40 seconds, you will hear two beeps,
and the LEDs below the battery symbol will
turn off.
Power off MECHA by pressing the power button for 3 to 5 seconds.

18
MECHA User’s Guide v.06 ‒ Single Axis
© 2021 FANOTEC
Simple Rotations
Power on MECHA as shown above.
●For 45° rotations:
○Press <then quickly press 1.
○Press >then quickly press 1, for the opposite direction.
●For 90° rotations:
○Press <then quickly press 2.
○Press >then quickly press 2, for the opposite direction.
●For 180° rotations:
○Press <then quickly press 3.
○Press >then quickly press 3, for the opposite direction.
Note that the rotation angle for the above button combinations can be
set on the Configuration page.
For continuous rotation press and hold the arrow buttons, one at a time.
For example, for continuous left rotation, press and hold <.
If, for some reasons, you want to reverse the direction of horizontal
simple rotations, you can use the 2313< code. After this change, for
example, <will rotate the system to the right, and >, to the left. Use the
same code to cancel the change.
📹https://youtu.be/EV0X6H1b4bw
Simple rotations - MECHA Single Axis
📹https://youtu.be/sw1FDseF4QU
Simple rotations 2 - MECHA Single Axis

19
MECHA User’s Guide v.06 ‒ Single Axis
© 2021 FANOTEC
Note that the above code does not change the rotation of the motor.
There is a special code to do that.
Quick Panoramas Using MECHA’s Buttons
● 1< – press the 1button, which comes pre-programmed with 4 shots
around, then the left button, <, to specify the direction of rotation to
the left.
● 1> – press the 1button, then the right button, >, to specify the
direction of rotation to the right.
● 2< – press the 2button, which comes pre-programmed with 6 shots
around, then the left button, <, to specify the direction of rotation to
the left.
● 2> – press the 2button, then the right button, >, to specify the
direction of rotation to the right.
● 3< – press the 3button, which comes pre-programmed with 8 shots
around, then the left button, <, to specify the direction of rotation to
the left.
● 3> – press the 3button, then the right button, >, to specify the
direction of rotation to the right.
These are the default presets assigned to the three numerical buttons of the
MECHA. If the results are as expected, it means that they have not been
overwritten yet, and you can use them to take panoramas from 4, 6 and 8
shots around with camera mounted. Later in this guide, we will see that
these presets can be overwritten.
MECHA's firmware act as the device's complete operating system, perform-
ing all control, monitoring and data manipulation functions, and it is impor-
tant to have the latest version installed.
However, if you prefer not to update at this time, or you are not comfortable
with the firmware update procedure, you can skip now to Test using
MECHA’s buttons, in the next page.

20
MECHA User’s Guide v.06 ‒ Single Axis
© 2021 FANOTEC
Firmware Update Using a Hot-spot
This update method is available starting with firmware version 02118.
For this simple method of updating the firmware, we assume that you know
how to set up a hot-spot on your 3G, or 4G, smartphone, a smartphone with
mobile data enabled and Internet available to it. In other words, you can
navigate the Internet using that smartphone alone, without the smartphone
being connected to a Wi-Fi.
●First, set up a hot-spot with the name MECHA-UPDATE and password
87654321.
●Press the power button, P, for about 3 to 5 seconds to power on
MECHA, and wait until the splitting lights end: -=-=-= , there is no more
LED activity and you will hear two beeps. MECHA is now in idle status and
can accept commands and codes. If MECHA doesn’t reach this status,
then please power it down, by pressing the power button 3 to 5 seconds,
●Using MECHA’s buttons, enter the code 312123< by pressing one after
another each button. Before pressing the last button, you can wait and
look how the LEDs show the entered sequence, just to be sure you
entered the correct code. If there is any mistake, short-press the power
button and enter the code again, and terminate with < by pressing the
left arrow button, <. Now, notice how MECHA starts scanning the
existing networks.
📹https://youtu.be/8DK4xyrzQHU
Firmware update using a hot-spot - MECHA Single Axis
Please do not turn off MECHA while updating the firmware!
!
📹https://youtu.be/LNx64vps6Pg
LEDs during Firmware Update - MECHA Single Axis
Table of contents
Other Fanotec Camera Accessories manuals
Popular Camera Accessories manuals by other brands

Soloshot
Soloshot 3 user manual

Ikelite
Ikelite 6242.90 Canon S90 ULTRAcompact Digital... instruction manual

Scheppach
Scheppach ABP2.0-20Li Translation from the original instruction manual

Videotec
Videotec MAXIMUS MVXT instruction manual

Videotec
Videotec HOV instruction manual

Yongnuo
Yongnuo RF605C user manual

Rocket Fish
Rocket Fish RF-KL12 Quick setup guide

Next Century
Next Century BAT-4 quick start guide

PowerBear
PowerBear iPhone 6+ Replacement Battery Kit Replacement manual

3LeggedThing
3LeggedThing Legends Mike instruction manual

KICK ASS
KICK ASS KASMARTBG user manual

FeiYu Tech
FeiYu Tech AK Series instructions