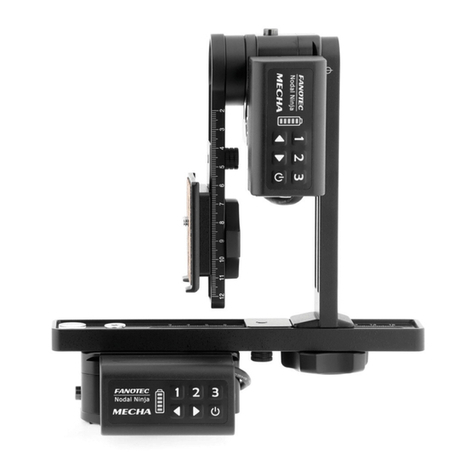
Fanotec MECHA C2 User manual

i
MECHA C2 User’s Guide v.01.10
© 2021 FANOTEC
C2 USER’S GUIDE
March 3, 2021

ii
MECHA C2 User’s Guide v.01.17
© 2021 FANOTEC
Contents
WARNINGS...............................................................................6
Introduction.......................................................... 7
C2 – C1 Differences and Similarities ....................................8
Table of Equivalences: Numbers ‒ Buttons....................................9
About the User Interface .....................................................10
Set MECHA in AP, STA, or AP+STA Mode at - + ≡ on Display .....11
About the Firmware (FW) Update.......................................12
Before First Use...................................................13
Power on and Test ...........................................................................15
Check the Battery Level...................................................................16
Simple Rotations..............................................................................16
Parked, Level and Raised Positions ...............................................18
Quick Panoramas Using MECHA’s Buttons..................................19
Firmware Update Using a Hot-spot....................................19
Test Using MECHA’s Buttons.............................21
Set the Rotator Using MECHA’s Buttons ......................................21
Test without Camera – 1312 Parked Position....................22
Test without Camera – 1313 Level Position .......................22
Test without Camera – 1321 Raised Position.....................22
Panorama with Camera Mounted ......................................23
Panorama with Automatic Shooting Pattern Using only
the MECHA’s Buttons ...........................................................24
C2’s Menu Mode .................................................26
How to Access the UI..........................................28

iii
MECHA C2 User’s Guide v.01.17
© 2021 FANOTEC
Access the User Interface (UI) with a Smartphone ..........28
Access the User Interface (UI) on Your Computer
Connected to a Wireless Network ......................................28
Test Using the UI.................................................30
Set the Rotator on Conguration Page.........................................30
UI Test ‒ 1312, 1313, 1321 Codes ...................................................31
User Interface (UI)..............................................33
UI Controls.............................................................................33
Conguration Page.............................................43
Default Mode....................................................................................43
STA Mode ..........................................................................................44
Fixed Settings ...................................................................................45
Rotator Settings ...............................................................................46
Buzzer PWM and Start Page...........................................................46
IR Settings and more.......................................................................47
Reverse Direction of Rotations.......................................................48
Camera Settings...............................................................................48
Arrow Buttons ..................................................................................49
Favorite Codes..................................................................................50
Battery Voltage.................................................................................50
More from Server, zLM, Firmware .................................................51
Technical Details ‒ IP Addresses, FW ............................................52
Backup and Restore Data ...............................................................52
Other Updating Methods...................................53
Firmware Update Using a Smartphone: Method 2 .........53
Working with Presets .........................................54
Programming a Preset Using Parameters.........................54
How to Create Your Own Presets Using the UI.................56
Default Presets.................................................................................56

iv
MECHA C2 User’s Guide v.01.17
© 2021 FANOTEC
Loading a Preset ..............................................................................57
Modifying a Preset...........................................................................60
Saving a Preset.................................................................................60
Preset Power Code .........................................................................61
MECHA’s Simple Scripting (MSS) ........................................62
Panorama of 3 Rows + Nadir + Zenith (MSS)................................62
Shooting Panorama Made Easy for Dual Axis..............................64
MSS Script Explained .......................................................................65
What Needs to be Changed, sometimes, in Real Situations ......67
Using Pause in MSS Script ..............................................................68
Let's Take a more Dense Approach with more Photos toward
Gigapixel Imagery............................................................................69
Rewind after each ROW ..................................................................70
Shooting in Horizontal Zigzag Pattern..........................................70
Download more Presets from Server.................................71
How to Set Both MECHA and Smartphone to
Have Internet Access..........................................72
MECHA’s Current Codes ....................................74
Current Codes List ................................................................74
Appendix
MECHA’s S (Shots) Language............................83
Panorama of 3 Rows + Nadir + Zenith ‒ EXAMPLE 1 (SL)............85
Panorama of 3 Rows + Nadir + Zenith ‒ EXAMPLE 2 (SL)............85
Panorama Using Loop in Script ‒ EXAMPLE 3 (SL) ......................88
Panorama with Extra Shoots and Pause ‒ EXAMPLE 4 (SL)........88

5
MECHA C2 User’s Guide v.01.17
© 2021 FANOTEC
MECHA C2 User’s Guide
Copyright © 2021 by Fanotec International Limited
www.nodalninja.com
www.fanotec.com
All rights reserved. No part of this guide may be reproduced or transmitted
in any form by any means, electronic, mechanical, photocopying, recording,
or otherwise, without the prior written permission of the publisher. For
information on getting permission for reprints and excerpts, contact
How to use this User’s Guide
Welcome to the MECHA C2 User’s Guide!
C2 is our second generation of controllers, with OLED display, external bat-
tery, and support for two MECHA rotators.
Before you start reading page-by-page, go section-by-section, looking at ti-
tles, tables, highlighted paragraphs, images, etc. Although there is a lot of
information you have not read yet, this will clue you into what you are about
to read.
After that, go back to the beginning and read the Introduction and Before
First Use chapters. Please move on only after you become familiar with the
basic operations we present here, and leave aside the more complex chap-
ters and deepen the part that interests you more.
Even if you are an experienced user, please pay attention to the warnings.
If you find the firmware update and other operations difficult, you can
Let’s get started!

WARNINGS
WARNINGS to Dual Axis MECHA Users
●Test MECHA WITHOUT a camera mounted first!
●Please test for camera clearance before running any program.
●Test any preset supplied or adjusted WITHOUT a camera mounted FIRST,
especially when the clearance is not enough.
●CHECK for clearance with shutter cable attached!
●Use short cable with extreme caution.
●The power button, P, can always be used as an emergency stop, except
for the speed calibration procedure (123123<).
●If the movement is not as expected, or there is any danger for the
moving parts to hit something, please press
P
, the power button of
MECHA, to stop the movement immediately.
6
MECHA C2 User’s Guide v.01.17
© 2021 FANOTEC

7
MECHA C2 User’s Guide v.01.17
© 2021 FANOTEC
Introduction
You may already know, from the doc-
umentation available at this time,
that MECHA consists of a rotator (E1,
E2, or P1) and a controller (C1), and is
generally used to automate the
movement of various devices, such
as a panoramic head mounted on a
tripod, or a turn table holding an ob-
ject for filming or photography.
Two such paired MECHA units –
MECHA Dual Axis Combo (DAC) – can
be used for dual axis applications, for
example, in panoramic photography.
The controller is the part of MECHA where
the buttons are located and that allows you
to send various commands to the rotators,
or to update the firmware, for example,
when you do not want to use the User
Interface (UI) for these purposes.
The new controller – C2 – which we present
in this user guide, is specially designed for
dual axis applications.
It is similar to C1 and can control the same
rotators – E1, E2, and P1 – so now you can
choose from the two controllers the one that
best suits your needs and preferences.

8
MECHA C2 User’s Guide v.01.17
© 2021 FANOTEC
C2 – C1 Differences and Similarities
●C2 can be connected to two rotators, so it can control two rotators
simultaneously.
○C1 can control only one rotator at a time.
For dual axis applications, you need either one C2 controller and two
rotators or two C1 controllers and two rotators.
●The C2 controller connects to the rotators with its built-in cable.
○The C1 controller connects wirelessly to another C1, thus two C1 can
be assembled in DAC and control two axes.
●The C2’s battery is external and you can quickly replace it when needed.
○C1 has a built-in battery which lasts for one day after a full charge and
can be charged from a power bank or outlet adapter even while it is
in use.
Both systems allow MECHA to operate non-stop.
●C2 has a 0.96 inch OLED display on which various data are
shown, including the codes that you enter using the controler buttons.
The Codes are special, predefined numerical combinations that you can
use to get information from MECHA or to ask MECHA to perform various
operations
○C1 has no display, but it has five LEDs with a similar function.
●C2 has nine buttons, C1 has six.
○-The minus button of C2 is the equivalent of 1button of C1. It
comes pre-programmed with 4 shots around. It can also be used to
enter the number 1, or to execute the favorite code 1 by long
pressing this button.
○+The plus button of C2 is the equivalent of 2button of C1. It
comes pre-programmed with 6 shots around. It can also be used to
enter the number 2, and to execute the favorite code 2 by long
pressing this button.
○=The menu button of C2 is the equivalent of 3button of C1. It
comes pre-programmed with 8 shots around. It can also be used to
enter the number 3, or to execute the favorite code 3 by long

9
MECHA C2 User’s Guide v.01.17
© 2021 FANOTEC
pressing this button. In case the favorite code 3 (FavCode 3) is not set,
the menu with all codes will be shown instead.
NOTE. When we say the MECHA’s buttons, or the buttons, we are
actually referring to the controller buttons.
Table of Equivalences: Numbers ‒ Buttons
○<> On both C1 and C2, the left and right buttons are used to
rotate the system manually to the left and to the right, respectively,
and also to specify the direction when launching a preset using the
controller buttons, as terminator for codes (similar to the Enter key).
○/\ The up and down buttons of C2 control the up and down
movement of the upper rotator, when two rotators are used.
→On Dual Axis Combo, the left and right buttons of the upper C1,
<>, act as up and down buttons and control the upper
rotator.
○SThe middle button of C2 has a camera trigger function and
confirms the execution of the code selected from the menu.
The codes can be entered using the buttons and can also be selected
from the C2’s menu.
→There is no C1 equivalent of the above button.
○POn both C1 and C2, the power button is used to power on/off
MECHA, to confirm or cancel some operations, and it is also the
equivalent of the number 0 (zero) when power codes are entered.
Power codes are codes that start with zero.
●Both C1 and C2 have support for IR or wired remote control.
numbers 1 2 3
C2 buttons - + =
C1 buttons 1 2 3

●Both C1 and C2 can be controlled using the User Interface and also using
their own buttons.
●C2 uses Wi-Fi for connection, as does C1, so both can be accessed
directly by phone or via a Wi-Fi network, or even via the Internet, with a
device connected to the Internet.
●On both C1 and C2, for complex tasks, or to assign complex tasks to a
single button, the User Interface can be used.
About the User Interface
To access the MECHA’s User Interface, a
device with an Internet browser needs to
be used. It can be a smartphone, or a
tablet, or even your own computer.
MECHA uses wireless connection, ab-
breviated Wi-Fi.
It can be set as AP (Access Point), or STA
(Station), or even both: AP+STA, as well as
no Wi-Fi, in which case the control is
possible only by buttons.
The desired mode can be set as default in
MECHA's configuration page, or by a short
press of a button when MECHA expects
this, and this is when - + ≡ is shown on
the display, during the starting sequence,
as in the image on the right.
10
MECHA C2 User’s Guide v.01.17
© 2021 FANOTEC

11
MECHA C2 User’s Guide v.01.17
© 2021 FANOTEC
Set MECHA in AP, STA, or AP+STA Mode at - + ≡ on
Display
When - + ≡ is shown on C2’s display:
pressing -will set MECHA in AP mode
pressing +will set MECHA in STA mode
pressing =will set MECHA in AP+STA mode
If you missed the setting time, power MECHA off and on again, and this
time make sure you act faster. Also, if the desired option is already
selected, then you don’t have to select it again.
When MECHA is in AP or AP+STA mode, it broadcasts a SSID with a specific
name – the default name contains the word "MECHA" in it – to which the
smartphone can be connected using a password, which is 12345678 by
default.
Once the smartphone is connected to the MECHA’s SSID, the MECHA’s User
Interface can be accessed in browser at 192.168.8.1
When MECHA is in STA or AP+STA, it can also connect to the SSID of a
particular network, other than MECHA’s own SSID, and as a result the User
Interface of MECHA can also be accessed at the address given in that
particular network, like this: 192.168.1.100
As a note, the particular network can be managed by the smartphone itself,
if on smartphone a hot-spot is enabled and MECHA can connect to it.

About the Firmware (FW) Update
To benefit from all the features implemented in MECHA, we recommend that
you update the firmware to the latest version available. There are a couple
of ways to update the firmware, and the easiest is via the Internet. To check
and perform the update, on the UI there is the [Update] button.
If MECHA is not connected to a Wi-Fi with Internet access, it will ask for a
SSID name and password, as a guest asks if Wi-Fi is available in your home,
to be able to check something on the Internet, a Wi-Fi the guest will connect
the phone to. The same way, MECHA will use that Wi-Fi in order to download
the new firmware and perform the update.
MECHA is in the idle status after it is powered on, as long as it doesn't
execute any preset.
Apreset is a set of instructions and configuration settings, that can be saved
and used when needed, to perform specific operations much faster. For
example, some presets contain all the information that MECHA needs to
execute a whole panorama. You can create your own presets or download
presets from server.
If MECHA is off, pressing the power button, P, for 3 seconds, will turn it on
and, depending on the configuration, it may take about 35 seconds for the
start sequence to complete, then MECHA reaches the idle status.
When MECHA is idle, you can use codes to perform specific tasks and tests
without using the User Interface. This is useful if you don't know how to use
the User Interface yet or don't want to use it. For example, 121< is a code
that tells MECHA to show its id.
We will give you more details about codes in this user guide. For now, you
should just know that there is also this possibility to communicate with
MECHA, in addition to the web interface.
12
MECHA C2 User’s Guide v.01.17
© 2021 FANOTEC

13
MECHA C2 User’s Guide v.01.17
© 2021 FANOTEC
Before First Use
Note the numbers 1 and 2 printed on
the back of the controller, and then
connect the controller to the rotators
as follows:
●the end of the cable 1 to the
lower rotator
●the end of the cable 2 to the
upper rotator
⑤ ⑥ ①
1. Controller to lower
rotator built-in cable
2. Controller to upper
rotator built-in cable
3. Aux Port
4. Camera Trigger Port
5. DC Power Input port
6. USB Port
④ ③ ②

14
MECHA C2 User’s Guide v.01.17
© 2021 FANOTEC
The lower rotator is the rotator mounted under the lower rail of the device,
and the upper rotator is the vertical rotator, mounted on the upper rail.
Although the controller can be mounted in several ways, we recommend
that you mount it on the upper rotator, using its attachment strap, as shown
in the image below.
Upper
Rotator
Controller to Upper
Rotator built-in
cable
C2 Controller
Upper Rail
Controller to Lower
Rotator built-in
cable
Attachment strap
External
Battery
Lower
Rotator
Nadir
Adapter
Lower Rail

Power on and Test
The long press of the power button is only necessary at power on/off. In all
other cases, use a normal press.
Notice that the dynamic ip address is also
shown on the display; you will need it to access
the User Interface on your computer.
Assuming that the controller and rotators are mounted as shown in the
image above, without the camera, let's perform two test rotations.
For a rotation of 90° to the left:
○Press <then quickly press +.
For a rotation in the opposite direction, to go back to the starting position:
○Press >then quickly press +.
Now you already know how to power MECHA on and off and perform two
simple rotations.
We recommend that you perform the above operations a few more times to
familiarize yourself with long and normal button presses, then move on to
the next section.
Power on MECHA by pressing the power button, P, for 3 to 5
seconds (long press). It may take about 35-45 seconds to start, then
the controller display will show 1 OK and 2 OK, which means that
both rotators are working properly and MECHA is ready to be used.
Power off MECHA by pressing the power button for 3 to 5 seconds.
15
MECHA C2 User’s Guide v.01.17
© 2021 FANOTEC

16
MECHA C2 User’s Guide v.01.17
© 2021 FANOTEC
Check the Battery Level
Power on MECHA as shown above.
After that, press the power button, P, and notice the battery voltage
shown in the lower right corner of the display. If necessary, replace the
battery. Always use a 9-19V battery, according to the technical
specifications.
If the display is not showing anything, the battery may be completely
discharged and needs to be replaced.
Simple Rotations
Power on MECHA as shown above.
For the lower rotator
●For 45° degree rotations:
○Press <then quickly press -.
○Press >then quickly press -, for the opposite direction.
●For 90° degree rotations:
○Press <then quickly press +.
○Press >then quickly press +, for the opposite direction.
●For 180° degree rotations:
○Press <then quickly press =.
○Press >then quickly press =, for the opposite direction.

17
MECHA C2 User’s Guide v.01.17
© 2021 FANOTEC
For the upper rotator do the same, but use the up and down buttons
instead of the left and right buttons:
●For 45° degree rotations:
○Press \then quickly press -.
○Press /then quickly press -, for the opposite direction.
●For 90° degree rotations:
○Press \then quickly press +.
○Press /then quickly press +, for the opposite direction.
●For 180° degree rotations:
○Press \then quickly press =.
○Press /then quickly press =, for the opposite direction.
Note that the rotation angle for the above button combinations can be
set on the Configuration page.
For continuous rotation press and hold the arrow buttons, one at a time.
For example, for continuous left rotation, press and hold <.
If, for some reasons, you want to reverse the direction of horizontal and
vertical simple rotations, you can use the 2313< and 2323< codes. After
this change, for example, <will rotate the system to the right, and >, to
the left. Similar for the \and /buttons. Use the same codes to cancel
the change.
Note that the above code does not change the rotation of the motors.
There are special codes to do that.

18
MECHA C2 User’s Guide v.01.17
© 2021 FANOTEC
Parked, Level and Raised Positions
The simple rotations mentioned above are very helpful when the upper rail
needs to be in a certain position. The basic positions required for presets are
shown in the image below, and they are:
1. Parked — the most compact position, the upper rail is oriented vertically
down.
2. Level — the upper rail is in the horizontal position.
3. Raised — the opposite of parked, the upper rail is oriented vertically
upwards.
For example, if the current position is parked and the preset requires
raised, you can do this with one of the following:
●Press /then quickly press +, and do this twice (90°x2=180°).
●Press /then quickly press =.
●Press and hold /until the upper rail reaches the desired position.
Adjust
the position
using /\
buttons
to match
the preset
before starting
the preset.
The naming conventions
for starting and ending positions
for dual axis presets available via
More from Server...
LevelParked Raised

19
MECHA C2 User’s Guide v.01.17
© 2021 FANOTEC
Quick Panoramas Using MECHA’s Buttons
● 1< — Press -, which comes pre-programmed with 4 shots around,
then <to specify the direction of rotation to the left.
● 1> — Press -then >to specify the direction of rotation to the right.
● 2< — Press +, which comes pre-programmed with 6 shots around,
then <to specify the direction of rotation to the left.
● 2> — Press +then >to specify the direction of rotation to the right.
● 3< — Press =, which comes pre-programmed with 8 shots around,
then <to specify the direction of rotation to the left.
● 3> — Press =then >to specify the direction of rotation to the right.
These are the default presets assigned to the -,+, and =buttons of
MECHA. If the results are as expected, it means that they have not been
overwritten yet, and you can use them to take panoramas of 4, 6 and 8 shots
around with camera mounted.
Later in this guide, we will see that these presets can be overwritten.
Firmware Update Using a Hot-spot
MECHA's firmware act as the device's complete operating system, perform-
ing all control, monitoring and data manipulation functions, and it’s impor-
tant to have the latest version installed.
However, if you prefer not to update at this time, or you’re not comfortable
with the firmware update procedure, you can skip now to Test Using
MECHA’s Buttons in the next page.
This update method is available starting with the firmware version 02118.

20
MECHA C2 User’s Guide v.01.17
© 2021 FANOTEC
For this simple method of updating the firmware, we assume that you know
how to set up a hot-spot on your 3G, or 4G, smartphone, a smartphone with
mobile data enabled and Internet available to it. In other words, you can
navigate the Internet using that smartphone alone, without the smartphone
being connected to a Wi-Fi.
●First, set up a hot-spot with the name MECHA-UPDATE and password
87654321.
●Press the power button, P, for about 3 to 5 seconds to power on
MECHA, and wait until MECHA reaches the idle status and can accept
commands and codes. If MECHA doesn’t reach this status, then please
power it off, by pressing the power button 3 seconds, and contact us at
●Using MECHA’s buttons, enter the code 312123<, by pressing the
corresponding buttons one after another (see Table of Equivalences:
Numbers – Buttons). Before pressing <, you can check the code on the
display to make sure you entered it correctly. If the code is incorrect,
short-press the Pbutton (to cancel) and enter it again, and terminate
with <, by pressing <. Now MECHA starts scanning the existing
networks, and when it connects to the previously created hot-spot, two
beeps are heard. The code 312123< will update the firmware using the
MECHA-UPDATE hot-spot you set. The response – shown on the display
– will be: ”!!!”, if Internet is not available for MECHA.
If you use the above code without creating the hot-spot, the firmware
will be updated later, when the internet will be available.
The update may take up to 5 minutes, but it could take longer in case of slow
Internet connection.
Please do not turn off MECHA while updating the firmware!
!
Other manuals for MECHA C2
1
Table of contents
Other Fanotec Camera Accessories manuals