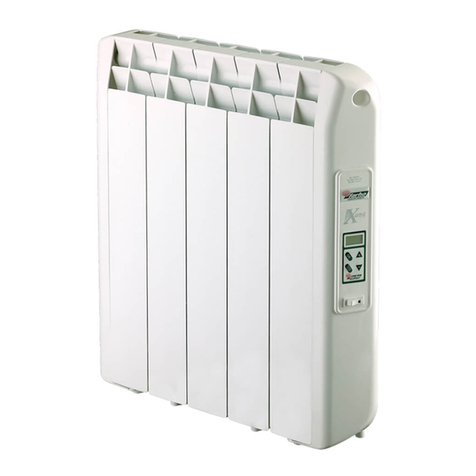
Farho VICTORIA User guide

1
THERMAL RADIATOR VICTORIA
INSTRUCTIONS FOR INSTALLATION AND OPERATION
WARNING
Please read carefully and thoroughly through the following instructions and
retain them for future reference.
It is recommended that the installation of this thermal radiator is performed by
a qualied electrician.

2
CONTENT
• USER GUIDE .......................................................................................................... 3
• SCREEN DESCRIPTION ................................................................................... 4
• PROGRAMMING .................................................................................................. 6
• START SCREEN ................................................................................................... 6
• MAIN MENU ........................................................................................................... 7
• CONFIGURATION ............................................................................................... 8
• ADVANCED SETTINGS .................................................................................... 9
• UPDATING HEATER’S FIRMWARE ............................................................ 9
• ADDITIONAL FEATURES OF THE APP ................................................... 10
• WHAT HAPPENS IF THE RADIATOR DOES NOT EMIT HEAT? .... 11
• TECHNICAL SPECIFICATIONS SHEET ..................................................... 12
• INSTRUCTIONS FOR THE INSTALLER ..................................................... 12
• WARRANTY TERMS .......................................................................................... 14
• CAUSES EXCLUDED BY THIS WARRANTY .......................................... 15
CORRECT USE OF THE RADIATOR
• Comfort temperature varies from one individual to another, even depending upon the level of physical
activity. However, 21ºC tends to be regarded as the most appropriate temperature indoors. For
information purposes, every degree Celsius over 21ºC could lead to an increase in energy consumption
of up to 7%.
• Raising the setpoint temperature does not mean comfort temperature will be achieved more rapidly, so
it is recommended to choose a temperature close to 21ºC and wait for the radiator to heat the room.
• Use the radiator when necessary. With the help of the programming, the radiator can stay activated
the desired time, without exceeding.
END OF THE RADIATOR’S USEFUL LIFE
When disposing of the radiator, it must be taken to a waste recycling
centre, as it contains oil, which can be harmful to the environment.
IMPORTANT

3
USER GUIDE
GENERAL INFORMATION
Thank you for purchasing the VICTORIA thermal radiator. It has been
manufactured in a modern procedure of serial production. It is known
for its elegant style, its user friendliness, its great heat output and its
safe use and operation.
It has been designed and manufactured in accordance with all the
requirements of household appliances complying with standards
EN60335-1, EN60335-2-30 and EN55014.
A thermal radiator is a device which serves to consume electric current,
transforming it into heat and emitting it in the site which is going to be
heated according to the user’s temperature requirements.
When appropriately dimensioned, the thermal radiator generates
sufcient temperature to heat the room where it is placed, to the user’s
complete satisfaction. A properly insulated house constitutes, of course,
a signicant advantage and will help decrease heating expenses.
Once your heating system is installed, you will want to ensure that the heat
remains into your house. This is the reason why insulation is so important.
Apart from adding value to the house, insulation prevents your money
from escaping through the doors, roof, outside walls, windows, etc. Thus,
if we install appropriate insulation in roofs and facades, weather-strip
windows or change single-paned windows for double-glazed ones, cold
will remain outside, whereas heat will stay in. Besides, a well-insulated
house is comfortably cooler in the summer.
DO NOT COVER the surface of the radiator, as it will be hot. Inammable
objects or with risk of re MUST NOT BE PLACED on the surface or
close to it. For this reason, we won’t put clothes, towels, magazines, spray
cans or volatile substances within 25 cm of the radiator.

4
SCREEN DESCRIPTION
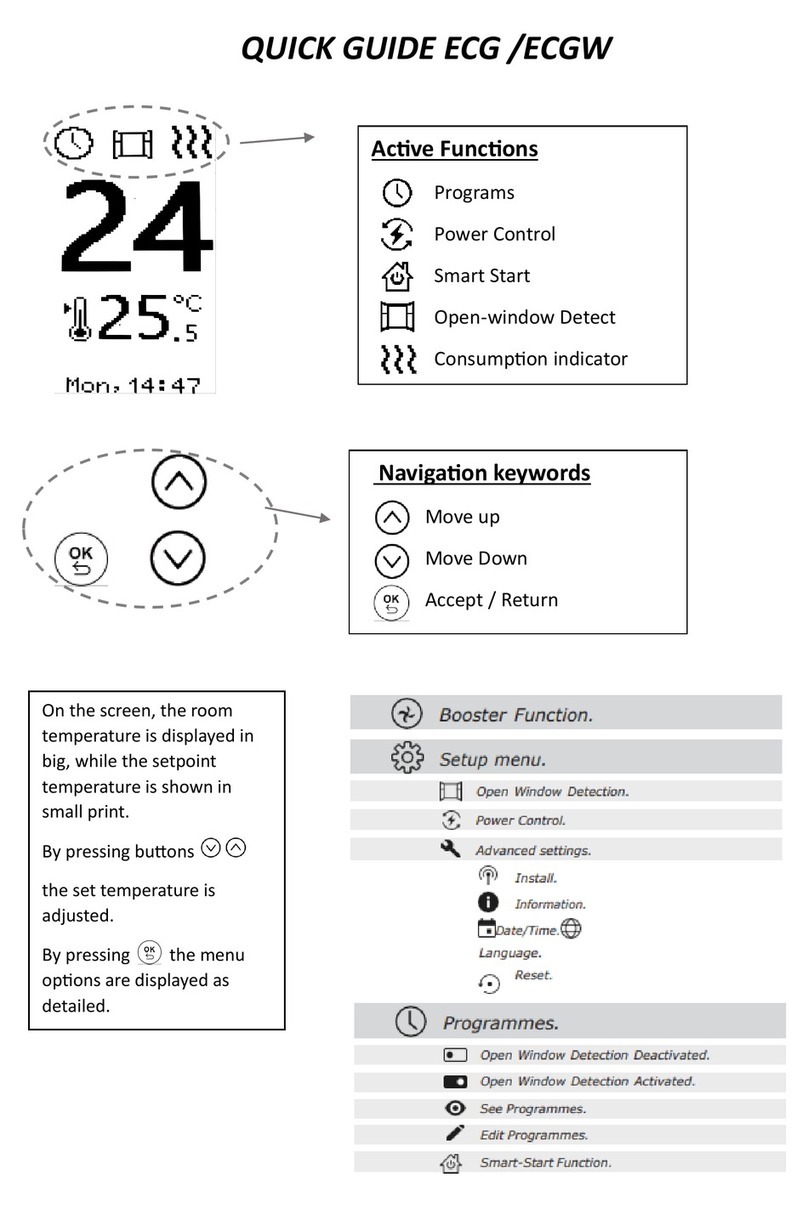
Active Functions.
Active Functions.
Programme.
Smart-Start.
Power Control.
Open Window
Detection.
Time and Day.
Scroll up selection.
Scroll down selection.
Accept / Enter the menu.
Return / Cancel .
Consumption indicator.

5
Open Window Detection.
Power Control.
Advanced settings.
Install.
Information.
Date/Time.
Language.
Reset.
Open Window Detection Deactivated.
Open Window Detection Activated.
See Programmes.
Edit Programmes.
Smart-Start Function.
When activating the screen in this zone,
room temperature will be displayed.
Pressing or setpoint temperature
will be displayed.
Pressing the options of the menu will
be displayed, listed beside.
Booster Function.
Setup menu.
Programmes.

6
START SCREEN
Room temperature will be shown on the start screen, as well as icons for
Smart Start, open windows detection and power control, in case they
are activated.
Clicking up and down buttons you will be able to edit the setpoint value.
In manual mode, the heater will keep that value until further modication.
With the active programmes, the current section will be cancelled and
the heater will keep the set point value introduced manually until entering
a new programme section.
When clicking the OK button you will enter the main menu.
After a few seconds without touching the buttons, the heater will turn
off the display.
PROGRAMMING
1. First, update date and time of the radiator
(MENU – ADVANCED SETTINGS – TIME).
2. ENTER THE PROGRAMMES
(MENU – PROGRAMMES – OK).
3. USE THE NAVIGATION ARROWS AND to access EDIT
and press OK:
• Select the days of the week which will share the same programming,
pressing ok in each one of them. Then, scroll down to “next” and
press OK.
• ●Start time, nish time and desired temperature will be requested
for this period. Once introduced, press OK. A blank time slot will
be shown, repeat this step to set it up.
• ●Up to 6 time slots can be introduced from 00 h to 24 h, repeating
the previous step. If you do not want more than 2 or 3 time
slots, the rest will be automatically congured with anti-freeze
temperature (5ºC).
• ●Unscheduled periods will be automatically congured with anti-
freeze temperature.
4. TO SEE RECORDED PROGRAMMES.
• ●Enter MENU – PROGRAMMES. Using the arrows, search for SEE
and click OK.
• ●Select the day of the week you want to see and click OK.

7
MAIN MENU
You can access the main menu clicking OK in the start screen.
Boost.
• Boost mode allows the heater to emit heat during the time indicated in
the counter, regardless of the setpoint temperature or programming.
Once boost time has nished, the heater will go back to the previous
mode.
• Boost mode can be cancelled any time by pressing the Cancel button.
• Initially, boost mode’s counter will be 30 minutes long, but it can be
increased or reduced in fractions of 5 minutes by pressing the up and
down buttons.
Programmes.
Programmes On/Off.
• Press OK to activate or deactivate time programming. With time
programming activated, the heater will modify its setpoint as indicated
in the time lots previously congured. In those time periods without a
congured slot, setpoint temperature will be anti-freeze temperature.
• If the programmes are deactivated, the setpoint will remain invariable
until there is a new manual modication done by the user.
See.
• Choose the day and the 6 programmes’ congurable periods are shown
on-screen, with their starting time, ending time and operation setpoint.
Edit.
• With the checks, choose one or several days in which you want to put
the same programming and then select “Next”,
• In the time periods’ conguration screen, choose the rst empty slot
or select an existing one in order to edit it.
• You will be asked for the start time, end time and setpoint tempera-
ture. Programming is for a whole day starting at 00:00 and ending
at 24:00 (end of slot time 00:00 will be considered to be 24:00).

8
Unscheduled slots will be automatically congured with anti-freeze
temperature of +5º.
• In case of any confusion at some point and if the back arrow pops up,
you can use up and down buttons to recover some of the programmed
information.
• ●To delete a slot, select it and modify the start time so that two hyphens
emerge“- -“ and press OK. When deleting a slot or selecting “00:00” as
end time, all the slots below will be deleted. Once modied, scroll up
or down until no slot is selected, and you will nd an arrow to go back.
• ●By clicking OK, all selected periods will be saved.
Smart Start.
• From the programmes menu, you can activate Smart Start. With it
activated and according to an automatic learning process, the heater
will anticipate the start time of the programme slot so that at the start
time established by the user in the setpoint temperature programme
it already is the desired one for the slot.
• The feature of Smart Start can take some days to auto-adjust due to
an automatic learning process. The heater has to calculate how much
time before it must be turned on on the basis of the room tempera-
ture, the desired setpoint and the estimated time for the room to be
heated.
CONFIGURATION
In the setup menu, more unusual settings of the heater can be modied.
Open Window Detection.
• With the up and down buttons this feature can be activated or
deactivated.
• ●The heater can detect if a window has been opened in the room and
pause the heating a maximum of 15 minutes or until it detects the
window has been closed.

9
ADVANCED SETTINGS
The least usual settings which will mainly be performed in the setting up
of the heater are displayed in this menu.
Install.
• The heater can be controlled remotely using an application and the
online control module Mi-Vic Farho.
• ●In order to add the heater to the Mi-Vic Farho module, indicate through
the app the zone where you want to install the heater and launch the
installation process there. Then, in the heater, press OK once the Install
icon has been selected. The screen will display when the process has
been completed successfully.
Information.
• Date and time, rmware versión, system ID and heater ID within the
system (in case it has been installed in a MI-Vic Farho module), and
IDU (Unique identier) will be displayed in this section.
Time.
• Press to set the current date and time. It is only necessary if time
programming is to be used.
(Menu – Advanced Settings – Time).
Language.
• In this menu, the heater’s interface language can be changed.
(Menu – Advanced Settings – Language).
Reset.
• In order to reset the heater to its factory settings you must enter this
menu and follow the instructions displayed on-screen.
UPDATING HEATER’S FIRMWARE
• The heater’s rmware can be updated without the need to send the
instrument to factory. For that, it is necessary to have the internet
control module Mi-Vic Farho.
• In the start-up, the heater always veries if the rmware updating
process has been launched.

10
ADDITIONAL FEATURES OF THE APP
Power Control.
• Power control menu allows you to select the heater’s power value and
its priority in case the consumed power limit is reached by the heating
system.
• ●The heater’s power will be indicated on its rating label and the precise
value dened there must be introduced.
• Priority level can be established in one of the 3 possible values.
O: Highest priority -> the heater is always activated, whether or not
the available power limit for the system has been reached or not.
1: High priority -> the heater is only activated if there is available
power, but in case there is not, it will prioritize its activation over other
heaters with low priority.
2: Low priority -> the heater is only activated if there is available power
and other heaters with high priority are not requesting activation.
Setting Geo Fence.
• Setpoints can be congured when the mobile device in which the
heater’s control system app is installed and congured, enters or leaves
a specic location.
• ●Select the centre of the circle which denes the Geo Fence by pressing
the button “Save my current location”.
• ●Next, select the geo fencing circle radius. It may be different for entering
the area and for leaving it. Geo Fence scenes will be triggered when
getting closer or moving away from the indicated km in this section.
• ●Finally, indicate in the scenes the setpoint to which the heaters are to
be congured when entering or leaving the geo-fenced area.

11
Modifying temperature’s calibration probe.
• In order to modify the temperature’s calibration probe of a heater
we must access “Air conditioning”, choose the area where the heater
we want to modify is installed, select the button “Advanced settings”
and then press “Adjust temperature sensor”. A list of all the heaters in
the area will be displayed, as well as the offset value. Press the Offset
value (OFF if there is no modication of the read value) and select the
desired value.
WHAT HAPPENS IF THE RADIATOR
DOES NOT EMIT HEAT
If the room temperature is less than the setpoint and the radiator does
not emit heat, the reason may be one of the following:
• Check the power supply of the radiator.
• ●The heater is working but it is too early to perceive thermal comfort.
Check if the consumption indicator is visible and wait a few minutes.
• ●Consumption indicator is not visible but room temperature is higher
than the operation preset temperature. Switch off the heater, wait a
few seconds and switch it on again.
• ●Only in case of having the module Ml-Vic: the power control may have
been congured. Verify the available power, the power assigned to the
heater and its priority.
• ●If the reason why the radiator does not heat is none of the previous
mentioned ones, please contact Farho’s Technical Service by calling
985.514.082.

12
POWER SUPPLY:
• Farho radiator requires a current supply of 230 V.
• All Farho Victoria radiator are supplied with a standard interchangeable
power cord.
• If the cord is too long or short, it can be substituted by another one,
with IEC plug and maximum supported power of 16A.
• The power cord must not touch any hot part of the radiator. In order
to ensure this, gutters, clips or some other type of securing compo-
nent will be employed.
• In order to disconnect the radiator, perform the inverse operation of
the one previously mentioned. The radiator will be installed under the
applicable laws of the country where it is installed.
POSITIONING:
• The ideal positioning for the radiator is to place it as close as possible
to the facing that suffers most heat loss. It is not recommended to
place the heaters on uninsulated exterior facing walls. If necessary, a
reinforcement in the insulation of the surface onto which the heater is
to be tted must be added.
• In the bathrooms,
radiator will not be
installed within de pro-
tection volume reec-
ted in the applicable
laws of the country
where it is installed.
• When choosing the
positioning, the mini-
mum distances indica-
ted in gure 1 will be
respected.
INSTRUCTIONS FOR THE INSTALLER
TECHNICAL SPECIFICATIONS SHEET
Close to a wall
100% yield
With top shelf
90% yield
In niche
85% yield

13
ASSEMBLY:
• The radiator will be mechanically attached to the wall through its
upper side with specically designed wall-mounting brackets which
are supplied with the heater. These brackets will have an axle distance
(dimension A) that is shown in table 1 and a distance from the ground
(dimension B) of between 600 and 620mm.
CONSERVATION:
• Under no circumstances shall the radiator be covered.
• ●“DO NOT COVER” / “NO CUBRIR” serves as a reminder for the user. Air
should be freely able to enter into contact with all the heater’s surfaces.
• A damp cloth must be used for cleaning the radiator, and liquid
detergent with NEUTRAL PH may be added, always ensuring the
radiator are DISCONNECTED.
ASSEMBLY OF HEATER
HEAT.SAMPLE A-7
DIMENSION A = 480
DIMENSION B
INITIAL POSITIONING
INSTALLED HEATER

14
WARRANTY TERMS
• Farho guarantees a proper functioning of the appliance, the data of
which appear hearin. For your safety, before beginning installation, the
instructions of every product must be taken into account.
• ●The guarantees offered by Farho, provided that the radiator are
installed under the applicable laws of the country, are as follows:
• During the rst 6 months from the acquisition date, the present
guarantee covers free repair of any defect of the radiator and of any
damages or harm related to it. Both delivery fees and labour costs will
be free for the client. During this period, if the reparation performed
were not satisfactory and the radiator were not in perfect condition
to fulll the purpose to which it had been acquired, the holder of the
guarantee shall be entitled to receive a replacement of the acquired
appliance for other with the same characteristics, and if this were not
possible, a refund of the price paid for that product.
• During the rst 6 months the previous term, Farho will replace any
piece or defective component without any charge for the user, also
including delivery to factory and labour.
• From the second year, for any fault in the ELECTRONIC PART Farho
puts at the disposal of the user their Technical Service in factory to
handle any repair, but both delivery and labour costs must be covered
by the client.
Country Aluminium body Electronics
Spain 20 years 2 years
Europe 10 years 2 years
Other countries 5 years 2 years

15
CAUSES EXCLUDED BY THIS WARRANTY:
• Faults provoked by atmospheric phenomena or geological features
(frosts, storms, rain, etc.) as well as those stemming from inadequate
voltage.
• ●Pieces or components damaged in the transportation, installation or
during use.
• Cleaning operations in the heater or its components motivated by dirt,
oils, fumes and soots, among other circumstances of the place where
it is installed.
• Modication in Farho’s original products, without consulting the factory
or using replacement parts not specied by it.
• Regarding the ALUMINIUM BODY, Technical Service warranty,
including labour, is extended up to 20 years in Spain, 10 in the rest of
the European countries and 5 in all remaining countries.
WARNING: Farho will not cover the damages caused by the possible
appearance of marks on the walls and ceilings of houses which are prone
to dirt, dusty environments or any other circumstances of the place where
the radiator is located.
WARNING
Please read carefully and thoroughly through the following instructions and
retain them for future reference.
It is recommended that the installation of this thermal radiator is performed by
a qualied electrician.

16
EMAIL:
NAME:
ADDRESS:
TELEPHONE:
NAME:
ADDRESS:
STARTUP DATE:
INSTALLER:
INSTALLER:
INSTALLER’S NUMBER AND SEAL:
DATE OF PURCHASE:
DISTRIBUTOR:
THERMAL RADIATOR FARHO
VERY IMPORTANT:
If you wish to report any incident please
consult factory by calling
Table of contents
Other Farho Heater manuals