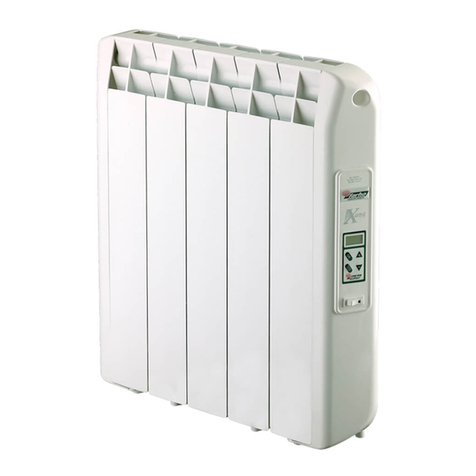
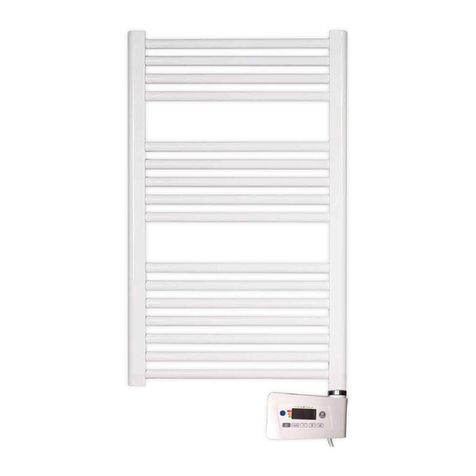
Farho XP-3 Manual

1
FITTING AND OPERATING
INSTRUCTIONS FOR FARHO HEATERS
WARNING
Please read these instructions carefully and keep them for future queries.
It is recommended that heaters are being installed and accredited by a qualied
electrician following Low Voltage Regulations. Any claim presented will be deemed
as invalid if the prevailing regulations have not been met.
GENERAL INFORMATION
Thank you for purchasing a Farho heater.
Farho, is a unique heating system designed, developed and produced by Farho based on a
heating conducting uid with a very high heat inertia. Farho heaters put together a great
number of the advantages of existing heating systems such as the use of injected aluminum
and electricity as a source of energy easy to use and control and Farhoil, a patented uid
elaborated just for Farho. Farho heaters are available in different types giving therefore
solutions for everyone.
Farho heaters have been designed and are manufactured in accordance with appliance
requirements pursuant to EN 60950, EN 300 220, EN 301 489, EN 60335-1 y EN 60335-
2-3 standards.
Correctly sized, the heater will provide sufcient heat to keep the space in which it has
been tted warm in a very efcient way.
IMPORTANT: Always disconnect the electricity supply from the power point before any
maintenance operations.
DO NOT COVER heater´s surface. Inammable items must not be placed on the heaters.
Heaters should not be used to dry out clothes, towels… These items as well as other such
as spray cans and volatile substances or objects must be kept away at least 2cm from
the radiator.

2
GENERAL INFORMATION .................................................................................. 1
INDEX ........................................................................................................................... 2
CORRECT USE OF THE HEATER .................................................................... 2
ALEJANDRIA MODEL- AN, ECO R ULTRA Y LPR .................................... 3
ECO GREEN MODEL- ECG, ECG ULTRA ...................................................... 3
MODELOS XANA PLUS- XP, XP-LST, LPD ................................................. 8
WHY IS THE HEATER NOT GIVING OFF HEAT? ..................................... 12
TECHNICAL INFORMATION ............................................................................. 13
FITTER´S INSTRUCTIONS ................................ ................................................. 13
GUARANTEE TERMS AND CONDITIONS ................................................... 15
INDEX
CORRECT USE OF THE HEATHER
• The comfort temperature varies on each person, and even depends on their physical
activity. It is usually considered that 21C is the most suitable temperature indoors.
Indicatively, each degree Celsius above 21ºC can represent an increase in energy
consumption up to 7%.
• The fact of raising the setpoint temperature does not mean that the comfort
temperature is reached more quickly, so it is advisable to choose a temperature
close to 21ºC and wait for the radiator to warm the room up.
• Use it when it is really necessary. With the heater programming help, it can be
switched on as long as convenient, without excees.
PRODUCT LIFETIME
When we want to get rid of the heater, we will have to
take it to a recycling centre, since it contains oil that
can be harmful to the environment.
You can consult all our manuals on our website
www.farho.com
IMPORTANT

3
The Alejandría model, with its analogical thermostat, combines quality
with a friendly functional system.
This heater is tted with a snap and analogical thermostat. Once the
heater is plugged at the appropriate voltage, the switch will be turned
on (Fig. A) and if the room temperature is lower than the one set with
the dial, the aluminum body will start warming up.
Once the room temperature reaches the set temperature, the thermostat
will cut the power, the resistor will stop working, the signal light will go
off and the heat supply to the heater will cease. The heater will remain
in stand-by until the room temperature gets below the set temperature.
To change the temperature, you must move the dial clockwise (Fig. B)
to increase the temperature and anticlockwise to lower it.
ALEJANDRIA MODEL- AN, ECO R ULTRA Y LPR
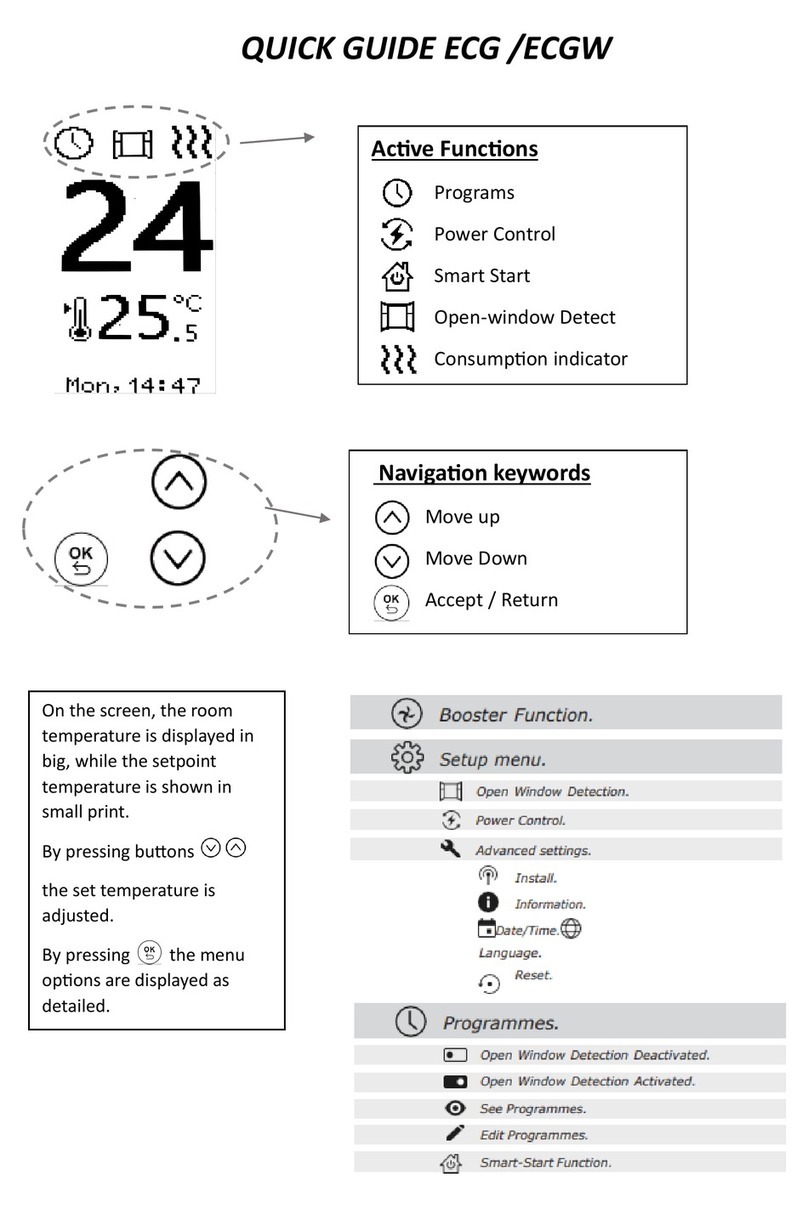
The EG model is the latest product in Farho range. This heater combines high technology
performance with easy use. Farho EG models can be programmed in up to six independent
operating periods for each day of the week and it can also be controlled from the front
panel.
This heater incorporates a “open window detection” function, which can be enabled
from the menu. When operating on this mode, the heater will pause the operation (i.e.
stop consuming) whenever it detects a drop of 2ºC or more on less than 5 minutes. This
function only applies when the heater is consuming.
ECO GREEN MODEL- ECG, ECG ULTRA
Increase temperature and scroll up on menus.
Decrease temperature and scroll down on menus.
Enter menu / Accept / Back (long press).
DESCRIPTION OF THE KEYPAD AND DISPLAY:
The Eco Green model is controlled by an intuitive menu, thus greatly facilitating its use.
In order to access the menu, simply press the button labeled (OK) and scroll through
it by pressing the buttons (+) and (-). To go back to the previous menu, just press
and hold until “Back” is displayed on the screen.
To select a menu item or to perform an action, simply press for a short period.
1. TIME.
2. ACTIVATED PROGRAMMES.
3. DAY OF THE WEEK.
4. ROOM TEMPERATURE.
5. DESIRED TEMPERATURE.
1
4 5
23

4
HOW TO ACTIVATE THE “BOOSTER” FUNCTION:
The “Booster” function allows the radiator to be maintained at full power for a predetermined
time of 1, 2 or 3 hours.
1. Hold down the key and without releasing it press the key
2. The text “1h” will appear on the screen.
3. By pressing the and keys you can select “2h”, “3h” or “OFF”.
4. At any time during the operation in “Booster” mode you can increase or decrease the
operating time, or cancel the “Booster” function by selecting “OFF”.
HOW TO ACTIVATE AND DEACTIVATE PROGRAMS:
TO ACTIVATE PROGRAMS:
1. Press the key.
2. The “ ► “ indicator will position itself in front of “Programs”. Press the key.
3. The “ ► “ indicator will position itself in front of “ Active”. Press the key.
4. The text “Prog: Off” will be displayed. Press to change the text to “Prog: On” and
then press .
The programmes have now been activated.
HOW TO LOCK AND UNLOCK THE SCREEN:
1. Press the keys and simultaneously for the screen approximately 3 seconds.
CHANGE TEMPERATURE:
To raise or lower the room temperature simply press buttons or until the temperature
indicator displays the desired temperature level. The Farho heater will automatically adjust
the heat emission efciently until reaching the temperature level set.
HOW TO KNOW IF THE HEATER IS CONSUMING OR NOT:
If the heater is consuming, the pre-set temperature indicator on
the display will icker. If it is not ickering, the heater is in the
idle mode.
HOW TO SET THE CLOCK:
1. Press the key .
2. Press the key ONCE, which will make the “ ” indicator position itself in front of
“Conguration”
3. Press the key.
4. The “ “ indicator will now be positioned in front of “Time”. Press the key again.
5. Press the and keys to enter the correct day of the week.
6. Press the key.
7. Press the and keys to enter the correct hour setting.
8. Press the key.
9. Press the and keys to enter the correct minute setting.
10. Press the key.

5
TO DEACTIVATE PROGRAMS:
1. Press the key.
2. The “ ► “ indicator will position itself in front of “Programs”. Press the key.
3. The “ ► “ indicator will position itself in front of “ Active”. Press the key.
4. The text “Prog: On” will be displayed. Press or to change the text to “Prog: Off”
and then press .
The programmes have now been activated.
When programs have been activated, the symbol will come up on the display screen.
HOW TO DISPLAY THE MEMORISED PROGRAMS:
If you wish to see what programs have been memorised, you can display them at any
given time as follows:
1. Press the key.
2. The “ ► “ indicator will position itself in front of “Programs”. Press the key.
3. The “ ► “ indicator will position itself in front of “Active”. Press the key once to position
the “ ► “ indicator in front of “See”, and then press .
4. The “ ► “ indicator will position itself in front of “Mon”. Press the and keys to
position the “ ► “ indicator in front of the day of the week for which you wish to display
the stored program, and then press .
5. Scroll up and down using the and keys to see the stored program. (Remember
that you can press the key at any time to go back to step 4 and choose a different
day of the week to display its program.
CUSTOMISE PROGRAMS:
This model enables you to customise, in a centralised fashion, operating programmes of
radiators so that these meet your heating needs. You can customise programs for every
day of the week up to six operating time slots.
1. Press the key.
2. The “ ► “ indicator will position itself in front of “Programs”. Press the key.
3. Press the key twice. The “ ► “ indicator will position itself in front of “Edit”.
4. Press the key.
5. Press the and keys in order to scroll up and down the list of the days of the week.
In front of each day an empty square is displayed.
6. Upon having the “ ► “ indicator positioned in front of a day of the week which program
you wish to edit, you can select it by pressing . This will cause a cross to appear on
within the square, indicating this day is selected for editing. You can select multiple days
for which you want the same program to apply.
7. Once you are satised that you have selected all the days for which you want the same
program to apply and no others, you can scroll back to the start of the list, by pressing
until the “ ► “ indicator is positioned in front of .
8. Press to go into programming mode.
9. Press once to set the start time of the rst slot to “00:00” (Note: it is strongly advised
that all programs start at “00:00” and end at “00:00”).
10. Press twice.

6
11. Press and to set the desired ending hour for the rst program slot, and then
press .
12. Press and to set the desired ending minute for the rst program slot, and then
press .
13. Press and to set the desired temperature for the rst programming block, and
then press .
14. Repeat steps 10 – 13 until you reach “00:00” as an ending time for your programming
block (Reminder: maximum 6 programming blocks available).
15. If you have programmed less than 6 blocks in total, you need to press and keys
until “--:--“ is displayed as a starting time for the next block, and then press . This
will cause the programs editor to close and the program to be stored. If you press
and hold to exit the programs editor, no changes will be stored.
HOW TO ENTER A TEMPERATURE OFFSET:
This heater allows the user to manually enter a temperature offset for the temperature
probe. This is useful when the heater is located in a particularly exposed or particularly
sheltered location, to correct the temperature reading relative to another relevant location
within the same space.
1. Press the key.
2. The “ ► “ indicator will position itself in front of “Programs”. Press key to position
the “ ► “ indicator in front of “Conguration”.
3. Press the key.
4. The “ ► “ indicator will position itself in front of “Time”. Press the key twice to position
it in front of “Offset”.
HOW TO ENABLE OR DISABLE OPEN WINDOW DETECTION FUNCTION:
TO ENABLE OPEN WINDOW DETECTION:
1. Press the key. The “ ► “ indicator will position itself in front of “Programs”.
2. Press the key once to position the “ ► “ indicator in front of “Conguration”.
3. Press the key. The “ ► “ indicator will position itself in front of “Time”.
4. Press the key once to position the “ ► “ indicator in front of “Window sensor”.
5. Press the key.
6. The text “Wind: Off” will be displayed. Press or to change the text to “Wind: On”.
7. Press . The Open Window Detection function will now be enabled.
TO DISABLE OPEN WINDOW DETECTION:
1. Press the key. The “ ► “ indicator will position itself in front of “Programs”.
2. Press the key once to position the “ ► “ indicator in front of “Conguration”.
3. Press the key. The “ ► “ indicator will position itself in front of “Time”.
4. Press the key once to position the “ ► “ indicator in front of “Window sensor”.
5. Press the key.
6. The text “Wind: On” will be displayed. Press or to change the text to “Wind: Off”.
7. Press . The Open Window Detection function will now be enabled.

7
5. Press the key.
6. The text “Offset: 0ºC” will be displayed. Press and keys to display the offset you
wish to apply.
(Note: this offset can be positive or negative, and is added to the temperature value
obtained by the probe. If you select +5ºC, a probe reading of 15ºC will be displayed as
20ºC, conversely, if you select 5ºC, a probe reading of 15ºC will be displayed as 10ºC).
7. Once you are satised that the displayed value is the one you wish to apply, press
the key. After a few seconds the corrected temperature will be displayed and the
heater will use it to turn on or off.
HOW TO RESET A HEATER:
NOTE: If you reset the EG heater, all of the customised programmes that you may have
stored in the memory will be deleted, as well as time and day of the week settings. Any
programs that have been congured by the user will be replaced by a standard program.
1. Press the key.
2. Press the key once, Which will make the “ ► “ replaced indicator position itself in
front of “Cong”.
3. Press the key.
4. Press the key four times, which will make the “ ► “ indicator position itself in front
of “Reset”.
5. Press the key.
6. The text “Sure: No” will be displayed. Press or to change the text to “Sure: Yes”,
7. Press . The Heater will now be reset.
HOW TO CHANGE THE LANGUAGE:
1. Press the key.
2. Press the key once, this will make the “ ► “ indicator to position in front of
“Conguration”.
3. Press the key.
4. Press the key three times, the “ ► “ indicator will position in front of “languages”.
5. Press the key.
6. Press the & keys to select the desired languages ( English, Spanish, Italian, French,
Portuguese or German)
7. Press the key. The heater will memorise the chosen language.
8. Keep the key pressed to go back to the previous menu.
9. Repeat step 8 again to go back to the main menu.

8
HOW TO SET THE CLOCK:
1. Press the key.
2. Press the key ONCE, which will make the “ “ indicator position
itself in front of “Settings”.
3. Press the key.
4. The “ “ indicator will now be positioned in front of “Time”. Press
the key again.
1. Press the key.
2. Press the key ONCE, which will make the “ “ indicator position
itself in front of “Settings”.
3. Press the key.
4. Press the key ONCE, which will make the “ “ indicator position
itself in front of “Languages”.
5. Press the key.
6. Press the and keys in order to scroll down the menu, and
position the “ “ indicator in front of the desired “Language”.
7. Press the key.
The XP model is the most innovative product at Farho. This heater combines high
technology performance with easy use. Farho. XP models can be programmed in up
to six independent operating periods for each at day of the week and it can also be
controlled from anywhere with its automation model.
The XP-LST has the same characteristics as the XP and therefore, it is operated as
the XP, except the following: the max. surface temperature is limited to 40º Celsius
in order to full a European Regulation that requires limited temperature on heaters
that are to be installed in schools, nurseries and hospitals in order to avoid possible
accidents with children.
The Xana Plus model is controlled by an
intuitive menu, thus greatly facilitating
its use.
In order to Access the menu, simply
press the button “MENU/CANCEL”
and scroll through it by pressing the
buttons “+” and “-“. To go back to the
previous menu, just press “MENU/
CANCEL”.
DESCRIPTION OF THE KEYPAD AND DISPLAY:
SELECT LANGUAGE:
XANA PLUS, XP-LST, XP ULTRA, LPD, Eco-D Ultra
1. TIME.
2. ACTIVATED PROGRAMMES.
3. DAY OF THE WEEK.
4. ROOM TEMPERATURE.
5. DESIRED TEMPERATURE.
1. OPERATION
CONFIRMATION KEY.
2. UP KEY.
3. MENU/CANCEL KEY.
(All menu seltings).
4. DOWN KEY.
1
1
3
4 5
2
2
4
3

9
CHANGE TEMPERATURE:
To raise or lower the room temperature simply press buttons “+” o “-“ until the
temperature indicator displays the desired heat level. The Farho heater will automatically
adjust the heat emission efciently until reaching the temperature level set.
HOW TO ACTIVATE AND DEACTIVATE PROGRAMMES:
TO ACTIVATE PROGRAMMES:
1. Press the key.
2. The “ “ indicator will position itself in front of “Programmes”. Press the key.
5. Press the and keys to enter the correct hour setting.
6. Press the key.
7. Press the and keys to enter the correct minute setting.
8. Press the key.
9. Press the and keys to enter the correct day of the week.
10. Press the key.
BOOSTER MODE:
The “booster” function allows users to set the heater to its maximum performance
during 1, 2 or 3 hours so the room temperature increases rapidly. To activate this feature
users must press simultaneously buttons “OK” and “+” for every hour that they want the
booster mode on. If you want to activate the booster just for one hour press the button
once, if the user wants it to be running for two hours press it twice and for three hours
press it three times. If the user wishes to deactivate the booster feature, the “OK” and
“+” button should be pressed until the display shows the message “BOOSTER OFF”.
HOW TO BLOCK AND UNBLOCK THE KEYPAD:
The XP model has a keypad blocking function to avoid its handling by children or
unauthorized people.
To block the keypad, press the “MENU/CANCEL” button during approximately 4 seconds
until the display shows a “Blocked” message. While the keypad is blocked the heater
will not respond to orders and the screen will show the word “Blocked”.
To unblock the keypad, just press during approximately 4 seconds the same “MENU/
CANCEL” button until the message “Unblocked” shows up.
HOW TO KNOW IF THE HEATER IS CONSUMING OR NOT:
If the heater is consuming, the pre-set temperature indicator
on the display will ick. If it is not ickering, the heater is in
the idle mode.

10
1. Press the key.
2. The “ “ indicator will positionitself in front of “Programmes”.
Press the key.
3. Press the key, which will make the “ “ indicator position itself
in front “Display”.
4. Press the key.
5. Press or in order to scroll down the menu, thus positioning
the indicator “ “ in front of the day of the week for which you
wish to display the programmes. Press the key.
6. Press or in order to scroll down the menu and
7. Display the programmes that have been memorised for the day in
question.
8. Remember that you can always press the key to return to the
previous menu.
1º Day of the week.
2º Time zone (Each day is divided into 6 different time zones).
3º Pre-set temperature.
4º Time zone start time.
5º Time zone nish time.
6º Time zone dividing line.
3. The indicator “ “ will be in front of “Activate”. Press the key. The programmes
have now been activated.
(Note: If on reaching this step the “ “ indicator is positioned in front of the word
“Deactivate” instead of “Activate”, this means that programmes had already been
activated).
TO DEACTIVATE PROGRAMMES:
To deactivate programmes follow the steps given below:
1. Press the key.
2. The “ “ indicator will position itself in front of “Programmes”. Press the Key.
3. The indicator “ “ will be in front of “Deactivate”. Press the key. The programmes
have now been deactivated. (Note: If on reaching this step the “ “ indicator is
positioned in front of the word “Activate” instead of “Deactivate”, this means that
programmes had already been deactivated).
When programmes have been activated, the symbol will come up on the start
menu display screen.
HOW TO DISPLAY THE MEMORISED PROGRAMMES:
If you wish to see what programmes have been memorised, you can display them at
any given time as follow.
Lu 1180C
00:00
07:00
-----------
00:00
07:00
6º
5º
4º
1º 2º 3º

11
1. Press the key.
2. The “ “ indicator will now position itself in front o “Programmes”.
Press the key.
3. Press the key TWICE, thus the “ “ indicator will be positioned
in front of “Edit”.
4. Press the key.
5. Press or in order to scroll down the menu in order to position
the indicator “ “ in front of the day of the week on which you
wish to customise the programmes.
6. Press the key. The “ “ symbol on the display screen to the right
of the selected day should now have turned into the following
“ “ symbol indicating that the particular day has been selected.
7. Repeat Step 5 and 6 until you have selected all days of the week
on which you wish to implement the programme in particular.
8. Press the key until positioning the “ “ indicator in front of
“Accept”.
9. Press the key. A menu will come up showing the time zone
that is being implemented and the word “ON”, which indicates
what time the time zone starts at.
10. Press the and keys to enter the hour required for the time
zone to start.
11. Press the key.
12. Press the and key to enter the minute required for the time
zone to start.
13. Press the key. A menu will come up showing the time zone that
is being implemented and the word “OFF”, which indicates that
time at which the time zone in question nishes should be entered.
14. Press the and keys to enter the hour at which the time zone
is to nish.
15. Press the key.
16. Press the and keys to enter the minute at which the time
zone is to nish.
17. Press the key.
18. Press the and keys to enter the desired operating temperature
for the time zone in particular.
19. Press the key.
20. If you have finished entering all the time zones for this
programme, press the key. If you wish to enter another time
zone, repeat all the steps as of Step 10. Bear in mind that you
have six time zones for each day of the week.
CUSTOMISE PROGRAMMES:
This model enables you to customise, in a centralised fashion, operating programmes of
radiators so that these meet your heating needs. You can to customise your programmes
so these can be adjusted to your heating requirements.

12
1. Press the key.
2. Press the key ONCE, which will make the “ “ indicator position
itself in front of “Settings”.
3. Press the key.
4. Press the key TWICE, which will make the “ “ indicator position
itself in front of “Reset”.
5. Press the key.
6. The radiator will then request conrmation before resetting. Press
the and keys to select “YES” or “NO”.
7. Press the key. If you chose “YES”, the radiator will now be reset.
If the room temperature is lower than the set temperature and the heater is not heating
up, the reason will be one of the following:
• Check if the heater has been plugged in correctly.
• The heater may be working correctly but it hasn´t been turned on for long enough for
the aluminium body to warm up. Check that the set temperature indicator is ickering
and wait for a few minutes.
• If the set temperature is not ickering but the room temperature is is above the pre-
set operating temperature, disconnect the heater, wait for a few seconds and turn it
on again.
• Perhaps you have set the heater operating output and this is not receiving permission
from any central unit to come into operation. If this is the case, you must enter MENU-
>SETTINGS->POWER and press the “+” button until it reaches 0.
• If none of the above work, contact Farho´s Technical Service at 985.514.082
WHY DOES THE HEATER NOT GIVING OFF HEAT?
HOW TO RESET A HEATER:
NOTE: If you reset the XP heater, all of the customised programmes that you may have
stored in the memory will be deleted. If you have a Central Unit Farho or a MI-Farho, if
you reset the heater you must also re-install the automation system.
REPEATER:
This heater can work as a repeater if the signal from the internet module to the heater
is weak.
VOLTAGE:
Only if there is an internet module installed, the user can change the heater´s voltage in
order to limit the whole installation’s consumption.

13
TECHNICAL INFORMATION
MODELS POWER DIMENSIONS WEIGHT
LPR / LPD W width x depth x height kg
3 330 290X350X950 5,8
5 550 450X350X950 8,5
9 675 770X350X950 12,7
11 825 930X350X950 15,5
13 975 1090X350X950 18,7
ULTRA POWER DIMENSIONS WEIGHT
MODELS W width x depth x height kg
4 660 450x58x980 10,3
6 1.000 610x58x980 14,4
8 1.330 770x58x980 15,5
10 1.650 930x58x980 22,7
12 2.000 1090x58x980 26,8
MODELS POWER DIMENSIONS WEIGHT ECG WEIGHT XP
XP/XP LST/ECG W width x depth x height kg kg
3 330 370x(590;58)x(95;98) 7,42 7,6
5 550 530x(590;58)x(95;98) 11,06 11,5
7 770 690x(590;58)x(95;98) 15 15,58
9 990 850x(590;58)x(95;98) 18,76 19,6
11 1220 1010x(590;58)x(95;98) 22,62 23,48
13 1430 1170x(590;58)x(95;98) 26,3 27,64
15 1650 1330x(590;58)x(95;98) 29,36 31,68
You can consult all our manuals on our website
www.farho.com

14
CARE AND MAINTAINANCE:
Under no circumstances should the appliance be covered!.
Let the “DO NOT COVER” warning on the upper face of the radiator serve the user as a
constant reminder. Air must be freely able to enter into contact with all heater surfaces.
Use pH neutral detergents to clean the radiator.
POSITION:
The ideal position for the
heater is to t it away from
any non-insulated wall. If
necessary, the surface’s
insulation should be
increased.
Heaters should not be tted
within the safety protection
area limit in bathrooms
that is stipulated in each
country´s regulations and
the minimum distances
shown on the gure below
should be respected.
Beside a wall
100% yield
With a shelf or sill
above 90% yield
In a recess
85% yield
FITTING:
The Farho heater will be
mechanically secured to the
wall by using the brackets
which have been specially
designed for this purpose
and that are included with
the heater.
FITTING THE RADIATOR
FIG 1
FITTER’S INSTRUCTIONS

15
Farho guarantees the proper and correct functioning of the heater. For user´s safety
before installing and starting off the heater, the user must read the instruction manual.
The guarantee of Farho products, when installed following each country´s legislation
is the following:
VERY IMPORTANT: In order to accredit the guarantee start date the client must have the
purchase bill or the bill issued by the tter upon its installation. Regarding the validity
of this guarantee, when requesting technical intervention in the factory, it is absolutely
essential that the authorised personnel be presented with this certicate along with the
duly completed bill of purchase.
During the FIRST 6 MONTHS after the purchase date, the guarantee covers the repair at
Farho installations of any manufacturing aw or defect and any damages arising of such
defect. During these 6 months, the client may also ask for a replacement free of charge
without having to run with the carriage charges and the labour costs involved. If the
repair is not satisfactory for the client, the holder of the guarantee has the right to have
the item changed for a new one or even chose to return the product and ask for a refund.
During the next 18 months, Farho will cover any replacement without any cost for the
client including carrier and labor costs.
After the second year, any electronic aw can be repaired in Farho´s Technical Service
Department but carrier and labor costs will be charged to the client.
Flaws in the aluminum body such as leaks or paint aws, are covered by the guarantee
meaning that the guarantee holder will not have to cover any labor costs or materials that
need to be replaced. The guarantee for the aluminum body is of 20 years in Spain, 10 years
in other European countries and 5 years in any other country and UK: 15 years | 6 years.
NOTE: Farho is not responsible for damages produced by the possible appearance of
stains on walls and ceilings provoked by dirt, dusty atmospheres or any other unhygienic
circumstances of the premises where the heater is tted.
CAUSES EXCLUDED FROM GUARANTEE:
• Breaks provoked by atmospheric or geological phenomena (frosts, storms, rains…)
as well as those arising from inappropriate voltage.
• Parts or components that have received knocks or bumps during carriage or the tting
operation.
• Cleaning operations of the appliance or parts of it caused by dirt, grease or other
circumstances related to the premises where the appliance has been tted.
• Modications to original Farho products without consulting the factory or using spare
parts that have not been recommended by Farho.
GUARANTEE TERMS AND CONDITIONS
Country Aluminum body Electronics
Spain 20 years 2 years
Europe 10 years 2 years
Rest of the countries 5 years 2 years
UK 15 years 6 years

16
EMAIL:
NAME:
ADDRESS:
TELEPHONE:
NAME:
ADDRESS:
STARTUP DATE:
INSTALLER:
INSTALLER:
INSTALLER’S NUMBER AND SEAL:
DATE OF PURCHASE:
DISTRIBUTOR:
THERMAL RADIATOR FARHO
VERY IMPORTANT:
If you wish to report any incident please
consult factory by calling
Have a look at the manuals in our web
This manual suits for next models
35
Table of contents
Other Farho Heater manuals