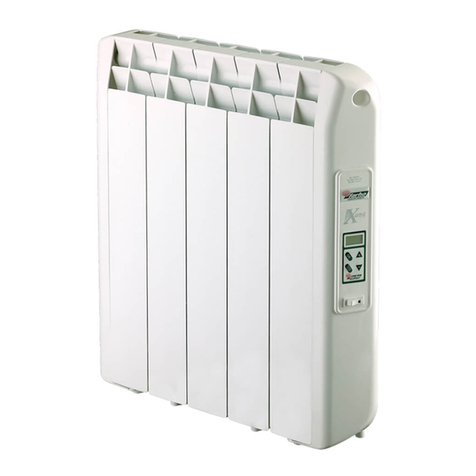
Farho Nova User manual

Manual de Instrucciones.
Toallero Modelos Nova y Nova Little.
Instruction Manual.
Towel Rail Nova and Nova Little Models.
Mode d’emploi.
Porte-serviettes, Nova et Nova Little Modèles.
Manuale di istruzioni.
Scalda-asciugamani Modelli Nova e Nova Little.
Gebrauchsanweisung.
Handtuchtrockner Modelle Nova und Nova Little.
ENG
E
F
D
I
2
10
28
31
40

3
INDICE
............................... ................................ ................................ ................................ .......
............................... ................................ ................................ .................
............................... ................................ ................................ ................................ ....
............................... ................................ .................
............................... ................................ ................................ ...............
............................... ................................ ................................ ....
............................... ................................ ................................ ................................ ........
SEGURIDAD
NORMAS DE CONEXIÓN
INSTALACIÓN
MANUAL BÁSICO DE FUNCIONAMIENTO
INFORMACIÓN TECNICA
MANTENIMIENTO Y LIMPIEZA
GARANTÍA
Manual de Instrucciones.
Toallero Modelos Nova y Nova Little.
E
3
4
5
6
8
8
9
2

GraciasporhaberelegidountoalleroFARHO.Siguiendolasindicacionesdeestemanualde
instrucciones,legarantizamosuncorrectofuncionamiento,paraquepuedadisfrutardelproductoque
haadquiridodurantemuchosaños.Léalodetalladamenteantesdeutilizareltoalleroyguárdeloenun
lugarseguro,leserádeutilidadparacualquierconsulta.
SEGURIDAD
3
3

Laconexiónalareddebeefectuarserespetandolatensiónindicadaenlaetiquetadecaracterísticas
técnicasdelproducto.
Estádiseñadoparasermontadosobreunlugarfijo.Elcircuitodealimentacióndeltoallerodebe
incorporaruninterruptordecorteomnipolarconunaseparacióndecontactosdealmenos3mm.
Elaparatodebeserinstalado,siesposible,alabrigodelascorrientesdeaire(ventanas,puertas)ode
cualquierotroelementoquepudieraperturbarsuregulación.Así,leaportarámayorconfort.
Coloquecualquierobjetoquepuedasuponerunimpedimentoalacirculacióndelaire(muebles,
sillones,etc.)a50cmdelaparato.
IMPORTANTE
-Noinstalarlonuncaconlacajademandosenposiciónelevada.
-Elaparatoverticalnodebeserutilizadohorizontalmente.
-Durantelainstalaciónutilicecalcesparaevitarquelacajadelosmandosapoyeenelsuelo.
NORMAS DE CONEXIÓN
X
4
4

Reglas particulares para cuartos de baño según el
reglamento electrotécnico para baja tensión ITC-BT-27
de septiembre de 2003.
Eltoallerocumpleconlasnormasdeseguridadde
CLASEI.Puedeestarinstaladoenlosvolúmenes2y3,
posicionesAyBsiemprequeserespetenlassiguientes
normas:
-Enelbaño,nuncadebeinstalarsedetalformaquelos
interruptoresuotrosdispositivoseléctricosse
encuentrenamenosde60cmdelabañeraoducha.
Lainstalación,manipulaciónoutilizacióninadecuadadeltoalleroserámotivoinmediatodelarescisión
delagarantíaofrecidasobreelproducto.Lainstalacióndebedeserrealizadaporunprofesional
cualificadouotrapersonaplenamentecompetente.Debeinstalarsesiguiendolascorrespondientes
normasEuropeas.
Asegúresededisponerdelequipamientonecesarioparasuprotecciónpersonalantesdecomenzarla
instalación.Compruebequetienepreparadostodosloscomponentesquefiguranenlacajade
accesoriosyqueeltamañoyacabadosonlosqueustednecesita,antesdecomenzarconlainstalación.
Contenido de la caja (ejemplo ZT y ZX)
Consejos de instalación
INSTALACIÓN
5
5

Paraencender/apagarutilizandolatecla
Eltoallerotiene4modosdefuncionamiento,pulsala
Teclaparaelegirelmododeseado.
•MODOAUTO.
Modoprogramablepara7días,encualquiermomentosepuedevariarlatemperaturadeformamanual
subiendoobajandolatemperaturaconlasteclasy.
•MODOCONFORT.
Mododetemperaturafijodelas24hdeldía,sepuedevariarlatemperaturadeformamanualsubiendo
obajandolatemperaturaconlasteclas+y-.
•MODOECO.
Mododetemperaturafijodelas24hdeldía,nosepuedevariarlatemperatura,tiene3,5℃menosque
latemperaturadeconfort.
•MODOANTI-HIELO.
Mododetemperaturaa7
℃
paraevitarelhielo.
MANUAL BÁSICO DE FUNCIONAMIENTO
DEL TOALLERO
auto
6
6

prog
•AJUSTESDEHORAYDIA.
Paramodificarlahorayeldíamantenerpresionadalatecladurante5seg,aparecerá
seleccionadoeliconodel,utilizalasteclasyparaelegirlahoracorrecta(tienequeestar
parpadeando)ydespuéspulsa,ahorautilizalasteclasyparaelegirlosminutoscorrectos
(tienequeestarparpadeando)ydespuéspulsa,utilizalasteclasyparaelegireldía
correctoydespuéspulsaok.Paravolveralmenúprincipalpulsa3veceslatecla.
•ELECCIONDEPROGRAMAS.
Lasopcionesdeprogramaciónparacadadíason5:
CONFORT(todoeldíaalatemperaturafijadaenelmodoCONFORT).
ECO(todoeldíaalatemperaturafijadaenmodoECO).
P1(todoeldíaalatemperaturadelmodoECOexceptountramohorarioconlatemperaturadelmodo
CONFORT,pordefectovieneprogramadode6:00a22:00entemperaturaCONFORTyelrestoen
temperaturaECO).
P2(todoeldíaalatemperaturadelmodoECOexcepto2tramoshorariosconlatemperaturadelmodo
CONFORT,pordefectovieneprogramadode6:00a9:00yde16:00a22:00entemperaturaCONFORTy
elrestoentemperaturaECO).
P3(todoeldíaalatemperaturadelmodoECOexcepto3tramoshorariosconlatemperaturadelmodo
CONFORT,pordefectovieneprogramadode6:00a8:00,de12:00a14:00yde18:00a23:00en
temperaturaCONFORTyelrestoentemperaturaECO).
Paraelegirlaprogramaciónsemanalmanténpresionado5segundos,cuandoelcursoresté
posicionadoen,presionarlevemente.Lapantallaleiramostrandolaconfiguraciónfijada
paracadadía,paramodificarlapulselasteclasyparaseleccionarentreunadelasopciones
deseadas(CONFORT,ECO,P1,P2yP3),unavezseleccionadalaprogramacióndeseadapulsay
pasaraaldía2yasísucesivamentehastafijarlos7días.
•MODIFICACIONDEPROGRAMAS.
Paramodificarlaprogramaciónpresiona5segundos,cuandoelcursorestéposicionadoen,
presionarlevemente.PresionelasteclasyparaseleccionarP1(1intervalodetiempo
contemperaturadeconfortyelrestotemperaturaeco),unavezseleccionadoP1mantengapresionado
durante5seg,cuandosalgalahoraparpadeandopuedemodificarlausandolasteclasyen
intervalosde30mparaseleccionarlahoradeiniciodeseada,pulseparafijarlahoradefindeseada
yparaguardar.ParamodificarP2(2intervalosdetiempocontemperaturaconfortyelresto
temperaturaeco)sigalospasosanterioresperoseleccioneP2enlugardeP1ymodifiquelahorade
entradaysalidadelas2franjashorariasfijandolashorasdeinicioyfindelosciclospulsadopara
avanzarenlaconfiguraciónigualquesehizoconelP1.ParamodificarP3(3intervalosdetiempocon
modoconfortyelrestomodoeco)sigalospasosanterioresperoseleccioneP3enlugardeP1y
modifiquelahoradeentradaysalidadelas3franjashorariasfijandolashorasdeinicioyfindelos
ciclospulsadoparaavanzarenlaprogramaciónhorariaigualquesehizoconelP1.
•FUNCIÓNBOOST(MARCHAFORZADA).
Presionarenelbotónlatemperaturaprogramadaodeseadasubiráalmáximoduranteeltiempo
programado,60minutosparpadearanpordefecto.Duranteel1erminuto,ustedtienelaposibilidadde
modificarladuracióndelamarchaforzadapresionandoymodificandoeltiempoprogramado
porintervalode5m.ParapararlafunciónBOOSTpulsalateclayvolveráalmenúinicial.
•BLOQUEARTECLADO.
Parabloquearelteclado,sedebepulsarsimultáneamentelosbotonesydurante5seg.El
símboloapareceráenlapantalla,eltecladoestábloqueado.Paradesbloquearelteclado,pulsar
simultáneamenteydurante5seg.Elsímbolodesaparecerádelapantalla.
prog
7
7

•AJUSTESDEUSUARIO.
Paramodificarlosajustespredefinidosdefábricamantengapulsado5Seg,despuéspulse
levemente2veceslatecla,deberíasalirseleccionadoelicono yponerUSErenlapantalla,
pulseparaverlosparaverparámetrosdefinidosdefábrica,paramodificarlospulseyen
losdiferentesajustesparamodificarlos,pulseparaguardarloscambiosypasaralsiguienteajuste.
Losajustessonlossiguientes:
LuzdeFondo.Modosdeiluminación:L1(RetroiluminaciónTemporal:Pantallasealumbracuandose
presionaunatecla),L2(RetroiluminaciónPermanente:Pantallaalumbradasiempre)yL3(Enesteajuste
lapantallafuncionarasegúnelmodoL1,estemodovienepredeterminado)
NivelDescensoEconómico.Labajadaestápreajustadaa-3,5ºCconrelaciónalatemperatura
programadaCONFORT,sepuedevariarde-1ºCa-8ºCenintervalosde0,5ºC.Latemperatura
programadaECOnosuperaranuncalos19ºC.
TemperaturaProgramadaAntihielo.Elapartovienepre-ajustadoa7ºC,sepuedevariarlatemperatura
antihielode5ºCa15ºCconintervalosde0,5ºC.
LimitacióndelaTemperaturaprogramadaConfort.Latemperaturamínimapuedevariarsede7ºCa
15ºCporintervalosde1ºC,pordefectomarca7ºC.Latemperaturamáximapuedevariarsede19ºCa
30ºCporintervalosde1ºC,pordefectomarca30ºC.
DuraciónMáximaMarchaForzada.Laduraciónmáximadelamarchaforzadaestápredeterminadaen
60minutos.Puedevariarlade30ª90,porintervalosde30minutos.
Temperaturaambienteparaparadaautomáticadelamarchaforzada.Estapredeterminadaa39ºC,
pudiendovariarlade25ºCa39ºCporintervalosde1ºC.
1.Potencia:230V~50Hz.7.FunciónBoost(Marchaforzada)1y2horas.
2.Potenciadelaresistencia:400,800ó1.200W8.Modosdetrabajo:Confort,económicoyanti-hielo.
3.Temperaturadefuncionamiento:de70a300C9.Normativasbajatensión:
4.NiveldeProtección:ClaseI.CEEn.93/68yCEEn.89/336porlacompatibilidad
5.Conexiónalradiador:G1/2”electromagnética.
6.SondaelectrónicadetemperaturaNTC.CEEEN60335-1yEN60335-2-43.
Limpiedeformaperiódicalasuperficiedeltoalleroconunpañolimpioysuave,noutiliceproductos
abrasivosocorrosivos.Detengaeltoalleroantesdeprocederasulimpieza.Paralalimpiezadelacaja
conlosmandos,utiliceunpañoseco(sindisolvente).
Graciasalasaltasprestacionesdesusmaterialesyalacalidaddesutratamientosuperficial,sutoallero
estáprotegidodelacorrosión.
INFORMACIÓN TECNICA
MANTENIMIENTO Y LIMPIEZA
8
8

Debeenviarsutoalleroalserviciodegarantía,remítaloaldistribuidor/instaladordondeloadquirió.En
elcasodeSilesurgendificultades,FARHOdisponedeServiciodeAsistenciaTécnica:info@farho.com.
FARHOgarantizaqueesteproductonopresentaningúndefectomaterial,nidediseñonidefabricación
enelmomentodesuadquisiciónydurantelos5añosenelaceroyestanquidad,y2añosen
componenteseléctricosyelectrónicos.
Siduranteelperiododegarantíaeltoalleronofuncionacorrectamenteconunusonormal,oseafallo
dediseño,delosmaterialesodefabricación,FARHOrepararáosustituiráeltoallero,segúnconsidere
oportuno,bajolascondicionesqueseestipulanacontinuación:
-LagarantíasólosefacilitasisepresentaelCertificadodeGarantíaemitidoporeldistribuidoro
instaladoralcompradorolafacturadecompra.Debefigurarenlagarantíaelnºdeserieymodelodel
toalleroyfechadecompradelmismo.FARHOsereservaelderechoderechazarelserviciodegarantía
cuandoestainformaciónhayasidoretiradaorectificadatraslacompraoriginaldelproducto.
-Elreciboofacturaoriginalsóloseaceptarácomopruebadecompracuandosepresenteanteel
distribuidoroinstaladorquevendióelproducto.
Lagarantíasóloseaplicaráaloscasosrelativosadefectosdematerial,diseñoodefectodefabricación,
enningúncasocubredañosdeltoalleroporlossiguientes:
-UsoincorrectodelproductoparafinesnoadecuadososinrespetarlasinstruccionesdeFARHOacerca
delusoymantenimientodeltoallero,asícomounaincorrectainstalaciónousodelproductodeforma
queincumplalosestándarestécnicosdeseguridadvigentes.
-Reparacionesrealizadasportalleresdeservicionoautorizadosolaaperturadeltoalleroporpersonas
noautorizadas.
-AccidentesimprevistosqueseescapandelcontroldeFARHOcomorayos,incendios,riadas,
desórdenespúblicos,etc.
-Lasreparacionesosustitucionesquecontemplaestagarantía,nopermitenlaextensiónninuevo
comienzodelperiododelagarantía.
-Lasreparacionesosustitucionesquecontemplanestagarantíasecumpliránconunidades
reacondicionadasfuncionalmenteequivalentes.Laspiezasocomponentesdefectuososretirados
pasaránaserpropiedaddeFARHO.
-Estagarantíanoafectaalosderechoslegalesdelcompradorprevistosporlalegislaciónnacional
vigente,nilosderechosdelcompradorcontralosdeldistribuidoroinstaladorquesurjanapartirdel
contratodecompraventa.
-Enausenciadeunalegislaciónnacionalvigenteaplicable,estagarantíaserálaúnicaproteccióndel
comprador.FARHO,susoficinasydistribuidoreseinstaladoresnoseresponsabilizarándeningúntipo
dedaños,tantofortuitoscomoaccidentales,derivadosdeinfringircualquiernormaimplícita
relacionadaconesteproducto.
DirectivaEuropea2012/19/UE
EnbasealaDirectivaEuropea2012/19/UEdeResiduosdeAparatosEléctricosyElectrónicos(RAEE),
dichosaparatosnopuedenserdepositadosenloscontenedoresmunicipaleshabituales;tienenqueser
recogidosselectivamenteparaoptimizarlarecuperaciónyrecicladodeloscomponentesy
materialesquelosconstituyen,yreducirelimpactoenlasaludhumanayelmedioambiente.
ElsímbolodelcubodebasuratachadofiguraentodoslosproductosFARHOpararecordaral
consumidorlaobligacióndesepararlosparalarecogidaselectiva.
Contacteconlaautoridadlocaloconelvendedorparainformarseenrelaciónalacorrecta
eliminacióndesuaparato.
GARANTÍA
9
9

components into their systems to drawup, for use by their customers, instructions for installation and use.
ance, be approved by an accreditedlaboratory, to ensure that the final appliance meets applicable standards.
TABLE ON CONTENTS
Overview ................................................................................................................................................................... 11
Product plus points .............................................................................................................................................................................11
Operation .................................................................................................................................................................. 12
Diagram.......................................................................................................................................................................................... 12
Power ON/Standby mode
....................................................................................................................................................... 12
Selecting the operating mode ............................................................................................... . .. .............................................. 12
Boost feature .................................................................................................................................................................................. 13
Gauge consumption, energy savings............................................................................................................................................... 13
Setting the comfort mode temperature .......................................................................................................................................... 14
Consumption indication accumulated in kWh, energy savings........................................................................................................... 14
Child anti-tamper, keypad lock/ unlock ............................................................................................................................................. 14
7 day and daily programme integrated, energy savings .................................................................................................................... 14
Open window detection, energy savings.......................................................................................................................................... 16
Information about remote control by pilot wire............................................................................................................................................. 17
Information about priorities between the different modes .............................................................................................................. 18
Optional: remotely management by infrared remote control .............................................................................................................. 18
User settings........................................................................................................................................................................ 19
Access ........................................................................................................................................................................................19
Backlight setting ................................................................................................................................................................................. 19
Setting the Eco mode temperature lowering-level ............................................................................................................................... 19
Setting the Frost protection temperature ........................................................................................................................................ 19
Comfort setpoint temperature limit ............................................................................................................................................................ 20
Setting of the maximum duration of authorised Boost ............................................................................................................................ 20
Setting of the maximum ambient temperature for the automatic stop of the Boost ................................................................................. 20
Setting the temperature unit ............................................................................................................................................................................. 20
Restoring factory settings ............................................................... .................................................................................................... 21
Installer settings.................................................................................................................................................................. 21
Access ........................................................................................................................................................................................21
Open window detection, activation/ deactivation of the Auto mod e .. ........................................................... ............................. .. 22
PiN cod e lock ........................................................................................................................................................................... 22
Restoring factory settings ................................................................................................................................................................ ... 23
Expert settings..................................................................................................................................................................... 24
Access ........................................................................................................................................................................................24
Ambient temperature sensor adjustement ........................................................................................................................................... 24
Setting the power ............................................................................................................................................................................ 25
Restoring factory settings ................................................................................................ ................................................................ ... 25
Load shedding and power cut ........................................................................................................................... 26
Load shedding by pilot wire only................................................................................................................................................................26
Other remotely management by power shutdown.............................................................................................................................. 26
In case of power cut, backup ................................ ..................................................................................................................... 26
Fitting and connections ............................................................................................................................................. 26
Assembling of the controller on to the towel rails ......................................................................................................................................... 26
Technical information ................................................................................................................................................ 27
Product codes............................................................................................................................................................ 27
2
12
Instruction Manual.
Towel Rail Nova and Nova Little Models.
ENG
10

OVERVIEW
Range of e lectronic PID control unit for towel rails, p rogramma-
ble digital control, with p ilot wire, white or g rey.
PRODUCT PLUS P OINTS
-
Open window detection: Automatic switching to frost protec-
tion m ode when t he d evice detect a s ignificant d rop in t em-
perature.
-
7 day programme: you have t he o ption, f or e ach day of t he
week, of a ssigning f ive different program profiles.
-
Child anti-tamper: The c ontrol p anel c an b e locked, making
changes impossible.
-
Special safety f or s ocial or p rivate rental housing:
-
Limits o f the adjustment r ange o f the Comfort setting t em-
perature.
-
PIN code l ock of s ettings reserved f or p rofessionals.
-
A safety feature prevents t he room temperature from getting
too high when in Boost mode. Internal protection against heat-
ing anomalies
-
Active memory: Permanent backup o f the whole of s ettings
and programming, b ackup date a nd t ime of 3 hrs typical.
-
Two positions for output c able - vertical d uring transportation,
horizontal o nce it is fitted.
-
Special O-ring s upplied in s achets o f 50 i n each b ox.
-
An i ncorporated temperature sensor, which can not be a c-
cessed f rom the outside - product is m ore robust w hen you are
installing i t.
-
38mm thick – this makes packing them with straight-"ladder"
towel rails easier.
-
Electronic PID control with microprocessor.
-
A safety feature p revents t he room temperature from getting
too high when i n Boost mode.
- A zero-voltage control device reduces electromagnetic inter-
ference NF p erformance * ** c ompatible.
-
Setting temperature can be viewed in all operating modes.
-
Help for the v isually-impaired: the appliance emits sound
beeps which indicate t hat it i s switching from S tandby Mode
to a n active operating m ode.
-
Ergonomic to s et: The d isplay i s inclined a nd w hite b ack-light
(depending on version) t o make s ettings easier to access and
view. Setting t he module is s imple, straightforward a nd intui-
tive.
-
Boost: Adjustable u p 90 m inutes, increases the speed at w hich
your b athroom heats up a nd also allows d amp clothes and
towels t o dry quickly.
-
Infrared remote control (optional): supplied with a wall mount
and enables you to r emotely control your t owel r ails.
-
An integrated water-removal system - very unlikely that water
will a ccumulate inside t he control b ox, even i f water gets into
it a ccidentally ( meaning increased u ser safety).
-
Gauge consumption: Automatic indication o f the level of c on-
sumption a ccording t o the setting t emperature.
-
Energy consumption indication: posting of the estimated
amount o f energy c onsumed in k Wh s ince t he l ast reset to 0 o f
the energy m eter.
11

4
In Automatic Mode, the device will
automatically change from Comfort
mode to Eco mode according to
the
established programme.
OPERATION
DIAGRAM
•
Buttons overview
POWER ON/STANDBY MODE
Power on feature
Press the
button to put the device in operation, in Auto
mode.
beep beep
1
Infrared receiver
2
Button power on/standby mode
3
Selecting operating modes
Plus and minus buttons, used to set temperatures, time, date and
2 programmes
Save settings
Boost
•
Indicators overview
Help for the visually impaired: sound signals
Thedevicemakes 2 short beeps to notify that it is in operation,
in Auto mode.
Standby mode
This function allows you to stop the heating in summer, for ex-
ample.
Press the
button to put the device in standby mode.
beep
Boost indicator light
2
Gauge consumption
3
Heating indicator
4
Days of the week (1=Monday … 7= Sunday)
5
Setting temperature
6
Open window detection indicator
7
Keypad locked
8
Radio transmissionindicator
9
Operation modes:
Auto mode
Comfort mode
Eco mode
Frost protection mode
Time and date setting mode
Programming mode
Settings
Help for the visually impaired: sound signals
The device makes 1 short beep to notify that it is in standby
mode.
SELECTING THE OPERATING MODE
The button allows you to adapt the oper-
ating schedule of your device to your needs,
depending on the season, whether your home is
occupied or not.
Press the
button several times to select the
required mode.
Mode sequence
:
Mode overview
Display
Important: In Auto, Comfort, Eco and Standby mode, back-
light turns off automatically after 20 seconds if no buttons are
pressed.It will be necessary toreactivateitbypressingone of
the keypad buttons before making settings.
Note
Beforecarryingout anysettingprocedures,ensure that
the keypad is indeed unlocked (see page 6).
3 different cases depending on your set-up
:
7 day and daily programme
Your device has been programmed and is executing Comfort and Eco
modeordersin line with the settingsand time periods youhave selected
(see "7 day and daily programme integrated" chapter page 7).
4
4
12

5
Mode overview
Display
Programming by pilot wire
If you do not want to use the programming feature, the deviceˇs
default setting is non-stop Comfort for 7 days a week, you do not
have to change any settings. Orders sent by the pilot wire will only
be applied in Auto mode, thus your device will automatically receive
and apply the programmed orders sent by your power manager or
your time switches (see Information about remote control by pilot wire
page 9).
After 1 minute, the Boost count begins and the time is running,
minute by minute.
Comment: After 1 minute, you can modify temporarily the du-
ration: it will be valid only for this active Boost and therefore
non-recurring.
The Boost can stop for 2 different reasons:
-
Anorder"Stop"hasbeensentbyyourenergymanagerthrough
the pilot wire:
if the 7 day and daily programme is not enabled or no orders are
being sent by pilot wire, then your deviceˇs factory settings mean that
it will operate in nonstop Comfort mode, 7 days of the week.
The device stops, −− appears. The cursor moves above auto.
When the order Comfort will be sent, the device will be restarted
until the count end.
-
If the ambient temperature reaches the maximal Boost
temperature during thecount:
Restoring factory settings See page 13.
BOOST FEATURE
Important:
the Boost mode can be enabled at any time, what-
ever the current operating mode (Auto, Comfort, Eco or Frost
protection).
To activate Boost mode, press
, the desired temperature
setting will be set at maximum for the time period you request.
60 minutes display will flash by default.
- First press = Boost.
Duringthefirstminute:the boostsymbol and the heating indica-
tor appear and the duration count flash.
Duringthefirstminute, you can modify theBoostduration from 0
to the maximal authorised duration of the Boost, such as
defined during the user settings (see page 12 for more details)
by intervals of 5 minutes (or more quickly by push superior to
2 seconds) by pressing
and
. This modification will be
saved and effective for the next Boost.
The device switches off but the Boost mode is always active :
the count is always displayed, the Boost symbol and the heat-
ing indicator flash on the display. When the temperature drops
under the maximal authorised temperature, the device will be
restarted until the count ends.
- Second press = Boost cancellation.
The cursor moves above the previous active mode and the set-
ting temperature appears.
France’s Agency for Environment and Energy Management
(ADEME) recommends a Comfort setting temperature lowerr or
equal to 19°C.
In the device display, a selector indicates the energy comsump-
tion level by positioning it in front of the colour: red, orange or
green. So, depending on the setting temperature, you can
choose your level of energy usage. As the temperature setting
increases, the consumption will be higher.
Thegaugeappearsin Auto,Comfort, Eco and Frost protection
modes and whatever the temperature level.
GAUGE CONSUMPTION, ENERGY
SAVINGS
Non-stop Comfort mode. The device
will operate 24 hours a day to achieve
the temperature which has been set
(e.g. 19°C). The Comfort mode tem-
perature level can be set by the user
ature page 6).
Eco mode
Eco, which means the Comfort Mode
you to lowerthe temperature without
perature.
es (between 2 and 24h ) and during
the night.
This mode enables you to protect
your home against the effects of cold
you will be away from your home for a
long time (more than 5 days).
C-Redcolour
High Temperature
level:it isadvisa-
bletosignificantly
reduce the
setting
temperature.
Setting tempera-
ture > 22°C
When the setting
temperature is
higher than 22°C
B - Orange colour
Average temper-
ature level: it is
advisable
to slightly reduce
the setting temper-
ature.
19°C < Setting
temperature Ç
22°C
Whenthesetting
temperature is
higher than 19°C
andlower or
equal
to 22°C
5
13

6
1
Keypad unlock
To unlock the keypad, press the and
buttons hold
them down for 10 seconds again. The padlock symbol
disap-
pears from the display, keypad is unlocked.
When keypad is locked, only the key
is active.
If the device is on Standby mode when the keypad is
locked, you have to unlock it for the next heating on to
access the setup.
Youcan access the Comfort temperature set up from the Auto
and Comfort Mode. It is preset to 19°C.
Using
and
you can adjust the temperature from 7°C
to 30°C by intervals of 0.5° C.
Note:you can limit the Comforttemperature,seepage12for
more details.
In this mode, you have the option of programming your device,
by setting one of the five programmes on offer for each day of
the week.
Access to the programming mode
From Auto, Comfort, Eco or Frost protection mode, press
for 5 seconds to enter into the programming mode.
Schematicsequence ofprogramming settings:
Setting day andtime
Inthis mode, you can set dayand time to programyourdevice
in line with your needs.
1-
From Auto, Comfort, Eco or Frost protection mode, press
for 5 seconds.
The cursor moves to the setting day and time mode.
It is possible to see the estimation ofenergy consumption in kWh
since the last reset of the energy meter.
Display of the estimated power consumption
To see this estimation, from Auto,
Comfort, Eco or Frost protection
mode, then press
.
To exit the display mode of
consumption: press
or
, the
device is automatically in the previous active mode.
Resetting the energymeter
To reset the energy meter, from Auto, Comfort, Eco or Frost pro-
tection mode, then proceed as follows.
1-
Press
.
2-
Press simultaneously
and
for more than 5 seconds.
To exit resetting the energy meter, press
or
,the de-
vice is automatically in the previous active mode.
Keypad lock
To lock the keypad, press the
and buttons and
hold them down for 10 seconds.
The padlock symbol
appears
on the display, the keypad is
locked.
2-
Select using
or
. The two hour figures will flash.
Thehourswill scroll quickly, if you press the
or
and
hold them.
Save by pressing
.
3-
The two minute figures will flash.
Select using or .
Save by pressing .
CHILD ANTI-TAMPER,
KEYPAD LOCK/ UNLOCK
1 2 3 4 5 6 7
CONSUMPTION INDICATION
ACCUMULATED IN KWH, ENERGY
SAVINGS
7 DAY AND DAILY PROGRAMME
INTEGRATED, ENERGY SAVINGS
SETTING THE COMFORT MODE
TEMPERATURE
Setting tempera-
A - Green colour
ture Ç 19°C
When the setting
Ideal temperature.
temperature is
lowerorequalto
19°C
6
14

7
1
1
1
4-
The cursor above the number 1 (which represents the
Monday) will flash. Select the date using
or
.
Save by pressing
.
2-
Press or . The cursor moves above prog.
5- To change and/or allocate programmes press . To exit
the setting the time and day mode, press
3 times.
Choices programmes
Schematic sequence of programmes:
3-
With or , select P1.
P1 will flash. Press
for 5 seconds to make changes.
Your device’s default setting is non-stop Comfort for 7 days a
week.
1 2
5 sec.
Programmes overview
-
Comfort: your device will operate in Comfort mode, 24 hours a
day, as regards each day selected.
Note: You can set the Comfort mode temperature to the tem-
perature you require (see Setting the comfort mode tempera-
ture page 6).
-
Eco: The device will operate 24 hours a day in Eco mode.
Note: You can set the temperature-lowering parameters (see
Setting the Eco mode temperature lowering-level page 11).
-
P1: your device will operate in Comfort mode from 06:00 to
22:00 (and in Eco mode from 22:00 to 06:00).
-
P2: your device will operate in Comfort mode from 06:00 to
09:00 and from 16:00 to 22:00 (and in Eco mode from 09:00 to
16:00 and from 22:00 to 06:00).
-
P3: your device will operate in Comfort mode from 06:00 to
08:00, from 12:00 to 14:00 and from 18:00 to 23:00 (and in Eco
mode from 23:00 to 06:00, from 08:00 to 12:00 and from 14:00
to 18:00).
Potential modifications of programmes
If the default time schedules for the P1, P2 and P3 programmes
does not suit your routines, you can change them.
Modifying the P1, P2 or P3 programmes.
If you modify the time schedules for the P1, P2 or P3 programmes,
the schedules will be modified for all the days of the week for
which P1, P2 or P3 had been set.
1- If you just set the time and day, go to step 2.
FromAuto,Comfort,Eco orFrostprotectionmode,press
for 5 seconds.
When the cursor moves above the setting time symbol
,
press shortly.
4-
The P1 start time (which by default is 06:00) will flash.
Using
or
, you can change this time, by increments
of 30 minutes.
Save by pressing
.
5-
TheP1 endtime(whichbydefaultis22:00)willflash.Using
or
,youcan changethistime,by incrementsof30
minutes.
Save by pressing
.
6-
Press
to exit the programmingModeandreturntoAuto
Mode.
Note: without action on the keys, it will return to Auto after a few
minutes.
7
15

8
1
1
1
Choices and allocation programmes
1- If you just set the time and day, the cursor moves automati-
cally under PROG.
From Auto, Comfort, Eco or Frost protection mode, then press
for 5 seconds. When the cursor positionned under the
set time symbol
, press
again.
5- Once you have chosen a programme for each day, confirm
your selection by pressing
. The days of the week will suc-
cessively scroll on display with the programmes that you set
for them (P1, P2, P3, CONF or ECO).
ToexittheProgrammingmode,press
twice.
Viewing the programmes that you have selected
- From Auto, Comfort, Eco or Frost protection mode, press
for 5 seconds. Press
twice, the programme for each day
Prior information:
display area
Correspondence days /
numbers
of the week (Comfort, Eco, P1, P2 or P3) will scroll on display in
front of you.
- Toexit the programme viewing mode, press
twice.
Manual and temporary exemption from a running
programme
This function allows you to change the setting temperature tem-
porarily until the next scheduled change in temperature or the
transition to 0:00.
The days of the week will scroll on display with the programmes
that you set for them, meaning Comfort
‰2÷)
every day.
Example:
1-
The device is in Auto mode, the running programme is Eco
15,5°C.
2- Press
or
.
The programme set for day 1 (1= Monday, 2 = Tuesday, etc.)
will flash.
2-
By pressing
or
, you can change temporarily the
desired temperature up to 18°C for example.
3-
Chose the programme you want for this day with
or
.
Save by pressing
.
Note: The cursor corresponding to the operating mode, i.e Eco
mode in our example, is blinking during the duration of the tem-
porary derogation.
3-
This change will be automatically cancelled at the next
change of programme or transition to 0:00.
4-
The programme assigned to the second day of the week
(Tuesday) will flash.
Repeat the procedure described previously (in point 3) for
each day of the week.
Important information about the open window
detection
Important: the open window detection is sensitive to temper-
ature variations. The device will reactto the window openings
in accordance with different parameters: temperature setting,
rise and fall of temperature in the room, outside temperature,
location of the device...
If the device is located close to a front door, the detection
may be disturbed by the air caused by opening door.If this is a
problem, we recommend that you disable the automatic mode
OPEN WINDOW DETECTION, ENERGY
SAVINGS
Monday
1
Tuesday
2
Wednesday
3
Thursday
4
Friday
5
Saturday
6
Sunday
7
8
16

9
open window detection (see page 14). You can, however, use
the manual activation (see below).
•
Overview
Yourdevicecan be controlled by a central control unit through
apilotwire,inwhichcasethedifferentoperating modeswillbe
remotely enabled by the programmer.
You can only control the device by pilot wire in the Auto mode.
In the other modes, the orders transmitted by the pilot wire will
not be executed.
In general, a pilot wire control system makes it possible to im-
pose externally a lowering of the temperature setpoint, com-
bined with the internal programming.
If several lowering requests appear simultaneously, priority is giv-
en to the lowest temperature setpoint, thus maximizing savings
(see information on priorities for different modes on page 10).
When a signal is sent from the pilot wire, the self learning optimi-
zation function is suspended.
Below the different views of the display for each order sent by
pilot wire:
Overview
Lowering temperature cycle by setting frost protection dur-
ing ventilation of a room by opened window. You can access
the open window detection from the Comfort, Eco and Auto
modes. Two ways to enable the detector:
- Automatic activation, the lowering temperature cycle starts as
soon as the device detects a temperature change.
Pilot wire = Comfort Pilot wire = Eco
Comfort- 3,5°C
Pilot wire = Eco - 1
Comfort - 1°C
- Manual activation, the cycle of lowering temperature starts by
pressing a button.
Automatic activation (factory settings)
To disable this mode, see page 14.
The device detects a temperature fall. An opened window, a
door to the outside, can cause this temperature fall.
Pilot wire = Eco - 2
Comfort - 2°C
Pilot wire = Boost
Pilot wire = Frost
protection
Pilot wire = Stop
(Standby mode)
Note: The difference between the air from the inside and the
outside must cause a significant temperature fall to be percep-
tible by the device.
This temperature drop detection triggers the change to Frost
Protection mode.
Manual activation
By pressing
for
more than 5 seconds,
the device will switch
on Frost protection
mode.
Exemption to an order coming from a pilot wire
external programmer
Thisfeature allows youtomodifytemporarily thesettingtemper-
atureuntilthenextordersentbythecentralcontrolunit or the
transition to 00:00.
Example:
1-
The device is in Auto mode. The central control unit sent an
Eco order 15,5°C.
Frost protection digital meter
When the device performs a lower temperature cycle due to
opened window, a meter appears on the display to show the
cycle time.The counter is automatically reset at the next time
to Frost protection by opened window (automatic or manual
activation).
Stop the Frost protection mode
Bypressingonebutton,youstop the Frost protection mode.
Note: if a temperature rise is detected, the device may return
to the previous mode (active mode before the open window
detection).
2-
By pressing
or
, you can change temporarily the
desired temperature up to 18°C for example.
Note: The cursor corresponding to the operating mode, i.e Eco
mode in our example, is blinking during the duration of the tem-
porary derogation.
INFORMATION ABOUT REMOTE CON-
TROL BY PILOT WIRE
location
= another location
10
17

18

10
3-
This modification will be automatically cancelled at the next
ordersent bythecentralcontrolunitor thetransitionto00:00.
Your towel rails can be managed by a remote control with in-
frared transmissionthrough its IR receiverlocatedon the front of
the controller.
Diagram
Principe
In Comfort, Eco and Frost protection modes, only orders of the
open window sensor will be considered.
In Auto mode, the device can receive different orders coming
from :
-
7 day and daily programming integrated (Comfort or Eco
orders);
-
6-order pilot wire, if connected to central control unit;
-
Open window detector.
In general, it is the lowest received order which prevails except
when the pilot wire is connected to an energy management
system, in this case the orders of the pilot wire take priority.
-
If an open window is detecting, switching to frost protection
takes precedence unless a load shedding order is present on
the pilot wire.
-
The Boost activation will take precedence over others orders
received except when the standby (stop) order is present on
the pilot wire, the device will switch off and the Boost will be not
activated.
Display of the ambient temper-
ature
Boost: activation of the boost
Selection of the Auto, Comfort,
Eco, Frost protection modes
Adjustment of the setting
temperature desired and the
boost duration
Note: the buttons
,
, and
have the same features as the buttons
on the controller.
Operation
Position the remote control toward the infrared receiving
window of the device.
Check that there is no obstacle between the remote control
and the infrared receiver to disturb the transmission.
•
Examples
7 day and daily programming
= Comfort
Pilot wire 6 orders
= Eco
Eco
7 day and daily programming = Eco
Pilot wire 6 orders
= Stop (standby mode)
Open window detector = Frost protection
Standby mode
INFORMATION ABOUT PRIORITIES BE-
TWEEN THE DIFFERENTMODES
OPTIONAL: REMOTELY MANAGEMENT BY
INFRARED REMOTE CONTROL
11
19

12
10- Press
or
to display the desired duration.
You can limit the setting temperature range by introducing a
maximum and / or minimum setting, preventing unintentional
changes in temperature.
•
Low temperature limit
Locking of the setting range using a minimum temperature stop,
preventing the temperature from being set below that temper-
ature.
The minimum setting is preset to 7°C. You can adjust from 7°C to
15°C by intervals of 1°C.
7-
To change the minimum temperature setting, press
or
then save by pressing
.
If you do not want to change it, press
:thedevice chang-
es automatically to set the maximum setting. To exit the user
settings, press
twice.
•
High temperature limit
Locking of the setting range using a maximum temperature in-
crease, preventing the temperature from being set above that
temperature.
Themaximum settingispresetto30°C.You canadjustfrom19°C
to 30°C by intervals of 1°C.
8-
To change the maximum temperature setting, press
or
.
To save and move automatically to the next setting, press
. To exit the user settings, press
twice.
The maximum duration of Boost is preset at 60 minutes. You can
adjust it from 30 to 90 minutes by intervals of 30 minutes.
9-
The Boost symbol and the heating indicator appears on the
display and the preset duration of 60 minutes flash.
11-
To save and move automatically to the next setting, press
.
To exit the user settings, press
twice.
When the Boost is enabled, the device has to heat the room
until the temperature limit: the maximum ambient temperature.
When it is reached, the Boost stops automatically.
It is preset at 35°C, you can adjust it from 25°C to 39°C by inter-
vals of 1°C.
TheBoostsymboland the heating indicatorappearonthedis-
play and the maximum temperature flashes.
12-
You can set the Boost maximum temperature by pressing
or
from 25°C to 39°C by intervals of 1°C.
13-
To save and move automatically to the next setting, press
. To exit the user settings, press
twice.
SETTING THE TEMPERATURE UNIT
The pre-set temperature unit is degrees Celsius. This setting can-
not be changed on this version.
14-
Tomove automaticallyto the nextsetting, press .Toexit
theusersettings,press
twice.
SETTING OF THE MAXIMUM DURATION
OF AUTHORISED BOOST
SETTING OFTHE MAXIMUM AMBIENT
TEMPERATURE FOR THE AUTOMATIC
STOP OF THE BOOST
COMFORT SETPOINT TEMPERATURE
LIMIT
12
20
This manual suits for next models
2
Table of contents
Languages:
Other Farho Heater manuals
Popular Heater manuals by other brands

Remington
Remington HH-400T-KFA User's manual & operating instructions

Beper
Beper RI.094 use instructions

THOMSON
THOMSON FIFTY THBDH07VN instruction manual

Vortice
Vortice SCALDATUTTO CLASSIC FH-VO Instruction booklet

Kusters
Kusters GE Series instruction manual

Dimplex
Dimplex Winterwarm WWFH20E instruction manual

Fandis
Fandis TRT-10A230V-NO Assembly instructions

Bimar
Bimar HF198 Instruction booklet

Toyotomi
Toyotomi HC-190 Installation and operation instructions

Flexiheat
Flexiheat ELIS B-W-100 manual

Mor Electric Heating
Mor Electric Heating 303 SERIES Installation and operation instructions

Trumatic
Trumatic S 3002 P installation instructions