manuals.online logo
Brands
  1. Home
  2. •
  3. Brands
  4. •
  5. Costway
  6. •
  7. Heater
  8. •
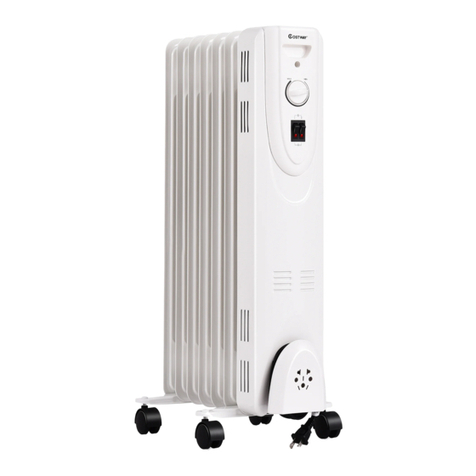
  9. Costway EP24150 User manual

Costway EP24150 User manual

www.costway.com
THIS INSTRUCTION BOOKLET CONTAINS IMPORTANT SAFETY INFORMATION. PLEASE READ AND KEEP FOR FUTURE REFERENCE.
Visit us: www.costway.com
Follow Costway
Please give us a chance to make it right and do better!
Contact our friendly customer service department for help first.
Replacements for missing or damaged parts will be shipped ASAP!
USER’S MANUAL
OIL FILLED RADIATOR
EP24150
2
www.costway.com
Contact Us!
Do NOT return this item.
Contact our friendly customer service department for help first.
E-mail
US: cs.us@costway.com
UK: cs.uk@costway.com
Before You StartBefore You Start
Please read all instructions carefully.
Retain instructions for future reference.
Seperate and count all parts and hardware.
Read through each step carefully and follow the proper order.
We recommend that, where possible, all items are assembled near to the
area in which they will be placed in use, to avoid moving the product
unnecessarily once assembled.
Always place the product on a flat, steady and stable surface.
Keep all small parts and packaging materials for this product away from
babies and children as they potentially pose a serious choking hazard.
3
www.costway.com
4
www.costway.com
5
www.costway.com
when the heater has been on a short while.
YL-B08 Series
ASSEMBLY INSTRUCTIONS
The heater is packaged with the feet unattached. You must attach them before operating the heater.
WARNING: Do notoperate without feet attached. Do operate the heater only in upright position
(feet on the bottom, controls on the top), any other position could create a hazardous situation.
1. Place the radiator body upside-down on a scratch-free location, make sure it is stable and will not fall.
2. Screw off the wing nuts from the U-shaped bolt provided, attach the U-shaped bolt to the U-facing
flange between first and second fins (near the front cover).
3. To attach the castor mounting plate to the radiator body, you should insert the threaded ends of the U
bolt in the holes on the castor mounting plate.
4. Screw the wing nuts back to the U bolt and fasten the wing nut properly.
Note: do notover tighten, which may cause the damage of radiator flange.
5、Screw off spherical nut from the castor, align the shaft to the hole of the castor mounting plate, insert in,
and screw on the spherical nut.
6、Repeat 2, 3, 4 and 5 on the rear of radiator for mounting of the rear castors.
Note: the rear castors must be mounted between the end two fins.
1. Carry handle 4. Cord storage
2. Thermostat knob 5. Radiant fins
3. Power switch 6. Castor
1
52
6
3
4
INSTRUCTIONS FOR USE
1. Before using the heater, make sure that it is onaflat and stable surface. Damage may occur if it is
placed on an incline or decline.
2. Set all the controls to OFF position and insert the plug intoasocket-outlet with well grounded. Be sure
that plug fits firmly.
3. Rotate the thermostat knob clockwise to MAX position and switch the heater on as follow: the switch I
for low heat, the switch II for medium heat and both switches on for high heat.
4. When your room reaches the desired temperature, now slowly rotate the thermostat knob counter
clockwise until the pilot light goes out. The thermostat can now be left at this setting. As soon as the room
temperature has dropped below the set temperature, the unit will switch it self on automatically until the
set temperature hasbeen reached again. In this way the room temperature remains constant with the
most economical use of electricity.
5. If you want to change the room temperature setting, rotate the thermostat knob clockwise to raise the
temperature, or counter clockwise to lower it.
6. This heater includes an overheat protection system that shuts off the heater when parts of the heater
are getting excessively hot.
7. To completely shut the heater off, turn all the controls to OFF, and remove plug from the socket-outlet.
MAINTENANCE
1. Always remove the plug from the socket-outlet and allow the radiator to cooldown before clean the
heater.
2. Wipe radiator with a soft damp (not wet) cloth.
WARNING:
Do not immerse the heater in water.
Do not use any cleaning chemicals such as detergents and abrasives.
Do not allow the interior to get wet as this could create a hazard.
3. To store away the heater, wind the cable round bobbin and store the heater in a clean dry place.
4. In case of malfunction or doubt, do not try to repair the radiator yourself, it may result inafire hazard or
electric shock.
CONFORMITY WITH DIRECTIVES
This product is CE marked to denote conformity with Directives 2006/95/EC (Low Voltage) and the EMC
directive (2004/108/EC), as amended.
Correct Disposal of this product
This marking indicates that this product should not be disposed with other
household wastes throughout the EU. To prevent possible harm to the
environment or human health from uncontrolled waste disposal, recycle it
responsibly to promote the sustainable reuse of material resources.
6
Welcome to visit our website and purchase our quality products!
Reward Points
Exclusive Customer Service
Personalized Recommendaons
Permanent Shopping Cart
Order History
We would like to extend our hearelt thanks to
all of our customers for taking me to assemble
this product and giving us valuable feedbacks.
www.costway.com
Your suggestions and comments for COSTWAY are really important to us!
We sincerely solicit you to go back to our shop and leave a good rating in just a
simple click. It would be quite encouraging if you could kindly do so like below:
February 24, 2019
Great products so far. Fast delivery, easy setup, and working without any issues.
Great products so far
With your inspiring rating, COSTWAY will be more consistent to offer you
EASY SHOPPING EXPERIENCE, GOOD PRODUCTS and EFFICIENT SERVICE!
US office: Fontana, California
UK office: Ipswich
www.costway.com

Other Costway Heater manuals

Costway EP24918US Series User manual

Costway

Costway EP24918US Series User manual

Costway EP23760 User manual

Costway

Costway EP23760 User manual

Costway EP25150US-SL User manual

Costway

Costway EP25150US-SL User manual

Costway FP10220 User manual

Costway

Costway FP10220 User manual

Costway BA7733US User manual

Costway

Costway BA7733US User manual

Costway ES10252 User manual

Costway

Costway ES10252 User manual

Costway ES10159US User manual

Costway

Costway ES10159US User manual

Costway EP22913 User manual

Costway

Costway EP22913 User manual

Costway EP24694US User manual

Costway

Costway EP24694US User manual

Costway EP24700DE User manual

Costway

Costway EP24700DE User manual

Costway EP23750 User manual

Costway

Costway EP23750 User manual

Costway EP24192 User manual

Costway

Costway EP24192 User manual

Costway EP22916 User manual

Costway

Costway EP22916 User manual

Costway EP24688US User manual

Costway

Costway EP24688US User manual

Costway EP23757 User manual

Costway

Costway EP23757 User manual

Costway ES10254 User manual

Costway

Costway ES10254 User manual

Costway EP25436 User manual

Costway

Costway EP25436 User manual

Costway EP23746 User manual

Costway

Costway EP23746 User manual

Costway ES10253US User manual

Costway

Costway ES10253US User manual

Costway OP3178 User manual

Costway

Costway OP3178 User manual

Costway EP23759 User manual

Costway

Costway EP23759 User manual

Costway ES10285US User manual

Costway

Costway ES10285US User manual

Costway EP22917 User manual

Costway

Costway EP22917 User manual

Costway EP25439 User manual

Costway

Costway EP25439 User manual

Popular Heater manuals by other brands

Supply Chain Sources lifeSMART PCHT1109US Assembly instructions

Supply Chain Sources

Supply Chain Sources lifeSMART PCHT1109US Assembly instructions

Argo BOBO operating instructions

Argo

Argo BOBO operating instructions

International comfort products PDS4 installation instructions

International comfort products

International comfort products PDS4 installation instructions

Pelonis HB-215T owner's manual

Pelonis

Pelonis HB-215T owner's manual

MILL NE900WIFI Assembly and instruction manual

MILL

MILL NE900WIFI Assembly and instruction manual

Currys Essentials C7MOR10 instruction manual

Currys Essentials

Currys Essentials C7MOR10 instruction manual

Applica WWH02 Use and care book

Applica

Applica WWH02 Use and care book

RADtec G15R instruction manual

RADtec

RADtec G15R instruction manual

TZS First AUSTRIA FA-5565-2 instruction manual

TZS First AUSTRIA

TZS First AUSTRIA FA-5565-2 instruction manual

Dimplex 403TSFTIE7 instruction manual

Dimplex

Dimplex 403TSFTIE7 instruction manual

HAEGER Thermoheat FH-200.010A User instructions

HAEGER

HAEGER Thermoheat FH-200.010A User instructions

Sealey PEH5001 quick start guide

Sealey

Sealey PEH5001 quick start guide

Biddle SensAir manual

Biddle

Biddle SensAir manual

Mars QP10 Series Installation, operation and maintenance manual

Mars

Mars QP10 Series Installation, operation and maintenance manual

Draper DSH-IR Instructions for

Draper

Draper DSH-IR Instructions for

Arbonia GQE10 Instructions for installation and use

Arbonia

Arbonia GQE10 Instructions for installation and use

Beurer UB60 Instructions for use

Beurer

Beurer UB60 Instructions for use

Beper RI061 use instructions

Beper

Beper RI061 use instructions

manuals.online logo
manuals.online logoBrands
  • About & Mission
  • Contact us
  • Privacy Policy
  • Terms and Conditions

Copyright 2025 Manuals.Online. All Rights Reserved.