manuals.online logo
Brands
  1. Home
  2. •
  3. Brands
  4. •
  5. Faria
  6. •
  7. Measuring Instrument
  8. •
  9. Faria Commander User manual

Faria Commander User manual

ISO128E ECR#4851 08/04
IS0128
Copyright 2004 by the Thomas G. Faria Corporation, Uncasville CT
No part of this publication may by reproduced in any form, in an electronic retrieval system or otherwise, without
the prior written permission of the company.
Faria® is the trademark of the Thomas G. Faria Corporation
SystemCheck®, Evinrude®, Johnson®, and Bomardier® are trademarks of Bombardier Motor Corporation of America.
Analog Tachometer
Digitally displays
Hours Engine Has Been Run
Fuel Level
Other Features if Available:
Fuel Management
Fuel Flow in GPH or LPH
Total or Trip Fuel Used
Low Fuel Alarm
Calculates Fuel Remaining In Tank
SystemCheck® with Fuel Management
or
Ambient Air/ Water Temperature
Commander™
Tachometer/ Engine Hourmeter
M
All manuals and user guides at all-guides.com
all-guides.com
Harness HN0358
Small Connector
SystemCheck® adaptor
Small connector(CN0082)
To Small
Connector
Socket
SystemCheck®
Harness
SystemCheck® Harness Deutsch Connector
Purple Not Used
Tan/Orange
Tan
Tan/Black
Black
Gray
Tan/Yellow
Pin A Purple +14 Ignition
Pin B Tan/Orange Check Engine
Pin C Black Ground
Pin D Gray Tachometer Signal
ECR 2275 4/15/02
Pin 1 Purple +14 vDC Ignition
Pin 2 Black Ground
Pin 3 Gray Tachometer Signal
Pin 4 Tan/Yellow No Oil Sensor
Pin 5 Tan/Black Low Oil Sensor
Pin 6 Tan Over Temperature
Pin 7 Tan/Orange Lo Oil Sensor
Pin 8 Not Used
ECR 2275 4/15/02
1
2
3
4
8
7
6
5
1
7
6
5
8
2
3
4
Page 18
Installation
Smaller Connector Page 1
Larger Connector Page 1
Operations
Lighting Page 2
Tachometer Page 2
Engine Running Only Hourmeter Page 2
Fuel Level Page 2
Other Features Page 3
Set-Up Mode Page 3
Tachometer Selection Page 4
Fuel Management
Installation guide (Fuel Flow Transducer) Page 5
Fuel Flow Page 6
Units per Hour selection Page 6
Fuel Used Page 6
Reset Page 7
Calibrate Page 7
T
otal Fuel Used Page 7
Reset Page 7
Fuel Remaining Page 8
Adjust Fuel Remaining Page 8
Fuel Remaining Alarm Page 8
Fuel Level Page 9
Bombardier® SystemCheck®
Discription Page 10
Engine Temperature Page 10
Oil Level Page 10
Oil Flow
Four Stroke engine Page 10
Two Stroke engine Page 10
Check Engine Page 10
Operating Modes
Self Test Page 10
Normal Mode Page 10
Diagnostic Mode Page 11
Ambient Air and Water Temperature
Discription Page 12
W
ater Temperature Page 12
Air T
emperature Page 12
Figure 1 Fuel Management LCD Display Modes Page 9
Figure 2 Air/Water LCD Display Modes Page 12
Figure 3 Tachometer Set-Up Page 14
Table 1 Tachometer Selecion Table Page 15
Table 2 Fuel Sender Selection Table Page 15
HN0355 Larger connection Air/Water Temp.Wire Diagram Page 13
HN0356 Smaller Socket Connection Wire Diagram Page 16
HN0354 Larger connection Fuel Management Wire Diagram Page 17
HN0358 SystemCheck Wire Diagram Page 18-19
Index
All manuals and user guides at all-guides.com
Installation:
CAUTION: Disconnect the battery during
installation. Tighten nuts on the
backclamp only slightly more than you
can tighten with your fingers. Six inch-
pounds of torque are sufficient. Over-
tightening could result in damage to the
instrument and may void your warranty.
1. Cut a 3-3/8” diameter hole in the dash
and mount the gauge with the backclamp
supplied.
Follow the enclosed instructions for
installing the sender. Once the sender is
installed and you have run the cables to
the Commander, connect the wires from
the sender to the corresponding Small or
Large connectors as illustrated using the
butt connectors supplied. The butt
connectors have a heat activated
waterproofing. Once the butt connections
have been crimped slowly apply heat with
a heat gun until you see sealant coming
out of the connector ends. It is
recommended to wrap the connections
together with electrical tape for further
protection.
2. Small Connector Socket
Tachometer with Fuel Flow
Follow the wiring diagram at the end of
this manual for wiring connections.
HN0356.
SystemCheck® connections can be found
on HN0358.
Tachometer with Ambient Air and
Water Temperature.
Follow the wiring diagram at the end of
this manual for wiring connections.
HN0355.
3. Large Connector Socket
Tachometer with Fuel Flow
Follow the wiring diagram at the end of
this manual for wiring connections.
HN0354.
SystemCheck® connections can be found
on HN0358.
Tachometer with Ambient Air and
Water Temperature.
Follow the wiring diagram at the end of
this manual for wiring connections.
HN0355 or HN0372 for 5 inch
Commanders..
Used for all splices.
Wires
Heat Shrink Tube
(red or blue)
Metal Butt Connector
(red or blue).
Used for all splices.
Larger
Connector
Socket
Smaller
Connector
Socket
Small
Plug
Large
Plug
Note: For wiring
diagram for the
Large Connector
Plug see HN0354
SystemCheck HN0358
or HN0355 for
Temperature senders.
HN0372 for 5 inch
Commanders.
Note: For wiring
diagram for the
Small Connector
Plug see HN0356
SystemCheck HN0358
or HN0355 for Temperature senders.
Page 1
Harness HN0354
Large Connector
Large Plug(CN0082)
To Commander
Shrink Tubing
or Wrap
Green
Pin A Red Fuel Flow Power
Pin B Green Sender Grounds
Pin C White Fuel Flow Signal
Pin D Pink Fuel Tank Level
ECR 1903 12/21/01
(Tank Sender Ground)
(Sender Ground)
(Sender Power)
(Sender Signal)
Fuel Flow Transducer
Pink
(Fuel Level)
White White
Red Black
Green Shield
Page 17
This manual for 4 or 5 inch Commanders
with
1) Tach/Hour/Fuel Flow.
2) Tach/Hour/SystemCheck®/Fuel Flow.
3) Tach/Hour/Ambient Air/Water
Temperature.
All manuals and user guides at all-guides.com
Harness HN0356
Small Connector
Small Plug(CN0082)
To Commander
Shrink Tubing
or Wrap
Black
Purple Gray
Pin A Purple +12 Ignition Power
Pin B Purple +12 Ignition Power
Pin C Black Ground
Pin D Gray Tachometer Input
ECR 1903 12/21/01
(Ignition) (Tach Signal)
(Ground)
Page 16
Description
The Commander has three push buttons;
These buttons control the modes of
operation. The “Mode” button is used to
change the function of the LCD display
and to access sub menus and adjustable
settings. The “Up” and “Down” buttons are
used to modify the settings.
In normal operation mode, pressing the
“Mode” button quickly causes the display
to cycle between the different instrument
displays. Pressing and holding the “Mode”
button causes the display to change to the
“settings” sub menus (see Figure 1).
When the settings menus have been
selected, pressing the “Mode” button
quickly causes the display to cycle through
the setting options. Within each setting
selection, pressing the “Up and “Down”
buttons causes the affected setting to
change.
Note: The microprocessor will
automatically record the new settings as
you adjust them.
When in a setting menu, pressing and
holding the “Mode” button returns to the
main function.
The Tachometer and Fuel Level functions
have several values that can be adjusted to
match your installed equipment. These
rarely used settings are changed in the Set-
Up Mode (see Set-Up Menu guide below).
Operation
Lighting
In normal operating mode the instrument
lighting can be adjusted by pressing the
“Up” and “Down” buttons.
Tachometer
The tachometer is a digital instrument with
the appearance of an analog instrument.
The tachometer is preset at the factory for
an eight cylinder engine and a 6000 RPM
dial. The setting for the tachometer can be
changed in the Set-Up menu (see below).
A microprocessor controlled stepper motor
moves the pointer to display engine
revolutions per minute using a linear dial
Engine Running Only Hourmeter
The Engine Hours display shows the
number of hours the engine has been
operated (Hr). The reading is based on a
signal being received at the tachometer
input to indicate that the engine is running.
Units are displayed as:
Fuel Level
The Fuel Level display shows the amount
M
Mode
Button
Down
Button
Up
Button
Down
Button
Up
Button
Page 2
All manuals and user guides at all-guides.com
Setup Mode
Tachometer settings and the fuel level
sender type can be changed using the
Setup Mode (see Figure 2, Table 1, and
Table 2). Use this option only if you have
reason to believe that your settings are
wrong. Setting an incorrect value in these
menus can result in extremely inaccurate
performance of the tachometer and fuel
level sender.
To access the Setup Mode, press and hold
both the “Up” and “Down” buttons while
turning on the instrument.
The display will shows,
Briefly pressing the “Mode” button will
cycle through the menu items.
The “Up” and “Down” buttons are used to
modify the settings.
The microprocessor will automatically
record the new settings as you change
them.
of fuel in the fuel tank in percent of full
(PC). The indication is based on the fuel
level sender in the tank and operates
similarly to a normal fuel gauge. There are
no adjustments to this reading.
Note: For proper operation no
additional fuel gauges may be connected
to the fuel level sender.
Other Features
The Commander can have special
features programmed in it at the Factory.
1) Fuel Management which includes, Fuel
Flow, Fuel Used, Total Fuel Used, and
Fuel Remaining.
2) Ambient Air and Water Temperature.
This manual covers both. Refer to your
boats owners manual for which feature
have been installed.
M
Mode
Button
Down
Button
Up
Button
Down
Button
Up
Button
Page 3
Flashes
then shows current fuel
sender selection.
Screen shows: Default = US
changes sensor selection
Flashes
then shows current
tachometer scale
selection.
Screen shows: Default = 6K
adjusts Tachometer full scale
reading to match dial.
Tachometer Selection Table
TAC 1 Two pulses per rev. (4 cylinder, 4 cycle gas engine)
TAC 2 Three pulses per rev. (6 cylinder, 4 cycle gas engine)
TAC 3 Four pulses per rev. (8 cylinder, 4 cycle gas engine)
TAC 4 Five pulses per rev. (10 pole alternator on outboard engine)
TAC 5 Six pulses per rev. (12 pole alternator on outboard engine)
TAC 6 Eight pulses per rev. (Not Used)
TAC 7 Ten pulses per rev. (20 pole alternator on outboard engine)
TAC 8 TH Two to Two Hundred Fifty pulses per rev.
TAC 9 VA Match reference calibration digital or mechanical tachometer
Table
Figure 3
1
Fuel Sender Selection Table
US Standard United States fuel sender ( 240 – 33 Ohms )
EU Standard European fuel sender ( 10 – 180 Ohms )
Table 2
Page 15
All manuals and user guides at all-guides.com
Tachometer Full Scale Selection
Refer to Figure 3 for an explanation of each of the tachometer full scale selections.
This is normally a factory setting that needs no adjustment. The setting adjusts the “full
scale” operating range of the tachometer to match the dial on the instrument. Using the
“Up” and “Down” buttons, adjust the setting to match the maximum reading on the
tachometer dial, 4000, 6000, or 7000 RPM.
Fuel Level Sender Selection
Refer to Figure 3 and Table 2 for an explanation of each of the fuel level sender selections.
Using the “Up” and “Down” buttons, adjust the setting to match the fuel level sender
installed in the fuel tank.
Set-Up Mode
Flashes
then shows current Tach
selection.
Flashes
then shows current
number of teeth (pulses)
per rev. if
was selected.
Flashes
and then shows current
RPM if
Screen shows:
Number of teeth (pulses) per rev
adjusts teeth (pulses) per rev
Screen shows:
Measured RPM
adjusts Pointer RPM shown to
match displayed calibration
reference
Enter Setup Mode:
Press both the buttons while turning on instrument.
To exit the setup mode, press and hold the button.
Set-Up start screen ,
shows that setup mode
has been entered.
M
Screen shows:
Screen shows: Default = TAC3
was selected.
Page 14
.
Pressing and holding the “Mode” button
sets the instrument to normal operation.
Tachometer Selection
Refer to Figure 3 and Table 1 for an
explanation of each of the tachometer
selections.
T SCALE-
The “TAC 1” - “TAC 7” settings are normal
engine tachometer settings based on
different engine options found on most
boats. Using “Up” and “Down” buttons,
adjust the setting to match the engine in
the boat as shown in Figure 3.
The “TAC 8TH” setting is normally used
on diesel engines with a magnetic pick-up
measuring the number of teeth on the
flywheel of the engine. When this option is
selected, the “TEETH” submenu is
available.
Using the “Up” and “Down” buttons, adjust
the number shown in the “TEETH” display
until the number matches the published
number of flywheel teeth for the engine.
The “TAC 9VA” setting is normally used
when a belt driven alternator supplies the
tachometer signal OR when no other
method of selecting the tachometer mode
gives correct readings.
A digital or mechanical reference
tachometer is needed to use this option.
When this option is selected, the
“VARIABL” submenu is available.
Connect the reference tachometer as
required. Operate the engine at a
convenient RPM as high as can be safely
maintained.
Using the “Up” and “Down” buttons, adjust
the number shown in the display to match
the reference tachometer.
The tachometer pointer should also match
the reference tachometer.
SENDER
Allows you to set the type of sender you
are using. See Figure 3.
Set up is now complete.
M
Mode
Button
Down
Button
Up
Button
Down
Button
Up
Button
Down
Button
Up
Button
Page 4
All manuals and user guides at all-guides.com
all-guides.com
IMPORTANT
Always install the Fuel Flow Transducer AFTER the primary filter. The primary filter must be
a good quality water separator type with a minimum filtration of 30 microns or better. (10 or 2
micron. The lower the micron rating the finer the filtration) Failure to provide this level of
filtration protection will result in inaccurate readings or total failure or damage to the transducer.
If there is not a suitable length of hose after the primary filter, an in-line filter (30 micron or
better) should be fitted before the Fuel Flow transducer. Damage due to insufficient filtration
is not covered by warranty. If in doubt please consult your local
Marine dealer for advice
prior to installation.
Fuel Flow
Signal (White) Fuel Flow DC
output positive (Black)
Common
Shield
Black Heat shrink
tubing on shield
Installation of the fuel flow transducer
Installation Guide for the fuel flow transducer
The fuel flow transducer is designed for
installation in Coast Guard approved 3/8“
flexible fuel line. The transducer MUST be
installed AFTER the main fuel filter. It should
be located well away from any area where it
will be effected by excessive heat or vibration
from the engine. It is preferable to mount the
transducer in a vertical position.
Drain all the fuel from the flexible fuel line. Cut
the fuel line and using the fuel hose attaching
clips provided install the transducer so that the
FUEL IN side of the transducer connects to
the fuel tank.
Wiring Connection
Keep electrical and transducer cables
away from alternator or other noise
generating electrical cables.
From Tank
Page 5
(Sensor Ground)
(Sensor Ground)
(Sensor Signal)
(Sensor Signal
(Fuel Tank Level)
Harness HN0355/HN372
Large Connector
Air/Water Temp.
Shrink Tubing
or Wrap
Water
Temp.
Sensor
signal
White
Black
White
Black
Black
Black
Red White
Pink
HN0355 - 4 inch Commanders
Pin A Red Air Temperature
Pin B Black Ground
Pin C White Water Temperature
Pin D Pink Fuel Tank Sensor
Pin E Plug Not Used
Pin F Plug Not Used
Air Temp.
Sensor
signal
ECR 1903 12/21/01
HN0372 - 5 inch Commanders
Page 13
2x
PJ0005
Same as above- Add the following
All manuals and user guides at all-guides.com
Ambient Air and Water
Temperature
Description
The Faria Commander Tachometer/ Water-
Air Temperature/ Fuel Level/ Engine
Hourmeter combines the features of
several instruments into one unit. The
LCD displays the information for the other
instruments:
1) Water Temperature - Displays the
current water temperature.
2) Ambient Air Temperature - Displays
shows current air temperature
3) Fuel Level - Displays fuel level in fuel
tank (based on level sender) in percent.
4) Engine Hours - Displays the number of
hours the engine has been run.
Water Temperature
The Water Temperature display shows
current water temperature based on a Faria
supplied temperature probe. The probe
must be mounted so as to always be
submerged to the depth desired. There are
no adjustments for this function.
Air Temperature
The Air Temperature display shows
current air temperature based on a Faria
supplied temperature probe.
The probe must be mounted so as to be
exposed to free air but preferably not in
direct sunlight. There are no adjustments
for this function.
Fuel Level
See description above.
M
LCD Display Modes
Figure 2
Quick
Press
Water
Temp.
Ambient
Air Temp.
Page 12
Fuel Management Functions
Description
The Faria Commander Tachometer/ Fuel
Monitor/ Engine Hourmeter combines the
features of several instruments into one
unit. The LCD displays the information for
the other instruments:
1) Fuel Flow - Displays current fuel usage
in Gallons or Liters per hour.
2) Fuel Used - Displays fuel used since
last reset (trip fuel meter).
3) Total Fuel Used - Displays fuel used
since last reset (total fuel meter).
4) Fuel Remaining - Displays the fuel
remaining since last set (based on fuel
flow).
5) Fuel Level - Displays fuel level in fuel
tank (based on level sender) in percent.
6) Engine Hours - Displays the number of
hours the engine has been run.
Fuel Flow
The Fuel Flow display shows current fuel
consumption in gallons per hour (G) or
liters per hour (L).
The fuel flow sensor can be calibrated if
necessary using the Fuel Used “settings”
menu (see Fuel Used description below).
The units displayed may be changed using
the submenu. Pressing and holding the
“Mode” button causes the display to change
to the “UNITS” submenu (see Figure 1).
Fuel Flow “UNITS” Menu
Pressing the “Up” and “Down” buttons will
change the setting between GH and LH.
Fuel Used
The Fuel Used display shows the amount
of fuel used since the gauge was reset.
The display is based on the fuel flow
system and therefore filling the fuel tank
will not disturb the reading. The Fuel Used
gauge may be reset to zero and the Fuel
Used and Fuel Flow system calibrated
using the sub menus.
Pressing and holding the “Mode” button
M
Mode
Button
Down
Button
Up
Button
Page 6
All manuals and user guides at all-guides.com
causes the display to change to the
“settings” submenu (see Figure 1).
Fuel Used “Settings” Menu
There are two items in the Fuel Used
“Settings” Menu; Reset and Fuel
Calibration. Briefly pressing the “Mode”
button cycles through the menu items. The
microprocessor will automatically record
the new settings as you adjust them.
Reset
Pressing the “Up” and “Down” button
resets the Fuel Used gauge to zero.
Calibration
If you know “exactly” how much fuel you
have used since the Fuel Used gauge was
reset you can adjust the amount and
therefore the Fuel Flow sensor calibration
in this “setting” menu.
Pressing the “Up” or “Down” buttons
changes the “amount of fuel used” display.
When the displayed quantity matches the
amount of fuel you know you have used,
calibration is complete.
Total Fuel Used
The Total Fuel Used display shows the
amount of fuel used since the Total Fuel
Used gauge was reset.
This gauge is useful for keeping track of
fuel usage over a longer period of time or
distance than the Fuel Used gauge. The
display is based on the fuel flow system
and therefore filling the fuel tank will not
disturb the reading.
The T
otal Fuel Used gauge may be reset to
zero using the submenu. Pressing and
holding the “Mode” button causes the
display to change to the “settings” submenu
(see Figure 1).
Total Fuel Used “Settings” Menu
There is one item in the Fuel Used
“Settings” Menu; Reset.
M
Mode
Button
M
Mode
Button
Down
Button
Up
Button
Down
Button
Up
Button
Page 7
This page left blank intentionally.
M
Mode
Button
All manuals and user guides at all-guides.com
If the engine stops running, but the key
switch remains on, the unit will
automatically go to “Diagnostic” mode.
Diagnostic mode: Simple diagnostics can
be done with the key on, engine off. The
intent is to aid the service technician in
troubleshooting wiring or sensor problems.
It can also be used to verify a system when
there is no engine on the boat.
In this mode, the following assumptions
are made:
1) The key switch is on.
2) There is no tachometer signal (the
engine is not running).
3) When the key switch is turned on, the
self-test will be performed as usual.
After the self test is completed, the
technician can ground any sensor input
lead. The system will immediately display
the fault condition associated with that
input. The audible alarm is not sounded in
this mode. In the event of a wiring error, it
would be possible for multiple inputs to be
grounded. In that case, the unit will display
the multiple messages.
Page 11
Reset
Pressing the “Up” or “Down” button resets
the Total Fuel Used gauge to zero.
Fuel Remaining
The Fuel Remaining display shows the
amount of fuel remaining in G or L.
This display is based on your manually
entered information (see Adjust Fuel
Remaining below) and the accumulated
Fuel Flow data since the gauge was
adjusted. This information is not obtained
from the fuel sender in the fuel tank and
therefore is not affected by the boats
position or angle as the fuel sender may
be.
There is an alarm which may be set to
warn of a low fuel condition. The amount
of Fuel Remaining and the Fuel
Remaining Alarm may be adjusted using
the submenu. Pressing and holding the
“Mode” button causes the display to
change to the “settings” submenu (see
Figure 1).
Fuel Remaining “Settings” Menu
There are two items in the Fuel
Remaining “Settings” Menu; Adjust Fuel
Remaining and Fuel Remaining Alarm.
Briefly pressing the “Mode” button cycles
through the menu items.
The microprocessor will automatically
record the new settings a you adjust them.
Adjust Fuel Remaining
When you fill the fuel tank or add fuel,
you make a reasonable (or “exact”)
estimate of the amount of fuel you have.
Using this menu item you can enter
(adjust) the amount of fuel remaining to
your known (or estimated) amount.
Pressing the “Up” or “Down” buttons will
change the indicated Fuel Remaining.
Fuel Remaining Alarm
M
Mode
Button
M
Mode
Button
Down
Button
Up
Button
Down
Button
Up
Button
Page 8
All manuals and user guides at all-guides.com
This alarm may be set to warn you when
there is only a certain amount of fuel
remaining according to the Fuel Flow
usage calculation. Pressing the “Up” or
“Down” buttons will change the Fuel
Remaining Alarm setting.
Fuel Level
The Fuel Level display shows the amount
of fuel in the fuel tank in percent of full
(PC). The indication is based on the fuel
level sender in the tank and operates
similarly to a normal fuel gauge. There are
no adjustments to this reading.
Down
Button
Up
Button
M
M
M
M
M
M
M
M
M
M
Fuel Management LCD Display Modes
Figure 1
Quick
Press
Quick
Press
Quick
Press Quick
Press
Quick
Press
Quick
Press
Hold
Hold
Hold Hold
Page 9
Bombardier® SystemCheck®
Description
The Bombardier SystemCheck is a system
that monitors Evinrude® and Johnson®
outboard engine sensors, providing clear
audible and visual indications whenever a
fault occurs.
The system monitors engine temperature,
oil level, oil flow, oil pressure, and fuel
restriction. In addition, the ECM (Engine
Control Module) can activate a warning
indication. Not all sensors are present on
all engines.
For information about the wiring of the
Commander to the SystemCheck harness
can be found on HN0358 in this manual.
Engine Temperature:
The displayed warning is “ENG HOT”.
Oil level:
The sensor is a mechanical float switch in
the 2 cycle oil reservoir.
The displayed warning is “LO OIL”.
Oil Flow:
Four stroke engine: An oil pressure switch
is used.
Two stroke engine: An oil flow sensor is
used to detect oil flow out of the oil
injection system.
The warning will be displayed as “NO OIL”.
Check Engine:
For fuel injected engines, the EMU
generates the warning based on several
fault conditions. For non-injected V6
outboard engines, a vacuum sensor is fitted
in the fuel line. This is used to detect a
blocked fuel line or fuel filter. (Non-
injected engines without the vacuum
sensor will not display this function.)
The warning will be displayed as “CHK ENG”.
Operating Modes
There are three operating modes for
SystemCheck systems, self test, normal,
and diagnostic.
Self test:
On power up (key on), a limited self-test is
performed to inform the operator that the
system is active. The test activates the
audible alarm and all warning messages.
During the self test, the audible alarm
sounds for 1/4 second. At the same time,
the unit begins displaying all of the
warning messages. Each warning message
is displayed for 1 second. When all four
messages have been displayed, the self test
is complete.
Normal mode: This mode occurs when
two conditions are met. The self test must
be complete, and the engine must be
running in excess of 200 R.P.M. In this
mode, any fault detected will result in an
audible and visual alarm. Both will
commence simultaneously.
The audible alarm will sound for 10
seconds. The visual warning will be
displayed for as long as the fault conditions
exist.
Page 10
All manuals and user guides at all-guides.com
all-guides.com
This alarm may be set to warn you when
there is only a certain amount of fuel
remaining according to the Fuel Flow
usage calculation. Pressing the “Up” or
“Down” buttons will change the Fuel
Remaining Alarm setting.
Fuel Level
The Fuel Level display shows the amount
of fuel in the fuel tank in percent of full
(PC). The indication is based on the fuel
level sender in the tank and operates
similarly to a normal fuel gauge. There are
no adjustments to this reading.
Down
Button
Up
Button
M
M
M
M
M
M
M
M
M
M
Fuel Management LCD Display Modes
Figure 1
Quick
Press
Quick
Press
Quick
Press Quick
Press
Quick
Press
Quick
Press
Hold
Hold
Hold Hold
Page 9
Bombardier® SystemCheck®
Description
The Bombardier SystemCheck is a system
that monitors Evinrude® and Johnson®
outboard engine sensors, providing clear
audible and visual indications whenever a
fault occurs.
The system monitors engine temperature,
oil level, oil flow, oil pressure, and fuel
restriction. In addition, the ECM (Engine
Control Module) can activate a warning
indication. Not all sensors are present on
all engines.
For information about the wiring of the
Commander to the SystemCheck harness
can be found on HN0358 in this manual.
Engine Temperature:
The displayed warning is “ENG HOT”.
Oil level:
The sensor is a mechanical float switch in
the 2 cycle oil reservoir.
The displayed warning is “LO OIL”.
Oil Flow:
Four stroke engine: An oil pressure switch
is used.
Two stroke engine: An oil flow sensor is
used to detect oil flow out of the oil
injection system.
The warning will be displayed as “NO OIL”.
Check Engine:
For fuel injected engines, the EMU
generates the warning based on several
fault conditions. For non-injected V6
outboard engines, a vacuum sensor is fitted
in the fuel line. This is used to detect a
blocked fuel line or fuel filter. (Non-
injected engines without the vacuum
sensor will not display this function.)
The warning will be displayed as “CHK ENG”.
Operating Modes
There are three operating modes for
SystemCheck systems, self test, normal,
and diagnostic.
Self test:
On power up (key on), a limited self-test is
performed to inform the operator that the
system is active. The test activates the
audible alarm and all warning messages.
During the self test, the audible alarm
sounds for 1/4 second. At the same time,
the unit begins displaying all of the
warning messages. Each warning message
is displayed for 1 second. When all four
messages have been displayed, the self test
is complete.
Normal mode: This mode occurs when
two conditions are met. The self test must
be complete, and the engine must be
running in excess of 200 R.P.M. In this
mode, any fault detected will result in an
audible and visual alarm. Both will
commence simultaneously.
The audible alarm will sound for 10
seconds. The visual warning will be
displayed for as long as the fault conditions
exist.
Page 10
All manuals and user guides at all-guides.com
If the engine stops running, but the key
switch remains on, the unit will
automatically go to “Diagnostic” mode.
Diagnostic mode: Simple diagnostics can
be done with the key on, engine off. The
intent is to aid the service technician in
troubleshooting wiring or sensor problems.
It can also be used to verify a system when
there is no engine on the boat.
In this mode, the following assumptions
are made:
1) The key switch is on.
2) There is no tachometer signal (the
engine is not running).
3) When the key switch is turned on, the
self-test will be performed as usual.
After the self test is completed, the
technician can ground any sensor input
lead. The system will immediately display
the fault condition associated with that
input. The audible alarm is not sounded in
this mode. In the event of a wiring error, it
would be possible for multiple inputs to be
grounded. In that case, the unit will display
the multiple messages.
Page 11
Reset
Pressing the “Up” or “Down” button resets
the Total Fuel Used gauge to zero.
Fuel Remaining
The Fuel Remaining display shows the
amount of fuel remaining in G or L.
This display is based on your manually
entered information (see Adjust Fuel
Remaining below) and the accumulated
Fuel Flow data since the gauge was
adjusted. This information is not obtained
from the fuel sender in the fuel tank and
therefore is not affected by the boats
position or angle as the fuel sender may
be.
There is an alarm which may be set to
warn of a low fuel condition. The amount
of Fuel Remaining and the Fuel
Remaining Alarm may be adjusted using
the submenu. Pressing and holding the
“Mode” button causes the display to
change to the “settings” submenu (see
Figure 1).
Fuel Remaining “Settings” Menu
There are two items in the Fuel
Remaining “Settings” Menu; Adjust Fuel
Remaining and Fuel Remaining Alarm.
Briefly pressing the “Mode” button cycles
through the menu items.
The microprocessor will automatically
record the new settings a you adjust them.
Adjust Fuel Remaining
When you fill the fuel tank or add fuel,
you make a reasonable (or “exact”)
estimate of the amount of fuel you have.
Using this menu item you can enter
(adjust) the amount of fuel remaining to
your known (or estimated) amount.
Pressing the “Up” or “Down” buttons will
change the indicated Fuel Remaining.
Fuel Remaining Alarm
M
Mode
Button
M
Mode
Button
Down
Button
Up
Button
Down
Button
Up
Button
Page 8
All manuals and user guides at all-guides.com
Ambient Air and Water
Temperature
Description
The Faria Commander Tachometer/ Water-
Air Temperature/ Fuel Level/ Engine
Hourmeter combines the features of
several instruments into one unit. The
LCD displays the information for the other
instruments:
1) Water Temperature - Displays the
current water temperature.
2) Ambient Air Temperature - Displays
shows current air temperature
3) Fuel Level - Displays fuel level in fuel
tank (based on level sender) in percent.
4) Engine Hours - Displays the number of
hours the engine has been run.
Water Temperature
The Water Temperature display shows
current water temperature based on a Faria
supplied temperature probe. The probe
must be mounted so as to always be
submerged to the depth desired. There are
no adjustments for this function.
Air Temperature
The Air Temperature display shows
current air temperature based on a Faria
supplied temperature probe.
The probe must be mounted so as to be
exposed to free air but preferably not in
direct sunlight. There are no adjustments
for this function.
Fuel Level
See description above.
M
LCD Display Modes
Figure 2
Quick
Press
Water
Temp.
Ambient
Air Temp.
Page 12
Fuel Management Functions
Description
The Faria Commander Tachometer/ Fuel
Monitor/ Engine Hourmeter combines the
features of several instruments into one
unit. The LCD displays the information for
the other instruments:
1) Fuel Flow - Displays current fuel usage
in Gallons or Liters per hour.
2) Fuel Used - Displays fuel used since
last reset (trip fuel meter).
3) Total Fuel Used - Displays fuel used
since last reset (total fuel meter).
4) Fuel Remaining - Displays the fuel
remaining since last set (based on fuel
flow).
5) Fuel Level - Displays fuel level in fuel
tank (based on level sender) in percent.
6) Engine Hours - Displays the number of
hours the engine has been run.
Fuel Flow
The Fuel Flow display shows current fuel
consumption in gallons per hour (G) or
liters per hour (L).
The fuel flow sensor can be calibrated if
necessary using the Fuel Used “settings”
menu (see Fuel Used description below).
The units displayed may be changed using
the submenu. Pressing and holding the
“Mode” button causes the display to change
to the “UNITS” submenu (see Figure 1).
Fuel Flow “UNITS” Menu
Pressing the “Up” and “Down” buttons will
change the setting between GH and LH.
Fuel Used
The Fuel Used display shows the amount
of fuel used since the gauge was reset.
The display is based on the fuel flow
system and therefore filling the fuel tank
will not disturb the reading. The Fuel Used
gauge may be reset to zero and the Fuel
Used and Fuel Flow system calibrated
using the sub menus.
Pressing and holding the “Mode” button
M
Mode
Button
Down
Button
Up
Button
Page 6
All manuals and user guides at all-guides.com
IMPORTANT
Always install the Fuel Flow Transducer AFTER the primary filter. The primary filter must be
a good quality water separator type with a minimum filtration of 30 microns or better. (10 or 2
micron. The lower the micron rating the finer the filtration) Failure to provide this level of
filtration protection will result in inaccurate readings or total failure or damage to the transducer.
If there is not a suitable length of hose after the primary filter, an in-line filter (30 micron or
better) should be fitted before the Fuel Flow transducer. Damage due to insufficient filtration
is not covered by warranty. If in doubt please consult your local
Marine dealer for advice
prior to installation.
Fuel Flow
Signal (White) Fuel Flow DC
output positive (Black)
Common
Shield
Black Heat shrink
tubing on shield
Installation of the fuel flow transducer
Installation Guide for the fuel flow transducer
The fuel flow transducer is designed for
installation in Coast Guard approved 3/8“
flexible fuel line. The transducer MUST be
installed AFTER the main fuel filter. It should
be located well away from any area where it
will be effected by excessive heat or vibration
from the engine. It is preferable to mount the
transducer in a vertical position.
Drain all the fuel from the flexible fuel line. Cut
the fuel line and using the fuel hose attaching
clips provided install the transducer so that the
FUEL IN side of the transducer connects to
the fuel tank.
Wiring Connection
Keep electrical and transducer cables
away from alternator or other noise
generating electrical cables.
From Tank
Page 5
(Sensor Ground)
(Sensor Ground)
(Sensor Signal)
(Sensor Signal
(Fuel Tank Level)
Harness HN0355/HN372
Large Connector
Air/Water Temp.
Shrink Tubing
or Wrap
Water
Temp.
Sensor
signal
White
Black
White
Black
Black
Black
Red White
Pink
HN0355 - 4 inch Commanders
Pin A Red Air Temperature
Pin B Black Ground
Pin C White Water Temperature
Pin D Pink Fuel Tank Sensor
Pin E Plug Not Used
Pin F Plug Not Used
Air Temp.
Sensor
signal
ECR 1903 12/21/01
HN0372 - 5 inch Commanders
Page 13
2x
PJ0005
Same as above- Add the following
All manuals and user guides at all-guides.com
Tachometer Full Scale Selection
Refer to Figure 3 for an explanation of each of the tachometer full scale selections.
This is normally a factory setting that needs no adjustment. The setting adjusts the “full
scale” operating range of the tachometer to match the dial on the instrument. Using the
“Up” and “Down” buttons, adjust the setting to match the maximum reading on the
tachometer dial, 4000, 6000, or 7000 RPM.
Fuel Level Sender Selection
Refer to Figure 3 and Table 2 for an explanation of each of the fuel level sender selections.
Using the “Up” and “Down” buttons, adjust the setting to match the fuel level sender
installed in the fuel tank.
Set-Up Mode
Flashes
then shows current Tach
selection.
Flashes
then shows current
number of teeth (pulses)
per rev. if
was selected.
Flashes
and then shows current
RPM if
Screen shows:
Number of teeth (pulses) per rev
adjusts teeth (pulses) per rev
Screen shows:
Measured RPM
adjusts Pointer RPM shown to
match displayed calibration
reference
Enter Setup Mode:
Press both the buttons while turning on instrument.
To exit the setup mode, press and hold the button.
Set-Up start screen ,
shows that setup mode
has been entered.
M
Screen shows:
Screen shows: Default = TAC3
was selected.
Page 14
.
Pressing and holding the “Mode” button
sets the instrument to normal operation.
Tachometer Selection
Refer to Figure 3 and Table 1 for an
explanation of each of the tachometer
selections.
T SCALE-
The “TAC 1” - “TAC 7” settings are normal
engine tachometer settings based on
different engine options found on most
boats. Using “Up” and “Down” buttons,
adjust the setting to match the engine in
the boat as shown in Figure 3.
The “TAC 8TH” setting is normally used
on diesel engines with a magnetic pick-up
measuring the number of teeth on the
flywheel of the engine. When this option is
selected, the “TEETH” submenu is
available.
Using the “Up” and “Down” buttons, adjust
the number shown in the “TEETH” display
until the number matches the published
number of flywheel teeth for the engine.
The “TAC 9VA” setting is normally used
when a belt driven alternator supplies the
tachometer signal OR when no other
method of selecting the tachometer mode
gives correct readings.
A digital or mechanical reference
tachometer is needed to use this option.
When this option is selected, the
“VARIABL” submenu is available.
Connect the reference tachometer as
required. Operate the engine at a
convenient RPM as high as can be safely
maintained.
Using the “Up” and “Down” buttons, adjust
the number shown in the display to match
the reference tachometer.
The tachometer pointer should also match
the reference tachometer.
SENDER
Allows you to set the type of sender you
are using. See Figure 3.
Set up is now complete.
M
Mode
Button
Down
Button
Up
Button
Down
Button
Up
Button
Down
Button
Up
Button
Page 4
All manuals and user guides at all-guides.com
all-guides.com
Setup Mode
Tachometer settings and the fuel level
sender type can be changed using the
Setup Mode (see Figure 2, Table 1, and
Table 2). Use this option only if you have
reason to believe that your settings are
wrong. Setting an incorrect value in these
menus can result in extremely inaccurate
performance of the tachometer and fuel
level sender.
To access the Setup Mode, press and hold
both the “Up” and “Down” buttons while
turning on the instrument.
The display will shows,
Briefly pressing the “Mode” button will
cycle through the menu items.
The “Up” and “Down” buttons are used to
modify the settings.
The microprocessor will automatically
record the new settings as you change
them.
of fuel in the fuel tank in percent of full
(PC). The indication is based on the fuel
level sender in the tank and operates
similarly to a normal fuel gauge. There are
no adjustments to this reading.
Note: For proper operation no
additional fuel gauges may be connected
to the fuel level sender.
Other Features
The Commander can have special
features programmed in it at the Factory.
1) Fuel Management which includes, Fuel
Flow, Fuel Used, Total Fuel Used, and
Fuel Remaining.
2) Ambient Air and Water Temperature.
This manual covers both. Refer to your
boats owners manual for which feature
have been installed.
M
Mode
Button
Down
Button
Up
Button
Down
Button
Up
Button
Page 3
Flashes
then shows current fuel
sender selection.
Screen shows: Default = US
changes sensor selection
Flashes
then shows current
tachometer scale
selection.
Screen shows: Default = 6K
adjusts Tachometer full scale
reading to match dial.
Tachometer Selection Table
TAC 1 Two pulses per rev. (4 cylinder, 4 cycle gas engine)
TAC 2 Three pulses per rev. (6 cylinder, 4 cycle gas engine)
TAC 3 Four pulses per rev. (8 cylinder, 4 cycle gas engine)
TAC 4 Five pulses per rev. (10 pole alternator on outboard engine)
TAC 5 Six pulses per rev. (12 pole alternator on outboard engine)
TAC 6 Eight pulses per rev. (Not Used)
TAC 7 Ten pulses per rev. (20 pole alternator on outboard engine)
TAC 8 TH Two to Two Hundred Fifty pulses per rev.
TAC 9 VA Match reference calibration digital or mechanical tachometer
Table
Figure 3
1
Fuel Sender Selection Table
US Standard United States fuel sender ( 240 – 33 Ohms )
EU Standard European fuel sender ( 10 – 180 Ohms )
Table 2
Page 15
All manuals and user guides at all-guides.com
Harness HN0356
Small Connector
Small Plug(CN0082)
To Commander
Shrink Tubing
or Wrap
Black
Purple Gray
Pin A Purple +12 Ignition Power
Pin B Purple +12 Ignition Power
Pin C Black Ground
Pin D Gray Tachometer Input
ECR 1903 12/21/01
(Ignition) (Tach Signal)
(Ground)
Page 16
Description
The Commander has three push buttons;
These buttons control the modes of
operation. The “Mode” button is used to
change the function of the LCD display
and to access sub menus and adjustable
settings. The “Up” and “Down” buttons are
used to modify the settings.
In normal operation mode, pressing the
“Mode” button quickly causes the display
to cycle between the different instrument
displays. Pressing and holding the “Mode”
button causes the display to change to the
“settings” sub menus (see Figure 1).
When the settings menus have been
selected, pressing the “Mode” button
quickly causes the display to cycle through
the setting options. Within each setting
selection, pressing the “Up and “Down”
buttons causes the affected setting to
change.
Note: The microprocessor will
automatically record the new settings as
you adjust them.
When in a setting menu, pressing and
holding the “Mode” button returns to the
main function.
The Tachometer and Fuel Level functions
have several values that can be adjusted to
match your installed equipment. These
rarely used settings are changed in the Set-
Up Mode (see Set-Up Menu guide below).
Operation
Lighting
In normal operating mode the instrument
lighting can be adjusted by pressing the
“Up” and “Down” buttons.
Tachometer
The tachometer is a digital instrument with
the appearance of an analog instrument.
The tachometer is preset at the factory for
an eight cylinder engine and a 6000 RPM
dial. The setting for the tachometer can be
changed in the Set-Up menu (see below).
A microprocessor controlled stepper motor
moves the pointer to display engine
revolutions per minute using a linear dial
Engine Running Only Hourmeter
The Engine Hours display shows the
number of hours the engine has been
operated (Hr). The reading is based on a
signal being received at the tachometer
input to indicate that the engine is running.
Units are displayed as:
Fuel Level
The Fuel Level display shows the amount
M
Mode
Button
Down
Button
Up
Button
Down
Button
Up
Button
Page 2
All manuals and user guides at all-guides.com
Installation:
CAUTION: Disconnect the battery during
installation. Tighten nuts on the
backclamp only slightly more than you
can tighten with your fingers. Six inch-
pounds of torque are sufficient. Over-
tightening could result in damage to the
instrument and may void your warranty.
1. Cut a 3-3/8” diameter hole in the dash
and mount the gauge with the backclamp
supplied.
Follow the enclosed instructions for
installing the sender. Once the sender is
installed and you have run the cables to
the Commander, connect the wires from
the sender to the corresponding Small or
Large connectors as illustrated using the
butt connectors supplied. The butt
connectors have a heat activated
waterproofing. Once the butt connections
have been crimped slowly apply heat with
a heat gun until you see sealant coming
out of the connector ends. It is
recommended to wrap the connections
together with electrical tape for further
protection.
2. Small Connector Socket
Tachometer with Fuel Flow
Follow the wiring diagram at the end of
this manual for wiring connections.
HN0356.
SystemCheck® connections can be found
on HN0358.
Tachometer with Ambient Air and
Water Temperature.
Follow the wiring diagram at the end of
this manual for wiring connections.
HN0355.
3. Large Connector Socket
Tachometer with Fuel Flow
Follow the wiring diagram at the end of
this manual for wiring connections.
HN0354.
SystemCheck® connections can be found
on HN0358.
Tachometer with Ambient Air and
Water Temperature.
Follow the wiring diagram at the end of
this manual for wiring connections.
HN0355 or HN0372 for 5 inch
Commanders..
Used for all splices.
Wires
Heat Shrink Tube
(red or blue)
Metal Butt Connector
(red or blue).
Used for all splices.
Larger
Connector
Socket
Smaller
Connector
Socket
Small
Plug
Large
Plug
Note: For wiring
diagram for the
Large Connector
Plug see HN0354
SystemCheck HN0358
or HN0355 for
Temperature senders.
HN0372 for 5 inch
Commanders.
Note: For wiring
diagram for the
Small Connector
Plug see HN0356
SystemCheck HN0358
or HN0355 for Temperature senders.
Page 1
Harness HN0354
Large Connector
Large Plug(CN0082)
To Commander
Shrink Tubing
or Wrap
Green
Pin A Red Fuel Flow Power
Pin B Green Sender Grounds
Pin C White Fuel Flow Signal
Pin D Pink Fuel Tank Level
ECR 1903 12/21/01
(Tank Sender Ground)
(Sender Ground)
(Sender Power)
(Sender Signal)
Fuel Flow Transducer
Pink
(Fuel Level)
White White
Red Black
Green Shield
Page 17
This manual for 4 or 5 inch Commanders
with
1) Tach/Hour/Fuel Flow.
2) Tach/Hour/SystemCheck®/Fuel Flow.
3) Tach/Hour/Ambient Air/Water
Temperature.
All manuals and user guides at all-guides.com
Harness HN0358
Small Connector
SystemCheck® adaptor
Small connector(CN0082)
To Small
Connector
Socket
SystemCheck®
Harness
SystemCheck® Harness Deutsch Connector
Purple Not Used
Tan/Orange
Tan
Tan/Black
Black
Gray
Tan/Yellow
Pin A Purple +14 Ignition
Pin B Tan/Orange Check Engine
Pin C Black Ground
Pin D Gray Tachometer Signal
ECR 2275 4/15/02
Pin 1 Purple +14 vDC Ignition
Pin 2 Black Ground
Pin 3 Gray Tachometer Signal
Pin 4 Tan/Yellow No Oil Sensor
Pin 5 Tan/Black Low Oil Sensor
Pin 6 Tan Over Temperature
Pin 7 Tan/Orange Lo Oil Sensor
Pin 8 Not Used
ECR 2275 4/15/02
1
2
3
4
8
7
6
5
1
7
6
5
8
2
3
4
Page 18
Installation
Smaller Connector Page 1
Larger Connector Page 1
Operations
Lighting Page 2
Tachometer Page 2
Engine Running Only Hourmeter Page 2
Fuel Level Page 2
Other Features Page 3
Set-Up Mode Page 3
Tachometer Selection Page 4
Fuel Management
Installation guide (Fuel Flow Transducer) Page 5
Fuel Flow Page 6
Units per Hour selection Page 6
Fuel Used Page 6
Reset Page 7
Calibrate Page 7
T
otal Fuel Used Page 7
Reset Page 7
Fuel Remaining Page 8
Adjust Fuel Remaining Page 8
Fuel Remaining Alarm Page 8
Fuel Level Page 9
Bombardier® SystemCheck®
Discription Page 10
Engine Temperature Page 10
Oil Level Page 10
Oil Flow
Four Stroke engine Page 10
Two Stroke engine Page 10
Check Engine Page 10
Operating Modes
Self Test Page 10
Normal Mode Page 10
Diagnostic Mode Page 11
Ambient Air and Water Temperature
Discription Page 12
W
ater Temperature Page 12
Air T
emperature Page 12
Figure 1 Fuel Management LCD Display Modes Page 9
Figure 2 Air/Water LCD Display Modes Page 12
Figure 3 Tachometer Set-Up Page 14
Table 1 Tachometer Selecion Table Page 15
Table 2 Fuel Sender Selection Table Page 15
HN0355 Larger connection Air/Water Temp.Wire Diagram Page 13
HN0356 Smaller Socket Connection Wire Diagram Page 16
HN0354 Larger connection Fuel Management Wire Diagram Page 17
HN0358 SystemCheck Wire Diagram Page 18-19
Index
All manuals and user guides at all-guides.com

Other manuals for Commander

1

Other Faria Measuring Instrument manuals

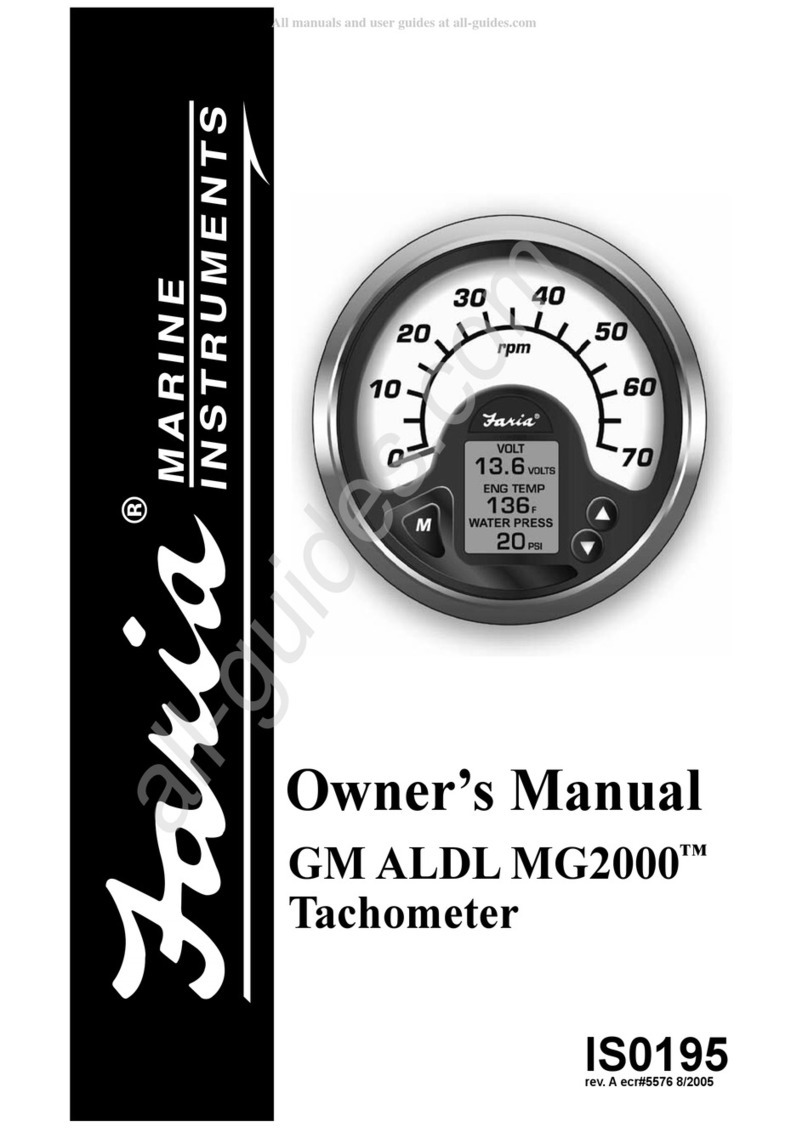
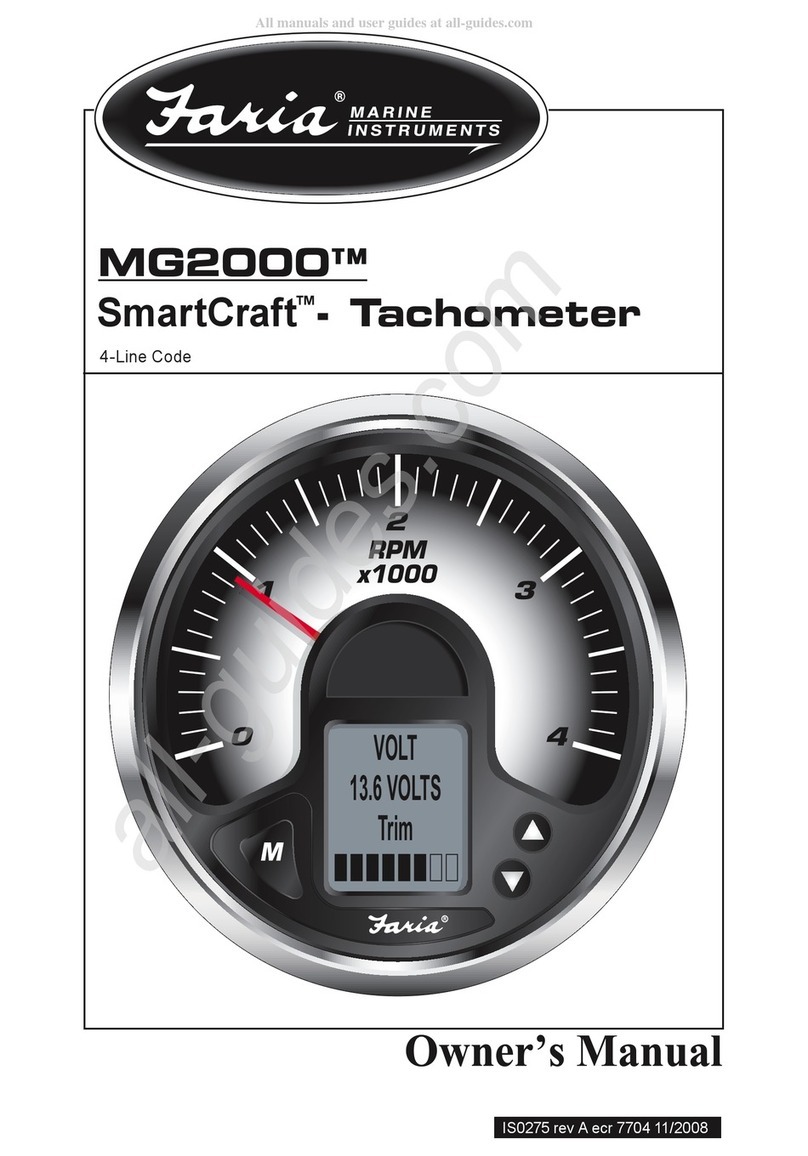
Faria SmartCraft MG2000 User manual

Faria

Faria SmartCraft MG2000 User manual

Faria GM ALDL MG2000 User manual

Faria

Faria GM ALDL MG2000 User manual

Popular Measuring Instrument manuals by other brands

SWR DensFlow operating instructions

SWR

SWR DensFlow operating instructions

PQ Plus UMD 807 E operating manual

PQ Plus

PQ Plus UMD 807 E operating manual

Lasermet ADM-1000 operating instructions

Lasermet

Lasermet ADM-1000 operating instructions

GDS XDI-XDIwin / 30J quick start guide

GDS

GDS XDI-XDIwin / 30J quick start guide

Teledyne Analytical Instruments 7500ZA operating instructions

Teledyne Analytical Instruments

Teledyne Analytical Instruments 7500ZA operating instructions

RJE DG100 Quick Start Sheet

RJE

RJE DG100 Quick Start Sheet

Alesis ADAT HD24 FirePort 1394 Service manual

Alesis

Alesis ADAT HD24 FirePort 1394 Service manual

Simex SWE-73-T user manual

Simex

Simex SWE-73-T user manual

Met One 228 operating guide

Met One

Met One 228 operating guide

Fuji Electric NRF50 user manual

Fuji Electric

Fuji Electric NRF50 user manual

Illuminati IM150 quick start guide

Illuminati

Illuminati IM150 quick start guide

Burkert 8756 operating instructions

Burkert

Burkert 8756 operating instructions

Keller LEO 2 Ei manual

Keller

Keller LEO 2 Ei manual

Trotec BD21 operating manual

Trotec

Trotec BD21 operating manual

solarwatt AC-SENSOR FLEX installation instructions

solarwatt

solarwatt AC-SENSOR FLEX installation instructions

AEI Security & Communications CTVM300AFR quick start guide

AEI Security & Communications

AEI Security & Communications CTVM300AFR quick start guide

Endress+Hauser RID14 operating instructions

Endress+Hauser

Endress+Hauser RID14 operating instructions

Bender ISOMETER isoRW685W manual

Bender

Bender ISOMETER isoRW685W manual

manuals.online logo
manuals.online logoBrands
  • About & Mission
  • Contact us
  • Privacy Policy
  • Terms and Conditions

Copyright 2025 Manuals.Online. All Rights Reserved.