manuals.online logo
Brands
  1. Home
  2. •
  3. Brands
  4. •
  5. Faro Barcelona
  6. •
  7. Outdoor Light
  8. •
  9. Faro Barcelona MAYA 1 User manual

Faro Barcelona MAYA 1 User manual

INSTRUCCIONES
INSTRUCTIONS ● INSTRUCTION ● INSTRUÇÕES ● ANWEISUNGEN
INSTRUCTIES ● INSTRUZIONI ● Ο∆ΗΓΊΕΣ ● ИНСТРУК ИИ
MAYA 1
Aplique / Wall Lamp / Applique / Aplique / Wandleuchte / Wandlamp / Applique / Απλίκα / Бра
72247
C/. Dinámica, nº1 ●Polígono Industrial Santa Rita ●08755 Castellbisbal ●Barcelona ●Spain
Tel. 902 165 166 - +34 93 772 39 49 ●Fax. +34 93 772 00 18 fa[email protected] ●www.faro.es
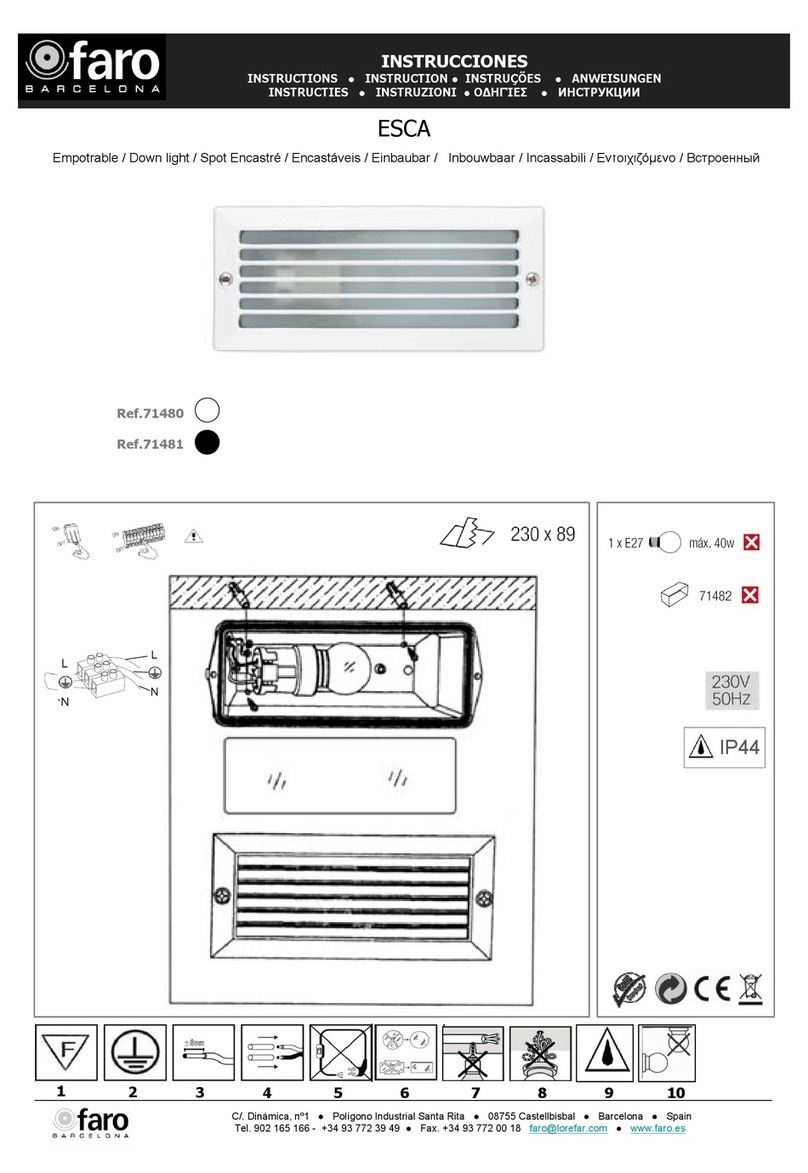
1 2 34
IP23
INSTRUCCIONES DE SEGURIDAD ■
■■
■ESPAÑOL ■
■■
■
- La instalación debería ser hecha por un electricista autorizado y según las normas de su país.
- El abricante aconseja un uso correcto de los aparatos de iluminación. Por lo tanto seguir siempre estas instrucciones para asegurar un correcto y seguro
uncionamiento de las lámparas y conservarlas para uturas consultas.
- Cortar la corriente siempre antes de comenzar la instalación, el mantenimiento o la reparación.
- Mantener el interior de las lámparas con un paño seco y limpio, no usar disolventes o sustancias abrasivas. Evitar el contacto de líquidos en todas las partes
eléctricas.
- MÁX….W. Usar únicamente bombillas adecuadas para este aparato y no superar nunca el wataje especi icado.
- Tener en cuenta siempre todas las especi icaciones del aparato. Veri icar siempre los iconos de la etiqueta gris pegada en la lámpara y los iconos en la parte A
de las instrucciones de seguridad.
ATENCIÓN: A continuación encontrará las explicaciones de todos los iconos ordenados numéricamente que aparecen en las instrucciones de
seguridad (PARTE A)
1. Protección clase I: El aparato tiene toma de tierra. El cable de toma de tierra (amarillo/verde) debe ser conectado al clip marcado con símbolo
2. El aparato puede ser instalado en super icies normalmente in lamables.
3. Reemplazar inmediatamente cristales de seguridad agrietados o rotos y use sólo recambios aprobados por el abricante
4. IP2X: Protegidocontra la penetraciónde cuerpossólidos con Ø ≥12 mm
5. IPX3: Protegido contra la lluvia con un ángulo máx de 60º sobre la vertical
SAFETY INSTRUCTIONS ■
■■
■ENGLISH ■
■■
■
- All wiring should be done by a quali ied electrician according to the regulations o your country.
- The manu acturer advises the correct use o light- ittings. There ore always ollow these instructions to ensure the correct and sa e installation and unctioning
o the ittings and keep the instructions sa e or uture re erence.
- Always isolate the power be ore commencing installation, maintenance or repair.
- Clean interior lighting with a dry cloth duster; do not use abrasives or solvents. Avoid liquid on all electrical parts.-
- Max…W: Only use lamps suitable or this itting and keep within the maximum speci ied wattage.
- Always consider all the technical speci ications o the itting. Veri y the stated icons on the identi ication label on the itting and the icons that are shown in part
A
o
your
sa ety
instructions
.
INSTRUCCIONES DE SEGURIDAD
SAFETY INSTRUCTIONS ● INSTRUCTION DE SÉCURITÉ ● INSTRUÇÕES DE SEGURANÇA ● SICHERHEITSHINWEISE
VEILIGHEIDSINSTURCTIES ● INSTRUZIONI DI SICUREZZA ● Ο∆ΗΓΊΕΣ ΑΣΦΑΛΕΊΑΣ ●
ИНСТРУК ИИ ПО ТЕХНИКЕБЕЗОПАСНОСТИ
A
o
your
sa ety
instructions
.
ATTENTION: Below you will find all the explanations with numeric reference to the icons respectively in front of these safety instructions
(PART A)
1. Protection class I: the itting has an earthing connection. The earth wire (yellow / green) has to be connected to the clip marked with
2. The itting is suitable or ixing to normal lammable sur aces.
3. Immediately replace a cracked or broken sa ety glass and use only manu acturer approved parts
4. IP2X: Protected against solid objects greater than 12 mm, IPX3: Protected against spraying water
INSTRUCTION DE SÉCURITÉ ■
■■
■FRANÇAIS ■
■■
■
- L’installation doit être aite par un électricien autorisé et selon les règlements de votre pays.
- Le abricant donne toujours des conseils pour une utilisation correcte des articles d’eclairage. Pour vous assurer d’une installation correcte et sûre, il aut donc
suivre les instructions qui vous sont données avec chaque article.
- Coupez systématiquement l’arrivée de courant avant de commencer une installation, une maintenance ou une réparation sur un article d’éclairage.
- Le nettoyage des articles d’éclairage se ait avec un chi on sec, n’utilisez pas de solvants ou de produits abrasi s. Evitez les projections de liquides sur les parties
électriques.
- MÁX….W. n’utilisez pas d’ampoule d’une puissance supérieure à celle indiquée sur l’etiquette du produit.
- Prenez toujours en compte les spéci ications techniques de l’équipement. Véri iez les icônes sur l’etiquette argentée de l’article et les icônes que nous vous
Expliquons sur la partie A de votre notice de sécurité.
ATTENCION: Vous trouverez ci-après toutes les explications avec des références numériques correspondant respectivement aux instructions
de sécurité. (PARTIE A)
1. Protection de classe I: L’équipement a une conexion à la prise de terre. Le câble de terre (jaune et vert) doit connecté au clip marqué d’une croix
2. L’équipement peut être installé sur des sur aces normalement in lammables.
3. Remplacez immédiatement un verre de sécurité issuré ou cassé et n’utilisez que des éléments approuvés par le constructeur
4. IP2X: Protection contre corps de diamètre supérieur à 12 mm, IPX3: Protection contre pluie de 0°à 60°de la verticale et ruissellement.
C/. Dinámica, nº1 ●Polígono Industrial Santa Rita ●08755 Castellbisbal ●Barcelona ●Spain
Tel. 902 165 166 - +34 93 772 39 49 ●Fax. +34 93 772 00 18 fa[email protected] ●www.faro.es
VEILIGHEIDSINSTURCTIES ■
■■
■NEDERLANDS ■
■■
■
- Verlichtingsartikel moet worder geïnstalleerd dor een erkend vakman.
- De abrikant adviseert een juiste toepassing van verlichtingsarmaturen. Volg én bewaar daarom deze gebruiksaanwijzing voor een veilige en betrouwbare installatie en
werking van het armatuur.
- Schakel altijd eerst de elektriciteit uit loor installatie, onderhoud o herstelling.
- Onderhoud binnenverlichting met een droge doek o borsteltje, gebruik geen schuur- o oplosmiddelen. Vermijd vocht op alle elektrische onderdelen.
- MÁX….W. gebruik uitsluitend lampen van het juiste type en overschrijd nooit het maximum aagegeven wattage.
- Houd steeds alle technische speci icaties van uw armatuur in acht. Raadpleeg hiervoor de speci iek vermelde pictogrammen van het identi icatielabel op het armatuur
én de pictogrammen die worden vermeld in deel A van uw veiligheidsinstructies.
OPGELET: Hieronder vindt u echter we alle tekstuele verklaringen met numerieke verwijzing naar de respectievelijke pictogrammen vooraan deze
gebruiksaanwijzing (DELL A)
1- Beschermklasse I: het armatuur is uitgerust met een aardklem en moet dus worden geaard. Sliut de aardleinding (geelgroene ader) aan op de met gemarkeerde klem
2- Het armatuur is geschikt voor bevestiging/plaatsing aan/op normaal ontvlambare materialen/oppervlakten.
3-Vervang onmiddellijk een gebarsten o gebroken beschermglas en gebruik enkel originele wisselstukklen
4-IP2X: Biedt bescherming tegen het binnendringen van vaste elementen met Ø ≥ 12 mm; IPX3: Biedt bescherming tegen regen met een max. hoek van 60°over
verticaal.
ISTRUZIONI DI SICUREZZA ■
■■
■ITALIANO ■
■■
■
- Tutto il cablaggio dovrebbe essere atto da un elettricista quali icato secondo il suo regolamento del suo paese.
- Il abricante in orma sul corretto uso degli articoli d’ illuminazione. Pertanto attenetevi sempre a queste istruzioni che assicurano una corretta e sicura installazione
nonchè unzionamento e conservatele quindi per uture consultazioni.
- Staccate sempre il ilo della corrente prima di iniziare un’installazione, manuntenzione o riparazione.
- E ettuate la pulizia degli articoli d’illuminazione con panni asciutti e non usate nè solventi nè prodotti abrasivi. Evitate di spargere liquidi su tutte le parti elettriche.
- MÁX….W. usate solo lampadine adatte per questo articolo e con petnza non superior al wattagio indicate.
- Tenete sempre in considerazione tutte le speci iche tecniche dell’apparecchio. Veri icate i simboli che si trovano sull’etichetta di identi icazione di ogni articolo e le icone
visibili nella parte A delle Vostre istruzioni di sicurezza.
ATTENZ.: Qui sotto troverete tutte le spiegazioni con riferimenti numerici alle corrispodenti icone allegate a queste istruzioni di sicurezza (PARTE A)
1.
Protezione in classe I
:
L’apparecchio
ha una
connessione
di presa a
terra
.
Il
cavo di
terra
(
giallo
/verde) debe
essere
collegato
alla
vite con una
INSTRUCCIONES DE SEGURIDAD
SAFETY INSTRUCTIONS ● INSTRUCTION DE SÉCURITÉ ● INSTRUÇÕES DE SEGURANÇA ● SICHERHEITSHINWEISE
VEILIGHEIDSINSTURCTIES ● INSTRUZIONI DI SICUREZZA ● Ο∆ΗΓΊΕΣ ΑΣΦΑΛΕΊΑΣ ● ИНСТРУК ИИ
ПО ТЕХНИКЕБЕЗОПАСНОСТИ
C/. Dinámica, nº1 ●Polígono Industrial Santa Rita ●08755 Castellbisbal ●Barcelona ●Spain
Tel. 902 165 166 - +34 93 772 39 49 ●Fax. +34 93 772 00 18 fa[email protected] ●www.faro.es
1.
Protezione in classe I
:
L’apparecchio
ha una
connessione
di presa a
terra
.
Il
cavo di
terra
(
giallo
/verde) debe
essere
collegato
alla
vite con una
2. E’ adatto per essere installato su normali acciate in iammabili.
3. Sostituite immediatemente un vetro di sicurezza incrinato o rotto ed utilizzate esclusivamente ricambi approvati dal abbricante
4. IP2X: Protetto contro l’ingresso di corpi solidi con Ø ≥ 12 mm; IPX3: Protetto contro la pioggia con angolo max. di 60°sulla verticale.
INSTRUÇÕES DE SEGURANÇA ■
■■
■PORTUGUĚS ■
■■
■
- A instalação deverá ser eita por un electricista autorizado e segundo o regulamento do vosso país.
- O abricante aconselha a correcta instalação do nosso material. Por isso, sigua sempre estas instruções para assegurar uma correcta e segura instalação e
uncionamento do nosso material, preservando-o para utura re erência.
- Desligue sempre a corrente antes de começar uma instalação , manutenção ou reparação.
- Limpe o material eléctrico do interior da casa com um pano seco, não use abrasivos ou solventes. Evite o contacto de líquidos com as partes eléctricas.
- MÁX….W. Use lâmpadas adecuadas e que estejam dentro da voltagem indicada.
- Leve sempre em consideração todas as especi icações técnicas no processo de instalação. Veri ique os ícones que vêm impresos na olha de instalação e os
ícones que vêm na parte A na olha de instruções de segurança.
ATENÇÃO: Em baixo vai encontrar todas as explicações com referências numéricas para os ícones respectivos destas instruções de segurança
(PARTE A)
1. Protecçâo classe I: O material tem uma ligaçao terra. O iio terra (amarelo e verde) tem que ser conectado com o clip marcado com um
2. Material próprio para ixar em super ícies in lamáveis normais.
3. Substitua imediatamente o ou os vidros rachados ou partidos e use exclusivamente peças aprovadas pelo abricante
4. IP2X: Protegido contra a penetraçáo de corpos solidos com 0 > 12 mm.; IPX3: Protegido contra água en orma de chuva con un angulo max. de 60°.
DIESE SICHERHEITSHINWEISE ■
■■
■DEUTSCH ■
■■
■
- Beachten Sie stets die geltenden Installationsvorschri ten. Manche Vorschi ten verlangen, dass der Anschluβ durch einen Fachmann ausge ührt wird.
- Der Hersteller weist zu einem ordnungsgemässem Gebrauch von Leuchten. Folgen Sie immer den Hinweisen dieser Anleitung ür eine sichere und ge ahrlose Montage
und Gebrauch dieser Leuchte. Bewahren Sie die Montageanleitung ür spätere Nach ragen au .
- Schalten Sie stets die Spannung vor Installation, Instandhaltung oder Reparatur ab.
- P legen Sie Wohnraumleuchten mit einem trockenen Reinigungstuch, benutzen Sie keine schar en Reiniger oder Lösungsmittel. Vermeiden Sie, daβ Flüssigkeiten an
elektrisch-leitende Teile gelangen.
- MÁX….W. verwenden Sie ausschliesslich Leuchtmittel mit den angegebenen Wattleistung, die ür diese Leuchte geeignet sind.
- Beachten Sie immer die technischen Daten au dem Produkt. Vergleichen Sie die Symbole au dem Typenschild der Leuchte mit den Symbolen aus Teil “A”. Diese
Symbole aus Teil A sind nach olgend erklärt
ACHUNG: Unten bzw. auf der Vorderseite dieser Anleitung finden Sie alle Erklärungen mit einem Nummernbezug zu den Symbolen (TEIL A)
1. Schutzklasse I: Diese Leuchte hat einen Schutzleiteranschluss. Der Schutzleiter muβ an die mit,, “gekennzeichnete Erdungsschraube angeschlossen werden.
Diese Leuchte ist geeignet ür die Montage au normal ent lammbaren Ober lächen.
2- Diese Leuchte ist geeignet ür die Montage au normal ent lammbaren Ober lächen. Einbauspots dür en unter keinen Umständen mit Isolationsmaterial oder ähnlichem
abgedeckt werden.
3- Ersetzen Sie umgehend das zerbrochene Schutzglas. Verwenden Sie nur Orginalersatzteile
4- IP2X: Geschützt gegen das Eindringen von esten Körpern mit Ø ≥ 12 mm; IPX3: Geschützt gegen Regen all mit einem Winkel von max. 60°über die Senkrechte.
Ο∆ΗΓΙΕΣ ΑΣΦΑΛΕΙΑΣ ■
■■
■ΕΛΛΗΝΙΚΗ ■
■■
■
- Η εγκατάσταση πρέπει να πραγµατοποιηθεί από εξουσιοδοτηµένο ηλεκτρολόγο και σύµφωνα µε τους κανονισµούς της χώρας σας.
- Ο κατασκευαστής συνιστά τη σωστή χρήση των συσκευών φωτισµού. Ακολουθείτε πάντοτε αυτές τις οδηγίες για να εξασφαλίζετε τη σωστή και ασφαλή λειτουργία των
φωτιστικών και φυλάξτε τις για µελλοντική χρήση.
- Κλείνετε τον γενικό πριν ξεκινήσετε την εγκατάσταση, συντήρηση ή επισκευή.
Καθαρίζετε το εσωτερικό των φωτιστικών µε ένα στεγνό και καθαρό πανί, µην χρησιµοποιείτε διαλυτικά ή λειαντικές ουσίες. Αποφύγετε την επαφή υγρών µε όλα τα
ηλεκτρικά µέρη.
- ΜΕΓ….. Χρησιµοποιείτε µόνο λαµπτήρες κατάλληλους για αυτή τη συσκευή και µην ξεπερνάτε τα watt που προδιαγράφονται.
-Έχετε πάντα υπόψη όλες τις προδιαγραφές της συσκευής. Ελέγχετε πάντοτε τις εικόνες της γκρι ετικέτας που είναι κολληµένη στον λαµπτήρα και στις εικόνες στο µέρος
Α των οδηγιών ασφαλείας.
ΠΡΟΣΟΧΗ
: Στη συνέχεια θα βρείτε τις επεξηγήσεις όλων των εικονιδίων µε αλφαβητική σειρά, τα οποία εµφανίζονται στις οδηγίες ασφαλεία
ς (
ΜΕΡΟΣ A)
INSTRUCCIONES DE SEGURIDAD
SAFETY INSTRUCTIONS ● INSTRUCTION DE SÉCURITÉ ● INSTRUÇÕES DE SEGURANÇA ● SICHERHEITSHINWEISE
VEILIGHEIDSINSTURCTIES ● INSTRUZIONI DI SICUREZZA ● Ο∆ΗΓΊΕΣ ΑΣΦΑΛΕΊΑΣ ● ИНСТРУК ИИ
ПО ТЕХНИКЕБЕЗОПАСНОСТИ
ΠΡΟΣΟΧΗ
: Στη συνέχεια θα βρείτε τις επεξηγήσεις όλων των εικονιδίων µε αλφαβητική σειρά, τα οποία εµφανίζονται στις οδηγίες ασφαλεία
ς (
ΜΕΡΟΣ A)
1- Προστασία κλάσης I: Η συσκευή έχει γείωση. Το καλώδιο γείωσης (κίτρινο / πράσινο) πρέπει να συνδεθεί στο κλιπ που φέρει το σύµβολο .
2- Η συσκευή µπορεί να εγκατασταθεί σε εύφλεκτες επιφάνειες.
3- Αντικαθιστάτε αµέσως τα κρύσταλλα ασφαλείας που έχουν ραγίσει ή σπάσει και χρησιµοποιείτε µόνο ανταλλακτικά εγκεκριµένα από τον κατασκευαστή
4- IP2X: Με προστασία κατά της διείσδυσης στερεών αντικειµένων διαµέτρου Ø ≥ 12 mm; IPX3: Με προστασία κατά της βροχής µε µέγιστη γωνία 60º επί καθέτου
ИНСТРУК ИИ ПО ТЕХНИКЕ БЕЗОПАСНОСТИ ■
■■
■РУССКИЙ ■
■■
■
. Установка должна производиться профессиональным электриком с соблюдением норм страны.
. Производитель рекомендует использовать осветительные приборы согласно нормам их эксплуатации. Для обеспечения правильной и надежной работы ламп
всегда следуйте указаниям в инструкции и сохраняйте ее для дальнейшего использования.
. Перед установкой, обслуживанием или ремонтом светильника всегда отключайте его от электросети.
. Всегда завинчивайте шурупы на распределительной коробке, особенно на подсоединениях низковольтной проводки (12V).
. Перед установкой убедитесь в правильном подсоединении всех проводов с цветовой маркировкой: голубой (N - нуль), коричневый или черный (L - фаза) и
желтый / зеленый (заземление) (для защиты класса I).
Протирайте внутреннюю поверхность светильника сухой и чистой тряпкой. Не используйте растворители и абразивные средства. Не допускайте попадания
жидкости на любые электрические части светильника.
. МАКС. ... ВАТТ. Используйте только лампы, подходящие для данного осветительного прибора, и никогда не превышайте указанной мощности.
. Обязательно обращайте внимание на все описания прибора. Обязательно сверяйте предупредительные знаки на серой этикетке на светильнике со знаками в
разделе А инструкции по технике безопасности.
. Соединение типа Y: замена соединительного шнура должна производиться фирмой-изготовителем или высококвалифицированным персоналом
ВНИМАНИЕ! Ниже приведены описания всех предупредительных знаков согласно их нумерации в инструкции по технике безопасности
(РАЗДЕЛ А).
1- Защита класса I: прибор имеет заземление. Провод для заземления (желтый / зеленый) должен быть подсоединен к зажиму, маркированному символом .
2- Прибор можно устанавливать на поверхностях без риска воспламеняемости. Встроенные светильники ни в коем случае нельзя накрывать изоляционным
или аналогичным материалом.
3- Обязательно заменяйте разбитое или треснувшее защитное стекло. Для замены используйте только одобренные производителем запчасти
5- IP2X: Защищен от проникновения твердых тел Ø ≥ 12 мм; IPX3: Защищен от дождевых струй под углом до 60º по вертикали
C/. Dinámica, nº1 ●Polígono Industrial Santa Rita ●08755 Castellbisbal ●Barcelona ●Spain
Tel. 902 165 166 - +34 93 772 39 49 ●Fax. +34 93 772 00 18 fa[email protected] ●www.faro.es

This manual suits for next models

1

Other Faro Barcelona Outdoor Light manuals

Faro Barcelona SABA 68544 User manual

Faro Barcelona

Faro Barcelona SABA 68544 User manual

Faro Barcelona ANCORA User manual

Faro Barcelona

Faro Barcelona ANCORA User manual

Faro Barcelona BOLETUS User manual

Faro Barcelona

Faro Barcelona BOLETUS User manual

Faro Barcelona 75531 User manual

Faro Barcelona

Faro Barcelona 75531 User manual

Faro Barcelona PICCOLA 70246 User manual

Faro Barcelona

Faro Barcelona PICCOLA 70246 User manual

Faro Barcelona SPARK User manual

Faro Barcelona

Faro Barcelona SPARK User manual

Faro Barcelona 750201 User manual

Faro Barcelona

Faro Barcelona 750201 User manual

Faro Barcelona FOC User manual

Faro Barcelona

Faro Barcelona FOC User manual

Faro Barcelona TAKUA User manual

Faro Barcelona

Faro Barcelona TAKUA User manual

Faro Barcelona LINK User manual

Faro Barcelona

Faro Barcelona LINK User manual

Faro Barcelona BU-OH User manual

Faro Barcelona

Faro Barcelona BU-OH User manual

Faro Barcelona ALFA 70025 User manual

Faro Barcelona

Faro Barcelona ALFA 70025 User manual

Faro Barcelona CORB 40135 User manual

Faro Barcelona

Faro Barcelona CORB 40135 User manual

Faro Barcelona ELE User manual

Faro Barcelona

Faro Barcelona ELE User manual

Faro Barcelona SPY 2 User manual

Faro Barcelona

Faro Barcelona SPY 2 User manual

Faro Barcelona NASE-1 User manual

Faro Barcelona

Faro Barcelona NASE-1 User manual

Faro Barcelona MUST 70657 User manual

Faro Barcelona

Faro Barcelona MUST 70657 User manual

Faro Barcelona SHELBY 75538 User manual

Faro Barcelona

Faro Barcelona SHELBY 75538 User manual

Faro Barcelona ESCA User manual

Faro Barcelona

Faro Barcelona ESCA User manual

Faro Barcelona LE VITA 29691 User manual

Faro Barcelona

Faro Barcelona LE VITA 29691 User manual

Faro Barcelona SURAT User manual

Faro Barcelona

Faro Barcelona SURAT User manual

Faro Barcelona GRUND 2W User manual

Faro Barcelona

Faro Barcelona GRUND 2W User manual

Faro Barcelona 71490 User manual

Faro Barcelona

Faro Barcelona 71490 User manual

Faro Barcelona SPY 1 User manual

Faro Barcelona

Faro Barcelona SPY 1 User manual

Popular Outdoor Light manuals by other brands

planeo Agate Manual and safety instructions

planeo

planeo Agate Manual and safety instructions

Hubbell Kim Lighting KLV Series installation instructions

Hubbell

Hubbell Kim Lighting KLV Series installation instructions

Haag-Streit BM 900 instruction manual

Haag-Streit

Haag-Streit BM 900 instruction manual

LUMIEN W3A1-2.5W-27K-BZ instruction manual

LUMIEN

LUMIEN W3A1-2.5W-27K-BZ instruction manual

REV Ritter SENSO BASE Assembly and operating instructions

REV Ritter

REV Ritter SENSO BASE Assembly and operating instructions

Trio FREDDY 4248101 Series quick start guide

Trio

Trio FREDDY 4248101 Series quick start guide

BEMKO LOP1-030BL-4K instructions

BEMKO

BEMKO LOP1-030BL-4K instructions

Kichler Lighting Brix 59123BKT installation instructions

Kichler Lighting

Kichler Lighting Brix 59123BKT installation instructions

MOOD CHIC instruction manual

MOOD

MOOD CHIC instruction manual

LIGMAN TRIANGLE 5 installation manual

LIGMAN

LIGMAN TRIANGLE 5 installation manual

Anolis ArcLine Mini Outdoor 9 User instructions

Anolis

Anolis ArcLine Mini Outdoor 9 User instructions

Timberlab Strato manual

Timberlab

Timberlab Strato manual

Vaxcel T0321 Assembly and installation instructions

Vaxcel

Vaxcel T0321 Assembly and installation instructions

Trilux CUVIA LED Mounting instructions

Trilux

Trilux CUVIA LED Mounting instructions

LIGMAN VANCOUVER 67 installation manual

LIGMAN

LIGMAN VANCOUVER 67 installation manual

LUCIDE BOOGY quick start guide

LUCIDE

LUCIDE BOOGY quick start guide

Garden Gear Rattan instruction manual

Garden Gear

Garden Gear Rattan instruction manual

Defiant 53302161 Use and care guide

Defiant

Defiant 53302161 Use and care guide

manuals.online logo
manuals.online logoBrands
  • About & Mission
  • Contact us
  • Privacy Policy
  • Terms and Conditions

Copyright 2025 Manuals.Online. All Rights Reserved.