Fass DDRP 02 User manual

WARRANTY STIPULATIONS:
• Copy of sales receipt mailed with this form
• All warranty information, located on back, completely filled out
• FASS products and/or paperwork must not tampered with
• Warranties are non-transferable
• Special Note: As of 7/2009 Product purchased through Dealers unauthorized to
sell FASS will carry only the manufacturers 1 year production warranty.
SERIAL NO. MANUFACTURED DATE:
SEND CORRESPONDENCE TO:
Diesel Performance Products, Inc
Att: Warranty
16240 Hwy O Suite B
Marthasville, MO. 63357
4 YEAR WARRANTY
Date Received:
Purchase Receipt: Yes (Receipt Date: ) No
DPP INC. OFFICE USE ONLY :

Dealer Purchased From : Date:
New FASS Owner Name:
Company/Organization:
Phone:
Street:
City, State & Zip:
Vehicle Year/ Make/ Model:
Color:
Vin Number:
Comments:
Quality Of Product
Excellent Good Fair Poor
Dealer Magazine
Show Online Friend
How did you hear about us?

DIRECT DODGE REPLACEMENT PUMP
INSTALLATION INSTRUCTIONS
The FASS’s DDRP series is a complete replacement for the stock lift pump (1998.5 – 2002 Dodge)
Will not work with retrofitted in tank pumps
Note: Banjo Bolt Mesh Screen is contained in the covered wire connector.
Included with DDRP:
• DDRP
• MC-990, Banjo Bolt Mesh Screen
• 3 Mounting Bolts
• 12” of 3/8” Fuel Line
• 2 Banjo Fittings
• Flathead Allen Set Screw
Needed:
• 3 Banjo Bolts and 6 Washers (from existing stock pump)
• 17mm wrench for the removal of the banjo bolts
10mm wrench for the removal of the fuel line retainer and
factory pump studs
• 1/8” allen
2. Remove the banjo bolt, located on the back side of the stock fuel pump. After removing the rear banjo
bolt you must remove the fuel line retainer that attaches to the factory bracket. It is easier to remove the
line on the back of the filter element before removing the final banjo bolt (this will save knuckles and o-
rings).
3. With the 10mm tool of your choice, remove the three studs on the bracket that holds the fuel pump in
place.
4. Once the pump is loose from the bracket you need to disconnect
the electrical connector located on the base of the pump (as pic-
tured below). Now you can remove the factory pump from the
truck completely.
5. With the factory pump out of the truck you can remove the fuel line with the 17mm wrench.

Note: Before next step spray some WD-40 into the inlet port of the pump
(or comparable), to help prevent gear wear while priming.
6. Bolt the factory fuel line into the inlet port, using the banjo bolt and 2
washers, while placing the mesh screen (very critical - only insert the
screen ¼” into the banjo bolt, leaving about ¾” of an inch exposed) in
the center of the banjo bolt. This is a 144 micro filter that helps keep
debris from entering your new pump. Loose assemble at this time,
making sure the support arm of the fuel line is located between the
mounting plate and pump motor of the DDRP.
7. Using the 10 x 32 tapered flathead cap screw, locate the mounting
hole of the support arm around this bolt while threading.
8. While tightening the inlet banjo bolt, hold the fuel line support
bracket firmly against the top of the pump motor. Following this
method of assembling the fuel line to the inlet port of the DDRP will
help insure against the loosening of fuel fittings.
9. Now slide the DDRP into the factory location. Once the DDRP is in
position use the included mounting bolts to bolt it in place.
10. Once the mounting bolts have been tightened you can as-
semble the fuel line from the DDRP to the inlet of the fac-
tory fuel filter housing. Note: Early models will have the
inlet/outlet ports on top of the filter housing (picture A),
while later models will have the inlet port on the firewall
side of the filter head (picture B).
A
B

11. Spray WD-40 on the push
lock portion of the banjo fit-
ting and on the inside diame-
ter of the fuel line before in-
serting the push lock into the
fuel line. Assemble this banjo
fitting to the outlet port of the
DDRP using the banjo bolt
and 2 washers.
12. Measure and cut the oppo-
site end of this fuel line to
the inlet port of the factory
fuel filter housing, top
(early model) or top side
(later model). Assemble
into this port using the as-
sembly instruction in the
previous step.
13. After everything is good and tight you can now plug the DDRP into
your factory wiring harness.
To insure our extended 4 year warranty be sure to send completed warranty informa-
tion in to Diesel Performance Products, Inc. 16240 Hwy o Suite B Marthasville, MO.
63357, with a copy of your receipt.

HARD STARTS (DODGE ‘98.5 – ’02)
Answer the following questions:
• Did the vehicle start fine without the FASS or HPFP? Do you have high mileage on the
VP44? If yes, have your VP44 checked. Has the VP44 been subjected to a PSI of 5 or
less? Has the VP44 been subject to a failing lift pump? Does it occur more frequently
when the conditions are warm? Have you recently replaced your VP44? Was it used?
If yes to any of these questions, Start vehicle as soon as you enter the key (do not wait
for the “wait to start” light to go out) If the vehicle starts it suggest that the problem
lies with the VP44.
• Is the fuel pressure where it should be?
• Has the truck had an ECM re-flash? If not, contact your dealer to find the most current
flash for your truck.
• Do you have a WH-1002? If yes, refer to the “WH-1002” section located in “Electrical”
LOW FUEL PRESSURE ISSUE WITH DDRP
After installing your new DDRP and you find that the pressure is lower than required ( Below
12 – 14) You will find a small pressure spring , and new o-ring included in the installation
kit.
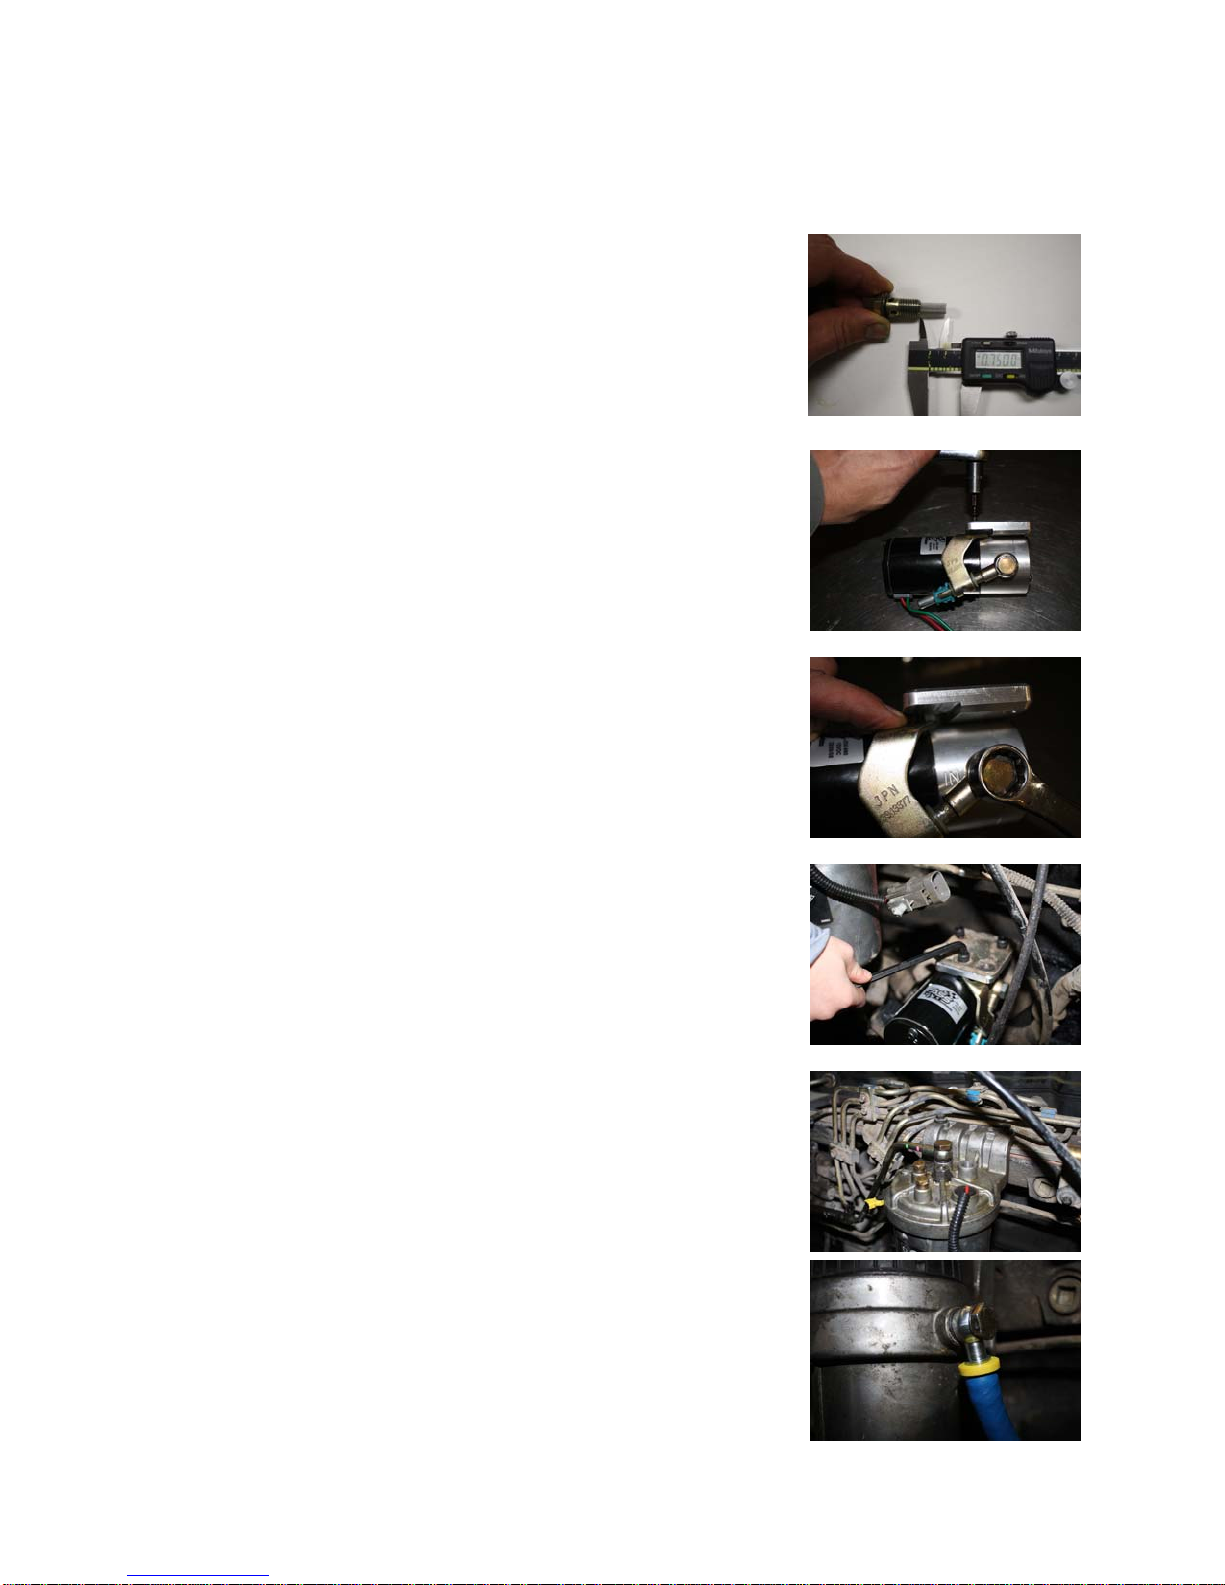
• Remove the DDRP from the vehicle.
• Position the DDRP in the horizontal position with the square mount-
ing plate facing in the upwards position.
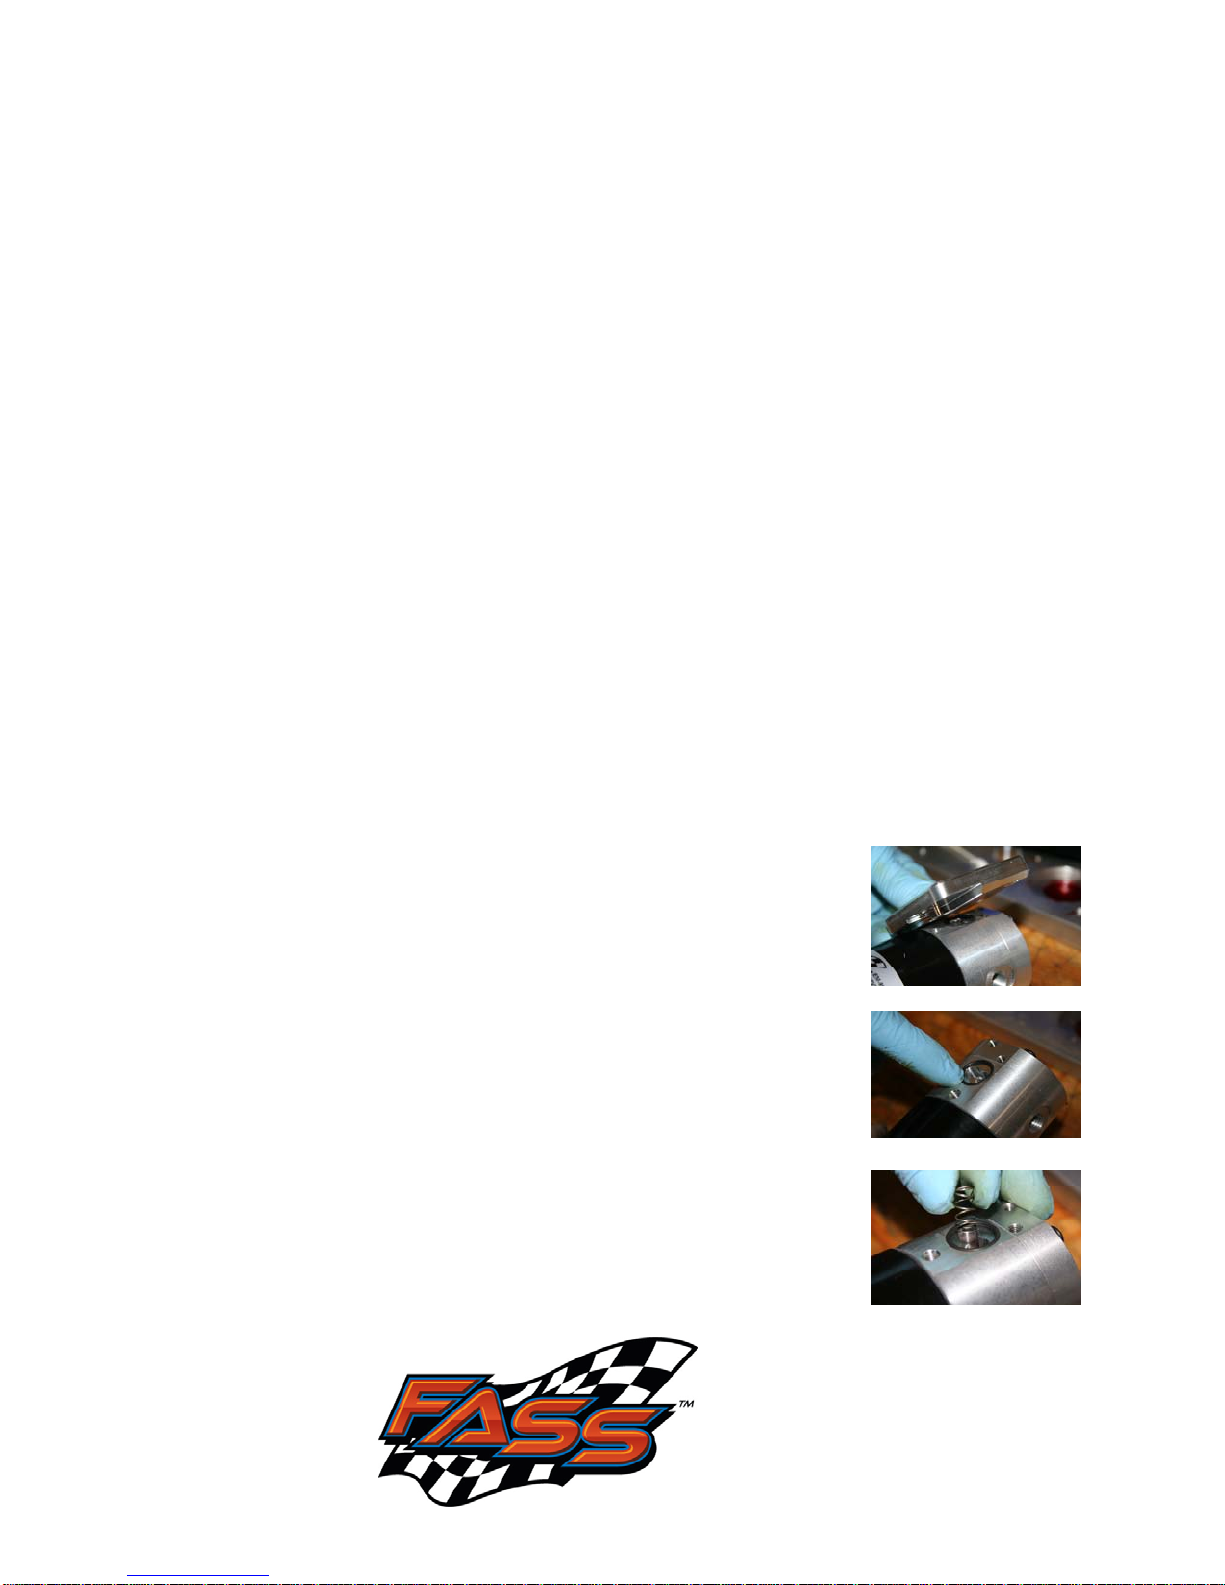
• Remove the 3 mounting screws holding the plate to the pump assy.
After removing the mounting plate you will find, an o-ring seal, a
small spring, and small check ball under the spring (do not remove
the check ball )
• Replace the spring and O-ring. Reattach the mounting plate, paying
close attention as to not pinch the sealing o-ring. Retighten the
mounting screws to 55 inch lbs. Reinstall DDRP on the vehicle. This
new spring will increase the psi about 5-6 lbs.
Table of contents
Other Fass Automobile Accessories manuals