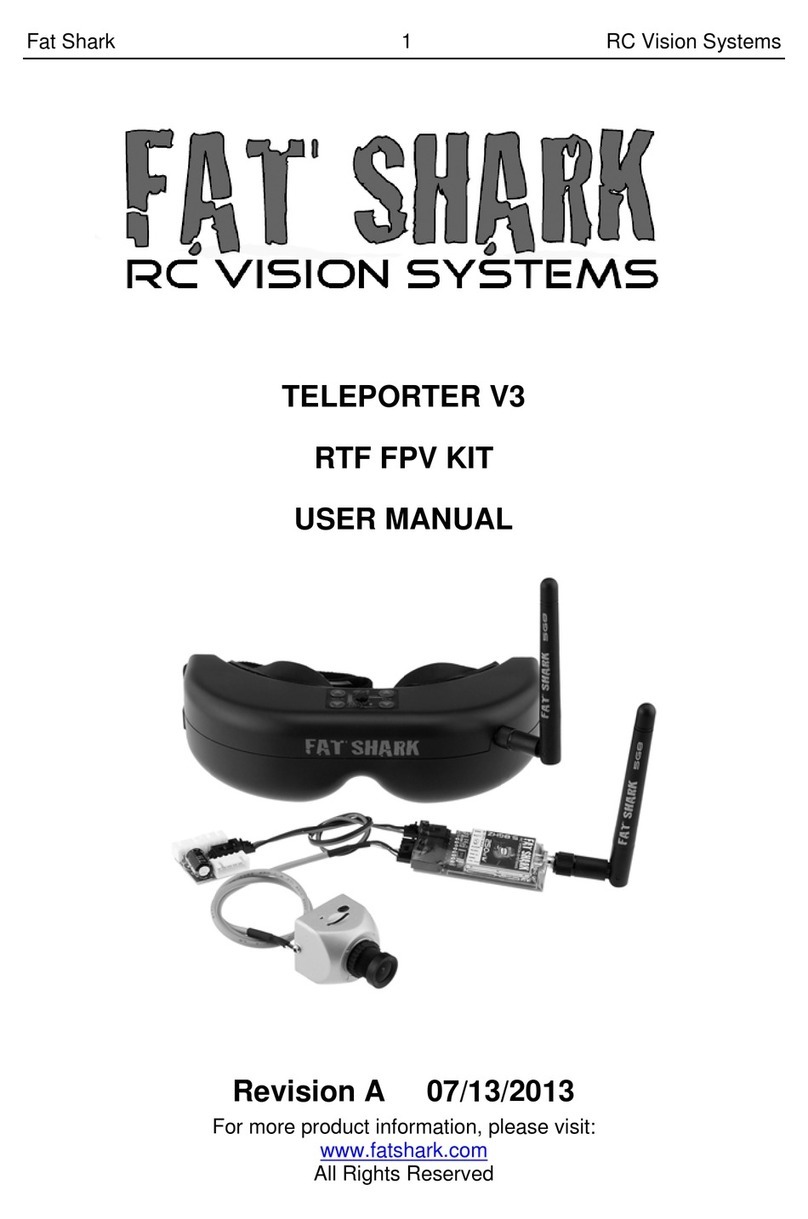
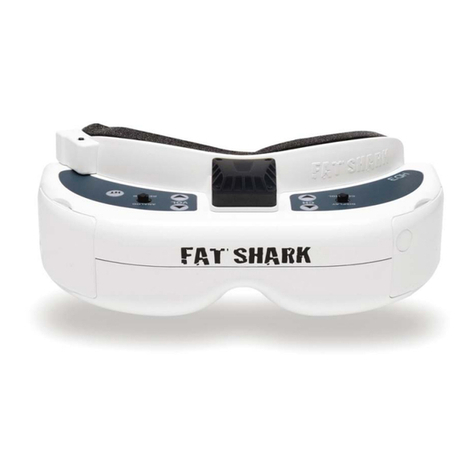
FatShark FSV1048 User manual

Fat Shark 1 RC Vision Systems
ATTITUDE V4
MODEL FSV1048
USER MANUAL
Revision B 05/22/2017
For more product information, please visit:
www.fatshark.com
All Rights Reserved

Fat Shark 2 RC Vision Systems
Contents
Product Contents.....................................................................................................3
Controls...................................................................................................................4
DVR Operation....................................................................................................5
Trinity Head tracker.............................................................................................6
OLED 5G8 RX.....................................................................................................7
AV in/out Port......................................................................................................7
Recording Video..................................................................................................7
Using an External Receiver:................................................................................7
1000mA Battery Pack..........................................................................................7
Battery Charging .....................................................................................................8
Accessories.............................................................................................................9
600TVL CCD Camera (FSV1231/1232)..............................................................9
Diopter Lens (FSV1601)......................................................................................9
Adjustable Earphones (FSV1605).......................................................................9
AV Cable (FSV2003)...........................................................................................9
Head Tracker Data Cables..................................................................................9
Specifications....................................................................................................10
Operational Advice............................................................................................12
Warranty................................................................................................................13
Trouble Shooting...................................................................................................13
Introduction
Congratulations on purchasing Fat Shark Attitude V4 10th anniversary edition headset
integrated with OLED display modular receiver, DVR recording/playback and 3-axis head
tracking. To ensure your continued enjoyment, please take the time to thoroughly read
through this operating manual before using.
Product Compatibility
This headset has been designed to adhere to established video standards and is compatible
with any product also adhering to accepted video standards. Due to the high number of
different manufacturers and variation in quality, it’s impossible to for us to have tested with
every product combination and some troubleshooting may be required if mix/matching
components. The Attitude V4 has been thoroughly tested with ImmersionRC gear. For best
results and no compatibility issues, Fat Shark recommends ImmersionRC gear for your
accessory products.
IMPORTANT!!!! Product Warning!!!!!
DO NOT LEAVE HEADSET EXPOSED TO DIRECT
SUNLIGHT. SUNLIGHT WILL MAGNIFY THROUGH THE
OPTICS AND BURN HOLES IN THE LCD COLOR FILTER
THIS WILL NOT BE COVERED BY WARRANTY. KEEP
GOGGLES IN PROTECTIVE CASE WHEN NOT IN USE

Fat Shark 3 RC Vision Systems
Product Contents
Carry Case
Attitude V4 Headset
5G8 Receiver Module
with OLED display
(32ch with RaceBand)
SpiroNET Circular
Polarized Antenna
1000mAh Battery
with LED indicator
(and discharge lead)
Quick Start Manual

Fat Shark 4 RC Vision Systems
Controls Diagram
Controls
Brightness/contrast control: Pressing left/right increases/decreases display contrast.
Pressing forward/back increases/decreases display brightness.
RX power switch: The receiver module power is controlled by this switch. Turn off RX
module to avoid video conflict with video source via the AV cable.
Channel select: Rocking the channel select switch forward and back will cause the channel
to incrementally increase/decrease. Audio beep sounds on channel change. A long beep
sounds on channel top and bottom limits. See OLED section for more details.
Head tracker menu/reset: Activated by a vertical press on the channel rocker switch.
Low battery warning: Audio warning if input voltage drops below 6.8V
Volume control: There is no volume control - volume level is set at high. Please use with
adjustable earphone accessory for volume control.
Channel Selection /
Head Tracker Reset
Display Control
AV in/out
Power in
DVR Control
RF Module
Earphone jack
RX on/off
IPD adjustment
DIN Data Port
(Head Tracker)

Fat Shark 5 RC Vision Systems
DVR Operation
1.SD card MUST be formatted before use to ensure stable recording.
2.DVR is for analog recording only, no HD recording.
3.Do not place alternative files that you want to keep into the DVR. The DVR may not
recognize the file space and write over your files. Use dedicated SD card.
Recording:
After powering goggles, turn on DVR by depressing vertically and holding the DVR control
button for 1 full second (long press).
RED LED should now show solid.
Ensure SD card is inserted and short press to start recording (RED LED will slowly FLASH
(~2 times/second). Single beep on record start.
Short press again stops recording (turns to solid RED LED). Double beep on record stop.
Playback
Note: requires turning off external receiver and removing any other AVin sources (to not
conflict with menu navigation OSD).
After turning on DVR and in stop record mode (SOLD RED LED) depress and hold DVR
button for 1 second (long press) to enter menu.
Menu Navigation
Playback (press right to enter)
Now can see: Preview shot with file number
press up/down to change file number
press right to play
Up/down controls playback speed/direction
Right press pause/play
Left press, back to main menu
Format (press right to enter)
Execute (press right)
Record (press right)
Now can see:
default (no recording until press the button to start)
auto start (auto start recording when power on)
auto start continuous (auto start recording when power on and overwrite the file if
space is full)
press up/down to select the recording mode
press right to enter to confirm
Pressing left from main menu exits menu

Fat Shark 6 RC Vision Systems
Trinity Head tracker
For a complete and up to date list of compatible RC radios and their setup, a head tracking
sticky thread is maintained at www.FPVlab.com under SPONSORS GATE/FAT SHARK
Operation notes:
Head tracker initiates in pause mode. Head tracker reset button needs to be depressed and
held to start camera motion. Default range motion is normal. Your radio may support
extended motion but may result in errant behavior.
Menu navigation and settings:
Beep code Mode
1 short beep: P/T/R on ch 5/6/7
2 short beep: P/T/R on ch 6/7/8
3 short beep: Long beep then enter P/T only channel setting sub menu
1 short beep: P/T only on ch 5/6
2 short beep: P/T only on ch 5/7
3 short beep: P/T only on ch 5/8
4 short beep: P/T only on ch 6/7
5 short beep: P/T only on ch 6/8
6 short beep: P/T only on ch 7/8
No selection: exit menu
4 short beep: Long beep then enter reverse servo direction sub menu
1 short beep: reverse pan direction
2 short beep: reverse tilt direction
3 short beep: reverse roll direction
No selection: exit menu
1 long beep: adjust servo center point: press to gain manual control of the
camera with the headset. Adjust camera to desired center
position and press button to set new camera center. Note that
if your servos are not near the center point before adjusting, the
servo travel may be limited in one direction.
1 short beep: Long beep then enter pan ratio sub menu
1 short beep: ratio = 1:1
2 short beep: ratio = 1:1.5
No selection: exit menu
2 short beep: Long beep then enter tilt ratio sub menu
1 short beep: ratio = 1:1
2 short beep: ratio = 1:1.5
No selection: exit menu
3 short beep: auto pause on/off (if movement exceeds 90 degree, put HT in
pause mode)
4 short beep: Long beep then enter motion limits sub menu
1 short beep: standard range = 1.04 ms – 2.0ms (center =
1.52ms +/- 0.48)
2 short beep: extended range = 0.8ms–2.24ms (center=1.52ms +/- 0.72)
No selection: exit menu
5 short beep: Long beep then enter cycle time sub menu
1 short beep: standard cycle (8CH PPM, 20ms)
2 short beep: rapid cycle (3CH PPM, 8ms)
No selection: exit menu
6 short beep: Restore factory defaults
2 long beep: no selection made, automatically exits menu

Fat Shark 7 RC Vision Systems
OLED 5G8 RX
Channel Chart: See Specification section at end
Operation:
When power on, the receiver module will stay on last saved channel, single short press
the button on receiver to start auto scan active channel within the current band.
Long press receiver button 0.5s will enter into spectrum analyzer interface, single short
press the receiver button to move to the next band,long press receiver button 0.5s to
confirm band selection.
During auto scan process, cursor will flash on each channel# in order, if press “CH + / -
” buttons on headset can interrupt the scan process and to select wanted channel.
AV in/out Port
RCA Connector: Yellow: Video, White: Audio
Left, Red: Audio Right
Recording Video
Connect AV cable to AV out port on right side of headset. Connect recording device to
cables and set up as per manufacturer directions.
Note: Cables pins are not all the same (see above chart), be sure to connect to headset
using the included cable.
Using an External Receiver:
Use the AV cable to connect headset to the RCA AV port of external devices.
To share the base station power supply with your goggles, pick up a 3m Dominator AV cable
accessory from your retailer. Note; internal receiver must be shut off to properly display
external AV.
1000mA Battery Pack
The latest Fat Shark 1000mAh pack with a
row of stylish blue LED indicators allows you
to visually check its remaining capacity (4
levels) to prevent a sudden power/vision lost.
It seats securely in the headset strap pocket.
The soft silicone battery cable extends out
of the top of the pack to avoid contact with
head strap. Barrel connector cable features
high strand count wire for flexibility and long
life. Wire stress is minimized by the
additional rubber gasket around the cable exit. Balancing circuit is already built inside, for
charging, only need to connect the barrel connector via the supplied adapter cable to RC
charger.
Note: this battery can still be charged via the barrel connector with the original Fat Shark
headset battery charger.
Ground Video AudR AuL

Fat Shark 8 RC Vision Systems
Battery Charging
This lithium polymer battery pack is equipped with an internal cell balancing circuit that allows
the battery to be charged from standard RC battery chargers. Charge the battery by
connecting the barrel connector via the supplied adapter cable and setting the charger for
7.4V, 1000mAh Li-Po, 1A (1C). Some RC chargers require a balance lead connector to be
connected to the charger, or else the charging attempt will result in an error. The balance
lead on the battery is not a true balance lead and is only used for powering the
optional fan faceplate.
To charge this battery set your LiPo charger to Fast Charge mode,
which usually disables the balance lead requirement (set at 7.4V – 2cell - maximum 1A). On
some LiPo chargers none of the above procedures will work. In that case you can set the RC
charger to NiMH mode and set max charge rate to 1A (1C).
Note (1): In NiMH mode the charger may fail to announce completing the charge. You should
be able to estimate your battery charge amount by either timing (a fully depleted battery will
charge in 1 hour at 1C) or monitoring the mA charge rate on the RC charger display (will drop
to almost zero as it becomes full). Remember, you can always remove the battery from the
charger and depress the battery level indicator button to check the charge level.
Note (2): If battery becomes fully discharged or shorted, an internal safety circuit will trip. To
reset the battery, tap 9V direct to the barrel connector via the discharge adapter cable’s
banana connector. This will instantly reset the battery and it can be recharged as normal.
General Lithium Polymer safety and handling instructions:
• NEVER balance charge this LiPo battery.
• NEVER leave a LiPo battery unattended while being charged or discharged.
• ALWAYS monitor the battery and charger during the entire charging process.
• ALWAYS charge LiPo batteries in a fireproof location.
• ALWAYS have a lithium approved “class D type” fire extinguisher available.
• NEVER charge LiPo batteries at currents greater than the “1C” rating of the
battery (“C” equals the rated capacity of the battery).
• NEVER continue to charge LiPo batteries if the charger fails to recognize full
charge. Overheating or swelling of the LiPo cells is an indication of a problem and
the battery should be disconnected from the charger immediately and placed in a
fireproof location
• ALWAYS discontinue charging or discharging a LiPo immediately if at any time
you see smoke or the battery starting to swell up and leave it in a safe fireproof
location for approximately 30 minutes.

Fat Shark 9 RC Vision Systems
Accessories
600TVL CCD Camera (FSV1231/1232)
The 600L CCD Camera utilizes 1/3" SONY CCD imager for fantastic light handling and color
fidelity. The camera cable has an integrated control stick for navigating the camera OSD to
fine tune your personal preferences. Fat Shark branded plastic shell is sleek and lightweight
and the bracket is designed for easy mounting to a pan servo as well as compatible with Fat
Shark’s pan/tilt/roll mount (accessory). V3 case now is also added with top pivot for mounting
on ImmersionRC Vortex racing quad. An extra no control stick cable is included for
lightweight or space limited installs. 2.9mm IR coated wide angle 125 degree FOV (diagonal);
ideal for fixed camera piloting. Camera is NTSC/PAL optional.
Diopter Lens (FSV1601)
For near sighted users, diopter lens insert sets are available that include -2, -4 and
-6 dpt. Lens orientation is not critical.
Adjustable Earphones (FSV1605)
For simplicity and minimalist controls, the Attitude V4 does not have volume control. Audio is
outputting at max volume and needs to be adjusted to comfortable level via adjustable
volume earphones.
AV Cable (FSV2003)
This 3 RCA Male to 4-pole Right Angle Cable allows you output the wireless signal from your
Fat Shark headset to an external monitor or recording device. It can also be used to connect
and display alternative video sources in the goggles.
Head Tracker Data Cables
Due to the various number of radios and aftermarket products, data cables are not included
in the set. The following model numbers can be purchased through your retailer:
FSV2112: Futaba type radios (square connector)
FSV2113: JR type radios (3.5mm 3p prong)
FSV2114: ezUHF cable (PS/2 to PS/2)
FSV2115: Spektrum radios

Fat Shark 10 RC Vision Systems
Specifications
Headset Specifications
Optics:
FOV (field of view): 32°diagonal (Image size: 1.3m @ 2m)
Type: Plastic optic module
Interpupillary Distance (IPD): 59 to 69 mm (adjustable)
Optional Diopter Lens Inserts: -2, -4, -6 dpt
Display:Full color LCD polarized LED backlit
Binocular display (640 X 480 VGA)
NTCS/PAL auto selecting
Audio: Stereo
(Requires adjustable volume earphone)
User Controls: Channel selection/ head tracker reset
Mode selection (wired/wireless)
Contrast/ brightness control
DVR control
HT control
Electrical:
Power supply: 7 - 13 V (2S/3S supply)
Power consumption: 400mA wireless
220mA direct mode (RX off) (@7.4V nominal)
Battery: 7.4V, 1000mAh Li-po battery with LED indicator
DVR: Analog Video Recording (no audio or HD recording)
MicroSD support to 32 GB
Record Rate: 6Mbps (MJPG compression, 30 fps, AVI)
File playback (native recording, no codec support)
Upgradeable via SD card
PAL/NTSC continuous scan auto detect/mode change
Auto save if power removed
RF Modules (Optional): multi channel and band support (modular RF)
Head Tracker: 9DOF 3-axis
Interface:3.5mm AV in/out port
Power in port
3.5mm stereo earphone port
Mini DIN head tracker data port
Accessories: 5G8 32ch RaceBand RF module with OLED display
5G8 SpiroNET CP antenna
7.4V, 1000mAh Li-po battery with LED indicator
Battery discharge adapter
Mechanical: Ergonomic molded headset w/ adjustable headband
Dimensions: 168 x 83 x 71mm
Weight: 193 g
Packaging:
Size: 616g, 202 x 139 x 100mm

Fat Shark 11 RC Vision Systems
5G8 Receiver w/ OLED Display Specifications:
Electrical:
OLED display: Band, Channel and Frequency / Antenna Indication / RSSI
Push Button: Band / Channel Selection
Supply Power: 3.3~5 V
RX Sensitivity: ≤-90 dB
RF Input Level: -90 dBm~+5 dBm
Video Format: NTSC/PAL
Operation:
Operating Temperature: -10~65 °
Mechanical:
Size: 42 x 25 mm
Weight: 11.4g
Channel Chart:
Band
Sign Name CH1 CH2 CH3 CH4 CH5 CH6 CH7 CH8
F
Fat Shark
5740
5760
5780
5800
5820
5840
5860
5880
R
RaceBand
5658
5695
5732
5769
5806
5843
5880
5917
A
Band A
5865
5845
5825
5805
5785
5765
5745
5725
E
Band E
5705
5685
5665
5645
5885
5905
5925
5945

Fat Shark 12 RC Vision Systems
Operational Advice
•For best performance, select a channel that has the least amount of
interference. While the transmitter is turned OFF, turn on the video
headset and look at the screen as you check each channel. Clear
channels will have a consistent static background. Channels with
interference will have horizontal static lines.
•Always perform a range test before flying. This includes AV and RC
controls. Some RC receivers can be affected by the proximity of other
electronic devices particularly the AV TX.
•Try to space out your components as much as possible to avoid
interference to your RC control range (keep stuff away from RX)
•Until experienced, practice flying in a familiar area to avoid becoming
disorientated.
•Due to antenna characteristics, there is a “null” in line with antenna
direction. You may experience excessive video breakup when flying
overhead
•5.8Ghz signal strength drops off very fast, stay safely within solid AV
range.
•For maximum distance it is very important that a clear line of sight exists
between the transmitter and the video headset. 2 of the worst causes of
interference are human bodies and reinforced concrete.
•Place your TX antenna in open area in a vertical orientation
•Multipathing (reflections off buildings/ tall objects) causes signal
cancellation and result in broken video. Fly in open areas away from
buildings or other tall structures (i.e. barns, hills).
•5.8Ghz AV with 2.4Ghz RC controllers: 2.4Ghz may cause harmonic
interference on Ch2 – Ch7 of the 5.8Ghz AV (Ch1 not affected). The
headset has been equipped with a high pass filter that will allow the
system to work with CE certified 2.4Ghz RC controllers. However, the
filtering may be insufficient to remove noise from overpowered non CE
certified controllers.
If you experience interference from your RC radio, change the AV channel
to channel 1.
•Although you don’t require any license to operate this device, you are still
legally responsible for operating in a responsible manner.

Fat Shark 13 RC Vision Systems
Warranty
The system can be exchanged for a new unit within 7 days for any manufacturing
defects if returned in new condition. The video headset will be warranted for repair
for 2 years if no signs of excessive use. Buyer will be responsible for shipping
costs. If beyond the warranty period we will provide repair services.
Trouble Shooting
If your problem can’t be solved here, please visit our support forum at www.FPVLAB.com
under SPONSORS GATE/ FAT SHARK RC VISION SYSTEMS. Any direct support enquires
will be first directed to this forum for the benefit of all customers.
Observation
Possible cause/solution
No image, display is completely
dark
- No power supplied. Check power connections.
No image, display is glowing
dark grey
- If using wireless module, turn on RX power on bottom of
headset.
- If using AV in cable, check video source.
- Ensure TX is on and camera connections solid
- Ensure lens cap is removed from camera
- Trying to power a 12V camera with the 5V TX supply
(need to connect 12V camera direct to RC pack.
Complete white screen
LCD driver has failed and needs to be replaced under
warranty. Contact your retailer.
Lots of interference lines
(horizontal lines) when using
5.8Ghz receiver
Check to see if cause is harmonic interference from
2.4Ghz RC controller (turn radio on/off).
- Use CH1 on TX/headset (Ch1 not affected by 2.4Ghz)
- check correct frequency antenna is used
Head tracker not working but
can hear beeps
(can enter and navigate beep
menu)
- Ensure headset is turned on before RC radio
- Review controller manual for correct settings
- Check servos are plugged into correspondingly selected
channels
Head tracker not working, and
no beeps (can’t enter nor
navigate beep menu)
- Cable was modified and resulted in voltage applied to
signal line (fried HT)
- Mated to an aftermarket channel mixer and wired wrong
resulting in voltage applied to signal line
- Incorrect installation of aftermarket UHF RC system
resulting in voltage applied to signal line.
Head tracker stops working
after short time
Auto disengage function activated. Follow menu
instructions to turn off.
Short range
- Ensure 5.8Ghz antenna were installed
- Turn off transmitter and check for other sources of
interference
- Ensure transmitter has clear LOS to headset. Test in
wide open area, away from any obstructions
Short range (con’t) - Ensure that a compatible antenna is installed. Do not
use other manufacture antenna, they may be dual band
or may be reverse SMA
White dots on LCD display You were careless and left goggles exposed to sun. Sun
burnt off LCD color filter.
Table of contents
Other FatShark Magnifier manuals
