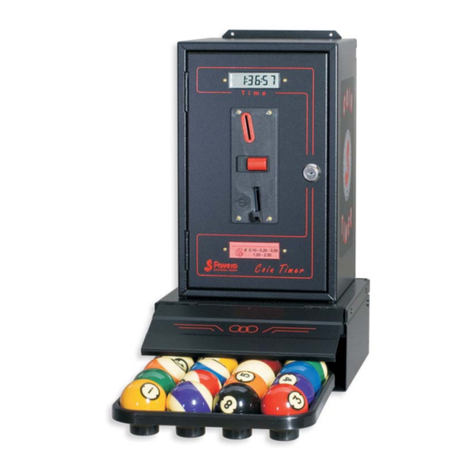
Favero TIMER 16B-52 User manual

1
PROGRAMMING WITH HOURLY BANDS
The option of "tariffs for HOURLY BANDS" allows the automatic change
of the tariffs at determinate times during the whole week. Therefore
exists innerly a weekly clock and the possibility to insert along all the
week at determinate times the wished tariffs. The possible tariffs are 3
and furthermore a fourth tariff (called CLUB tariff) exists, which can be
manually choosed by the operator pushing the TARIFF button. Such
tariff can also be excluded. There are twelve (12) steps to be
programmed in set order. To start the programming, turn the
INSTALLATION key in a clockwise direction.
STEP 1 will appear automatically:
The letter "C" followed by a number indicates
the total sum on the counter. The counter
shows the number of clicks which have run off, and since the charge for
one click may be programmed for whatever you yourself decide (see STEP
2), if you wish to determine the total money receipts, multiply the figure
shown on the counter by the rate of one click. The counter runs to a total of
99,999 clicks and then returns to zero. To go back to zero, you must push
the (-) button with the tip of a pen. If you do not wish to go on to the further
stages in programming, you must turn the INSTALLATION key again in the
clockwise direction. This will be useful when access only to the counter is
required. To continue to STAGE 2, push the TARIFF button. The device
must not be in the cash counting operation during subsequent
programming.
This is the cash figure by which the amount to
be paid increases with each time interval.
That figure depends on the monetary value applicable to each individual
country. The click figures available are the following: 0.05 -0.10 - 0.20 -
0.50 - 1 - 2 - 5 - 10 - 20 - 50 -100. Ex. for EURO 0,05, USA0,10, RUSSIA
1, JAPAN 10. You may make your choice by using the (+) and (-) buttons.
To go on to the next stage, push the TARIFF button.
This is the letter that appears before the total
sum to be paid. The following letters available
are:CdEFLPStY or"noletter". The choice can be made by using the
(+) and (-) buttons. To go on to the next step, push the TARIFF button.
(15 figures available) This is a set figure
charged at the beginning of every game
above and which is not included in the hourly rate. Use the (+) and
(-) buttons to register that figure. To go on to the next stage, push
the TARIFF button.
It is possible to enable or disable the
visualization of the time signal and his
influence or not on the tariffs. Use the (+) and (-) keys to set up one of the 3
values following:
.
The time signal is excluded and therefore it is not shown and does
not have any flu on the tariffs. As the result, the steps 9, 10, 11,12
which concern the tariff 2, tariff 3, the time and the hourly bands will be
skipped in the programming.
COUNT TOTALIZATOR.
PRICE OF ONE CLICK.
MONEY SYMBOL.
START-GAME CHARGE.
TIME SIGNAL ENABLING.
EXCLUDED
13345
1.
2.
0.05
3.
E
4.
0.05
5.
1
:
0
TIME SIGNAL VISUALIZED BUT HOURLY BANDS DISABLED
HOURLY BANDS ENABLING
EXCLUDED
HOURLY ONLY ACTIVATEABLE WHEN TARIFF 1
IS WORKING
CLUB TARIFF ALWAYS ACTIVATEABLE.
HOURLY .
.
The time signal will be shown but without no action on the tariffs.
Conseguently, the STEP 9, 10, 12 which concern the tariff 2, tariff 3
and the will be skipped.
.
The time signal is shown and the automatic change of the tariffs will
furthermore take place in the hourly bands established to the step 12.
To pass to the next step press TARIFF.
.
The CLUB tariff will not be able to be activated. STEP 7 of the CLUB
tariff programming will be skipped.
. When the tariffs 2 or 3 are working, TARIFF button is
deactivated and therefore the hourly CLUB tariff cannot be activate.
The operator will be able to active the hourly CLUB tariff at any
time, even if the tariffs 2 or 3 are active. To pass to the next step press
TARIFF.
(Can be varied from 10 to 500 click per hour:
This STEP can be skipped if STEP6 was programmed
to exclude the CLUB tariff. Set up the wished CLUB tariff using the (+) and
(-) keys. Keep them pressed to change quickly. To go on to the next STEP
press the TARIFF button.
hourly bands
.
It is possible to decide if using or not the hourly
CLUB tariff and if the who will have to
manage the counter, will be able or not to his own discretion to enable the
CLUB tariff by TARIFF button. Use the (+) and (-) keys to set up one of the
3 values following:
a click is undersood to be that monetary figure
entered in STEP2).
(Can be varied from 10 to 500 clicks per
hour). Set up the wished Tariff1 using the
Keep them pressed to change quickly. To go on to
the next phase press the TARIFF button.
Used in the hourly bands. This step will be
skipped if to the STEP5 the hourly bands have
not been enabled. For the programming, as in the phase 8. To pass to the
next phase press TARIFF.
3th HOURLY
Used in the hourly bands. This step will
be skippeded if to the STEP5 the hourly
bands have not been enabled. For the programming, as in the
phase 8. To pass to the next phase press TARIFF.
SET UP CLUB TARIFF
CLUB TARIFF
CLUB TARIFF
1st HOURLY TARIFF .
2nd HOURLY TARIFF
TARIFF
operator
(+) and (-) keys.
.
.
2
0
1
2
6.
1
7.
8.00
8.
8.00
9.
8.00
10.
8.00
_
()
_
()
_
(
_
)
_
_
TIMER3-22B
with hourly bands
ENGLISH
INSTALLATION GUIDE
516-F01

VISUALIZATION AND PROGRAMMING OF
THE TIME SIGNAL.
This step is skipped if to the STEP5 the time
signal is excluded. The first number on the left is blinking and shows the
day of the week running from the 1 (Monday) to 7 (Sunday). Use the (+) and
(-) keys to set up the current day. Once the correct value has been inserted,
turn the INSTALLATION key and the hour will start blinking. Set up the
current hour and then, turning the key once again in the clockwise
direction, enter the minutes number. To go on push the TARIFF button.
VISUALIZATION AND HOURLY BANDS
PROGRAMMING.
This step is skipped if to the STEP 5 the hourly
bands are not enabled. The programming of
every hours in which a tariff change must take effect requires some time,
since you have to cover all the week day by day. It's good so you write down
on paper, beginning with Monday, the hours in which a tariff change must
happen and which of the 3 available tariffs will come in action to each of the
hours above. The possible hours are of half time by half time. As shown in
the figure above you will begin from day 1 (Monday) at zero time. To side of
the number showing the day it is shown through a symbol which can be
from 1 to 3 horizontal dashes, which of the 3 hourly tariffs is in function at
the indicated time. Turning the INSTALLATION key the tariffs 1, 2, 3
will be selected. Once decided the tariff at Monday's zero time,
increase the time with the (+) key or decrease with the (-) key of half time
by half time checking that the tariff seted up remains the same until the new
time, which the tariff change must to happen, is reached. Use the
INSTALLATION key once again to select the new tariff and then go on with
the time. After 23:30 on Monday the display will turn to zero hours on
Tuesday and so ahead up to 23:30 of the day 7 (Sunday). It is possible to
plan 28 changes in tariff during the span of a week. If such value was
exceed the FULL word is shown on display. To move forward or backward
quickly with the time, held down the (+) or (-) keys. Once you have finished
the programming, you can check all the days of the week verifying the riff at
every time.
To finish the programming press TARIFF.
Using the START PLAY key, we open the Timer’s door and begin the
count, which is indicated by the blinking of the display. If in the
programming, the CLUB tariff has been enabled, it can be activated or
disactivated by the TARIFF button. When the CLUB tariff is activated a
dot appears on the left of the display. If during the count you press with
the tip of a pen on the (+) hole you will be able to see the time and what
of the 3 tariffs is active at that moment, shown by 1, 2 or 3
horizontal dashes. The stop of the count takes place when the
tray is reinserted with ALL the balls. At this moment the whole amount to
pay is added to the totalizer.
Please remember that the totalizer shows the number of the clicks
performed and so you must multiply that number for the monetary value of
a click to obtain the total income. At the moment of the stop of the count,
the amount to pay will appear on terminal display for 30 seconds, after
which is shown the day, time and tariff activates at that moment. If you wish
to see again the last paid amount press the TARIFF key. To read the total
amount without the use of the INSTALLATION key press with the tips of 2
pens on the (+) and (-) holes simultaneously.
OPERATION
SIDE ATTACHMENT
OPTIONALS
Loosen the two screws above of the front component, turn the
key and pull the unit toward you. Then attach the
TIMER to the wall by making use of the three holes on the back. If the
Timer will be placed on a shelf, you need simply use the lower hole (in
the tray area).
Allows the time count to restart even if the door is open (by turning the
START PLAY key). This is for changing players without having to replace
the tray with all the balls.
Remove the four screws on the two sides. For the two rear screws, the
self-blocking interior nut must be held firmly. This to insure that the unit
can be opened only by the owner of the INSTALLATION key. Then
detach the connector device on the panel and remove the inner cover.
You will find two holes on the left inner portion.
The micro-switch controlling the lamp will be attached to these holes.
INSTALLATION
- START FROM OPEN
- LAMP CONTROL
Turn the micro-switch so that it clicks in conjunction with the right micro-
switch when the sliding blade pushes forward; keep the ball-carrying
tray in position and push the last one through the middle slot in the
front. Have an connection electrician carry out the connection indicated
below by making sure that the metal frame has been grounded:
COM
NCNO
LAMP
CONNECT
TO METAL
MICRO
SWITCH
230 VAC (o 115 VAC)
POWER FEED TO THE LAMP
ARTICLE CODES
Art. 503 for Carambole 3 balls Ø61,5 mm.
Art. 503A for Italiana2xØ68+1xØ59mm.
Art. 504 for 4 balls Ø61,5 mm.
Art. 509 for 9 balls 9 x Ø61,5 mm.
Art. 509A for 9 balls8xØ59+1xØ54mm.
Art. 516 for POOL 16 x Ø57 mm.
Art. 516A for English Pool 16 x Ø50-52 mm.
(or use Art. 516 + Art. 446).
Art. 516B for Russian Pyramid 16 x Ø68 mm.
Art. 522 for Snooker 22 x Ø52-54 mm.
Art. 502 for controlling 2 bats and 1 ball.
Art. 446 SPACER 6mm in thickness for Pool Ø50-52 mm
(for use together with Art. 516).
Art. +642 OPTIONAL LAMP CONTROL.
Art. +641 OPTIONAL START FROM OPEN.
Art. +640 OPTIONAL HOURLY BANDS.
TIMER 3B
TIMER 3B
TIMER 4B
TIMER 9B
TIMER 9B
TIMER 16B
TIMER 16B-52
TIMER 16B-68
TIMER 22B
TIMER Ping-Pong
ELECTRONIC DESIGN
R
__
__
_
_
()
__
__
_
_
()
12.
0:001_
day tariff hour minutes
11.
12:372
day hour minutes

1
PROGRAMMAZIONE CON FASCE ORARIE
VALORE MONETARIO Dl UNO SCATTO.
È il valore in denaro che ad ogni intervallo di
tempo viene aggiunto all'importo da pagare.
Esso dipende dalla valuta monetaria di ogni nazione. I valori scatto
disponibili sono: 0,05 - 0,10 - 0,20 - 0,50 - 1 - 2 - 5 - 10 - 20 - 50 - 100.
Es. per l’EURO 0,05, USA 0,10, RUSSIA 1, GIAPPONE 10. Usare i
tasti (+) e (–) per selezionare un valore.
Per passare alla fase successiva premere TARIFF.
L'optional delle "TARIFFE PER FASCE ORARIE" permette il cambio
automatico della tariffa a determinati orari durante tutta la settimana.
Esiste quindi internamente un orologio settimanale e la possibilità di
inserire lungo tutta la settimana a determinati orari le tariffe desiderate. Le
tariffe possibili sono 3 ed inoltre esiste una quarta tariffa chiamata tariffa
CLUB che può essere inserita manualmente dall'operatore con il pulsante
TARIFF. Tale tariffa può anche essere esclusa. Ci sono 12 FASI da
programmare in successione. Per accedere alla programmazione girare
in senso orario la chiave INSTALLATION.
Apparirà la FASE 1:
La lettera "C" seguita da un numero indica il
valore del contatore totalizzatore. Il
contatore visualizza il numero degli scatti avvenuti e poiché il valore
di uno scatto può essere programmato a piacere (vedi FASE 2), per
ricavare l'incasso totale in denaro si deve moltiplicare il valore del
contatore per il valore di uno scatto. Il totalizzatore conta fino a
99.999 scatti e poi riprende da zero. Per azzerarlo si deve premere il
tasto (-) con la punta di una penna. Se non si desidera proseguire
alle successive FASI di programmazione si deve rigirare la chiave
INSTALLATION. Questo sarà utile successivamente alla
programmazione quando si desidera solamente accedere al
totalizzatore. Per passare alla FASE 2 premere il tasto TARIFF.
Nelle programmazioni successive l'apparecchio non deve essere in
conteggio denaro.
È il carattere che deve apparire davanti
all'importo da pagare. I caratteri
disponibili sono: C S Y oppure "nessun carattere".
La loro scelta può avvenire usando i tasti (+) e (-).
Per passare alla fase successiva premere
(15 valori selezionabili). È un importo
fisso che viene addebitato ad ogni inizio
gioco in aggiunta alla tariffa oraria. Usare iI tasti (+) e (-) per
impostare tale valore. Per passare alla fase successiva premere
possibile abilitare o disabilitare la
visualizzazione del segnale orario e la sua influenza o non influenza sulle
tariffe. Usare i tasti (+) e (-) per impostare uno dei 3 valori seguenti:
. Il segnale orario è escluso e quindi non è visualizzato e
non ha nessuna influenza sulle tariffe. Verranno quindi saltate nella
programmazione le FASI 9, 10, 11, 12 che riguardano la TARIFFA 2,
TARIFFA3, l'orario e le fasce orarie.
CONTATORE TOTALIZZATORE.
SIMBOLO MONETARIO.
dEFLP t
TARIFF.
TARIFFADI INIZIO GIOCO.
TARIFF.
ABILITAZIONE SEGNALE ORARIO.
E'
ESCLUSO
13345
1.
2.
0.05
3.
E
4.
0.05
5.
1
:
0
SEGNALE ORARIO VISUALIZZATO MA FASCE ORARIE
DISABILITATE
ABILITAZIONE FASCE ORARIE
ESCLUSO
TARIFFA CLUB ATTIVABILE SOLO QUANDO È ATTIVATA LA
TARIFFA 1
TARIFFA CLUB SEMPRE ATTIVABILE
. Verrà visualizzato il segnale orario ma senza
nessuna azione sulle tariffe. Verranno quindi saltate le FASI 9,10,12
che riguardano la TARIFFA2, TARIFFA3 e le fasce orarie.
. Il segnale orario viene
visualizzato ed inoltre avverrà il cambio automatico delle tariffe nelle
fasce orarie stabilite alla FASE 12. Per passare alla fase successiva
premere TARIFF.
. La tariffa CLUB non potrà essere attivata. La FASE 7
per la programmazione della tariffa CLUB verrà saltata.
. Se quindi in certe fasce orarie sono attive le tariffe 2 e 3,
in questi periodi il pulsante TARIFF non è abilitato e quindi la tariffa
CLUB non può essere inserita.
. L’operatore potrà inserire
la tariffa CLUB in qualsiasi momento, anche se sono attive le tariffe
2 o 3. Per passare alla fase successiva premere TARIFF.
MODALITA’TARIFFA CLUB.
CLUB,
CLUB
TARIFF.
TARIFFAORARIACLUB.
TARIFFAORARIA1 .
TARIFFA ORARIA2 .
TARIFFA ORARIA3 .
È Possibile decidere se utilizzare o meno la
tariffa e cioè se l'operatore che dovrà
gestire il tassametro potrà a sua discrezione abilitare la tariffa
tramite il pulsante
Usare i tasti (+) e (-) per impostare uno dei 3 valori seguenti:
(Variabile da 10 a 500 scatti per ora. Per
scatto si intende il valore monetario impostato
alla FASE 2). Questa FASE può essere saltata se alla FASE 6 è stata
programmata l'esclusione della tariffa CLUB. Impostare la tariffa CLUB
desiderata usando i tasti (+) e (-).Tenerli premuti per variare velocemente.
Per passare alla FASE successiva premere TARIFF.
(Variabile da 10 a 500 scatti per ora).
Impostare la tariffa CLUB desiderata usando i
tasti (+) e (-). Tenerli premuti per variare velocemente. Per passare alla
FASE successiva premere TARIFF.
Usata nelle fasce orarie. Questa FASE
sarà saltata se alla FASE 5 non sono
state abilitate le fasce orarie. Per la programmazione come nella
fase 8. Per passare alla FASE successiva premere TARIFF.
Usata nelle fasce orarie. Questa FASE sarà
saltata se alla FASE 5 non sono state abilitate
le fasce orarie. Per la programmazione come nella fase 8. Per passare
alla FASE successiva premere TARIFF.
2
0
1
2
6.
1
7.
8.00
8.
8.00
9.
8.00
10.
8.00
TIMER3-22B
con fasce orarie
INSTALLAZIONE
ITALIANO
_
()
_
()
_
(
_
)
_
_

VISUALIZZAZIONE E PROGRAMMAZIONE
DEL SEGNALE ORARIO.
ESCLUSO.
INSTALLATION
TARIFF.
VISUALIZZAZIONE E PROGRAMMAZIONE
FASCIE ORARIE.
INSTALLATION
INSTALLATION
FULL.
TARIFF.
START PLAY
CLUB,
TARIFF. CLUB
TARIFF.
INSTALLATION
Questa FASE viene saltata se alla FASE 5 il
segnale orario è Il primo numero a sinistra è lampeggiante ed
indica Il giorno della settimana e va dall' 1 (lunedì) al 7 (domenica). Usare i
tasti (+) e (-) per impostare il giorno attuale. Una volta impostato il valore
corretto girare la chiave e così inizierà a lampeggiare l'ora.
Impostare l'ora esatta e poi girando ancora la chiave portarsi sui minuti e
impostare gli stessi. Per passare alla fase successiva premere
Questa FASE viene saltata se alla FASE 5 non
sono abilitate le fasce orarie. la programmazione di tutti gli orari in cui deve
avvenire un cambio di tariffa richiede un certo tempo poiché si dovrà
percorrere tutta la settimana giorno per giorno. É bene quindi vi scriviate in
un foglio, cominciando dal lunedì, gli orari in cui deve avvenire un cambio
tariffa e quale delle 3 tariffe disponibili entrerà in funzione ad ognuno di detti
orari. Gli orari possibili sono di mezz'ora in mezz'ora. Come dalla figura
sopra si inizierà dal giorno 1 (lunedì) alle ore ZERO.
A fianco del numero indicante il giorno è indicata, tramite un simbolo che
può essere da 1 a 3 lineette orizzontali, quale delle 3 tariffe orarie è in
funzione all'orario indicato. Girando la chiave si
selezionano le tariffe 1, 2, 3 . Quindi una volta decisa la tariffa alle
ore ZERO di lunedì, avanzare l'orario col tasto (+) (o indietro col tasto (-) di
mezz'ora in mezz'ora controllando che la tariffa impostata rimanga uguale
finché si raggiunge il nuovo orario a cui deve avvenire il cambio tariffa.
Utilizzare ancora la chiave per selezionare la nuova tariffa
e poi avanti ancora con l'orario. Dopo le 23:30 del lunedì si passerà alle ore
zero di martedì e così avanti fino alle 23:30 del giorno 7 (domenica). Si
possono programmare 28 cambiamenti di tariffa nell'arco della settimana.
Se si dovesse superare tale valore viene visualizzata la parola Per
avanzare o indietreggiare velocemente con l'orario tenere premuti i tasti
(+) e (-). Una volta terminato potete quindi perlustrare tutta la settimana
verificando la tariffa presente ad ogni orario.
Per terminare la programmazione premere
Con la chiave si apre lo sportello bilie ed inizia il conteggio
indicato anche dal lampeggio del display. Se nella programmazione è
stata abilitata la tariffa questa può essere inserita e disinserita col
pulsante Quando la tariffa è in funzione appare un
puntino sul display nella sinistra. Se durante il conteggio si preme con la
punta di una penna sul foro (+) si potrà vedere l'orario e quale tariffa
delle3èattivainquel momento. È indicata da 1, 2 o 3
lineette orizzontali. L'arresto del conteggio avviene quando è
reinserito il vassoio con TUTTE le bilie. In questo momento l'importo da
pagare è addizionato al totalizzatore. Si ricordi che il totalizzatore
segnala il numero degli scatti avvenuti, e quindi bisogna moltiplicarlo per
il valore monetario di uno scatto per avere l'incasso totale in denaro. Dal
momento dello stop del conteggio, l'importo da pagare è visualizzato per
30 sec., dopodiché viene visualizzato il giorno, l'orario e la tariffa attiva in
quel momento. Se si desidera far riapparire l'ultimo importo pagato basta
premere il tasto Per visualizzare il totalizzatore senza l'uso della
chiave premere con le punte di 2 penne sui fori (+) e (-)
contemporaneamente.
FUNZIONAMENTO
FISSAGGIOA PARETE
OPTIONAL START DA APERTO
OPTIONAL COMANDO LAMPADARIO
Svitare le viti in alto sul frontale, girare la chiave e tirare
a se. Fissare poi il tassametro alla parete utilizzando i 3 fori sul fondo.
Se deve essere fissato sopra una mensola è sufficiente usare il solo
foro inferiore (in zona vassoio).
Permette di far ripartire il conteggio anche se lo sportello è aperto
(girando la chiave START PLAY). Viene così facilitato il cambio dei
giocatori senza la necessità di reinserire il vassoio con tutte le bilie.
E' disponibile la versione con l'OPTIONAL COMANDO LAMPADARIO.
Nel caso si desideri inserire autonomamente questo optional in un
modello che ne è sprovvisto, seguire le indicazioni che seguono.
Togliere le 4 viti sui lati. Per le 2 viti posteriori si deve tener fermo il dado
autobloccante interno. Questo affinché possa essere aperto solo dal
proprietario della chiave Staccare poi il connettore sulla
scheda e togliere l'intero coperchio. Nella parte interna sinistra ci sono 2
fori dove verrà fissato il microinterruttore che comanderà il lampadario.
INSTALLATION
INSTALLATION.
Piegare la lamella del micro-interruttore in modo che scatti assieme a
quello già presente sulla destra quando si spinge in avanti la lamiera
scorrevole; tenere inserito il vassoio con tutte le bilie e spingere
attraverso la fessura centrale anteriore. Far eseguire da un elettricista il
seguente collegamento assicurandosi che la carcassa metallica venga
collegata a terra.
ELECTRONIC DESIGN
R
CODICI ARTICOLI
Art. 503 per Internazionale o Carambola.
3 bilie Ø61,5 mm.
Art. 503A per Italiana2xØ68+1xØ59mm.
Art. 504 per 4 bilie Ø61,5 mm.
Art. 509 per Boccette Internaz. 9 x Ø61,5 mm.
Art. 509A per Boccette Nazionali
8xØ59+1xØ54mm.
Art. 516 per Pool 16 x Ø57 mm.
Art. 516A per Pool Inglese 16 x Ø50-52 mm
(oppure usare Art. 516 + Art. 446).
Art. 516B per Piramide Russa 16 x Ø68 mm.
Art. 522 per Snooker 22 x Ø52-54 mm.
Art. 502 per controllo di 2 racchette + pallina.
Art. 446 SPESSORE 6mm per pool Ø50-52 mm
(da usare assieme all’Art. 516).
Art. +642 OPTIONAL COMANDO LAMPADARIO
Art. +641 OPTIONAL START DA APERTO
Art. +640 OPTIONAL FASCE ORARIE
TIMER 3B
TIMER 3B
TIMER 4B
TIMER 9B
TIMER 9B
TIMER 16B
TIMER 16B-52
TIMER 16B-68
TIMER 22B
TIMER Ping-Pong
COM
NCNO
LAMP
CONNECT
TO METAL
MICRO
SWITCH
230 VAC (o 115 VAC)
ALIMENTAZIONE LAMPADARIO
__
__
_
_
()
__
__
_
_
()
12.
0:001_
giorno ore minutitariffa
11.
12:372
giorno ore minuti

FRANÇAIS
1
TIMER3-22B
avec tranches horaires
INSTRUCTIONS TECHNIQUES
PROGRAMMATION
L'option des "TARIFS SELON LA TRANCHE HORAIRE" permet de
changer automatiquement les tarifs à certaines heures pendant toute la
semaine. II y a donc, à l'intérieur, un timer hebdomadaire qui permet de
déterminer, pour toute la semaine, les tarifs désirés.
3 tarifs sont possibles, plus un quatrième, appelé tarif CLUB, qui peut être
inséré manuellement par l'opérateur en appuyant sur le bouton TARIFF.
On peut éliminer ce dernier tarif. 12 PHASES sont à programmer l'une
après l'autre. Pour accéder à la programmation, tourner dans le sens des
aiguilles d'une montre la clef INSTALLATION. La PHASE 1 apparaîtra:
COMPTEUR TOTALISEUR.
VALEUR D'UNE UNITÉ.
SYMBOLE MONETAIRE.
TARIF EN DEBUT DE JEU.
SIGNAL HORAIRE
EXCLU
La lettre “C” suivie par un nombre inique la
valeur du compteur totaliseur. Le compteur
affiche le nombre d'unités consommées et, puisque la valeur d'une unité
peut être programmée selon le désir de l'opérateur, (voir PHASE 2), pour
avoir la somme d'argent correspondante, il suffit de multiplier le nombre
affiché par le compteur par la valeur d'une unité. Le compteur va jusqu' à
99.999 puis repart à 0. Pour remettre le compteur à zéro, appuyer sur la
touche (-) avec la pointe d'un stylo-bille. Si vous ne voulez pas passer aux
autres phases de programmation, tournez la clef INSTALLATION un autre
fois dans le sens des aiguilles d'une montre. Cela sera utile après la
programmation, quand on ne voudra accéder qu'au totaliseur. Pour passer
à la PHASE 2, appuyer sur la touche TARIFF. Pour la programmation
successive, I'appareil ne doit pas être en train de compter l’argent.
C'est la valeur en argent qui à chaque moment
augmente ce que nous devons payer. Elle
dépend bien sûr de la monnaie de chaque Pays. Les valeurs disponibles
pour une unité sont: 0,05 - 0,10 - 0,20 - 0,50 - 1 - 2 - 5 -10 - 20 - 50 -100. Ex.
pour l'EURO 0.05, USA 0,10, RUSSIE 1, JAPON 10. On peut les
sélectionner en utilisant les touches (+) et (-). Pour passer à la phase
successive, taper TARIFF.
C'est le caractère qui doit apparaître devant la
somme à payer. Les caractères disponibles
sont: C d E F L P S t Y ou bien "pas de caractère". On peut les sélectionner
avec les touches (+) et (-). Pour passer à la phase suivante, taper la touche
TARIFF.
(on peut sélectionner 15 valeurs). C'est un
montant fixe qui est compté à chaque fois
qu'on commence à jouer et qui s'ajoute au tarif
horaire. Utiliser les touches (+) et (-) pour imposer cette valeur.
Pour passer à la phase suivante, taper la toucheTARIFF.
Il est possible d'avoir, ou de ne pas avoir,
l'affichage du signal horaire et son influence,
ou sa non-influence, sur les tarifs. Utiliser les touches (+) et (-) pour
obtenir l'une des trois valeurs suivantes :
.
Le signal horaire est exclu et ne sera donc pas affiché. II n'a aucune
influence sur les tarifs. Au cours de la programmation, on sautera
donc les PHASES 9, 10,11et12quiconcernent le TARIF 2, le TARIF 3,
I'horaire et les tranches horaires.
13345
1.
2.
0.05
3.
E
4.
0.05
5.
1
:
0
SIGNAL HORAIRE AFFICH MAIS TRANCHES HORAIRES NON
EN FONCTION.
TRANCHES HORAIRES.
MODALITES TARIF CLUB.
EXCLUSION
TARIF CLUB APPLICABLE UNIQUEMENT AVEC LE TARIF 1
TARIF CLUB TOUJOURS APPLICABLE
TARIF CLUB.
TARIF HORAIRE 1 .
TARIF HORAIRE 2 .
TARIF HORAIRE 3 .
É
Le signal horaire sera affiché, mais il n'aura aucune
action sur les tarifs. Dans la programmation, on sautera donc les
PHASES 9, 10, 12 qui concernent le TARIF 2, le TARIF 3 et les tranches
horaires.
Le signal horaire est affiché. De plus, le
changement de tarif selon la tranche horaire se fera
automatiquement aux heures fixées à la PHASE 12.
Pour passer à la phase suivante, taper la toucheTARIFF.
Il est possible de
décider si l'on veut utiliser le tarif CLUB ou non,
c'est-à-dire si l'opérateur responsable du
compteur pourra insérer le tarif CLUB avec la touche TARIFF. Taper les
touches (+) et (-) pour imposer l'une des trois valeurs suivantes:
Le tarif CLUB ne pourra pas être appliqué; on
sautera la PHASE 7 pour la programmation du tarif CLUB.
Si,
au cours de certaines tranches horaires, les tarifs 2 et 3 sont
appliqués, la touche TARIFF est inactive et, par conséquent, le tarif
CLUB ne pourra pas être appliqué.
L'opérateur pourra
insérer le tarif CLUB à tout moment, même quand les tarifs 2 et 3
sont appliqués.
Pour passer à la phase suivante, taper la toucheTARIFF.
(variable de 10 à 500 unités à l'heure. L'unité a
la valeur monétaire fixée à la PHASE 2). Cette
PHASE peut être sautée si on a exclu le tarif CLUB à la PHASE 6
précédente. Fixer le tarif CLUB désiré en utilisant les touches (+) et (-). Les
maintenir appuyées pour les changements rapides.
Pour passer à la phase suivante, taper la toucheTARIFF.
(variable de 10 à 500 unités à l'heure). Fixer le
tarif désiré en utilisant les touches + et (-). Les
maintenir appuyées pour les changements rapides. Pour passer à la
phase suivante, taper la toucheTARIFF.
Appilqué dans ies tranches horaires. Sauter
cette PHASE si, à la PHASE 5, on n'a pas
inséré les tranches horaires. Pour la programmation: voir PHASE 8. Pour
passer à la phase suivante, taper la toucheTARIFF.
Appilqué dans ies tranches horaires. Sauter
cette PHASE si, à la PHASE 5, on n'a pas
inséré les tranches horaires. Pour la programmation: voir PHASE 8. Pour
passer à la phase suivante, taper la toucheTARIFF.
.
.
.
2
0
1
2
6.
1
7.
8.00
8.
8.00
9.
8.00
10.
8.00
_
()
_
()
_
(
_
)
_
_

Plier la lamelle du microinterrupteur pour qu’il se déclanche en même
temps que celui de droite quand on pousse en avant la plaque
coulissante; maintenir le plateau en place avec toutes les boules et le
faire coulisseur la plaque on poussant dans la fente centrale
antérieure. Appeler un électricien pour faire les branchements indiqués
dans le schéma et lui rappeler que la carrosserie métallique doit être
reliée à terre.
COM
NCNO
LAMP
CONNECT
TO METAL
MICRO
SWITCH
230 VAC (ou 115 VAC)
ALIMENTATION LAMPADAIRE
CODES ARTICLES
Art. 503 pour Carambole 3 boules Ø61,5 mm.
Art. 503A pour Italiana2xØ68+1xØ59mm.
Art. 504 pour 4 boules Ø61,5 mm.
Art. 509 pour 9 boules 9 x Ø61,5 mm.
Art. 509A pour 9 boules8xØ59+1xØ54mm.
Art. 516 pour Pool 16 x Ø57 mm.
Art. 516A pour English Pool 16 x Ø50-52 mm.
(ou utiliser Art. 516 + Art. 446)
Art. 516B pour Russian Pyramid 16 x Ø68 mm.
Art. 522 pour Snooker 22 x Ø52-54 mm.
Art. 502 pour contrôle de 2 raquettes + balle.
Art. 446 CALE 6mm pour English Pool Ø50-52 mm
(à utiliser ensemble l’Art. 516).
Art. +642 OPTIONAL COMMANDE ÉCLAIRAGE.
Art. +641 OPTIONAL START À VOLET OUVERT.
Art. +640 OPTIONAL BANDES HORAIRES.
TIMER 3B
TIMER 3B
TIMER 4B
TIMER 9B
TIMER 9B
TIMER 16B
TIMER 16B-52
TIMER 16B-68
TIMER 22B
TIMER Ping-Pong
ELECTRONIC DESIGN
R
AFFICHAGE ET PROGRAMMATION DU
SIGNAL HORAIRE.
AFFICHAGE ET PROGRAMMATION DES
TRANCHES HORAIRES.
Sauter cette PHASE si, a la PHASE 5, on n'a
pas inséré les tranches horaires. Le premier nombre, à gauche, clignote et
indique le jour de la semaine; il va de 1 (lundi) à 7 (dirnanche). Utiliser les
touches (+) et (-) pour indiquer le jour actuel. Une fois la valeur correcte
indiquée, tourner la clef INSTALLATION et l'heure commencera à
clignoter. Afficher l'heure exacte puis tourner encore une fois pour arriver
sur les minutes. Afficher les minutes. Pour passer à la phase suivante,
taper la touche TARIFF.
Sauter cette PHASE si, à la PHASE 5, on n'a
pas inséré les tranches horaires. La programmation de toutes les heures
auxquelles le tarif devra changer demande un certain temps puisqu'on
devra parcourir toute la semaine, jour par jour. II est donc conseillé d'écrire
sur une feuille de papier, en commençant par le lundi, les heures
auxquelles le tarif doit changer et lequel des 3 tarifs disponibles entrera en
fonction à chacune de ces heures. Les heures disponibles vont de demi-
heure en demi-heure. Comme dans la figure ci-dessus, on commencera
par le premier jour 1 qui est le lundi, à ZERO heure. A côté du chiffre qui
indique le jour, figure le symbole (de 1 à 3 tirets superposés) indiquant
lequel des trois tarifs horaires est appliqué à l'heure indiquée. Sélectionner
les tarifs 1, 2, 3 en tournant la clef INSTALLATION. Une fois
indiqué le tarif à ZERO heure du lundi, faire avancer l'heure avec la touche
(+), ou la reculer avec la touche (-), de demi-heure en demi-heure tout en
contrôlant que le tarif imposé reste le même jusqu' à ce qu' on arrive à
l'heure à laquelle le tarif doit changer. Utiliser encore une fois la clef
INSTALLATION pour sélectionner le nouveau tarif, et avancer l'heure à
nouveau. Après 23h.30 de lundi, on arrivera à Oh.00 de mardi, et ainsi de
suite jusqu' à 23h.30 du jour 7, c'est- à -dire du dimanche. II est possible de
programmer 28 changements de tarifs au cours de la semaine. Si on
dépasse cette valeur, I'écran affiche FULL. Pour faire avancer (ou retarder)
rapidement l'heure, maintenir la touche + (ou - ) appuyée. Une fois
l'opération terminée, vous pouvez faire découler toute la semaine sur
l'écran et vérifier qu'il n'y a pas d'erreur. Pour terminer la programmation,
taper la touche TARIFF.
La clef START PLAY permet d 'ouvrir le volet des billes et déclanche le
départ du compteur, dont le fonctionnement est signalé par le clignotement
de l'écran. Si la programmation prévoit que l'on puisse utiliser le tarif CLUB,
celui-ci peut être inséré ou non en appuyant sur la touche TARIFF. Quand
le tarif CLUB est appliqué, I'écran affiche un point à gauche. Lorsque le
compteur fonctionne, si on appuie avec la pointe d'un stylo-bille sur le trou
(+), on peut voir apparaître l'heure et le tarif appliqué. Le tarif est indiqué
par 1, 2 ou 3 tirets horizontaux . Le compteur arrête de tourner
quand le plateau a été remis à sa place avec TOUTES les billes. Le
montant à payer est alors ajouté au totaliseur. Nous rappelons que le
totaliseur indique le nombre d'unités qui, multiplié par la valeur monétaire
de chaque unité, donne le montant total à percevoir. Au moment du STOP
du compteur, le montant à payer est affiché pendant 30 secondes, aprés
quoi l'appareil affiche de nouveau le jour, I'heure et le tarif applicable à ce
moment-là. Pour afficher de nouveau la dernière somme à payer, appuyer
sur la touche TARIFF. Pour afficher le totaliseur sans la clef
INSTALLATION, appuyer avec deux stylos-billes, sur les trous (+) et (-) en
même temps.
FONCTIONNEMENT
FIXATION AU MUR
EN OPTION
Dévisser les deux vis en haut sur le devant; tourner la clef
et tirer vers soi; fixer le compteur sur le mur en utilisant
les trois trous sur le fond. Si le compteur est mis sur une étagère, il
suffit de le fixer avec le trou qui se trouve en-dessous (dans la zone du
plateau).
Il permit de réactiver le compte même si le volet est ouvert (tournant la
clé START PLAY). De cette manière le changement des joueurs est
facilité sans la nécessité de réinsérer le plateau avec toutes les boules.
Enlever le 4 vis sur les deux côtés. Pour les deux vis postérieures,
bloquer l’écrou à l’intérieur. Cette opération est nécessaire pour qu’il ne
puisse être ouvert que par le propriétaire de la clef INSTALLATION.
Detacher le connecteur de la fiche et enlever tout le couvercle. Sur la
partie interne, à gauche, se trouvent les deux trous de fixation du
microinterrupteur qui commandera l’éclairage.
INSTALLATION
- START À VOLET OUVERT
- COMMANDE ÉCLAIRAGE
__
__
_
_
()
__
__
_
_
()
12.
0:001_
jour tarif heure minutes
jour
11.
12:372
heure minutes

1
TIMER3-22B
mit Zeitzonen
MONTAGEANLEITUNG
DEUTSCH
PROGRAMMIERUNG MIT ZEITZONEN
Das Optional der "PROGRAMMIERUNG FÜR ZEITZONEN” erlaubt zu
festgelegten Zeiten den automatischen Wechsel der Tarife wahrend der
ganzen Woche. Somit existiert eine Wochenuhr und die Möglichkeit,
während der ganzen Woche zu festgelegten Zeiten die gewünschten
Tarife einzugeben. Es sind drei Tarife m glich und desweiteren ein vierter
Tarif, genannt CLUB, der vom Bediener manuell mit dem Schalter TARIFF
eingefügt werden kann. Dieser Tarif kann auch ausgeschlossen werden.
Es gibt 12 in Folge zu programmierende PHASEN. Um die M glichkeit zur
Programmierung zu erhalten, wird der Schlüssel INSTALLATION im
Uhrzeigersinn gedreht.
Es erscheint die PHASE 1:
ö
ö
Der Buchstabe "C" gefolgt von einer Nummer
zeigt den Wert des Zählers Totalisators an. Der
Zahler zeigt die Anzaht der erfolgten Einheiten an, und da der Wert einer
Einheit nach Belieben programmiert werden kann (siehe PHASE 2), muß
der Zählerwert mit dem Wert einer Einheit multipliziert werden, um die
Totaleinnahme in Geld zu erhalten. Der Totalisator zahit bis 99.999
Einheiten und kann bei Null beginnen. Um ihn zu nullen, wird mit der Spitze
eines Kugelschreibers die Taste - gedrückt. Wird nicht gewünscht mit den
folgenden Programmier-PHASEN fortzufahren, muß der Schlüssel
INSTALLATION zurückgedreht werden. Das erweist sich nach der
Programmierung als nützlich, wenn nur gewünscht wird Zugang zum
Totalisator zu erhalten. Um zur PHASE 2 zu gelangen, wird die Taste
TARIFF gedrückt. Bei der nachfolgenden Programmierung darf sich der
Apparat nicht in der Geldaufzählung befinden.
Versteht sich als der Wert in Geld, der bei
jedem Zeitintervall zu der zu zahlenden
Summe addiert wird. Er hängt von der Währung eines jeden Landes ab.
Die verfügbaren Werte der Einheiten sind: 0,05 - 0,10 0,20 - 0,50 - 1 - 2 - 5
1 0 - 20 - 50 - 100. Beisp. Für Italien 100, Frankreich 0,50, Deutschland,
USA 0,10. Die Wahl derselben erfolgt durch Verwendung der Tasten (+)
und (-). Um zur nachfolgenden Phase zu gelangen wird TARIFF betätigt.
Ist der Charakter, der vor dem zu zahlenden
Betrag erscheinen muß. Die verfügbaren
Charakter sind: C d E F L P S t Y oder "kein Charakter". Die Wahl
derselben erfolgt durch Verwendung der Tasten (+) und (-). Um zur
nachfolgenden Phase zu gelangen wird TARIFF betätigt.
(15 Werte zur Wahl). Versteht sich als ein
Festpreis, der bei jedem Spielbeginn
zusätzlich zum Zeittarif aufgerechnet wird. Um diesen Wert einzugeben,
werden die Tasten (+) und (-) verwendet. Um zur nachfolgenden Phase zu
gelangen wird TARIFF betätigt.
Es besteht die Moglichkeit die Anzeige des
Zeitsignals und seinen Einfluß auf die Tarife zu
befähigen oder auszuschließen. Um die 3 nachfolgenden Werte
einzugeben werden die Tasten (+) und (-) verwendet:
Das Zeitsignal ist ausgeschlossen und somit wird es weder
angezeigt noch hat Lza es Einfluß auf die Tarife. Es werden bei der
Programmierung die PHASEN 9, 10, 1 1, 12 übersprungen, die den TARIF
2, den TARIF 3, die Zeit und die Zeitzonen betreffen.
ZÄHLER TOTALISATOR.
GELDWERT EINER EINHEIT.
WÄHRUNGSSYMBOL.
TARIF SPIELBEGINN.
BEFAHIGUNG ZEITSIGNAL.
AUSSCHLUß.
13345
1.
2.
0.05
3.
E
4.
0.05
5.
1
:
0
ZEITSIGNAL ANGEZEIGT, ZEITZONEN JEDOCH
AUSGESCHLOSSEN
BEFÄHIGUNG ZEITZONEN
MODALITÄT TARIF CLUB.
AUSSCHLUß
TARIF CLUB AKTIVIERBAR NUR WENN DER TARIF 1 AKTIV IST
TARIF CLUB STETS AKTIVIERBAR.
TARIF ZEIT CLUB
ZElTTARIF 1 .
ZEITTARIF 2 .
ZEITTARIF 3 .
. Es wird das Zeitsignal angezeigt, jedoch
ohne jegliche Aktion auf die Tarife. Somit werden die PHASEN 9, 10,
12 übersprungen, die den TARIF 2, den TARIF 3 und die Zeitzonen
betreffen.
. Das Zeitsignal wird angezeigt und
desweiteren erfolgt der automatische Wechsel der Tarife in den, in
der PHASE 12 festgelegten Zeitausschitten. Um zur folgenden
Phase zu gelangen wird TARIFF bet tigt.
Es besteht die Möglichkeit zu entscheiden, ob
der Tarif CLUB verwendet wird oder nicht. Das
bedeutet, daß der Bediener, der das Taxameter leitet, entsprechend
seiner Beschreibung, den Tarif CLUB mittels dem Schalter TARIFF
eingeben kann. Um einen der 3 nachfolgenden Werte einzugeben werden
die Tasten (+) und (-) verwendet:
.
Der Tarif CLUB kann nicht aktiviert werden.
.
Wenn somit in einigen die Tarife 2 und 3 aktiv sind, ist der
Schalter TARIFF in diesen Zeiträumen nicht befähigt und deshalb
kann der Tarif CLUB nicht eingegeben werden.
Der Bediener kann den Tarif
CLUB jederzeit einfügen, dies auch wenn die Tarife 2 oder 3 aktiv
sind. Um zur nachfolgenden Phase zu gelangen wird TARIFF
betätigt.
(variabel von 10 bis 500 Einheiten pro
Stunde. Als Einheit versteht sich der, in
PHASE2 eingegebene Geldwert). Diese PHASE kann ubersprungen
werden, sofern in der PHASE 6 der Ausschluß der Tarifs CLUB
programmiert wurde. Die Eingabe des gewünschten Tarifs CLUB erfolgt
unter Verwendung der Tasten (+) und (-). Sie werden gedrückt gehalten,
um schnelle Veränderungen zu erhalten. Um zur nachfolgenden Phase zu
gelangen wird TARIFF betätigt.
(variabel von 10 bis 500 Einheiten pro
Stunde). Eingabe der gewünschten Tarife
unter Verwendung der Tasten (+) und (-).Sie werden gedrückt gehalten,
um schnelle Veränderungen zu erhalten. Um zur nachfolgenden Phase zu
gelangen wird TARIFF betätigt.
Werden bei den Zeitzonen verwendet. Diese
PHASE wird übersprungen, wenn in der
PHASE 5 die Zeitzonen ausgeschlossen wurden. Die Programmierung
erfolgt wie für die PHASE 8. Um zur nächsten Phase zu gelangen wird
TARIFF betätigt.
Werden bei den Zeitzonen verwendet. Diese
PHASE wird übersprungen, sofern in der
PHASE 5 die Zeizonen nicht befähigt wurden. Die Programmierung
erfolgt wie für die PHASE 8. Um zur nachfolgenden Phase zu gelangen
wird TARIFF betätigt.
ä
Zeitzonen
2
0
1
2
6.
1
7.
8.00
8.
8.00
9.
8.00
10.
8.00
_
()
_
()
_
(
_
)
_
_

ANZEIGE UND PROGRAMMIERUNG DES
ZEITSIGNALS.
ANZEIGE UND PROGRAMMIERUNG VON
ZEITAUSSCHNI TTEN.
Die PHASE wird übersprungen, wenn in der
PHASE 5 das Zeitsignal AUSGESCHLOSSEN wurde. Die erste Zahl auf ,
der linken Seite leuchtet und zeigt den Wochentag an und reicht von 1
(Montag) bis 7 (Sonntag). Um den entsprechenden Tag einzugeben,
werden die Tasten (+) und (-) verwendet. Nachdem der korrekte Wert
eingegeben wurde, wird der Schlüssel INSTALLA TION gedreht und
dadurch beginnt die Stunde zu leuchten. Eingabe der exakten Stunde und
danach wieder den Schlüssel drehen, wodurch man zu den Minuten
gelangt, die nun eingegeben werden. Um zur nächsten Phase zu gelangen
wird TARIFF betätigt.
Diese PHASE wird übersprungen sofern in der
PHASE 5 die Zeitzonen nicht befähigt wurden. Die Programmierung aller
Zeiten, in denen ein Tarifwechsel erfolgen muß, erfordert einen gewissen
Zeitaufwand, da die ganze Woche durchlaufen werden muß, Tag für Tag.
Darum ist es ratsam wenn Sie sich, beginnend bei Montag, die Zeiten auf
ein Blatt schreiben, zu denen ein Tarifwechsel erfolgen soll und
desweiteren welcher der 3 verfügbaren Tarife zu jeder der besagten Zeiten
in Funktion tritt. Die möglichen Zeiten gehen von einer halben Stunde zur
nächsten. Wie auf dem obigen Bild ersichtlich, beginnt man beim Tag 1
(Montag) zur Stunde NULL. Seitlich der Nummer, die den Tag angibt, ist
mittels einem Symbol, das von 1 er bis 3 waagerechten Linien reichen
kann, angezeigt, welcher der 3 Zeittarife zur angegebenen Zeit in Funktion
ist. Durch Drehen des Schlüssels INSTALLATION werden die Tarife 1, 2, 3
. gewähit. Nach der Entscheidung des Tarifs zur Stunde NULL
am Montag wird die Uhrzeit mittels der Taste + (oder ruckwärts mit der
Taste -) in halbstündiger Weise eingegeben, dabei kontrollieren, daß der
eingegebene Tarif unverändert bleibt, bis die neue Zeit erreicht wird, zu der
ein Tarifwechsel erfolgen soll. Es wird erneut der Schlüssel
INSTALLATION verwendet, um den neuen Tarif zu wählen und danach
wird wieder mit der Zeit fortgefahren. Nach 23:30 Uhr am Montag, gelangt
man zur Stunde Null am Dienstag und das geht so weiter bis um 23:30 Uhr
am Tag 7 (Sonntag). Es konnen 28 Tarifwechsel im Verlauf einer Woche
programmiert werden. Sollte dieser Wert überschritten werden, erscheint
auf der Anzeige das Wort FULL. Um schnell mit den Zeiten vorwärts oder
rückwärts zu gelangen, werden die Tasten + und (-) gedrückt gehalten.
Nach Beendigung können Sie nun die gesamte Woche absuchen und den
vorhandenen Tarif für jeden Zeitabschnitt überprüfen. Um die
Programmierung zu beenden wird TARIFF betätigt.
Durch den Schlüssel START PLAY öffnet sich das Fach Kugeln und das
Zählen beginnt, was auch durch das Leuchten des Displays angezeigt
wird. Wurde bei der Programmierung der Tarif CLUB befähigt, kann dies
durch den Schalter TARIFF eingegeben oder ausgeschlossen werden. Ist
der Tarif CLUB in Funktion erscheint auf der linken Seite der Anzeige ein
kleiner Punkt. Wird während dem Zählen mit der Spitze eines
Kugelschreibers in die Öffnung + gedrückt, kann man die Zeiten ersehen
und welcher Tarif von den 3 moglichen zur Zeit aktiv ist. Dieser wird durch
1, 2, oder 3 waagerechte Linien . angezeigt. Der Zähistop erfolgt,
wenn das Tablett mit ALLEN Kugeln eingefugt wurde. Zu diesem Zeitpunkt
wird der zu zahlende Betrag dem Totalisator zuaddiert. Wir erinnern daran,
daß der Totalisator die Anzahl der erfolgten Einheiten anzeigt und daß
dieser deshalb mit dem Geldwert einer Einheit multipliziert werden muß,
um die Totaleinnahme in Geld zu erhalten.Ab dem Zeitpunkt des Zahistops
wird der zu zahlende Betrag für 30 Sekunden angezeigt danach
erscheinen der Tag, die Uhrzeit und der Tarif, der in diesem Augenblick
aktiv ist. Wird gewünscht den letzten Betrag erneut anzuzeigen, genugt es
die Taste TARIFF zu betätigen. Um dem Totalisator anzuzeigen, ohne den
Schlüssel INSTALLATION zu verwenden, drückt man gleichzeitig mit den
Spitzen von 2 Kugelschreibern in die Offnungen (+) und (-).
FUNKTIONSABLAUF
BEFESTIGUNGAN DER WAND
OPTIONAL
Lösen Sie die beiden oberen Schrauben an der Voderseite, drehen Sie
den Schlüssels und ziehen ihn zu sich heran. Befestigen
Sie danach das Taxameter an der Wand unter Verwendung der 3 Löcher
auf der Rückseite. Wird das Gerät in einer Konsole angebracht, reicht es
aus das untere Loch zu verwenden (in Zone Lade).
Ermöglicht die Wiederaufnahme des Zählens auch bei offener Luke (der
Schlüssel START PLAY muss umgedreht werden). Dadurch wird das
Abwechseln der Spieler vereinfacht, ohne jedesmal die Lade mit allen
Kugeln wieder hineinstecken zu müssen.
INSTALLATION
- INBETRIEBNAHME IN GEÖFFNETEM ZUSTAND
- KOMMANDO BELEUCHTUNG
Entfernen Sie die 4 Schrauben an den beiden Seiten. Zum Lösen der
beiden unteren Schrauben muß die innere selbstschließende Mutter
festgehalten werden. Das, damit Sie nur durch den Besitzer des
Schlüssels INSTALLATION geöffnet werden kann. Ziehen Sie dann die
Verbindung der Karte ab und entfernen Sie den gesamten Deckel. Links
im Innenteil sind 2 Löcher angebracht, an denen der Mikrounterbrecher,
der die Beleuchtung steuert, befestigt wird.
Biegen Sie das Blech des Mikro so, daß es zusammen mit dem Mikro
rechts einschnappt, wenn das verschiebbare Blech nach vorne
gedrückt wird; halten Sie die Lade mit allen Kugeln im eingeschobenen
Zustand und drücken Sie durch den vorderen Zentralschlitz. Lassen Sie
die folgende Verbindung durch einen Elektriker ausführen und
vergewissern Sie sich, daß das Metallgehäuse geerdet wird:
COM
NCNO
LAMP
CONNECT
TO METAL
MICRO
SWITCH
230 VAC (or 115 VAC)
VERSORGUNG BELEUCHTUNG
ARTIKELNUMMERN
Art. 503 für CARAMBOLA 3 Kugeln Ø61,5 mm.
Art. 503A für Italiana2xØ68+1xØ59mm.
Art. 504 für 4 Kugeln Ø61,5 mm.
Art. 509 für 9 Kugeln 9 x Ø61,5 mm.
Art. 509A für 9 Kugeln8xØ59+1xØ54mm.
Art. 516 für POOL 16 x Ø57 mm.
Art. 516A für ENGLISH-POOL 16 x Ø50-52 mm.
(oder Art. 516 + Art. 446 verwenden).
Art. 516B für Russian Pyramid 16 x Ø68 mm.
Art. 522 für SNOOKER 22 x Ø52-54 mm.
Art. 502 zur Kontrolle von 2 Schlägern + Ball.
Art. 446 STÄRKE 6mm für POOL Ø50-52 mm
(zusammen mit Art. 516 zu verwenden).
Art. +642 OPTIONAL BEDIENUNG DER BELEUCHTUNG.
Art. +641 OPTIONAL INBETRIEBNAHME IN
GEÖFFNETEM ZUSTAND.
Art. +640 TARIFZEITEN.
TIMER 3B
TIMER 3B
TIMER 4B
TIMER 9B
TIMER 9B
TIMER 16B
TIMER 16B-52
TIMER 16B-68
TIMER 22B
TIMER Ping-Pong
ELECTRONIC DESIGN
R
__
__
_
_
()
__
__
_
_
()
Tag
12.
0:001_
Tarif Stunde Minuten
11.
12:372
Tag Stunde Minuten
This manual suits for next models
7
Table of contents
Languages:
Other Favero Timer manuals
Popular Timer manuals by other brands
Intermatic
Intermatic WH2725AT Installation and setup instructions

WAREMA
WAREMA 1002 219 Operating and installation instructions
A.J.Antunes
A.J.Antunes roundup EST-3 installation instructions
LEGRAND
LEGRAND 4 127 31 quick start guide
Timeguard
Timeguard ETU17N Installation & operating instructions

Timeguard
Timeguard NTT06 Installation & operating instructions
