Profi Power 2.440.007 User manual
2
3
D
D
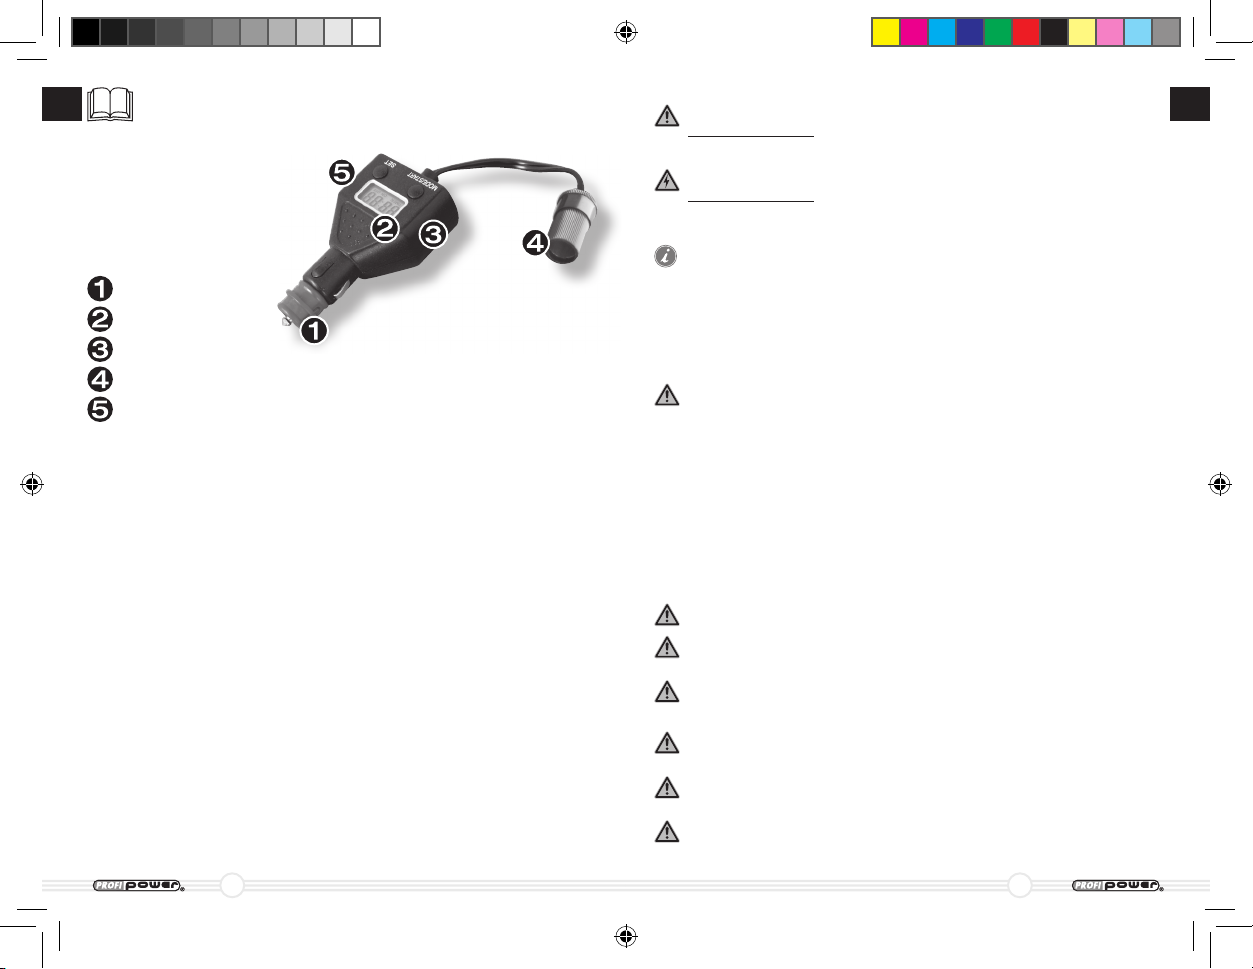
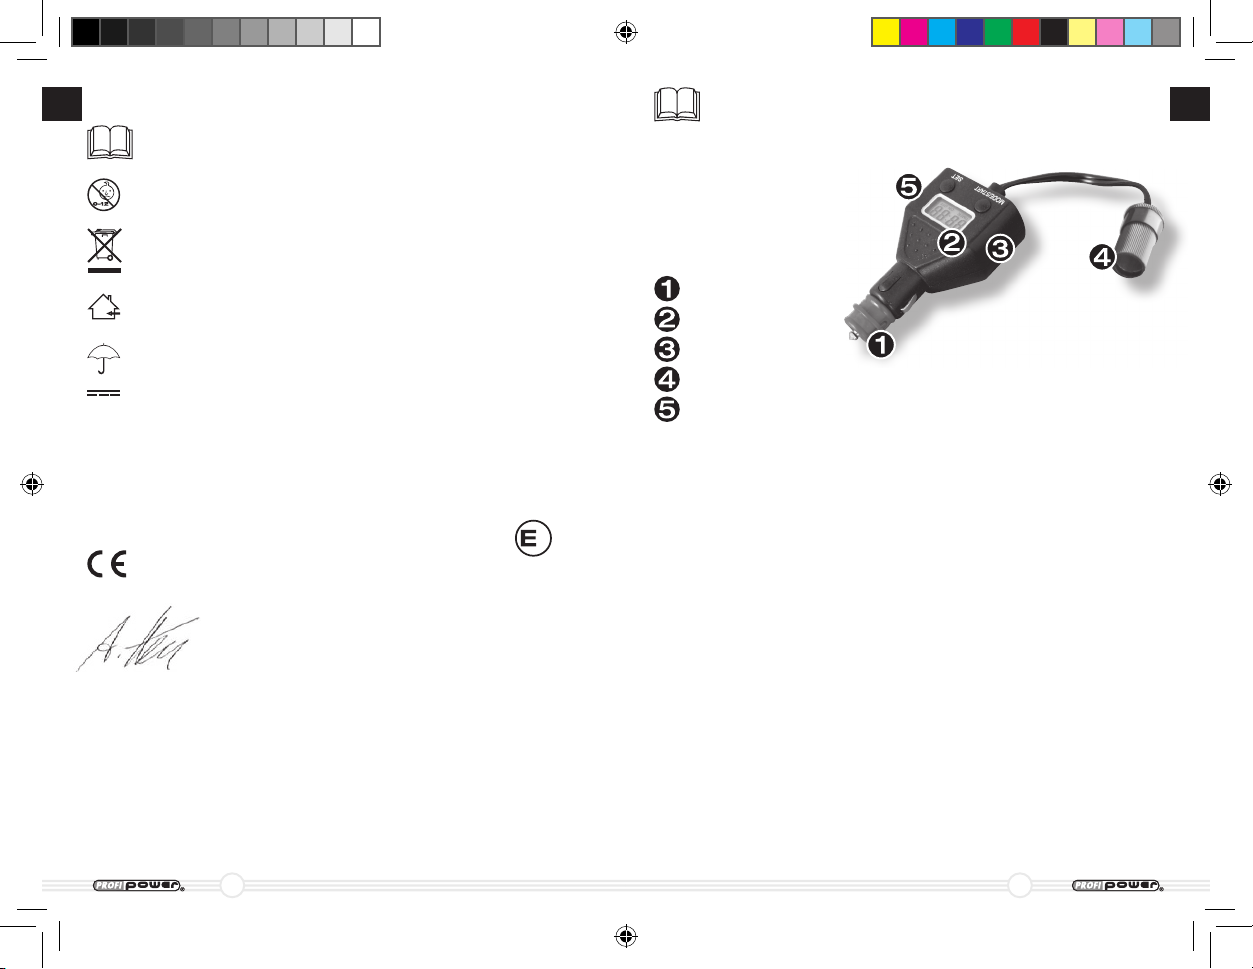
Gerätemerkmale
12 V-Stecker
LCD-Anzeige
Bedienungsknöpfe
Ausgangskabel mit 12 V-Steckdose
Batteriefach rückseitig
Lesen Sie diese Anleitung vor dem Einbau/Montage und
Inbetriebnahme sehr sorgfältig und bewahren Sie diese
auf um bei Bedarf, auch bei Weitergabe an Dritte, jederzeit
nachlesen zu können.
Inhaltsverzeichnis
1 Hinweise zur Benutzung der Anleitung
2 Allgemeine Sicherheitshinweise
3 Lieferumfang
4 Bestimmungsgemäßer Gebrauch
5 Technische Merkmale, Funktionsweise
6 Anschluss der Zeitschaltuhr
7 Pflege und Reinigung des Gerätes
8 Fehlerbeseitigung
9 Gewährleistung
10 Entsorgung
11 Übersicht Technische Daten
12 Konformitätserklärung
1 Hinweise zur Benutzung der Anleitung
ACHTUNG:
Sicherheitshinweis: Nichtbeachtung kann zu Materialschäden führen und
Gerätefunktionen beeinträchtigen/beschädigen.
ACHTUNG:
Sicherheitshinweis: Weist auf Gefahren mit elektrischem Strom oder
elektrischer Spannung hin. Nichtbeachtung kann zu Personen- und Ma-
terialschäden führen. Die Gerätefunktion kann beeinträchtigt werden.
HINWEIS:
Ergänzende Infos zur Gerätebedienung
Abb. Zahl/Zahl Weist auf eine Abbildung hin.
z.B. Abb. 1/4 bedeutet: siehe Abbildung 1 auf Seite 4
Beachten Sie die nachfolgenden Sicherheitshinweise.
2 Allgemeine Sicherheitshinweise
Die axhess GmbH & Co. KG, Bergstraße 18, 53547 Hausen, übernimmt
keine Haftung für Schäden und Folgen die auftreten aufgrund:
- Anschluss-, Bedien-, und/oder Montagefehler.
- Gewaltanwendung, Beschädigungen des Gerätes und/oder der An-
schlussleitungen.
- Gerätebeschädigungen durch mechanische Einflüsse und/oder Über-
spannung.
- Jegliche Veränderung am Gerät und/oder den Anschlussleitungen.
- Verwendung für andere, als in der Anleitung beschriebene Zwecke.
- Flüssigkeitseinwirkung und/oder unzureichende Belüftung.
- Unautorisiertes Öffnen des Gerätes. Dies hat u.a. den Verlust der Ge-
währleistung zur Folge.
- Folgeschäden die aufgrund nicht bestimmungsgemäßen Gebrauchs
und/oder defekter Batterien entstehen können.
Betreiben Sie das Gerät ausschließlich zu seinem bestimmungsge-
mäßen Gebrauch.
Niemals in feuchter oder nasser Umgebung betreiben!
Nur in trockener Umgebung verwenden!
Betreiben Sie das Gerät niemals in der Nähe von brennbarem Material.
Betreiben Sie das Gerät niemals in explosionsgefährdeter Umgebung.
Betreiben Sie das Gerät nur, wenn ausreichende Belüftungsmöglichkeit
gegeben ist.
Reparaturen und Wartungen dürfen nur durch autorisierte Fachkräfte
durchgeführt werden, die mit den damit verbundenen Gefahren/Vor-
schriften vertraut sind.
Achten Sie immer auf eine sichere Platzierung des Gerätes!
Die Zeitschaltuhr muss so sicher aufgestellt/platziert werden, dass diese
nicht herabfallen oder umstürzen kann.
Das Gerät so sichern, dass Kinder keinen Zugriff darauf haben können!
Kinder können entstehende Gefahren nicht erkennen und nicht einschätzen!
profipower_2440007_Timer2_Manual_1292_ok_k1.indd 2-3 25.08.2009 11:25:53
4
5
D
D
Achten Sie unbedingt darauf, dass die Lufteinlässe und Luftausgänge
von Anschlussgeräten soweit vorhanden immer frei und offen sind.
Das Gerät in Betrieb niemals zudecken. Achten Sie immer auf eine aus-
reichend Belüftung.
Bei Arbeiten am Gerät z.B. Reinigung, Gerätepflege, vorher immer erst
die Stromversorgung unterbrechen.
Beachten Sie unbedingt alle vorher beschriebenen Sicherheitshinweise!
5 Technische Merkmale
Digitale 12 V-Zeitschaltuhr
Stromversorgung 12 V DC
Max. Ausgangsstrom
8A/96 W DC
Datenanzeige LCD Monitor, 4-stellig
Uhranzeige Digitale Anzeige im 24 h-Modus mit Minutenan-
zeige.
Schaltfunktion Programmierbare »EIN/AUS«-Funktion.
Einstellung »Mode« oder »S e t« -Knopf betätigen.
Hintergrundbeleuchtung Bei Verbindung mit 12 V DC Bordnetz
sowie bei Betätigen eines Einstellkopfes
automatisch aufleuchtend.
Dauer der Hintergrund-
beleuchtung
ca. 15 sec., selbst erlöschend
Batteriewächterfunktion Zeitschaltuhr schaltet sich automatisch ab, wenn
Fahrzeugbatteriespannung auf ca. 8 V gesunken
ist. Somit werden auch angeschlossene Geräte
abgeschaltet. Diese Funktion verhindert, dass
eine Fahrzeugbatterie unter die erforderliche
Startspannung entladen wird.
Speicherung der Ein-
stellung
Eingestellte Daten werden gespeichert.
Knopfbatterie Rückseitig eingelegte 3 V-Knopfbatterie zur
Versorgung der LCD Anzeige, zur Erhaltung der
gespeicherten Daten, wenn die Zeitschaltuhr
nicht mit dem 12 V-Netz verbunden ist.
6 Anschluss der Zeitschaltuhr
Inbetriebnahme
Bevor Sie ein Gerät an die Zeitschaltuhr anschließen und bevor Sie die Zeit-
schaltuhr mit der 12 V-Stromversorgung verbinden, muss die Uhr eingestellt
werden.
Einstellen der Uhr
1. Drücken Sie den Knopf »MODE/START«, die ersten beiden Stellen der di-
gitalen Anzeige blinken (die Zeichen »TIMER, ON und OFF« werden jetzt
nicht angezeigt).
2. Drücken Sie dann den »Set« Knopf, die Stundenanzeige läuft. Wählen
Sie die Zeit aus und lassen Sie den »SET« Knopf los. Zur Feineinstellung
»SET« Knopf schrittweise drücken.
Setzen Sie das Gerät nicht direkter Sonneneinstrahlung oder anderen
Wärmequellen aus. Vermeiden Sie die zusätzliche Erwärmung des Ge-
rätes durch äußere Einflüsse.
Um Beschädigungen des Anschlusskabels zu vermeiden, niemals am
Kabel ziehen, immer mittels Stecker die Stromverbindung trennen.
Ist das Anschlusskabel beschädigt, Gerät nicht verwenden. Gerät zuerst
von einer autorisierten Fachkraft reparieren lassen.
Keine brennbaren Gegenstände wie z.B. Kerzen neben oder auf dem
Gerät abstellen.
Keine mit Flüssigkeiten gefüllten Gegenstände wie z.B. Wasserbehälter,
Getränkebehälter neben oder auf dem Gerät oder in der Nähe abstellen.
3 Lieferumfang
1 x 12 V-Zeitschaltuhr
1 x Knopfbatterie 3 V
1 x Mehrsprachige Bedienungsanleitung
1 x Recyclefähige Verkaufsverpackung
4 Bestimmungsgemäßer Gebrauch
Zeitschaltuhren, so auch diese 12 V-Ausführung, sind konzipiert um ange-
schlossene Geräte zu einem bestimmten, vorher ausgewählten Zeitpunkt au-
tomatisch einzuschalten. Ebenso schaltet diese Zeitschaltuhr ein angeschlos-
senes Gerät zu einem bestimmten, vorher ausgewählten Zeitpunkt wieder
aus. Vorausgesetzt, die Zeitschaltuhr ist mit einer Dauerstrom führenden
12 V-Steckdose verbunden.
Einstellungen an der Zeitschaltuhr werden gespeichert. Eine Unterstüt-
zungsbatterie (auswechselbar) in der Zeitschaltuhr versorgt den Datenspei-
cher der Schaltuhr wenn diese keine 12 V-Spannung vom Bordnetz erhält.
Eingestellte Daten bleiben erhalten. Diese Schaltuhr ist für den Einsatz mit
12 V-Fahrzeugbordnetzen konzipiert. Andere Spannungsgrößen zerstören
die 12 V-Zeitschaltuhr, nicht an andere Spannungen anschließen! Der max.
Ausgangsstrom beträgt 10 A. 12 V-Anschlussgeräte 12 V /10 A bis max. 120 W-
Leistungsaufnahme können mit dieser Zeitschaltuhr betrieben werden.
ACHTUNG!
Vor dem Einsatz der 12 V-Zeitschaltuhr vergewissern Sie sich anhand der
Fahrzeug-Begleitpapiere über die Stromversorgung und max. Belast-
barkeit der 12 V-Bordsteckdose (Zigarettenanzünder) des Fahrzeuges.
ACHTUNG!
Beachten Sie immer die folgenden grundsätzlichen Sicherheitsmaß-
nahmen beim Gebrauch von elektrischen Geräten zu Ihrem eigenen
und Schutz anderer vor:
• elektrischerSchlag
• Brandgefahr
• Verletzungen
• Vermögensschaden
Nehmen Sie das Gerät nur in Betrieb, wenn das Gehäuse und die
Leitungen unbeschädigt sind!
profipower_2440007_Timer2_Manual_1292_ok_k1.indd 4-5 25.08.2009 11:25:54

6
7
D
D
Hinweis: Beim Drücken des Knopfes »SET« laufen die Stunden- oder
Minutenanzeigen von 0–23 (Stunden) 0–59 (Minuten), bis Sie diesen
Knopf los lassen.
Die Zeitschaltuhr aktivieren, einschalten
1. Drücken Sie den Knopf »MODE/START«, die Anzeige »TIMER« blinkt. Die
Anzeigen »ON« und »OFF« sind nicht aktiv. Dies bestätigt Ihnen, dass die
Zeitschaltuhr eingeschaltet ist.
2. So lange die Zeitschaltuhr »EIN« geschaltet ist, blinkt die Anzeige
»TIMER« und die »ON« Anzeige ist angezeigt. Jedoch die Anzeige »OFF«
wird nicht angezeigt.
3. Wenn alle Symbole im Display angezeigt werden, so hat die Schaltuhr
entsprechend der vorgewählten Zeit, ausgeschaltet.
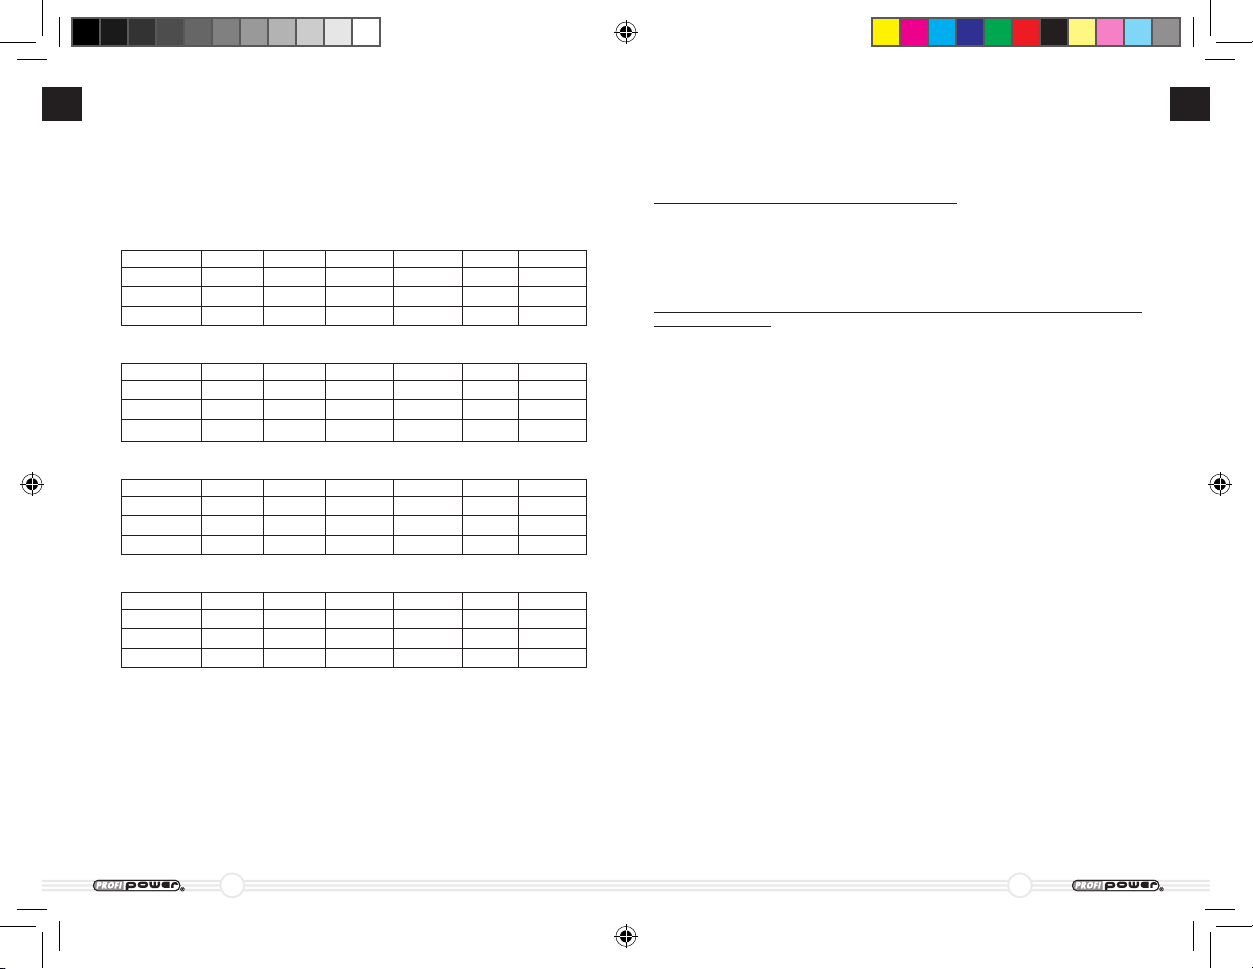
Hour :Minute Timer ON OFF
Anzeige
Blinkt
keine
Anzeige
Hour :Minute Timer ON OFF
Anzeige
Blinkt
keine
Anzeige
Hour :Minute Timer ON OFF
Anzeige
Blinkt
keine
Anzeige
Hour :Minute Timer ON OFF
Anzeige
Blinkt
keine
Anzeige
Löschen der eingestellten Daten
1. Drücken Sie beide Einstellknöpfe (»MODE/START« und »SET/TIMER«) für
ca. 5 Sekunden gleichzeitig um alle Zeiteinstellungen zu löschen.
2. Halten Sie den »MODE/START« Knopf für ca. 5 Sekunden gedrückt um
die gespeicherten Zeitschaltdaten zu aktivieren.
3. Drücken Sie den Knopf »SET/TIMER« ca. 5 Sekunden um alle Daten zu
löschen.
Beim Wechseln der eingelegten Knopfzelle werden ebenso alle Daten ge-
löscht. Eine Neuprogrammierung ist erforderlich.
3. Drücken Sie dann den Knopf »MODE/START«, die beiden hinteren Anzei-
gestellen blinken.
4. Drücken Sie dann den Knopf »SET«. Die Minutenanzeige läuft. Wählen
Sie die Minuten aus und lassen Sie den Knopf »SET« los. Zur Feineinstel-
lung »SET« Knopf schrittweise drücken.
5. Drücken Sie dann zur Bestätigung der eingestellten Zeit den Knopf
»MODE/START«. Der Doppelpunkt in der Mitte der digitalen Anzeige
blinkt (die Anzeigen für »TIMER«, »ON« und »OFF« sind nun sichtbar).
Hinweis:
Beim Drücken des Knopfes »SET« laufen die Stunden- oder Mi-
nuten
anzeigen von 0–23 (Stunden) 0–59 (Minuten), bis Sie diesen Knopf
los lassen.
Einstellung der Zeitschaltfunktion (TIMER ON)
Einstellen der Einschaltzeit
1. Drücken Sie den Knopf »MODE/START« einmal. Die Anzeigen »TIMER«
und »OFF« werden im Display gezeigt. Die Anzeige »ON« und die ersten
beiden Stellen der digitalen Anzeige blinken.
2. Drücken Sie dann dauerhaft den Knopf »SET«. Die vorher blinkende Stel-
le der Anzeige läuft, bis Sie den »SET« Knopf bei der ausgewählten Zeit
(Stunden) loslassen.
3. Drücken Sie dann den Knopf »MODE/START« erneut. Im Display erschei-
nen »TIMER und OFF« werden angezeigt. Die beiden hinteren Stellen der
Anzeige und die Anzeige »ON« blinken.
4. Drücken Sie zur Einstellung der Minuten den Knopf »SET« bis die ge-
wünschte Minutenanzeige erreicht ist. Lassen Sie den Knopf dann los.
5. Drücken Sie nun erneut den Knopf »MODE/START« um die eingestellte
Uhrzeit zu bestätigen. Die Anzeige »TIMER« und »OFF« sind im Display
angezeigt. Das Zeichen »ON« wird nicht angezeigt. Dies bestätigt Ihnen,
dass »ON« (Einschaltzeit) eingestellt ist.
Hinweis:
Beim Drücken des Knopfes »SET« laufen die Stunden- oder Mi-
nuten
anzeigen von 0–23 (Stunden) 0–59 (Minuten), bis Sie diesen Knopf
los lassen.
Einstellung der Zeitschaltfunktion (TIMER OFF)
Einstellen der Ausschaltzeit
1. Drücken Sie den Knopf »MODE/START« einmal. Die Anzeigen »TIMER«
werden im Display gezeigt. Die Anzeige »OFF« und die ersten beiden
Stellen der digitalen Anzeige blinken.
2. Drücken Sie dann dauerhaft den Knopf »SET«. Die vorher blinkenden
Stellen der Anzeige läuft, bis Sie den »SET« Knopf bei der ausgewählten
Zeit (Stunden) loslassen.
3. Drücken Sie dann den Knopf »MODE/START« erneut. Im Display erschei-
nen »TIMER« wird angezeigt. Die beiden hinteren Stellen der Anzeige und
die Anzeige »OFF« blinken.
4.
Drücken Sie zur Einstellung der Minuten den Knopf »SET« dauerhaft bis die
gewünschte Minutenanzeige erreicht ist. Lassen Sie den Knopf dann los.
5. Drücken Sie nun erneut den Knopf »MODE/START« um die eingestellte
Uhrzeit zu bestätigen. Die Anzeige »TIMER« ist im Display angezeigt.
Das Zeichen »OFF« wird nicht angezeigt. Dies bestätigt Ihnen, dass die
»OFF« (Ausschaltzeit) eingestellt ist.
profipower_2440007_Timer2_Manual_1292_ok_k1.indd 6-7 25.08.2009 11:25:54
8
9
D
D
Altgerät
Wenn das Gerät eines Tages endgültig außer Betrieb genommen wird, führen
Sie es entsprechend den gültigen Gesetzen, Vorschriften und Verordnungen
den dafür vorgesehenen Sammelstellen zu. Im Zweifelsfall wenden Sie sich
an den für Sie zuständigen Entsorger oder die entsprechende kommunale
Dienststelle.
Geben Sie dieses Gerät auf keinen Fall in den Hausmüll!
Die 3 V-Knopfbatterie (im Batteriefach auf der Geräte Rückseite)
muss separat über Batteriesammelstellen entsorgt werden!
Daher entnehmen Sie die Knopfbatterie bevor Sie das Altgerät in die
Entsorgung geben!
In Deutschland anfallende Entsorgungsgebühren zur Geräte- und
Batterieentsorgung hat der Hersteller bereits im Voraus entrichtet.
WEEE Reg. Nr. DE 36207475
Schützen Sie die Umwelt durch verantwortliches Handeln!
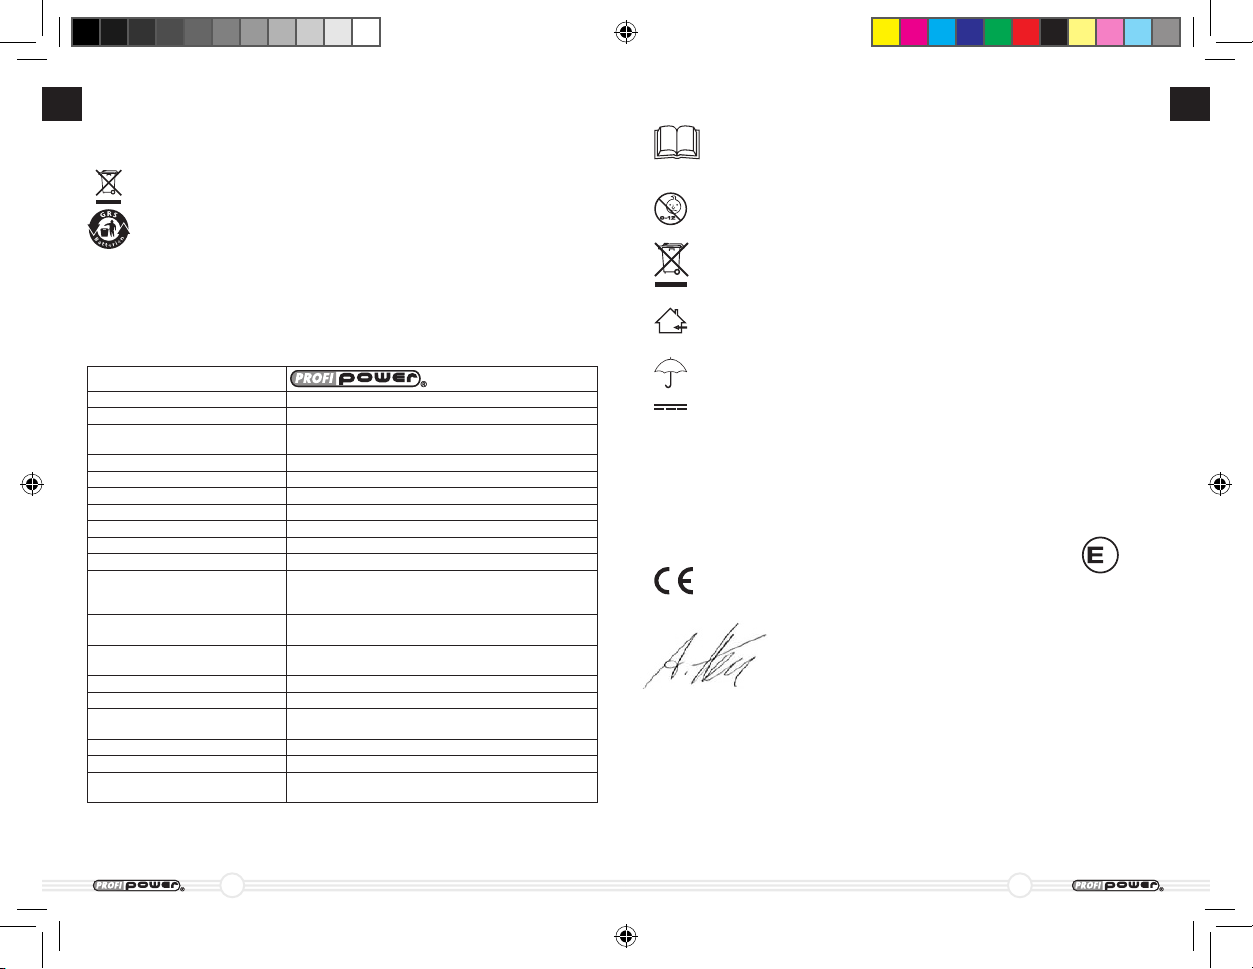
11 Technische Daten
Marke
Artikel 12 V-Zeitschaltuhr mit LCD-Anzeige
Artikel Nummer 2.440.007
Gerätetyp Überwachungs- und Kontrollinstrument,
programmierbar
Datenanzeige LCD Fenster mit Hintergrundbeleuchtung
Anschlussart 12 V-Steckdose
Eingangsspannung 12 V DC Gleichstrom (DC) 12 V (Volt)
Ausgangsspannung 12 V DC
Ausgangsleistung max.
8A DC, max. 12 V/96 W
Sicherung 12 A-Sicherung im Gerät eingebaut. Selbst
regenerierend.
Länge Anschlussleitung ca. 40 cm
Batteriewächter-Funktion Das Gerät schaltet sich automatisch ab,
wenn die Batteriespannung < 8 A erreicht.
Anschluss-Stecker Typ
12 V-Steckdose zum Anschluss von Geräten
mit 12 V-Stecker bis max. 8A/96 W Aufnah-
meleistung.
Datenerhaltung Zur vorübergehenden Erhaltung der ge-
speicherten Daten: Batterie 3 V DC 30 mAh
Knopfzelle
Artikel Abmessung 97 x 54 x 32 mm (L x B x H)
Artikel Abmessung verpackt 226 x 130 x 38 mm (L x B x H)
Artikel Gewicht unverpackt 0,118 kg (ohne 3 V-Batterie, inkl. Anschluss-
leitung)
Gewicht 3 V-Batterie 0,003 kg (Ausführung CR 927 Lithium Cell)
Artikel Gewicht verpackt 0,266 kg (inkl. Anleitung) 0,221 kg (exkl.
Anleitung)
Ausführung Verpackung 0,060 kg Pappe, 0,040 kg Kunststoff (PET)
08/2009 technische Änderungen ohne Vorankündigung jederzeit vorbehalten.
7 Pflege und Reinigung des Gerätes
Verwenden Sie zur Pflege und Reinigung der Zeitschaltuhr lediglich ein tro-
ckenes Tuch. Wischen Sie das Gerät von Zeit zu Zeit oder, wenn erforderlich
damit ab. Benutzen Sie keine Flüssigkeiten oder chemische Reinigungsmittel.
Tauchen Sie das Gerät niemals in Flüssigkeiten ein. Keine Flüssigkeiten über
das Gerät laufen lassen.
8 Fehlerbeseitigung
Die Zeitschaltuhr zeigt keine Funktion
Mögliche Ursache:
- Zusatzbatterie nicht aktiviert, nicht richtig eingelegt, Batterie leer.
Mögliche Abhilfe:
- Zusatzbatterie aktivieren, Batterie richtig einlegen, neue Batterie einsetzen.
Das Display scheint in Ordnung jedoch das Anschlussgerät wird nicht mit
Strom versorgt
Mögliche Ursache:
- Die 12 V-Steckdose wird nicht mit Strom versorgt.
- Die Zeitschaltuhr hat keinen Kontakt.
Mögliche Abhilfe:
- Zündung des Fahrzeugs einschalten.
- Ggf. Sicherung der 12 V-Steckdose (Zigarettenanzünder) erneuern.
- Schaltuhr richtig in die 12 V-Steckdose einstecken.
- Verbindung zum Anschlussgerät prüfen und ggf. herstellen.
- Anschlussgerät oder Anschlussleitung defekt –> Überprüfen und reparieren
lassen. Zeitschaltuhr nicht weiter benutzen.
9 Gewährleistung
Grundsätzlich gelten die allgemeinen Gewährleistungsbedingungen der
axhess GmbH & Co. KG. Diese beziehen sich ausschließlich auf Fertigungs-
und oder Materialfehler. Die Gewährleistung beginnt mit dem Kaufdatum und
endet nach 24 Monten ab Kaufdatum. Sollte das Gerät oder die Anschlusslei-
tung defekt sein, so bringen Sie es zu Ihrem Händler zurück oder senden Sie
es ausreichend frankiert an uns ein: www.axhess.com.
Warensendungen die unfrei an uns gesendet werden, nehmen wir nicht an.
Zur Gewährleistungsbearbeitung fügen Sie unbedingt folgende Belege bei:
Kaufnachweis (Kassenbon, Rechnung) mit Kaufdatum, Angabe des Reklama-
tionsgrundes, Fehlerbeschreibung.
10 Entsorgung
Die Verpackung ist recyclefähig. Geben Sie Verpackung nur in den entspre-
chenden Recycle-Hausmüll.
profipower_2440007_Timer2_Manual_1292_ok_k1.indd 8-9 25.08.2009 11:25:54
10
11
GB
D
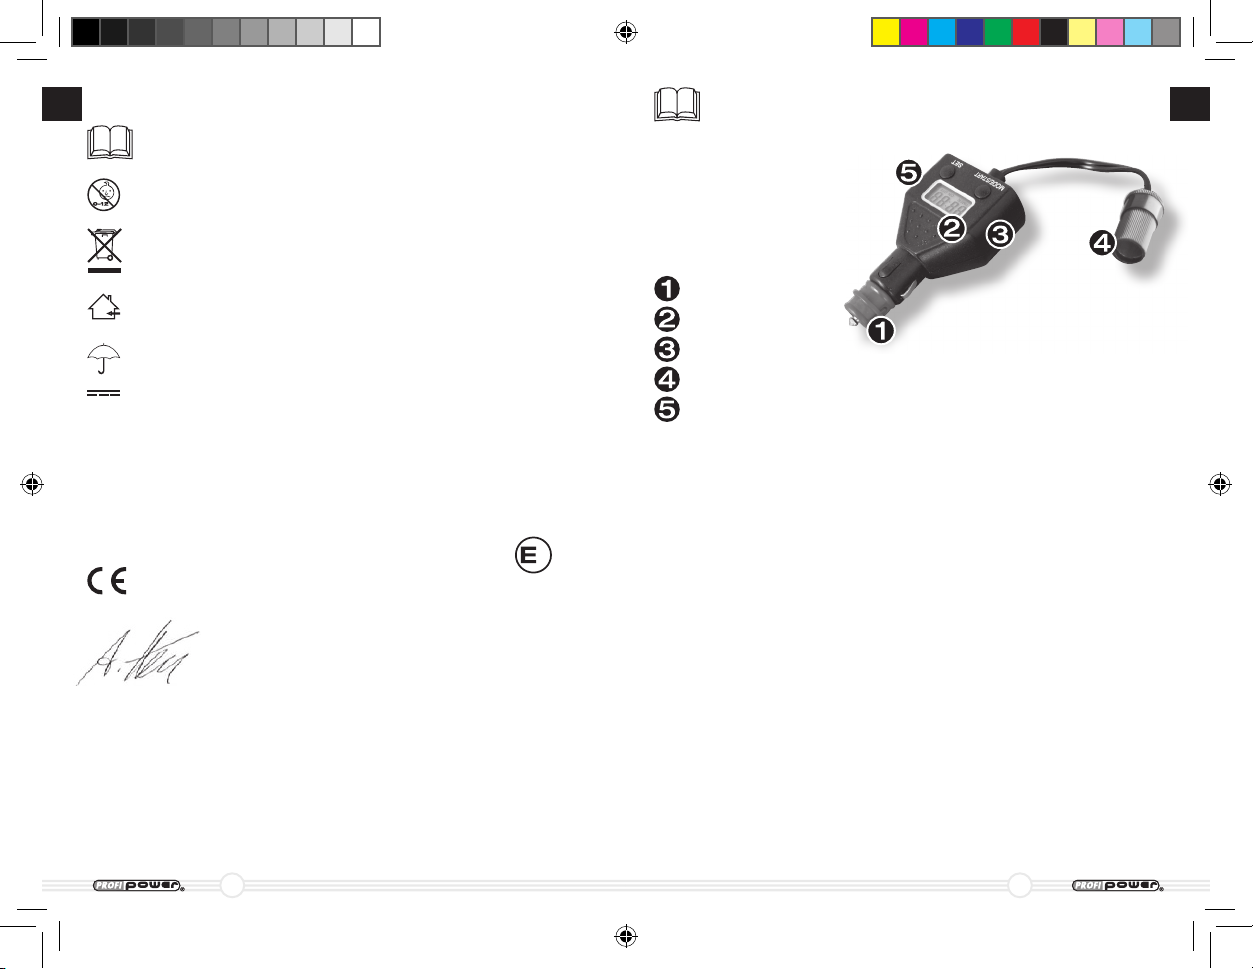
Characteristics
12 V plug
LCD read-out
Control lever
Output cable with 12 V socket
Battery compartment at rear side
Read this manual very carefully before assembly and use
and preserve it so you can reread it and pass it on to third
parties whenever necessary.
Index
1 Indications for using the manual
2 General safety references
3 Way of supply
4 Intended use
5 Technical features, functioning
6 Connecting the time switch
7 Maintenance and cleansing of the device
8 Error discarding
9 Warranty
10 Removal
11 Overview technical data
12 Clarification of conformity
Erklärung der am Produkt oder der Verpackung oder in der Anlei-
tung verwendeten Zeichen:
Vor Benutzung die Anleitung lesen und diese aufbewahren!
Von Kindern fern halten. Kein Spielzeug!
Produkt auf keinen Fall über den Hausmüll entsorgen.
An Sammelstellen abgeben.
Produkt nicht im Freien verwenden.
Produkt vor Nässe und Feuchtigkeit schützen.
Produkt funktioniert mit Gleichstrom.
12 Konformitätserklärung
Wir, die axhess GmbH & Co. KG, Bergstraße 18, D-53547 Hausen, erklären,
dass das Produkt ProfiPower 12 V-Zeitschaltuhr mit digitalem Display, Artikel
Nummer 2.440.007, auf das sich diese Erklärung bezieht, in seiner Konzeption
und Bauart sowie der von uns in Verkehr gebrachten Ausführung den grund-
legenden Sicherheits- und Gesundheitsanforderungen der EG Richtlinie(n)
entspricht.
Zutreffende EG Richtlinie(n) 2004/104/EC; 2006/28/EC
11
Hausen, den 10. Juli 2009
Axel Hess,
Geschäftsführer
axhess GmbH & Co. KG
profipower_2440007_Timer2_Manual_1292_ok_k1.indd 10-11 25.08.2009 11:25:55

12
13
GB
GB
1 Indications for using the manual
ATTENTION:
Safety reference: Not concerning may lead to material damage and may
influence or harm the functioning of the device
ATTENTION:
Safety reference: Refers to the dangers concerning electric flux or vol-
tage. Neglecting these references may lead to personal damage and/or
material damage. Also may the functioning of the device be influenced/
harmed.
REMARK:
Additional information with regard to controling the device
Image number/number refers to an image.
e.g. image 1/4: image 1 on page 4
Consider the next safety references.
2 General Safety References
The company axhess GmbH & Co. KG, 53457 Hausen, takes no respon-
sibility for damages and consequences which arise due to:
- Connecting, mounting or control failures
- Outrage, damages to the device and/or the connecting cables.
- Equipment damages due to mechanical influences and/or over-vol-
tage.
- Any changes inflicted to the device and/or the connecting cables.
- Use for all other purposes as described in this manual.
- Liquid influences and/or insufficient ventilation.
- Opening the device unauthorized; this will, among others, lead to the
lost of the given warranty.
- Consequential damage caused by non-intended use and/or a defec-
tive battery.
Handle this device exclusively for its intended use.
Never use in a moisty or wet environment!
Use the device exclusively in a dry environment!
Never handle this device close to inflammable material.
Never handle this device in an explosive hazard environment.
Exclusively use the device when there are sufficient possibilities for ven-
tilation.
Repairs and maintenance may only be accomplished by authorized
specialists, who are familiar with the dangers/regulations which go along
with this equipment.
Always make sure the equipment is in a safe, solid condition!
Mount the time switch in such a secure way it surely doesn’t collapses
or falls down.
The equipment is such a secure way children do not have access to it!
Children do not recognise originating dangers, neither are they able to
estimate them!
Do not directly expose the equipment to sunlicht or other sources of
heat. Avoid additional heating of the device by outside influences.
To avoid damages to the connecting cables: never pull the cable but
always disconnect by using the plug.
If the connecting cable is damaged the device may not be used any lon-
ger! First, the device needs to be repaired by an authorized specialist.
Do not place any inflammable objects like candles on or close to the
device.
No objects filled with liquid, like bottles or drinking cans, may be placed
next to, on, or close to the device.
3 Way of supply
1 x 12 V time switch
1 x Button cell 3 V
1 x Multilingual manual
1 x Recyclable packaging
4 Intended use
Time switches, and therefor also this 12 V version, are developed to automa-
tically switch on connected devices on a pre-determined moment. Also, the
time switch switches off again a connected device, as well on a pre-deter-
mined moment.
There is one condition for doing so; the time switch needs to be connected to
a 12V rated current socket. Settings of the time switch are being recorded. A
supporting battery (exchangeable) inside the time switch makes sure all data
is being saved when the time switch doesn’t receive any 12 V voltage from the
car battery. Set data is being conserved.
This time switch is developed for the use in combination with 12 V vehicle
batteries. Other voltages will disturb the 12 V time switch, do not connect to
any other voltage!
The maximal output is 10 A. Connecting devices with a power consumption
from 12 V/10 A up to 120 W at the upmost can be used with this time switch.
ATTENTION!
Before you set the 12 V time switch in operation check, by using the tuto-
rial of your vehicle, the current supply and the maximal load of the 12 V
board contact (cigarette lighter) of the vehicle.
ATTENTION!
Always consider the following basic precautions for your own and others
protection to avoid:
• electricalashes
• riskofre
• injuries
• materialdamage
Only start using the device when the housing and cabling are completely
intact!
profipower_2440007_Timer2_Manual_1292_ok_k1.indd 12-13 25.08.2009 11:25:55

14
15
GB
GB
Absolutely make sure the air inlets and air exits of the equipment are al-
ways free, open. Never cover the device when in use. Always make sure
there is sufficient ventilation.
Always interrupt the current supply before working (cleaning, mainte-
nance) on the equipment.
Respect indisputable all safety references mentioned in this manual!
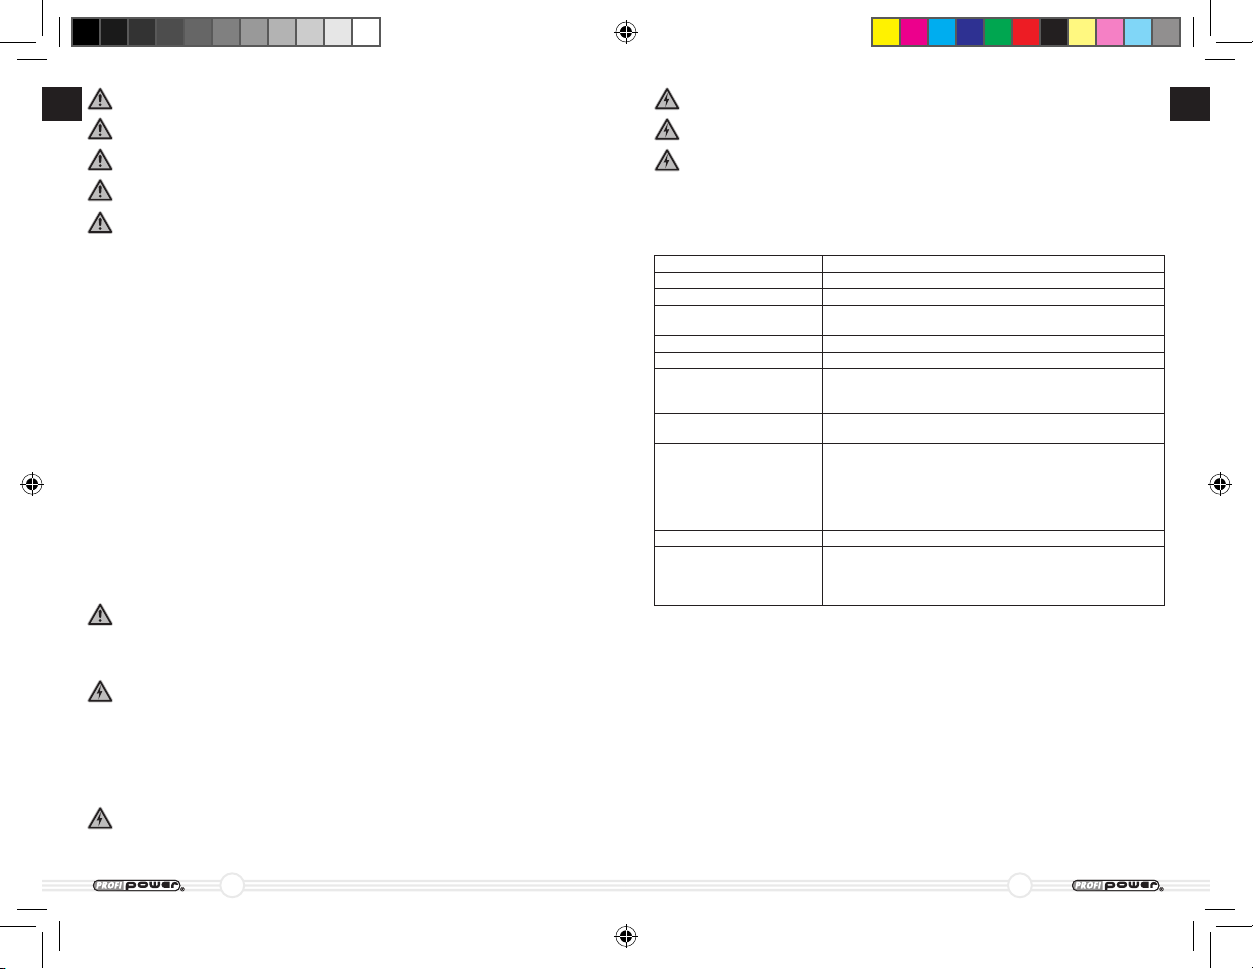
5 Technical features
Digital 12 V time switch
Current supply 12 V DC
Max. output current
8A/96 W DC
Data read-out LCD display, 4 digits
Hour indication Digital read out in 24 h-mode with minutes
indication
Switch function Programmable »ON/OFF« function.
Settings Press »MODE« or »SET« key.
Background illumination Lights up automatically when connected to the
12 V DC battery as well when pressing one of the
setting keys
Duration background
illumination
ca. 15 sec., extinguishes automatically
Battery protection func-
tion
Time switch switches off automatically when
the voltage is below ca. 8 V. At the same time
all connected devices will be switched off. This
function prevents the vehicle battery from sinking
beneath the necessary voltage for starting.
Saving preset data Preset data is being stored.
Button cell 3 V button cell, located at the rear side on behalf
of LCD-read-out and conservation of stored
data when the time switch is not connected to
the 12 V current supply.
6 Connecting the time switch
Initial starting
Before you connect a device to the time switch and before you connect the
time switch to the 12 V current supply,the clock needs to be set.
Setting the clock
1. Press the mode »MODE/START« key, the first two digits of the digital
read-out will lighten up (now the indicators »Timer, ON and OFF« are not
visible).
2. Subsequently, press the »SET« key, the hour indication is running.
Choose your tim and release the »SET« key. Press the »SET« key gradu-
ally for precise tuning.
3. Then press the »MODE/START« key, now both rear digits lighten up.
4. Subsequently, press the »SET« key. The minutes indication is running.
Determine the minutes and release the »SET« key. Again, press the
»SET« key gradually for precise tuning.
5. Then, to confirm your preset time, press the »MODE/START« key. The dot
in the centre of the digial indication lights up (the indicators for TIMER,
ON and OFF are visible now).
Remark: When pressing the »SET« key the hour or minutes indication is
running from 0–23 (hours) 0–59 (minutes) until you release the key.
Setting the time switch function (TIMER ON)
Setting the moment of switching on
1. Press the »MODE/START« key once. The indicators »TIMER« and »OFF«
will be shown on the display. The »ON« indicator and the first two digits
lighten up.
2. Then press the »SET« key lengthy. The indicators which lightened up
before start running until you release the »SET« key when reaching the
desired time (hours).
3. Then again press the »MODE/START« key. On the display »TIMER and
OFF« are shown. The two rear digits and the indicator »ON« lighten up.
4. For setting the minutes press the »SET« key until the desired minutes
indication is being reached. Then release the key.
5. Subsequently, press again the »MODE/START« key to confirm the preset
time. The indicators »TIMER« and »OFF« are shown on the display. The
indication »ON« will not be shown. This tells you the »ON« (switch on
time) function is set.
Remark: When pressing the »SET« key the hour or minutes indication is
running from 0–23 (hours) 0–59 (minutes) until you release the key.
Setting the time switch function (TIMER OFF)
Setting the moment of switching off
1. Press the »MODE/START« key once .The indicator »TIMER« will be shown
on the display. The indicators »OFF« and the first two digits lighten up.
2. Then press the »SET« key lengthly. The digits which lightened up before
start running until you release the »SET« key when reaching the desired
time (hours).
3. Again press the »MODE/START« key. On the display the indicator
»TIMER« appears. Both rear digits and the indicator »OFF« lighten up.
4. For setting the minutes press the »SET« key lengthly until reaching the
desired minutes indication. Then release the key.
5. Then again press the »MODE/START« key to confirm the preset time. The
indicator »TIMER« is shown on the display. The »OFF« indicator is not
visible. This tells you the »OFF« function (switch off time) is set.
Remark: When pressing the »SET« key the hour or minutes indication is
running from 0–23 (hours) 0–59 (minutes) until you release the key.
profipower_2440007_Timer2_Manual_1292_ok_k1.indd 14-15 25.08.2009 11:25:55
16
17
GB
GB
Activating the time switch, switching on
1. Press the »MODE/START« key, the »TIMER« indicator lights up. The indi-
cators »ON« and »OFF« are not active. This confirms you the time switch
is activated.
2. As long as the time switch is switched »ON«, the indicator »TIMER« is
visible and the »ON« indicator is shown. Therefore, the indicator »OFF« is
not shown.
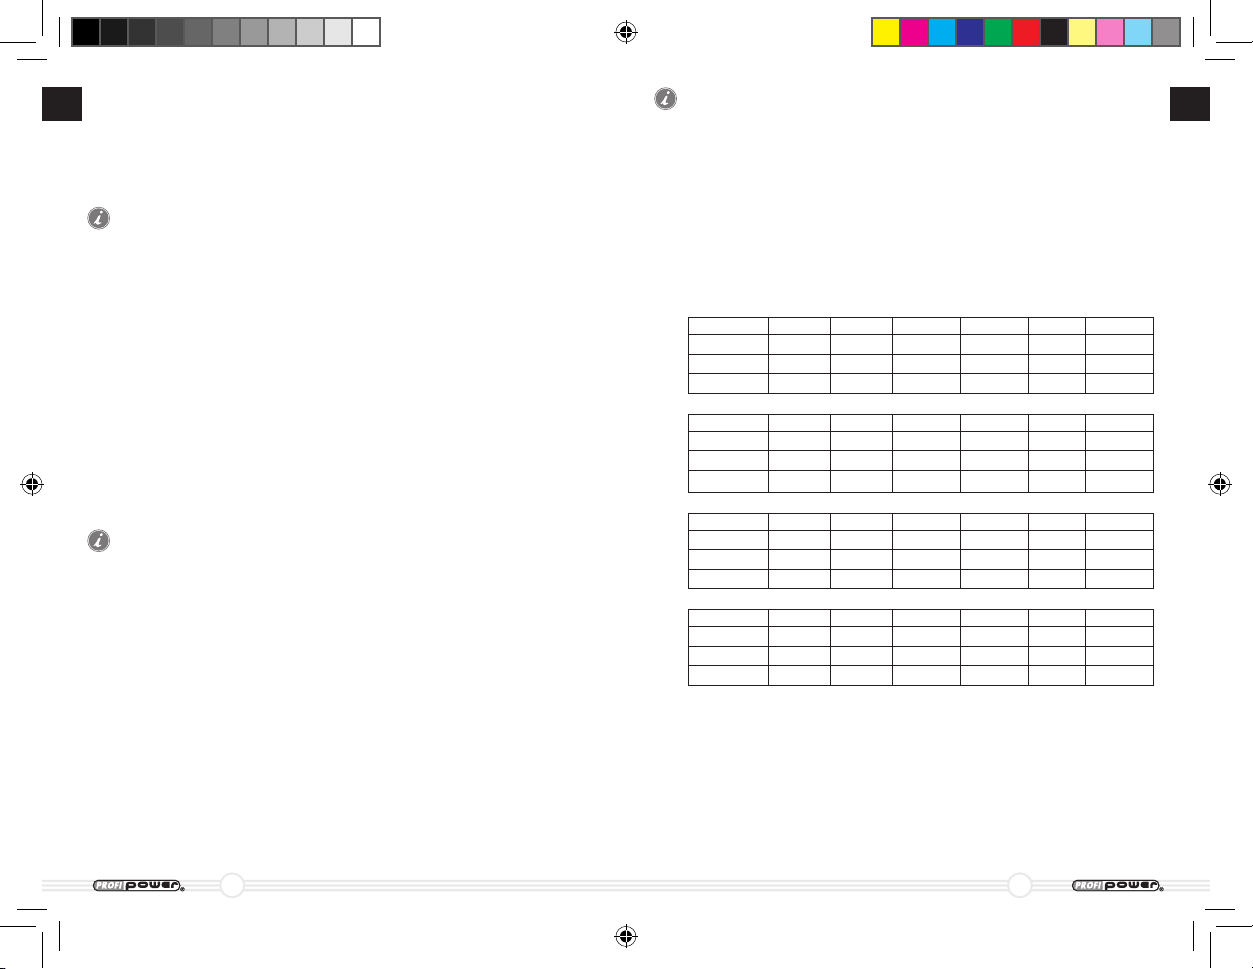
3: Wenn all indicators on the display are shown the time switch is, in accor-
dance with the preset time, switched off.
Hour :Minute Timer ON OFF
still
flash
away
Hour :Minute Timer ON OFF
still
flash
away
Hour :Minute Timer ON OFF
still
flash
away
Hour :Minute Timer ON OFF
still
flash
away
1. Hold both keys 5 seconds for resetting all clock setting, the LCD will
display all zero.
2. Hold the »MODE/START« key 5 seconds for resuming the timer again by
running the old timer setting.
3. Hold the »SET/TIMER« key 5 seconds for cancelling all timer setting, it is
preparing for new Timer mode setting.
7 Maintenance and cleansing of the device
Only use a dry cloth to clean the device. Do not use any liquids or chemical
cleaning agents. Never immerse the device in liquid. Never allow fluids to spill
onto the device.
8 Error discarding
Time switch does not reproduce any functions
Possible cause:
- The supporting battery is not active, placed incorrectly or empty.
Possible solution:
- Activate supporting battery, place battery in correct position or change
battery.
The display seems to be ok, nevertheless there is no current supply to the
connected device
Possible cause:
- The 12 V socket does not receive any electric current. Time switch does not
make contact.
Possible solution:
- Start the vehicle.
- Plug the time switch correctly in the 12 V socket.
- Check connection with the connected device and possibly install again.
- Connecting device or connecting cable is defective, check and if necessary
have it repaired. Do not use time switch any longer.
9 Warranty
In general the axhess GmbH & Co. KG warranty conditions are valid. These
refer exclusively to manufacturing and material defects. Warranty applies
from the date of purchase and expires 24 months after this date. If the time
switch or the connecting cable should be defective, return it to your dealer or
send it to us. To claim your warranty you definitely need to add the following
appendixes:
- copy of the buying voucher (receipt/invoice) with purchase date
- indication of the reason of complaint, error description
10 Removal
The packaging is recyclable. Deposit the packaging at the appropirate re-
cyclable domestic refuse.
profipower_2440007_Timer2_Manual_1292_ok_k1.indd 16-17 25.08.2009 11:25:56
18
19
GB
GB
Old equipment
If one day the device should be taken out of operation, leave it according to
the valid laws and regulations at one of the appropriate collecting points. In
case of doubt please turn to the refuse responsible or ask for it at the appro-
priate local agency. Do NOT add to your domestic refuse!
In no case put the device to your regular domestic refuse!
The 3 V button cell (in the battery compartment at the rear side of
the device) needs to be removed separately on a battery collecting
point.
Therefore, remove the button cell before you hand over the device
for removal!
The waste disposal fees for device and battery removal, as valid in Germany,
are already paid in advance by the manufacturer.
WEEE Reg.Nr. DE 36207475
Protect our environment by acting in a responsible way!
11 Overview technical data
Brand
Article 12 V Time switch with LCD read-out
Article number 2.440.007
Type of product Instrument for monitoring and control, pro-
grammable
Data screen LCD display with background illumination
Connection 12 V car socket
Input voltage 12 V DC direct current (DC) 12 V (Volt)
Output voltage 12 V DC
Output power max.
8A DC, max. 12 V/96 W
Fuse 12 A fuse built in
Length connecting cable ca. 40 cm
Battery protector function To avoid discharging the battery, the timer
unit will cut off the power automatically when
the voltage of battery is lower than 8.0 V.
Type connecting plug
12 V socket for connecting 12 V devices up to
8A/96 W max. power consumption.
Data back up For temporary data back up, built in button
battery 3 V 30 mA.
Dimensions article 97 x 54 x 32 mm (L x W x H)
Dimensions packed article 226 x 130 x 38 mm (L x W x H)
Weight unpacked article 0,118 kg (without 3 V battery, incl. connecting
cable)
Weight 3 V battery 0,003 kg (version CR 2032 lithium cell)
Weight packed article 0,266 kg (incl. manual) 0,221 kg (excl. manual)
Packaging 0,060 kg carton, 0,040 kg synthetic material
(PET)
082009 technical changes are, without pre-warning device, reserved at all times.
Explanation of the symbols applied to the product, the packaging
or the manual:
Read the manual before using the device and preserve it
conscientious.
Keep far from children. No toys!
Do absolutely not leave the product at your domestic refuse.
Leave at appropriate collection point.
Do not use the product in the open air.
Protect product against moist and wet influences.
Product works on direct current.
12 Clarification of conformity
We, the company axhess GmbH & Co. KG, Bergstraße 18, D 53457 Hausen,
clarify the considered product ProfiPower 12 V Time switch with digital display,
(art. no. 2.440.007) to which this clarification agrees, in the concept and
construction of our version, to all safety and health regulations determined by
the EG.
Applied EG regulation(s) 2004/104/EC; 2006/28/EC
11
Hausen, July 10th 2009
Axel Hess,
Director
axhess GmbH & Co. KG
profipower_2440007_Timer2_Manual_1292_ok_k1.indd 18-19 25.08.2009 11:25:56

20
21
F
F
Traits du produit
12 V fiche
LCD-affichage
Bouton
Câble amorce avec 12 V douille
Casier de la batterie à le verso
Lisez este manuel très soigneux avant l’utilisation. Garder
ceux-ci bien pour que vous le puissiez relire autant ceci que
cela transmettez aux tiers quand nécessaire.
Index
1 Indications pour l’utilisation du manuel
2 Les instructions de sécurité générales
3 Livraison
4 L’utilisation intentionellement
5 Les caractéristiques techniques, fonctionnement
6 Connexion de l’horloge de commutation
7 Entretien et nettoyage de l’outil
8 Aborir des erreurs
9 Garantie
10 Élimination
11 Liste de las dates techniques
12 Déclaration de conformité
1 Indications pour l’utilsation du manuel
ATTENTION:
Instructions de sécurité: Négliger ces instructions peut guider aux
dommages matériels et influencer/endommager l‘utilisation de l‘outil.
ATTENTION:
Instructions de sécurité: Instructions de sécurité: réfère aux dangers
avec l‘électricité et tension. Ignorer ces instructions peut mener aux
dommages personnels ou matériels. Le fonctionnement de l‘outil peut
démolira.
REMARQUE:
L’information additionelle concernant la commande d’outil
Im. Ciffre/Ciffre se réfère à une image.
p.e. Im. 1/4 Image: 1 sur page 4.
Veuillez considérer les références de sécurité.
2 Instructions de sécurité générales
La société Axhess GmbH & CO KG, 53547 Hausen, ne prend pas de
responsabilité pour les dommages et les conséquences provoque par:
- Erreurs d’assemblage ou de connexion.
- Acte de violence, dommages à l’outil et/ou le câble amorce.
- Les dommages à l‘outil a cause d’influences mécaniques et la
surtension.
- Chaque changement fait à l’outil et/ou le câble amorce.
- L’utilisation pour chaque autre application que décrit dans ce manuel.
- L’influence de liquides et/ou la ventilation insatisfaisante.
- L’ouvrir de l’outil pas légitime; ceci a pour conséquence la perte de la
garantie.
- Dommage indirecte naît a cause de l’utilisation non-intentionellement
et/ou par une batterie défectueuse.
Uniquement utiliser l’outil pour las applications destinées.
Jamais utilisez l’outil dans un entourage humide ou mouillé!
Seulement utilisez dans un entourage sec!
Jamais utilisez l’outil dans le voisinage de les matériels inflammables.
Jamais utilisez l’outil dans un entourage avec le danger d’explosion.
Seulement utilisez l’outil quand suffisantes chances de la ventilaton sont
disponible.
Les réparations et l‘entretien peuvent être fait uniquement par les
spécialistes autorisés qui sont au courant des dangers/réglementations
qui faire partie de ce l‘outil.
Rassurez vous-même que l’outil est en une condition sur!
L’horloge doit être placé/monté toujours tellement sûr que tomber vers
le bas ou basculer est impossible.
Placer l’outil tellement sûr que les enfants ne puissant pas le contacter!
Les enfants ne reconnaissent pas des dangers possibles, ni les ne
peuvent pas déterminer ceux-ci
!
profipower_2440007_Timer2_Manual_1292_ok_k1.indd 20-21 25.08.2009 11:25:57
22
23
F
F
Absolutement prenez soin de toujours laiser les prises d’air et les
diffuseurs d’air sont ouvertes, donc, libre.
Jamais couvrez l’outil pendant l’utilisation.
Toujours prenez soin d’une ventilation suffisante.
Toujours interrompez l’amenée du courant avant vous faites quelque
chose, comme nettoyage ou maintien, à l’outil.
Toujours respectez incontestable toutes mésures de sécurité décrit ici!
5 Les caractéristiques techniques
Horloge de commutation 12 V digitale
Amenée du courant 12 V DC
Rendement max.
8A/96 W DC
Affichage de las dates Affichage LCD, 4-numérique
Indication de las heures Affichage digitale en mode 24 h avec indication de
la minutes.
Fonction logique Fonction »ON/OFF« programmable.
Réglage Enclencher la touche »MODE« ou »SET«.
Illumination du fond S’allume automatiquement quand raccordé avec la
batterie 12 V DC et aussi quand enclencer une des
touches de réglage.
Durée d’illumination du
fond
ca. 15 sec., effaçant automatiquement allumer
Mécanisme du protec-
tion de la batterie
L’horloge débranche automatiquement quand la
tension de la batterie du véhicule est en bas de
8 V. Avec cela, aussi tout les appareils raccordés
sont débranchés. Cette fonction prévient que
la batterie est en bas la tension essentielle pour
démarrer le véhicule.
Mémoriser las dates Dates réglé sont stockées.
Pile bouton 3 V pile de bouton, place à le verso pour l’affichage
et la préservation de las dates stockées quand
l’horloge n’est pas raccordé avec l’amenée du
courant 12 V.
6 Raccorder l’horloge de commutation
Mis en service
D’abor vous raccordez un appareil à l’horloge de commutation et d’abord
raccorder l’horloge à l’amenée du courant, l’horloge doit être réglé.
Régler l’horloge
1. Enclenché la touche »MODE/START«, les deux ciffres sur le devant
d’affichage digital s’allument (les symboles »TIMER, ON et OFF« ne sont
pas montrés maintenant).
2. Ensuite, enclenché la touche »Set« de las heurs avance. Choisi votre
temps et révélé la touche »SET«. Enclenché la touche »SET« graduelle-
ment pour un réglage exactement.
Ne pas expose l’outil directement au soleil ou à autres sources de
chaleur. Évitez avec cela le chauffage additionelle d’outil.
Par prévenir les dommages à les câbles amorce, jamais tirez sur le
câble, mais débranchez à l’aide de la prise.
Si le câble amorce a endommagé, l’outil ne peut plus être utilisé.
Initial, l’outil doit être réparé par un spécialiste autorisé.
Ne mettez pas les objets inflammables comme, par exemple les cierges,
sur ou à côté d’outil.
Ne mettez pas les objets rempli avec liquides comme, par exemple
boîtes de boisson ou flacons d’eau, sur ou à côté d’outil.
3 Livraison
1 x Horloge de commutation 12 V
1 x Pile bouton 3 V
1 x Manuel multilingue
1 x Un emballage convenable pour recyclage
4 L’utilisation intentionellement
Las horloges de commutation, de même que cette horloge 12 V, sont destiné
pour enclencher les appareils raccordés automatiquement à un moment es-
timé à l’avance. Aussi, cette horloge de commutation déclenches un appareil
raccordé de nouveau, aussi en un moment estimé à l’avance. Une condition
est que l’horloge doit être raccordé avec une prise de courant 12 V d’une
intensité nominale.
Les réglages de la minuterie sont stockés. Une batterie adhérent (converti-
ble) mémorise la données de la minuterie entrées quand cela ne reçoit pas la
tension 12 V de la batterie du véhicule. Les réglages restent archivés.
L’horloge de commutation est conçue pour l’utilisation avec las batteries de
véhicule 12 V. Autres formats de la tension dérangent l’horloge de commu-
tation, ne pas raccorder à une tension électrique differente! Le rendement
maximal est 10 A. Appareils de raccordement de 12 V/10 A jusqu’à 120 W max.
peuvent servi avec cette horloge de commutation/minuterie.
ATTENTION!
Avant de mis en service l’horloge de commutation 12 V contrôlez
l’amenée du courant et la charge maximale du contact à bord
(allume-cigare) du véhicule à l’aide de la instruction du véhicule.
ATTENTION!
Toujours respectez las suivantes mesures de sécurité élementaires pour
votre propre protection et pour ceux-ci d’autres par prévenir les situa-
tions suivantes quand utiliser l’outil électrique:
• Retourdeammeélectrique
• Dangerd’incendie
• Blessures
• Dommagesmaterièles
Uniquement commencez utiliser l’outil quand le capot et les fils sont
entièrement intacte!
profipower_2440007_Timer2_Manual_1292_ok_k1.indd 22-23 25.08.2009 11:25:57
24
25
F
F
REMARQUE:
À l’enclencher de la touche
»S ET«
l’indication de les heures
ou de las minutes avance de 0–23 (heures) 0–59 (minutes) jusqu’à vous
révélez la touche
.
Activer la minuterie, enclencher
1. Enclenché la touche »MODE/START«, le symbol »TIMER« s’allume. Les
symboles »ON« et »OFF« ne sont pas actif. Ceci vous confirme la minu-
terie a été mis en marche.
2. Tant que la minuterie est mis en marche, le symbol »TIMER« est percep-
tible et le symbol »ON« est montré. Donc, le symbol »OFF« n’est pas
montré.
3. Quand tous les symboles sont montrés à l’affichage la minuterie a
déclenché, conformément à le temps choisi.
Hour :Minute Timer ON OFF
still
flash
away
Hour :Minute Timer ON OFF
still
flash
away
Hour :Minute Timer ON OFF
still
flash
away
Hour :Minute Timer ON OFF
still
flash
away
1. Tenir les deux clefs de 5 seconde pour remettre à l‘état initial tout cadre
d‘horloge, l‘affichage à cristaux liquides afficheront tout zéro.
2. Tenir le »MODE/START« saisit de 5 seconde pour reprendre le minuteur
encore en courant le vieux cadre de minuteur.
3. Tenir le »SET/TIMER« saisit de 5 seconde pour annuler tout cadre de
minuteur, il prépare au nouveau cadre de mode de minuteur.
3. À ce moment-là, enclenché la touche »MODE/START«, les deux ciffres
derniers s’allument maintenant.
4. Ensuite, enclenché la touche »SET«. L’indication de les minutes avance.
Déterminé las minutes et révélé la touche »SET«. Pour un réglage
exactement: enclenché de nouveau la touche »SET« graduellement.
5. confirmer le temps réglé par vous, alors enclenché la touche »MODE/
START«. Le point central d’affichage digital s’allume. (Les symboles pour
TIMER, ON et OFF sont perceptibel maintenant).
REMARQUE:
À l’enclencher de la touche
»S ET«
l’indication de les heures
ou de las minutes avance de 0–23 (heures) 0–59 (minutes) jusqu’à vous
révélez la touche
.
Régler la minuterie (TIMER ON)
Régler le moment d’enclenchement
1. Enclenché la touche »MODE/START« pour une fois. Les symboles
»TIMER« et »OFF« sont montrés à l’affichage. Le symbol »ON« et les
deux ciffres sur le devant s’allument.
2. Ensuite, enclenché la touche »SET« verbeusement. Les ciffres allumés
plus tôt avancera jusqu’à vous révélez la touche »SET« à l’obtention du
temps souhaité.
3. De nouveau enclenché la touche »MODE/START«. Les symboles »TIMER
et OFF« sont montrés à l’affichage. Les deux ciffres derniers et le
symbole »ON« s’allument maintenant.
4. Pour le réglage de las minutes, enclenché la touche »SET« jusqu’à
l’indication des minutes souhaité a atteint. Alors révélé la touche.
5. Après cela enclenché la touche »MODE/START« de nouveau pour
confirmer le temps réglé. Les symboles »TIMER« et »OFF« sont montrés
à l’affichage. Le symbol »ON« n’est pas montré. Ceci vous confirme la
fonction »ON« (le moment d’enclenchement) a réglé.
REMARQUE:
À l’enclencher de la touche
»S ET«
l’indication de les heures
ou de las minutes avance de 0–23 (heures) 0–59 (minutes) jusqu’à vous
révélez la touche
.
Régler la minuterie (TIMER OFF)
Régler le moment de déclenchement
1. Enclenché la touche »MODE/START« pour une fois. Le symbol »TIMER«
est montré à l’affichage. Les symboles »OFF« et les deux ciffres sur le
devant s’allument.
2. Alors, enclenché la touche »SET« verbeusement. Les ciffres allumés plus
tôt avancera jusqu’à vous révélez la touche »SET« à l’obtention du temps
(heures) souhaité.
3. Ensuite, enclenché la touche »MODE/START« de nouveau. L’affichage
montre »TIMER«. Les deux ciffres derniers et le symbol »OFF« s’allument.
4.
Pour le réglage de las minutes enclenché la touche »SET« verbeusement
jusqu’à l’indication des minutes souhaité a atteint. Alors révélé la touche.
5. Après cela, enclenché la touche »MODE/START« de nouveau pour
confirmer le temps réglé. Le symbol »TIMER« est montré à l’affichage.
Le symbol »OFF« n’est pas montré. Ceci vous confirme la fonction »OFF«
(moment de déclenchement) a réglé.
profipower_2440007_Timer2_Manual_1292_ok_k1.indd 24-25 25.08.2009 11:25:57

26
27
F
F
7 Entretien et nettoyage de l’outil
Pour l’entretien et le nettoyage d’horloge de commutation, seulement utilisé
un torchon sec. Avec ceci, essuyé l’outil de temps en temps, ou quand né-
cessaire. N’utilisé pas les liquides ou détergents chimiques. Ne pas laissez
l‘outil dans les liquides et ne déversez pas liquides au-dessus l’outil.
8 Aborir des erreurs
L’horloge de commutation ne montre pas las fonctions
Cause possible:
- La batterie adhérente n’est pas active, ne pas placé correctement ou vide.
Solution possible:
- Activé la batterie, placé la batterie correctement ou placé une batterie
nouvelle.
L’affichage paraît en règle, mais néanmoins il n’y a pas d’amenée du courant
à l’appareil raccordé
Cause possible:
- La prise de courant 12 V ne reçoit pas d’électricité.
- L’horloge de commutation ne fait pas de contact.
Solution possible:
- Démarrer le véhicule.
- Branché l’horloge de commutation correctement à la prise de courant 12 V.
- Contrôlé le raccordement avec l’appareil raccordé et éventuellement
installer de nouveau.
- L’appareil de raccordement ou le câble amorce est en panne
–> Contrôlé et laissé réparer. N’utiliser plus l’horloge de commutation.
9 Garantie
En général sont las conditions de garantie de axhess GmbH & Co. KG
applicable. Ceux-ci se rapportent uniquement aux erreurs de production
et dommages sur le matériel. La garantie est en vigueur à partir de la date
d’achat et expire 24 mois après cette date. Si l’outil ou le câble amorce est en
panne; retourné à votre vendeur ou envoyé-le à nous: www.axhess.com.
Pour réclamer la garantie vous devez ajouter absolutement les annexes su-
ivantes: La copie du bon d’achat (bon de caisse/facture) avec la date d’achat.
La raison de la plainte, la définition d’erreur.
10 Élimination
L’emballage est convenable pour recyclage. Seulement déposé l’emballage à
les déchets domestiques recyclable correspondantes.
Élimination du produit
Quand le l‘outil à un moment donné n‘est plus utilisé, écarté ceux-ci confor-
mément aux lois en vigueur et à la réglementation pour ceci aux points de
déchets destinés. En cas de doute s‘adresse vous au service de déchets ou
vous demande auprès de votre commune locale.
Dans aucun cas mettez l’outil dans vos déchets domestiques ordinaires!
La pile bouton 3 V (dans le casier de la batterie à le verso d’outil) doit
être écarté séparément à un lieu de rassemblement de las batteries!
À cet effet, écarté la pile bouton avant de écarter l’outil!
Las cotisations d’élimination qui sont valable pour l’élimination des
outils et de las batteries en l’Allemagne ont été payées d’avance par
le producteur. WEEE Reg.Nr. DE 36207475
Protégé l’environnement par opérer conform aux normes!
11 Dates techniques
Marque
Article Horloge de commutation 12 V
avec l’affichage LCD
Numéro d’article 2.440.007
Sorte du produit Outil pour signaler et contrôler,
programmable
Data Ecran LCD afficher avec l‘illumination de fond
Connexion 12 V douille
Tension d’entrée 12 V DC courant continu (DC) 12 V (Volt)
Tension finale 12 V DC
Rendement max.
8 A DC, max. 12 V/96 W
Fusible 12 A fusible a incorporé
Longueur du câble amorce ca. 40 cm
La fonction de protecteur
de pile
Pour éviter décharger la pile, l‘unité de mi-
nuteur coupera le pouvoir automatiquement
quand la tension de pile est plus basse que
8.0 V.
Sorte de la prise
12 V douille pour connecter 12 V appareils
en haut à 8 A/96 W maximum alimente la
consommation.
Le données reculent Pour les données temporaires recule, a
incorporé le bouton pile 3 V 30 mA.
Mesures d’article en mm 97 x 54 x 32 mm (L x L x H)
Mesures d’article emballé 226 x 130 x 38 mm (L x L x H)
Poids d’article non-emballé 0,118 kg (la batterie 3 V, incl. câble amorce)
Poids de la batterie 3 V 0,003 kg (version CR 2032 Lithium Cell)
Poids d’article emballé 0,266 kg (incl. manuel) 0,221 kg (excl.manuel)
Sorte d’emballage 0,040 kg de matière synthétique (PET)
08/2009 les modifications techniques sont, sans préannonce, toujours réservées.
profipower_2440007_Timer2_Manual_1292_ok_k1.indd 26-27 25.08.2009 11:25:58
28
29
I
F
Explication des symboles place en le produit, l’emballage ou le
manuel:
Lisez le manuel avant l’utilisation et préservé-le!
Tenir à l’écart des enfants. Pas de jouet!
Dans aucun cas mettez l’outil dans vos déchets domestiques.
Remis à lieu de rassemblement.
N’utilisé pas le produit en plein air.
Protéger contre la humidité.
Le produit fonctionne à un courant continu.
12 Déclaration de conformité
Nous, la société axhess GmbH & Co. KG, Bergstraße 18, D-53457 Hausen,
déclarons que le produit ProfiPower Horloge de commutation 12 V avec
l’affichage digital (numéro d’article 2.440.007), en ce qui concerne cette
déclaration suffise, en la version comme mis en circulation par nous, à les
prescriptions de sécurité et de la santé comme déterminé par la CE.
Prescription(s) CE applicable(s) 2004/104/EC; 2006/28/EC
11
Hausen, le 10 juillet 2009
Axel Hess,
Responsable
axhess GmbH & Co. KG
Caratteristiche del prodotto
Spina 12 V
Display LCD
Pulsante
Cavo uscita con 12 V presa
Scompartimento batterie sul retro
Leggere queste istruzioni attentamente prima
dell’installazione/del montaggio e dell’uso. Conservare per
consultarle o per inoltrarle a terzi in caso di necessità.
Indice
1 Indicazioni per l’utilizzo delle istruzioni
2 Istruzioni generali di sicurezza
3 Incluso nella fornitura
4 Uso intenzionale
5 Caratteristiche tecniche, funzionamento
6 Connettere il timer
7 Manutenzione e pulizia dell’apparecchio
8 Eliminare messaggi di errore
9 Garanzia
10 Lo smaltimento
11 Dati tecnici
12 Dichiarazione di conformità
profipower_2440007_Timer2_Manual_1292_ok_k1.indd 28-29 25.08.2009 11:25:58

30
31
I
I
1 Indicazioni per l’utilizzo delle istruzioni
ATTENZIONE:
Istruzione di sicurezza: Il non rispetto delle istruzioni può causa-
re danni materiali e influenzare/danneggiare il buon funzionamento
dell’apparecchio.
ATTENZIONE:
Istruzione di sicurezza: Indica il pericolo relativo alla corrente o tensione
elettrica. Il non rispetto di queste istruzioni può causare danni materiali
e corporali. Inoltre il buon funzionamento dell’apparecchio può essere
influenzato.
OSSERVAZIONE:
Informazioni supplementari relativo all’azionamento
dell’apparecchio
Imm. Numero/numero fa riferimento ad un’immagine.
p.es. Imm. 1/4: immagine 1 a pagina 4
Presta attenzione alle seguenti avvertenze di sicurezza.
2 Istruzioni generali di sicurezza
La ditta axhess GmbH & Co. KG, Bergstraße 18, D-53547 Hausen, non si
assume alcuna responsabilità per danni e conseguenze derivanti da:
- Errori di connessione, di azionamento e/o di montaggio.
- Danneggiamenti all’apparecchio e/o ai cavi di connessione.
- Danni all’apparecchio causati da influenze di natura meccanica e/o da
tensione di alimentazione troppo alta.
- Ogni modifica apportata all’apparecchio e/o ai cavi di connessione.
- L’utilizzo per scopi diversi da quelli descritti in queste istruzioni.
- Influenze derivanti da liquidi e/o una insufficiente ventilazione.
- L’apertura non autorizzata dell’apparecchio. Questo può comportare, tra
l’altro, la perdita della garanzia.
- Danni consecutivi causati dall’uso non intenzionale e/o da una batteria
difettosa.
Utilizzare l’apparecchio esclusivamente per gli scopi per cui è stato
costruito.
Non azionare mai l’apparecchio in un ambiente umido, ma
esclusivamente in un ambiente asciutto!
Non azionare mai l’apparecchio in prossimità di materiali infiammabili.
Non azionare mai l’apparecchio in ambienti con pericolo di esplosione.
Utilizzare l’apparecchio esclusivamente in luoghi in cui la ventilazione è
sufficiente.
I lavori di manutenzione e di riparazione possono essere eseguiti es-
clusivamente da tecnici autorizzati che sono a conoscenza dei pericoli/
delle istruzioni relativi a questi lavori.
Assicurarsi sempre che l’apparecchio venga posizionato in modo sicuro!
Il timer deve essere montato/posizionato in modo che esso non può
cadere giu o rovesciarsi.
Posizionare l’apparecchio fuori dalla portata dei bambini! I bambini non
distinguono i pericoli presenti ne sanno valutarli!
Non esporre l’apaprecchio al sole diretto o ad altre fonti di calore.
Evitare il surriscaldamento supplementare dell’apparecchio causato da
influenze esterne.
Non bisogna mai tirare il cavo per togliere una spina dalla presa: si ris-
chia di danneggiare i cavi di connessione.
Non utilizzare l’apparecchio se il cavo di connessione risulta danneggia-
to. Prima l’apparecchio deve essere riparato da un tecnico autorizzato.
Non posizionare oggetti infiammabili, p.es. candele, accanto o sopra
l’apparecchio.
Non posizionare oggetti contenenti liquidi, p.es. bottigliette d’acqua o
contenitori di liquori, sopra o vicino all’apparecchio.
3 Incluso nella fornitura
1 x Timer 12 V
1 x Batteria a bottone 3 V
1 x Istruzioni d’uso multilingua
1 x Imballaggio per la vendita riciclabile
4 Uso intenzionale
I timer, incluso questa versione 12 V, sono stati sviluppati per avviare automa-
ticamente apparecchi connessi ad un orario prestabilito. Il timer spegne inol-
tre un apparecchio connesso, sempre ad un orario prestabilito. Condizione è
che il timer deve essere collegato ad una presa di corrente nominale a 12 V.
Le impostazioni del timer vengono memorizzate. Una batteria di supporto
(sostituibile) nel timer provvede alla memorizzazione dei dati del timer, quan-
do esso non riceve corrente 12 V dalla batteria auto. I dati impostati vengono
conservati. Questo timer è stato sviluppato per l’uso con batterie auto 12 V.
Altre grandezze di tensione disturbano il timer 12 V, quindi non collegare ad
un’altra tensione! La corrente di uscita massima è 10 A. Con questo timer si
possono azionare apparecchi di connessione da 12 V/10 A fino a mass. 120 W
di assorbimento di potenza.
ATTENZIONE!
Prima di utilizzare il timer 12 V, controllare, con l’aiuto delle istruzioni,
l’alimentazione di corrente ed il carico massimo del contatto di bordo
12 V (accendisigare) del veicolo.
ATTENZIONE!
Rispettare sempre, per la vostra sicurezza e quella degli altri, le seguenti
instruzioni di sicurezza fondamentali relativo a:
• Scosseelettriche
• Rischiodiincendio
• Ferite
• Dannialprodotto
Utilizzare il prodotto solo se il rivestimento e i cavi sono integri!
profipower_2440007_Timer2_Manual_1292_ok_k1.indd 30-31 25.08.2009 11:25:58

32
33
I
I
Verificare assolutamente che le prese d’aria dell’apparecchiatura di
connessione siano sempre libere da ostruzioni ed aperte.
Non coprire mai l’apparecchio, quando è in funzione. Provvedere sem-
pre ad una sufficiente ventilazione.
Prima di iniziare dei lavori all’apparecchio, p.es. lavori di pulizia e di ma-
nutenzione, interrompere sempre la corrente.
Rispettare sempre incondizionatamente tutte le istruzioni di sicurezza sopra-
elencate!
5 Caratteristiche techniche
Timer digitale 12 V
Alimentazione di corrente 12 V DC
Corrente di uscita mass.
8 A/96 W DC
Lettura dati LCD-display, 4-caratteri
Indicazione dell’ora Lettura digitale in formato 24 ore con indicazi-
one dei minuti.
Funzione di regolazione Funzione programmabile »ON/OFF«.
Impostazione Premere il pulsante »Mode« o »S e t«.
Illuminazione di fondo Si illumina automaticamente sia alla connes-
sione alla batteria 12 V DC che premendo uno
dei tasti di impostazione.
Durata dell’illuminazione di
fondo
ca. 15 sec., si spegne automaticamente
Funzione protezione batteria Il timer si spegne automaticamente quando la
tensione della batteria auto scende a ca.
8 V. Di conseguenza si spengono anche
gli apparecchi connessi. Questa funzione
previene che la batteria auto scende sotto la
necessaria corrente di avviamento.
Memorizzare le impostazioni I dati impostati vengono memorizzati.
Batteria a bottone Batteria a bottone 3 V sul retro per la lettura
LCD e per la conservazione dei dati memo-
rizzati, quando il timer non è connesso alla
tensione 12 V.
6 Collegare il timer
Attivazione
Prima di collegare un apparecchio al timer e prima di collegare il timer alla
corrente elettrica 12 V, bisogna programmare il timer.
Programmare il timer
1. Premere il pulsante »MODE/START«, le prime due cifre della lettura
digitale si illuminano (gli indicatori »TIMER, ON e OFF« non vengono
mostrati).
2. Quindi premere il pulsante »SET«, l’indicatore delle ore scorre. Impostare
l’orario e lasciare il pulsante »SET«. Poi premere il pulsante »SET« gradu-
almente per l’impostazione esatta.
3. Quindi premere il pulsante »MODE/START«, le ultime due cifre della lettu-
ra digitale si illuminano.
4. Premere il pulsante »SET«. L’indicatore dei minuti scorre. Determinare i
minuti e lasciare il pulsante »SET«. Per l’impostazione esatta premere di
nuovo gradualmente il pulsante »SET«.
5. Quindi premere, per confermare l’orario impostato, il pulsante »MODE/
START«. Il punto al centro dell’indicazione digitale si illumina (gli indicatori
per TIMER, ON e OFF adesso sono visibili).
Osservazione:
Premendo il pulsante »SET«, l’indicatore delle ore o dei
minuti scorre da 0–23 (ore) 0–59 (minuti) finché non si lascia il pulsante
.
Impostazione della funzione temporizzatore (TIMER ON)
Impostare l’ora di avvio
1. Premere una volta il pulsante »MODE/START«. Gli indicatori »TIMER« e
»OFF« vengono mostrati nel display. L’indicatore »ON« e le prime due
cifre si illuminano.
2. Quindi premere e tenere premuto il pulsante »SET«. I suddetti indica-
tori scorrono finché non si lascia il pulsante »SET« al raggiungimento
dell’orario (ore) desiderato.
3. Poi premere di nuovo il pulsante »MODE/START«. Nel display vengono
mostrati gli indicatori »TIMER« e »OFF«. Le ultime due cifre e l’indicatore
»ON« si illuminano.
4. Per impostare i minuti tenere premuto il pulsante »SET« fino al raggiungi-
mento dell’indicazione dei minuti desiderato. Poi lasciare il pulsante.
5. Quindi premere di nuovo il pulsante »MODE/START« per confermare
l’orario impostato. Gli indicatori »TIMER« e »OFF« vengono mostrati
nel display. L’indicatore »ON« non viene mostrato. Ciò conferma che
l’indicatore »ON« (ora di avvio) è impostato.
Osservazione:
Premendo il pulsante »SET«, l’indicatore delle ore o dei
minuti scorre da 0–23 (ore) 0–59 (minuti) finché non si lascia il pulsante.
Impostazione della funzione temporizzatore (TIMER OFF)
Impostare l’ora di arresto
1. Premere una volta il pulsante »MODE/START«. L’indicatore »TIMER« viene
mostrato nel display. L’indicatore »OFF« e le prime due cifre si illuminano.
2. Quindi premere e tenere premuto il pulsante »SET«. I suddetti indica-
tori scorrono finché non si lascia il pulsante »SET« al raggiungimento
dell’orario (ore) desiderato.
3. Poi premere di nuovo il pulsante »MODE/START«. Nel display viene
mostrato l’indicatore »TIMER«. Le ultime due cifre e l’indicatore »OFF« si
illuminano.
4.
Per impostare i minuti tenere premuto il pulsante
»S ET«
fino al raggiungi-
mento dell’indicazione dei minuti desiderato. Poi lasciare il pulsante.
5. Quindi premere di nuovo il pulsante »MODE/START« per confermare
l’orario impostato. L’indicatore »TIMER« viene mostrato nel display.
L’indicatore »OFF« non viene mostrato. Ciò conferma che la funzione
»OFF« (ora di arresto) è impostato.
profipower_2440007_Timer2_Manual_1292_ok_k1.indd 32-33 25.08.2009 11:25:59

34
35
I
I
Osservazione: Premendo il pulsante »SET«, l’indicatore delle ore o dei
minuti scorre da 0–23 (ore) 0–59 (minuti) finché non si lascia il pulsante.
Attivare il timer, accendere
1. Premere il pulsante »MODE/START«, l’indicatore »TIMER« si illumina. Gli
indicatori »ON« e »OFF« non sono attivi. Ciò conferma che il timer è stato
messo in funzione.
2. L’indicatore »TIMER« è visibile e l’indicatore »ON« viene mostrato finché il
timer è in funzione. L’indicatore »OFF« quindi non viene mostrato.
3. Quando tutti i simboli nel display vengono mostrati, il timer si è spento
corrispondente all’orario scelto.
Hour :Minute Timer ON OFF
still
flash
away
Hour :Minute Timer ON OFF
still
flash
away
Hour :Minute Timer ON OFF
still
flash
away
Hour :Minute Timer ON OFF
still
flash
away
1. Tenere entrambe le chiavi 5 secondi per ripristinare tutto il montaggio di
orologio, il visualizzatore a cristalli liquidi mostrerà tutto lo zero.
2. Tenere il »MODE/START« intona 5 secondi per riprendere che il
cronometro di nuovo correndo il vecchio montaggio di cronometro.
3. Tenere il »SET/TIMER« intona 5 secondi per annullare tutto il montaggio
di cronometro, prepara per il nuovo montaggio di modo di cronometro
7 Manutenzione e pulizia dell’apparecchio
Per la manutenzione e la pulizia del timer usare soltanto un panno asciutto,
con cui pulire l’apparecchio ogni tanto o se necessario. Non usare prodotti
liquidi o detergenti chimici. Non immergere mai l’apparecchio in liquidi e non
versarci liquidi sopra.
8 Eliminare messaggi di errore
Il timer non indica le funzioni disponibili
Possibile causa:
- la batteria supplementare non è attiva, non è posizionata bene oppure è
scarica.
Possibile soluzione:
- Attivare la batteria supplementare, posizionarla bene oppure sostituirla.
Il display sembra apposto, ma manca l’alimentazione di corrente
all’apparecchio di connessione
Possibile causa:
- La presa 12 V non riceve corrente. Il timer non fa contatto.
Possibile soluzione:
- Mettere in moto il veicolo.
- Inserire il timer correttamente nella presa 12 V.
- Controllare il collegamento con l’apparecchio di connessione e, se
necessario, ri-installare.
- L’apparecchio o il cavo di connessione è difettoso, controllare e far riparare.
- Non utilizzare più il timer.
9 Garanzia
Come principio valgono le condizioni generali di garanzia di axhess GmbH &
Co. KG. Esse si riferiscono esclusivamente a errori di produzione ed a difetti
nei materiali. La garanzia è valida a partire dalla data dell’acquisto e scade 24
mesi dopo tale data. Se l’apparecchio o il cavo di connessione sono difettosi,
restituirli al relativo venditore o mandarli al nostro indirizzo.
Per far valere un eventuale diritto di garanzia, bisogna aggiungere i seguenti
allegati: Prova d’acquisto (scontrino, fattura) con la data d’acquisto. Motivo e
descrizione del reclamo.
10 Lo smaltimento
L’imballaggio è riciclabile. Depositare l’imballaggio esclusivamente nei apposi-
ti contenitori per i rifiuti domestici.
profipower_2440007_Timer2_Manual_1292_ok_k1.indd 34-35 25.08.2009 11:25:59

36
37
I
I
Smaltimento di prodotti metallici elettrici
Quando l’apparecchio non verrà più usato, esso deve essere smaltito presso
gli appositi centri di raccolta in conformità ai direttivi previsti dalla presente
legge. In caso di dubbio rivolgersi agli Enti per la gestione dei rifiuti o al pro-
prio Comune.
Non depositare assolutamente questo prodotto nei contenitori per la
raccolta di rifiuti domestici!
Depositare la batteria a bottone 3 V (nello scompartimento batteria
sul retro dell’apparecchio) separatamente nell’apposito contenitore!
Eliminare quindi la batteria a bottone prima di consegnare
l’apparecchio per lo smaltimento!
I contributi per lo smaltimento di apparecchi e batterie in vigore in Germania
sono stati pagati anticipatamente dal produttore.
WEEE Reg. Nr. DE 36207475
Proteggiamo l’ambiente agendo in modo responsabile!
11 Dati tecnici
Marca
Articolo 12 V Timer con display LCD
Numero articolo 2.440.007
Tipo di prodotto Istrumento di monitoraggio e di controllo,
programmabile.
Data Schermo LCD mostrare con l‘illuminazione di fondo
Collegamento 12 V presa
Tensione di entrata 12 V DC corrente continu (DC) 12 V (Volt)
Tensione di uscita 12 V DC
Potenza assorbita mass.
8A DC, max. 12 V/96 W
Fusibile 12 A il fusibile ha costruito in
Lunghezza cavo di connessione ca. 40 cm
Funzione di protettore di bat-
teria
Per evitare per scaricare la batteria, l‘unità
di cronometro taglierà il potere automati-
camente quando il voltaggio di batteria è
più basso di 8.0 V.
Tipo di spina di connessione
12 V la presa per collegare 12 V i dispo-
sitivi fino a 8A/96 W max. alimenta il
consumo.
I dati sostengono Per i dati temporanei sostiene, costruito
nella batteria a bottone 3 V 30 mA.
Dimensioni articolo 97 x 54 x 32 mm (L x L x A)
Dimensioni articolo imballato 226 x 130 x 38 mm (L x L x A)
Peso articolo non-imballato 0,118 kg (senza batteria 3 V, incl. cavo di
connessione)
Peso batteria 3 V 0,003 kg (versione CR 2032 Lithium Cell)
Peso articolo imballato 0,266 kg (incl. istruzioni) 0,221 kg (escl.
istruzioni)
Imballaggio 0,060 kg cartone, 0,040 kg plastica (PET)
082009 Si riserva il diritto di apportare modifiche tecniche in ogni momento e senza preavviso.
Significato dei simboli applicati sul prodotto, sull’imballaggio o nelle
istruzioni d’uso:
Leggere le istruzioni prima dell’uso e conservarle!
Tenere lontano dai bambini!
Il prodotto non deve assolutamente essere depositato nei contenitori
per i rifiuti domestici. Consegnarlo ad un centro di raccolta.
Non utilizzare il prodotto all’aria aperta.
Proteggere il prodotto dall’umidità.
Il prodotto funziona con corrente continua.
12 Dichiarazione di conformità
Noi, la ditta axhess GmbH & Co. KG, Bergstraße 18, D-53457 Hausen, dichi-
ariamo che il prodotto ProfiPower 12 V Timer con display digitale (articolo nr.
2.440.007), al quale si riferisce questa dichiarazione, è conforme, per quanto
riguarda il suo concetto e la sua costruzione, alle norme di sicurezza e di
salute secondo le direttive CEE.
Norma CEE applicabile 2004/104/EC; 2006/28/EC
11
Hausen, 10 luglio 2009
Axel Hess,
Direttore
axhess GmbH & Co. KG
profipower_2440007_Timer2_Manual_1292_ok_k1.indd 36-37 25.08.2009 11:25:59

38
39
NL
NL
Produkt kenmerken
12 V-stekker
LCD-uitlezing
Bedieningsknop
Uitgangskabel met 12 V contactdoos
Batterijvak aan de achterzijde
Lees deze handleiding uiterst zorgvuldig voor inbouw/mon-
tage en gebruik. Bewaar deze goed zodat u hem kunt nale-
zen dan wel doorgeven aan derden wanneer nodig.
Inhoudsopgave
1 Aanwijzingen voor het gebruik van de handleiding
2 Algemene veiligheidsvoorschriften
3 Inbegrepen bij levering
4 Intentioneel gebruik
5 Technische kenmerken, functionering
6 Aansluiten van de schakelklok
7 Onderhoud en reiniging van het apparaat
8 Elimineren van foutmeldingen
9 Garantie
10 Verwijdering
11 Overzicht technische data
12 Conformiteitsverklaring
1 Aanwijzingen voor het gebruik van de handleiding
LET OP:
Veiligheidsvoorschrift: Het niet in acht nemen kan leiden tot materiaal-
schade en kan het functioneren van het apparaat beïnvloeden/schaden.
LET OP:
Veiligheidsvoorschrift: Wijst op gevaar met betrekking tot elektrische
stroom of spanning. Het niet in acht nemen van deze voorschriften kan
leiden tot persoonlijke schade en materiaalschade.
Ook kan het functioneren van het apparaat worden beïnvloed.
OPMERKING:
Aanvullende informatie met betrekking tot de bediening van
het apparaat
Afb. Getal/Getal verwijst naar een afbeelding.
bijv. Afb. 1/4: afbeelding 1 op pagina 4
Neemt u alstublieft de volgende veiligheidsvoorschriften in acht.
2 Algemene veiligheidsvoorschriften
De firma axhess GmbH & Co. KG, Bergstraße 18, D-53547 Hausen, neemt
geen enkel verantwoordelijkheid voor schade en gevolgen die ontstaan door:
- Aansluitings-, Bedienings-, en/of montagefouten.
- Geweldpleging, beschadigingen aan het apparaat en/of de aansluitskabels.
- Apparaatbeschadigingen ontstaan door mechanische invloeden en/of
te hoge spanning.
- Elke toegebrachte verandering aan het apparaat en/of de aansluitkabels.
- Gebruik voor andere dan in deze handleiding beschreven doeleinden.
- Invloeden van vloeistoffen en/of ontoereikende ventilatie.
- Ongeautoriseerd openen van het apparaat. Dit heeft o.a. verlies van
garantie tot gevolg.
- Gevolgschade ontstaan door niet-intentioneel gebruik en/of door een
defecte accu.
Gebruik het apparaat uit uitsluitend voor die doeleinden waarvoor het
bedoeld is.
Nooit gebruiken in een vochtige of natte omgeving!
Slechts gebruiken in een droge omgeving!
Gebruik het apparaat nooit in de buurt van brandbaar materiaal.
Gebruik het apparaat nooit in een omgeving met explosiegevaar.
Gebruik het apparaat slechts wanneer er voldoende ventilatiemogelijk-
heden voorhanden zijn.
Reparaties en onderhoud mogen slechts worden uitgevoerd door geau-
toriseerde vakmensen die bekend zijn met de aan deze handelingen
verbonden gevaren/voorschriften.
Zorg altijd voor een zekere plaatsing van het apparaat!
De schakelklok moet zodanig stabiel worden gemonteerd/geplaatst dat
deze niet naar beneden of om kan vallen.
Het apparaat zodanig veilig stellen dat kinderen er geen grip op hebben!
Kinderen kunnen aanwezige gevaren niet herkennen en inschatten
!
profipower_2440007_Timer2_Manual_1292_ok_k1.indd 38-39 25.08.2009 11:26:00

40
41
NL
NL
Stel het apparaat niet direct bloot aan zonstraling of andere warmte-
bronnen. Vermijd additionele verwarming van het apparaat door invloe-
den van buiten.
Om beschadigingen aan de aansluitkabels te voorkomen, nooit aan de
kabel trekken, maar altijd aan de stekker de stroomverbinding
verbreken.
Wanneer de aansluitkabel beschadigd is mag het apparaat niet gebruikt
worden. Eerst dient het apparaat door een geautoriseerde vakman te
worden gerepareerd.
Geen brandbare objecten zoals bijvoorbeeld kaarsen naast of op het
apparaat plaatsen.
Geen met vloeistoffen gevulde objecten zoals bijvoorbeeld waterflesjes
of drankreservoirs naast, op of in de buurt van het apparaat plaatsen.
3 Inbegrepen bij levering
1 x 12 V Schakelklok
1 x Knoopcel 3 V
1 x Meertalige handleiding
1 x Recyclebare verkoopverpakking
4 Intentioneel gebruik
Schakelklokken, en zo ook deze 12 V-uitvoering, zijn ontwikkeld om aangeslo-
ten apparaten op een vooraf bepaald tijdpunt automatisch in te schakelen.
Ook schakelt deze schakelklok een aangesloten apparaat weer uit, eveneens
op een vooraf bepaald tijdstip. Voorwaarde hierbij is dat de schakelklok ver-
bonden moet zijn met een nominale stroom voerende 12 V-contactdoos.
Instellingen van de schakelklok worden opgeslagen. Een ondersteunende
batterij (verwisselbaar) in de schakelklok zorgt voor de dataopslag van de
schakelklok wanneer deze geen 12 V spanning van de autoaccu ontvangt. In-
gestelde data blijft bewaard. Deze schakelklok is ontwikkeld voor het gebruik
met 12 V voertuigaccu’s. Andere spanningsgrootten verstoren de
12 V schakelklok, niet aansluiten op een andere spanning! De maximale out-
put bedraagt 10 A. Aansluitapparaten van 12 V/10 A tot max. 120 W stroomver-
bruik kunnen met deze schakelklok bediend worden.
Voordat u de 12 V-schakelklok in gebruik neemt controleer dan, aan de
hand van voertuiginstructieboekje de stroomtoevoer en de maximale
belasting van het 12 V-boordcontact (sigarettenaansteker) van het
voertuig.
Neem altijd, voor uw eigen veiligheid en die van anderen, de volgende
fundamentele veiligheidsvoorschriften in acht met betrekking tot:
• stroomstoten
• Brandgevaar
• Verwondingen
• Produktbeschadiging
Neem het produkt alleen in gebruik als de behuizing en de bekabeling
onbeschadigd zijn!
Zorg er absoluut voor dat de luchtin- en uitlaten van aansluitapparatuur
altijd vrij en open zijn.
Dek het apparaat, wanneer in gebruik, nooit af.
Zorg altijd voor voldoende ventilatie.
Bij handelingen aan het apparaat zoals bijvoorbeeld reiniging, onder-
houd, altijd eerst de stroomtoevoer onderbreken.
Neem onvoorwaardelijk alle hier beschreven veiligheidsvoorschriften in acht!
5 Technische kenmerken
Digitale 12 V schakelklok
Stroomtoevoer 12 V DC
Max. uitgangsstroom
8A/96 W DC
Data-uitlezing LCD-display, 4-cijferig
Urenindicatie Digitale uitlezing in 24-uurs modus met
minutenindicatie.
Schakelfunctie Programmeerbare »AAN-/UIT«-functie.
Instelling »MODE«- of »SET«-knop indrukken.
Achtergrondverlichting Licht automatisch op bij verbinding met de
12 V DC accu als ook bij het indrukken van.
Duur van de
achtergrondverlichting
ca. 15 sec., dooft vanzelf
Accubeschermingsfunctie Schakelklok schakelt automatisch uit als de
spanning van de voertuigaccu tot ca. 8 V is
gedaald. Hiermee worden tevens aangesloten
apparaten uitgeschakeld.
Deze functie voorkomt dat de voertuigaccu
onder de noodzakelijke startspanning komt.
Opslaan van instellingen Ingestelde data worden opgeslagen.
Knoopcel Aan de achterzijde geplaatste 3 V knoopcel
t.b.v. de LCD-uitlezing en het behoud van
opgeslagen data wanneer de schakelklok niet
met de 12 V stroomtoevoer verbonden is.
6 Aansluiten van de schakelklok
Ingebruikname
Voordat u een apparaat aan de schakelklok aansluit en voordat u de schakel-
klok verbindt met de 12 V stroomtoevoer moet de klok ingesteld worden.
Instellen van de klok
1. Druk op de knop »MODE/START«, de eerste twee cijfers van de digitale
uitlezing lichten op (de tekens »TIMER«, »ON« en »OFF« worden nu niet
getoond).
2. Druk vervolgens op de »Set« knop, de urenaanduiding loopt. Kies uw tijd
en laat de »SET«-knop, de urenaanduiding loopt. Kies uw tijd en laat de
»SET«-knop geleidelijk in voor de precieze afstelling.
profipower_2440007_Timer2_Manual_1292_ok_k1.indd 40-41 25.08.2009 11:26:00
Table of contents
Languages:
Popular Timer manuals by other brands

Timeguard
Timeguard ETU17 Installation & operating instructions

Green Brook
Green Brook T105-C Simplified operating instructions

AQUAJOE
AQUAJOE AJ-ET2Z-RM manual

wattstopper
wattstopper RT-200 installation instructions

Powerplus
Powerplus LR1130 manual

Skytech
Skytech TM/R-AF1-1 Installation and operating instructions


