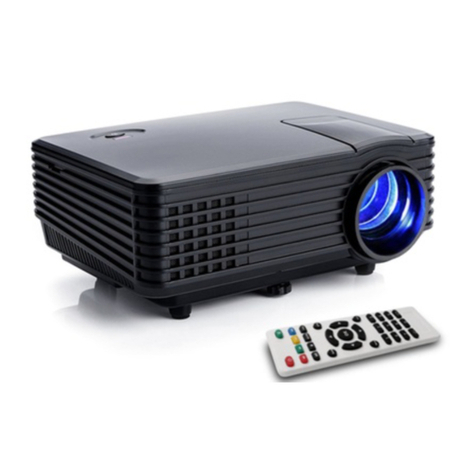
FAVI B1-LED-PICO User manual

Micro SD
B1-LED-Pico
User Guide


Contents
Chapter 1 Introduction and Notices
Introduction
Safety Precautions
Maintenance and Service
FCC Notices
European Notices
Chapter 2 Projector Overview
Features
Accessories
Main Unit Overview
Remote Control Overview
Connecting your projector to a video source
Connecting your projector to your PC
USB and Micro SD card usage overview
Chapter 3 Using your Projector
Setting up your projector
Adjusting the Image Size and Focus
A/V and VGA menu Overview
Chapter 4 PMP Functions
Viewing Photos
Slideshow Mode
Thumbnail Mode
Browse Mode
Playing Movies and Music
PMP settings
System Setup
Photo Setup
Video Setup
Music Setup
4
4
5
6
6
7
8
8
9
10
11
12
13
14
15
16
16
17
18
20
20
20
21
22
24
25
26
26
27
27
Chapter 5 Technical Specifications 28

4
CHAPTER 1 Introduction and Notices
Thank you for purchasing the FAVI B1-LED-Pico projector. This projector is a
small, lightweight, versitile unit designed for both business and home use.
This projector boasts a 28 lumen light output, built in speakers, SVGA native
resolution, VGA support up to 1600x1200, Composite video support, and an
integrated Personal Media Player (PMP). It’s small, operates quietly, and comes
with everything you need to get started.
Only 24 watts of power consumption means that this projector can be used just
about anywhere. It can project a clear image from as little as 5 inches, to over 60
inches.
and lamps. The integrated LED lamp is rated to last for up to 20,000 hours.
The integrated Personal Media Player allows this projector to function as a
media player, an image viewer, and a slide show viewer. You can even view a
Being designed with portability and business use in mind, the B1-LED-Pico
comes with everything a travelling business person would require, including
international power plug adapters for use in foreign countries.

5
Safety Precautions
Do not us e the projector under direct sunlight.
Please avoid looking directly into the projector’s lens while the unit is
operating. Doing so could damage your eyes.
Do not use this projector near sources of heat, such as space heaters,
Do not block any ventilation holes on this device.
Using a tripod with your projector is strongly recommended. A tripod
will allow for better ventilation and heat dissipation.
Do not allow liquids to come into contact with this projector. If the
projector is exposed to liquids, the internal electronics may be
damaged.
This projector should not be used at tempatures above 104
°F or below
40°F. Relative humidity should be less then 80%
This projector should not be used in a dusty location. Large amounts of
dust may hinder the projector’s ventilation, causing it to overheat.
Please avoid dropping, hitting or throwing this projector.
Please make sure your projector is placed on a steady surface prior to
operating it.
Please do not operate the projector at a high volume for an extended
to the projector’s audio output jack for situations where a high
volume is needed.
Upon powering down, the projector’s cooling fan will continue to spin
for up to 30 seconds. Please do not unplug the projector until after
the cooling fan stops spinning.

6
Keeping your projector clean will help prolong its life. If the projector
becomes dirty, wipe it clean using a dry or damp cloth. Please unplug the
projector before cleaning it. Do not use harsh chemicals to clean your
projector.
Please handle your projector carefully. Handling the unit carelessly may
cause physical damage to it. Physical damage is not covered under your
projector’s warranty.
Please use only the accessories and cables that come with your projector.
Using other accessories may cause damage to your projector and will void
your warranty.
Do not attempt to disassemble your projector. There are no user
serviceable parts inside. If your projector requires service, please
contact us.
This equipment has been tested and found to comply with the
limits for a Class B digital device pursuant to Part 15 of the FCC
Rules. These limits are designed to provide reasonable protection
against harmful interference in a residential installation.
This equipment generates, uses, and can radiate radio frequency
energy and, if not installed and used in accordance with the
manufacturer's instruction manual, may cause interference with
radio communications. However, there is no guarantee that
interference will not occur in a particular installation. If this
equipment does cause harmful interference to radio or television
and on, you are encouraged to try to correct the interference by
one or more of the following measures:
Maintenance and Service
FCC Notices

7
Disposal of Used Electrical and Electronic Equipment
(Independent collection programs applica ble to E U-member
states and other E uropean countries )
T he label s hown on this device or its package indi-
cates that this device should not be dis carded along
with other household waste; it mus t be collected and
given to E E E disposal centers. B y ens uring this device
is dis pos ed of correctly, you will help prevent potential nega-
tive impact on the environment and human health, which could
otherwise be caus ed by inappropriate handling of this device.
C ollection of s uch devices helps cons erve natural res ources .
T he label has the legal effect only in E U-member states .
C ontact your loca l agency or your dealer for more detailed
information about dispos ing of this device.
Reorient or relocate the receiving antenna.
Increase the separation between the equipment and the receiver.
receiver is connected.
Consult the dealer or an experienced radio/television technician for help.
European Union Notices

8
CHAPTER 2 Projector Overview
Features
Supports Divx and Xvid video codecs.
Supports MP3, WMA, and OGG audio formats.
Compact, versitile design.
Integrated Micro SD card slot. Supports Micro SD cards up to 32 GB.
28 lumen LED lamp output.
between the projector and a computer.
Supports viewing JPEG and Bitmap images.
Comes with international power plug adapters for use on foreign business
trips.
Supports AVI, and MP4 video formats.
The B1-LED-Pico projector has been designed to be far more functional
then previous pico projector models. Here is a summary of the features of
your new pico projector.

9
Accessories
A. Projector
B.Mini Y Cable
C. Mini USB Cable D.DC 12V / 2A Charger
E. Remote Control F. Tripod
G. Leather Case H. User Guide
The following accessories come with your projector:

10
Main Unit Overview
1. F ocus control
2. Go back to previous menu
(PMP mode)
3.
4.
Fast forward/Highlight menu
option (PMP mode)
5.
6. Select mode button (all modes)
7. IR Sensor
8. AV/VGA cable input
9. 12 volt DC input
10. P ower button
11. Micro S D slot
12. Decrease volume (all modes)
13. Increase volume (all modes)
14. Mini US B connector
15. Audio out jack
M
S
1
2
3
4
5
6
Power
Micro
SD
10
12
11
13
789
IR
AV / VGA DC
USB Audio
14
15
Play/Pause/Select option (PMP mode)
Rewind/Highlight menu
option (PMP mode)

11
Remote Control Overview
Your projector’s remote control can operate all of your projector’s functions.
Some of the buttons on both the projector and the remote control are multi
functional depending on how you are using the projector. PMP mode button
functions are explained more thoroughly in chapter 4.
1. P ower
2. Brightness presets (All modes)
3. Select PMP mode
4. Select A/V mode
5. Select VGA mode
6. Menu (AV/VGA modes)
7. E xit Menu (AV/VGA modes)
8.
9.
10. Menu navigation (AV/VGA modes)
11.
12. Select Menu option (AV/VGA modes)
13.
14.
15. View Photos (PMP mode)
16. View Videos (PMP mode)
17. View photo slideshow (PMP mode)
18. Video P layback button
19. Move Upward button
20. Video P ause button
21. Rewind/Move leftward (PMP mode)
22. Select highlighted option (PMP mode)
23. Fast forward/Move rightward
(PMP mode)
24. E xit the current menu
25. Move Downward button
26. Mute button (PMP mode)
27. Decrease volume (All modes)
28. Increase volume (All modes)
29. Zoom in on a photo (PMP mode)
3
0. Zoom out of a photo (PMP mode)
3
1. Rotate photo clockwise
(PMP mode)
32. Rotate photo counter-clockwise
(PMP mode)
Menu navigation (AV/VGA modes)
Menu navigation (AV/VGA modes)
Menu navigation (AV/VGA modes)
1
5
4
2
3
7
6
10
11
14
16
15
19
18
21
22
24
25
27
8
9
12
13
17
29
20
30
31
23
32
26
28

12
Powering your projector On and Off
Powering On
Press the power button
on either the projector
or remote control.
After a second, the
projector will start
operating.
Powering Off
Pressing the power
button on either the
remote or projector
while its operating will
bring up this menu
screen. Press the power
button again to power
accidentally pressed the
power button, wait a
few seconds for this
screen to disappear.
After powering down the projector, the projector’s cooling fan will
continue to spin for up to 30 seconds. Please do not unplug your
projector until after the cooling fan shuts down.
POWER OFF SYSTEM
NO YES

13
Audio
IR
DC
AV /
VGA
Connecting your projector to a video source
◄
DVD
Audio
IR
DC
AV / VGA
Mobile
Device
Your projector supports both Composite video with line audio, and standard VGA
video. A special Y cable is included that will allow you to connect either video source
to your projector. When plugging the cable into your projector, make sure the arrow
on the connector is facing upward to help prevent plugging in the connector upside
grasping the sides of the connector and gently pulling it out.
To connect a composite video
device such as a DVD player to your
projector, connect the Y cable to
the projector as shown in the
illustration. Switch the projector
to A/V mode and connect the
DVD player’s A/V cable to the
color coded RCA jacks on the Y
cable.
Along with DVD players and other
video equipment, your projector is
also compatible with any mobile
device that can output Composite
video. To use a mobile device with
your projector, connect it following
the above instructions. You may also
device to output composite video.

14
Your projector supports standard PC VGA in resolutions from 640x480
up to 1600x1200. The B1-LED-Pico projector is designed for use with
notebook computers that can connect to an external VGA display device.
Standard desktop PC’s will also work with the B1-LED-Pico projector.
Connecting your projector to your PC
Recommended VGA resolutions:
640x480, 800x600, 1024x768
Supported VGA resolutions:
640x480, 800x600, 1024x768, 1280x768, 1280x800, 1280x960,
1280x1024, 1600x900, 1600x1024, 1600x1200
All supported VGA resolutions are displayed in the 4:3 aspect ratio.
Your projector supports a 60 Hz refresh rate. Higher refresh rates are
not supported.
◄
PC
Audio
IR
DC
AV /
VGA
power on the projector and switch it to
VGA mode. Next, connect the Y cable to the
back of the projector, and to the computer
as shown in the illustration. Your computer
should automatically detect the projector
as a VGA display upon powering up.
If you are using a notebook computer and
your projector is not automatically
detected, you may need to manually switch
your computer’s video output to the
external VGA port.

15
Your projector comes with
internal memory that can be
accessed by using the
included USB cable to connect
it to any computer that
supports the USB 2.0 standard.
Once the projector is
connected to the computer
and powered on, the computer
should detect the projector as a
standard USB mass storage device. You can also connect the projector’s
When the projector is connected
to a computer via the USB
connection, it will project this
screen. To return to PMP mode,
simply unplug the USB cable.
Along with its internal
memory, your projector also
supports Micro SD cards in
sizes up to 32 GB. When a
Micro SD card is inserted, it will
be detected automatically.
Micro SD cards are given
access priority over the
projector’s internal memory.
USB
Audio
PC / Notebook
USB and Micro SD card usage overview
Micro SD
Card

16
Setting up your projector
Screw the tripod to the
base of the projector as
shown in the illustration.
Grasp the tripod’s legs to
tighten. Do not over tighten.
You can adjust the
tripod’s base to make better
contact with the base of
the projector. Rotate the
base on the tripod to adjust
it.
You can also extend the tripod’s legs to increase the height of your
projector. The tripod’s legs are keyed. When they are fully extended, you
can rotate the inner legs to prevent them from accidentally retracting while
the inner legs with the notches on the outer legs to allow the inner legs to
retract.
Once you have the projector set up and connected, press the power button
on either the projector or remote control. Once the projector begins
operating, you should be able to hear the cooling fan and see an image
projected onto your screen. You can then adjust the projected image to
your liking.
IR
DC
AV /
VGA
Adjustable base
CHAPTER 3 Using your Projector

17
Adjusting the Image Size and Focus
Once the projector is
connected and powered on,
you can adjust the image
screen.
To adjust the focus, move
the focus control slider
which is shown in the
illustration until the image
is clear.
7.9 5.0
19.7 12.5
31.5 20.0
39.4 25.0
59.1 37.6
78.7 50.1
98.4 62.6
103.8 66.0
Distance from projector to
screen Image Size
All distances are measured in inches.
The projector’s image size can be adjusted by moving the projector. The
closer the projector is to the screen, the smaller the image size will be.
The farther the projector is from the screen, the larger image size will be.
Below is a listing of image sizes and the distances needed to obtain that
image size.

18
While in either A/V or VGA mode, press the MENU button on your remote
control to bring up the menu screen.
A/V and VGA Menu Overview
There are two sub-menus available in this
menu screen. Use the navigation arrow
buttons on the remote control to
select which sub-menu you want, then
press the OK button on your remote
control to select that sub-menu.
C ontrast R ange: 0~100 (Default s etting: 50)
B rightness R ange: 0~100 (Default s etting: 50)
S aturation R ange: 0~100 (Default s etting: 50)
Tint R ange: 0~100 (Default s etting: 50)
C olor temperature Options: High / Medium / Low
( Default setting: Medium )
Here is a list of the display settings that you can adjust. Please note that
some settings may not be available in VGA mode. This menu screen is also
not available in PMP mode.
Recall Resets all display settings to their default

19
This menu screen allows you to
adjust the settings for the on screen
how the menu screen looks and
behaves.
Language Select between English and Chinese
language menu screens.
Select where the menu screen will appear.
Choices are Middle, Top left, Bottom left,
Top right, and Bottom right
Transparency
Select the amount of transparency the
menu screen will have. The range is from 0
to 5. The higher the value, the more
transparent the menu screen will be.
OSD timeout
Select how long the menu screen will be
displayed before automatically closing.
Choices are 15, 30, and 60 seconds.
OSD location
Here is a list of the settings you can adjust on this menu screen. These
settings can be adjusted in either AV or VGA mode.

20
When entering PMP mode,
the projector will display
the PMP menu screen as
seen in this illustration:
You can navigate through
the PMP menu screen
using either the projector’s
remote control, or the
buttons on the projector
itself.
The following buttons on your projector and remote control are
used for navigating through the PMP menu screens.
After 10 seconds of inactivity, the projector will enter slideshow mode
Micro SD card that has been inserted into the projector.
Viewing Photos
There are three modes for viewing photos, Slideshow mode, Thumbnail
mode, and Browse mode. You can select between these modes in the PMP
Photo settings menu. (Please see pages 25 and 26)
In this mode, photos will be displayed one by one in a continuous
slide show. In the Photo Setup screen, you can change the slideshow
Buttons on the
Projector
Function Description
Buttons on the Remote
Control
Go back to the previous menu screen.
Move Leftward.
Enter button. Press to select the option
you have highlighted.
CHAPTER 4 PMP Functions
Move Rightward.
projector will automatyically play them during the slideshow.
Table of contents
Other FAVI Projector manuals
FAVI
FAVI RioHD-LED-2 User manual
FAVI
FAVI J7-LED-PICO User manual
FAVI
FAVI RioHD-LED-4S User manual

FAVI
FAVI Rio HD User manual

FAVI
FAVI Rio HD User manual
FAVI
FAVI Entertainment RioHD-LED-3 User manual
FAVI
FAVI RioHD-LED-3T User manual
FAVI
FAVI E3-LED-PICO User manual
FAVI
FAVI LED-2 User manual
FAVI
FAVI RioHD-LED-4T User manual
FAVI
FAVI Pico+ J5-PICO-HD User manual
FAVI
FAVI RioHD-LED-K1 User manual

FAVI
FAVI RioHD-LED-3T User manual

FAVI
FAVI RioHD-LED-K1 User manual
FAVI
FAVI Entertainment RioHD-LED-3 User manual
FAVI
FAVI A3 User manual
FAVI
FAVI Pico+ J6-LED-PICO User manual
FAVI
FAVI RioHD-LED-G3 User manual
FAVI
FAVI E3-LED-PICO User manual
FAVI
FAVI RioHD-LED-4 User manual


