Fbt DLM26 User manual

FBT Elettronica SpA - Via P. SOPRANI 1 - Zona Ind.le SQUARTABUE - 62019 RECANATI - ITALY
User Manual

DLM26 Digital Speaker Processor
User Manual
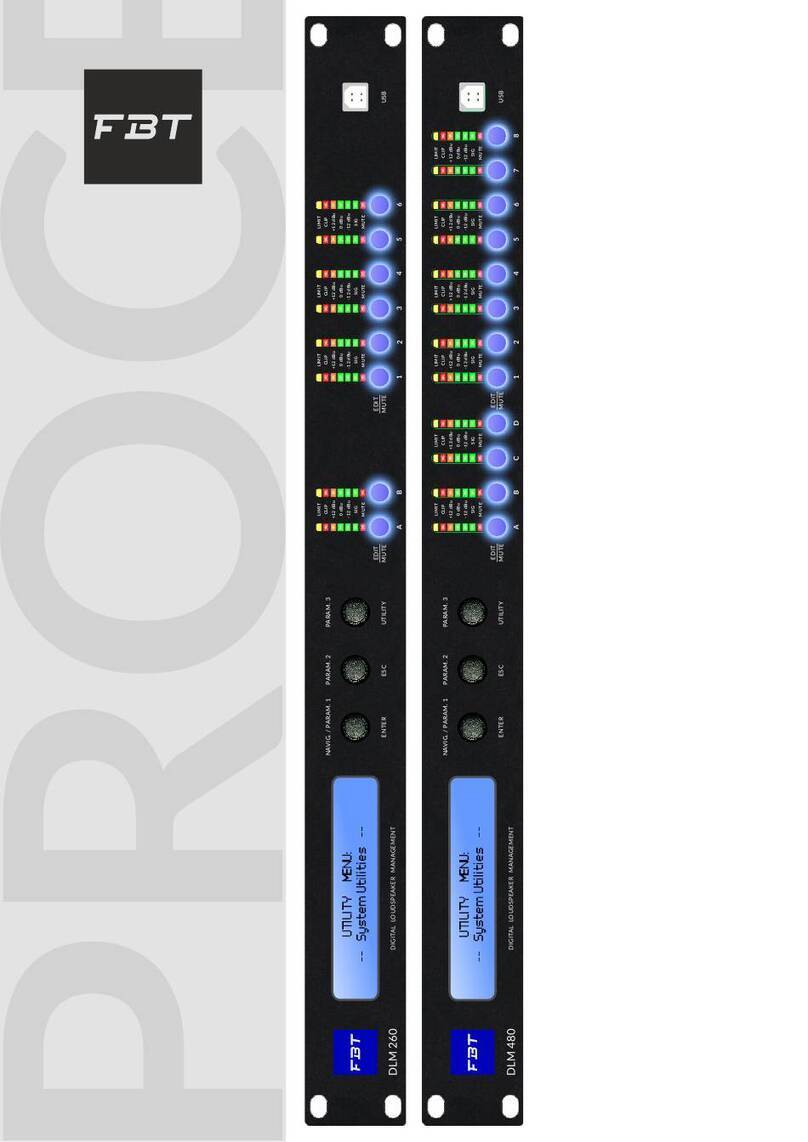
Described below are the functions of the front panel control buttons and encoders for the DLM26.
• Getting Started
As soon as the DLM26 is turned ON the device model name will appear in the LCD screen:
and a status bar will show the pro ress of the DLM26 initialization process:
The DLM26 has three factory pre-set workin modes: “2x2 Ways Xover + Sub”, “2x3 Ways Xover”
and “6 Ways Xover”.
After the initialization, the DLM26 will show on the LCD the first of the embedded preset workin
modes, or the last one selected prior to the unit bein turned off.
First time activation will default to the first of the preset workin modes.
DLM26
Speaker Management
DLM26
2x3 WAY X-OVER
DLM26

• Encoders and ENTER, ESC buttons
The DLM26 is equipped with 3 Relative Encoders, “NAV/Param.1”, “Param.2” and “Param.3”,
These encoders allow you to navi ate the user interface and edit sections of the processor. They
allow the user to navi ate within the screen for the selection of sub-menus, pa es and parameters
and to select the values to be assi ned durin the editin operations.
The “ENTER” and “ESC” buttons allow the user to confirm or NOT confirm the operations
performed by the encoders.
• UTILITY, A/B and 1/2/ /4/5/6 buttons
The UTILITY button allows the User to enter the Sub-menus and set the eneral characteristics of
the Processor. The A and B buttons allow the User to enter the Editin Menus of the Processor's
Input Channels and buttons 1, 2, 3, 4, 5 and 6, allow the User to enter the Editin Menus of the
Processor's Output Channels.
The A and B buttons as well as the 1, 2, 3, 4, 5 and 6 buttons have double functions dependent
on the push and hold time.
When the A and B buttons are pushed and held for more than one second Input Channels A or B
are either muted or unmuted. The red LED will illuminate when the Channel is muted. When the
“MUTE” LED is OFF, then the related Input Channel is UN-MUTED.
A momentary push of the A and B buttons enters the Editin Mode for the Input Channels (see
later for the Input Channel Editin details).
The blue “EDIT” LED will now be ON.
When the 1, 2, 3, 4 , 5 and 6 buttons are pushed and held for more than one second the Output
Channels 1, 2, 3, 4 , 5 and 6 are either muted or unmuted. The red LED will illuminate when the
Channel is muted. When the “MUTE” LED is OFF, then the related Output Channel is UN-MUTED.
A momentary push of the 1, 2, 3, 4 , 5 and 6 buttons enters the Editin Menu for the Output
Channels (see later for the Output Channel Editin details). The blue “EDIT” LED will now be ON.
• DLM26 Menu and Sub-Menu Structures
As stated above, the start-up default screen is the followin factory preset:
From this point, sub-menus are accessed usin the UTILITY”, “A/B”, “1/2/3/4/5/6”, “ENTER” and
“ESC” buttons and all parameters and values are navi ated by the “NAV/Param.1”, “Param.2” and
“Param.3” encoders. Please refer to the followin menu structures:
DLM26
2x3 WAY X-OVER

MENU “UTILITY MENU [Access by pushing the “UTILITY button]
NAV/Param.1 Encoder Param.2 or Param.3 Encoder
[to navi ate between menus] [to chose option, then ENTER to load it;
(*) indicates the selected option]
1 UTILITY MENU:......
<< System Utilities >>
1.1 SYSTEM UTILITY: System Mode
<< System Mode >> Mode: Standard *
Mode: Custom
1.2 SYSTEM UTILITY: System Setup [Standard Mode] System Setup [Custom Mode]
<< System Setup >> Setup: 2x2 WA+ SUB * Setup: 3 DCL *
Setup: 2x3 WAY XOVER Setup: 2x2 DCL
Setup: 6 WAY XOVER Setup: 4+1 DCL
1. SYSTEM UTILITY: Input Routing
<< Input Routing >> Source: Analog *
Source: Digital
1.4 SYSTEM UTILITY: Power-On Procedure
<< Power-On Procedure >> Fade-In: On *
Fade-In: Off
1.5 SYSTEM UTILITY: Delay Units
<< Delay Units >> Unit: Time(ms) *
Unit: Distance (m)
1.6 SYSTEM UTILITY: Ramps on changes
<< Ramps on changes >> Ramps: Off *
Ramps: On
1.7 SYSTEM UTILITY: Software Version
<< Software Version >> Version: V1.01 *
2 UTILITY MENU:......
<< Program Utilities >>
2.1 PROGRAM UTILITY: Recall a Program
<< Recall a Program >> 01: Preset 01
: :
64: Preset 24
2.2 PROGRAM UTILITY: Save a Program
<< Save a Program >> 01: Preset 01
: :
64: Preset 24
2. PROGRAM UTILITY: Delete a Program
<< Delete a Program >> 01: Preset 01
: :
64: Preset 24
3 UTILITY MENU:......
<< Interface Utilities >>
.1 INTERFACE UTILITY: Interface Setup
Interface Setup Source: USB
Source: RS485 *
4 UTILITY MENU:......
<< Security Utilities >>
4.1 SECURITY UTILITY: Parameter will
Show Parameter be shown *
not be shown
4.2 SECURITY UTILITY: Lock Unit
Lock Unit Lock: Off *
Lock: On
4. SECURITY UTILITY: User Password
User Password [ ]
4.4 SECURITY UTILITY: Enable Password (For the details about the Password Setting/Enable
Enable Password Password: Enable and Unit Lock, , refer to the “Utility Menus Use
Password: Disable * Section)
ENTER
ESC
ENTER
ESC
EN
TE
R
ES
C
EN
TE
R
ES
C
EN
TE
R
ES
C
EN
TE
R
ES
C
EN
TE
R
ES
C
ENTER
ESC
EN
TE
R
ES
C
EN
TE
R
ES
C
EN
TE
R
ES
C
EN
TE
R
ES
C
EN
TE
R
ES
C
EN
TE
R
ES
C
ENTER
ESC
EN
TE
R
ES
C
EN
TE
R
ES
C
EN
TE
R
ES
C
EN
TE
R
ES
C
EN
TE
R
ES
C

MENU “Input A/B Input Channels Editing [Access by pushing the “A/B buttons]
NAV/Param.1 Encoder NAV/Param.1 Enc. Param.2 Enc.
Param.3 Enc.
[to navi ate between menus] [to chose values for the parameters, no need to confirm the chosen values,
which are automatically loaded durin the encoders use]
1. Input A/B Gain
Gain = + 0.0 dB
-> Gain = + 0.0 dB Param.1 N/A -12 db Same as PAR2
:
+6 dB
2. Input A/B Delay
Delay = 0.000 ms
-> Delay = 0.000 ms Param.1 N/A 000.0000mS 000.0000mS
[1 ms steps] [20.8 us steps]
848.0000mS 000.9984mS
3. Input A/B EQ Byp
EQ Bypass = Off
-> EQ Bypass = Off Param.1 N/A Off Same as PAR2
:
On
4. Input A/B EQ-X (X from 1 to 5)
Byp = Off Type = Y (Y = Peaking_Eq, Hi-Shelv_1, Hi-Shelv_2, Hi-Shelv_Q, Lo-Shelv_1, Lo-Shelv_2, Lo-Shelv_Q,
Lo-Pass_1, Lo-Pass_2, Lo-Pass_Q, Hi-Pass_1, Hi-Pass_2, Hi-Pass_Q, All Pass_1, All Pass_2,
Band Pass, Notch Filt)
-> Byp = Off Type = Y Param.1 N/A Off Peaking_Eq
: :
On Notch Filt
Through the Param.2, it is possible to Byp the single selected filter.
Through the Param.3, it is possible to select one of the 17 available
filters' type.
Once selected the filter Type and NOT in Byp mode, pressing
again the ENTER button can be accessed the selected filter's editing page.
4.1 Input A/B EQ-[x] (X from 1 to 5)
-> Byp = Off Type = Y
4.1a. If selected a Peaking_Eq filter, then the filter can be set by
the following parameters
Input A/B EQ-[x] (up to 5 filters available)
[Freq] [Gain] [Q]
-> 1000Hz +0.0dB Q=1.00 [Freq.] 20Hz [Amp.] -15.0 dB [Q] 0.30
: : :
20kHz +15.0 dB 20.00
4.1b. If selected a Hi-Shelv_1 (first order High Shelving) filter,
then the filter can be set by the following parameters
Input A/B EQ-[x] (up to 5 filters available)
[Freq] [Gain] [Q]
-> 1000Hz +0.0dB Q= ---- [Freq.] 20Hz [Amp.] -15.0 dB [Q] ----
: : :
20kHz +15.0 dB ----
4.1c. If selected a Hi-Shelv_2 (second order High Shelving) filter,
then the filter can be set by the following parameters
Input A/B EQ-[x] (up to 5 filters available)
[Freq] [Gain] [Q]
-> 1000Hz +0.0dB Q= ---- [Freq.] 20Hz [Amp.] -15.0 dB [Q] ----
: : :
20kHz +15.0 dB ----
4.1d. If selected a Hi-Shelv_Q (variable Q High Shelving) filter,
then the filter can be set by the following parameters
Input A/B EQ-[x] (up to 5 filters available)
[Freq] [Gain] [Q]
-> 1000Hz +0.0dB Q=1.00 [Freq.] 20Hz [Amp.] -15.0 dB [Q] 0.30
: : :
20kHz +15.0 dB 20.00
ENTER
ESC
ENTER
ESC
ENTER
ESC
ENTER
ESC
ENTER
ESC

4.1e. If selected a Lo-Shelv_1 (first order Low Shelving) filter,
then the filter can be set by the following parameters
Input A/B EQ-[x] (up to 5 filters available)
[Freq] [Gain] [Q]
-> 1000Hz +0.0dB Q= ---- [Freq.] 20Hz [Amp.] -15.0 dB [Q] ----
: : :
20kHz +15.0 dB ----
4.1f. If selected a Lo-Shelv_2 (second order Low Shelving) filter,
then the filter can be set by the following parameters
Input A/B EQ-[x] (up to 5 filters available)
[Freq] [Gain] [Q]
-> 1000Hz +0.0dB Q= ---- [Freq.] 20Hz [Amp.] -15.0 dB [Q] ----
: : :
20kHz +15.0 dB ----
4.1g. If selected a Lo-Shelv_Q (variable Q Low Shelving) filter,
then the filter can be set by the following parameters
Input A/B EQ-[x] (up to 5 filters available)
[Freq] [Gain] [Q]
-> 1000Hz +0.0dB Q=1.00 [Freq.] 20Hz [Amp.] -15.0 dB [Q] 0.30
: : :
20kHz +15.0 dB 20.00
4.1h. If selected a Lo-Pass_1 (first order Low Pass) filter,
then the filter can be set by the following parameters
Input A/B EQ-[x] (up to 5 filters available)
[Freq] [Gain] [Q]
-> 1000Hz -----dB Q= ---- [Freq.] 20Hz [Amp.] ----- [Q] ----
: : :
20kHz ----- ----
4.1i. If selected a Lo-Pass_2 (second order Low Pass) filter,
then the filter can be set by the following parameters
Input A/B EQ-[x] (up to 5 filters available)
[Freq] [Gain] [Q]
-> 1000Hz ----- Q= ---- [Freq.] 20Hz [Amp.] ----- [Q] ----
: : :
20kHz ----- ----
4.1l. If selected a Lo-Pass_Q (variable Q Low Pass) filter,
then the filter can be set by the following parameters
Input A/B EQ-[x] (up to 5 filters available)
[Freq] [Gain] [Q]
-> 1000Hz ----- Q=1.00 [Freq.] 20Hz [Amp.] ----- [Q] 0.30
: : :
20kHz ----- 20.00
4.1m. If selected a Hi-Pass_1 (first order High Pass) filter,
then the filter can be set by the following parameters
Input A/B EQ-[x] (up to 5 filters available)
[Freq] [Gain] [Q]
-> 1000Hz -----dB Q= ---- [Freq.] 20Hz [Amp.] ----- [Q] ----
: : :
20kHz ----- ----
4.1n. If selected a Hi-Pass_2 (second order High Pass) filter,
then the filter can be set by the following parameters
Input A/B EQ-[x] (up to 5 filters available)
[Freq] [Gain] [Q]
-> 1000Hz ----- Q= ---- [Freq.] 20Hz [Amp.] ----- [Q] ----
: : :
20kHz ----- ----
4.1o. If selected a Hi-Pass_Q (variable Q High Pass) filter,
then the filter can be set by the following parameters
Input A/B EQ-[x] (up to 5 filters available)
[Freq] [Gain] [Q]
-> 1000Hz ----- Q=1.00 [Freq.] 20Hz [Amp.] ----- [Q] 0.30
: : :
20kHz ----- 20.00
4.1p. If selected an All-Pass_1 (first order All Pass) filter,
then the filter can be set by the following parameters
Input A/B EQ-[x] (up to 5 filters available)
[Freq] [Gain] [Q]
-> 1000Hz -----dB Q= ---- [Freq.] 20Hz [Amp.] ----- [Q] ----
: : :
20kHz ----- ----
4.1q. If selected an All-Pass_2 (second order, variable Q All Pass) filter,
then the filter can be set by the following parameters
Input A/B EQ-[x] (up to 5 filters available)
[Freq] [Gain] [Q]
-> 1000Hz ----- Q=1.00 [Freq.] 20Hz [Amp.] ----- [Q] 0.30
: : :
20kHz ----- 20.00
4.1r. If selected a Band Pass filter, then the filter can be set by
the following parameters
Input A/B EQ-[x] (up to 5 filters available)
[Freq] [Gain] [Q]
-> 1000Hz +0.0dB Q=1.00 [Freq.] 20Hz [Amp.] -15.0 dB [Q] 0.30
: : :
20kHz +15.0 dB 20.00
4.1s. If selected a Notch Filt filter,
then the filter can be set by the following parameters
Input A/B EQ-[x] (up to 5 filters available)
[Freq] [Gain] [Q]
-> 1000Hz -----dB Q=1.00 [Freq.] 20Hz [Amp.] ----- [Q] 0.30
: : :
20kHz ----- 20.00

MENU “1/2/3/4/5/6 Output Channels Editing [Access by pushing the “1/2/3/4/5/6 buttons]
NAV/Param.1 Encoder NAV/Param.1 Enc. Param.2 Enc.
Param.3 Enc.
[to navi ate between menus] [to chose values for the parameters, no need to confirm the chosen values,
which are automatically loaded durin the encoders use]
1. Output[x] [Name] HPF
Y F = 20.0 Hz (Y = Bypass OR Filter Type/Order, where filter type can be Buttw_1st, Buttw_2nd,
LRiley_2nd, Bessel_2nd, Buttw_3rd, Buttw_4th, Lriley_4th, Bessel_4th,
Custom_2nd, Custom_3rd, Custom_4th)
-> Y F = 20.0 Hz Freq Fast Selection [Filt Type] Bypass [Freq.] 20Hz
ONLY in Freq Editing Mode : :
Custom_4th 20kHz
Through the Param.2, it is possible to Bypass the filter or to select one of the 11 available
filters' type/orders, and through the Param.3 to set the HP cutting Frequency (quick fine tuning by 1Hz steps).
Once selected the filter Type and pressing again the ENTER button can be accessed the selected
filter's Fast Freq.Selection page.
1.1 Output[x] [Name] HPF
-> Y F = 20.0 Hz
1.1a. If selected a filter from Buttw_1st up to Bessel_4th, then
the filter's Cutting Frequency can be set as follow:
Output[x] [Name] HPF [Thousands Editor] [Hundreds Editor] [Units Editor]
-> Edit Freq = 250Hz [Freq.] 1000Hz [Freq.] 100Hz [Freq.] 1Hz
: : :
20000Hz 900Hz 100Hz
1.1b. If selected a Custom Filter (from 2nd up to 4th order), depending
from the filter's order, the cascade of second order Cells building
the filter are available for editing in their Freq and Q parameter,
independently.
For proceeding with the editing of a custom filter Cell, the Param.1 is
here used for the Cell selection.
So, a Custom Filter can be set in its parameters, as follow:
1.1b.1. If selected a Custom_2nd filter
Output[x] [Name] HPF
->Custom_2nd F = 250Hz [2nd order Cells selection]
→Filtx F= 250Hz Q = 0.3 [2nd Ord Cell x ] x=1 [Freq.] 20Hz [Q] 0.05
: : :
x=1 20kHz 10.00
1.1b.2. If selected a Custom_3rd filter
Output[x] [Name] HPF
->Custom_3rd F = 250Hz
→Filtx F= 250Hz Q = 0.3 [2nd Ord Cell x ] x=1 [Freq.] 20Hz [Q] 0.05
: : :
[Q not available] x=2 20kHz 10.00
1.1b.3. If selected a Custom_4th filter
Output[x] [Name] HPF
->Custom_4th F = 250Hz
→Filtx F= 250Hz Q = 0.3 [2nd Ord Cell x ] x=1 [Freq.] 20Hz [Q] 0.05
: : :
x=2 20kHz 10.00
Once editing the Cells “Filtx , pressing the Enter Button can be accessed also for the Custom Filters the page for the fast frequency setting, as available for the NOT Custom
Filters and which way of working is described at the point 1.1a.
2. Output[x] [Name] LPF
Y F = 20.0 Hz (Y = Bypass OR Filter Type/Order, where filter type can be Buttw_1st, Buttw_2nd,
LRiley_2nd, Bessel_2nd, Buttw_3rd, Buttw_4th, Lriley_4th, Bessel_4th,
Custom_2nd, Custom_3rd, Custom_4th)
-> Y F = 20.0 Hz Freq Fast Selection [Filt Type] Bypass [Freq.] 20Hz
ONLY in Freq Editing Mode : :
Custom_4th 20kHz
Through the Param.2, it is possible to Bypass the filter or to select one of the 11 available
filters' type/orders, and through the Param.3 to set the HP cutting Frequency (quick fine tuning by 1Hz steps).
Once selected the filter Type and pressing again the ENTER button can be accessed the selected
filter's Fast Freq.Selection page.
ENTER
ESC
ENTER
ESC
ENTER
ESC

2.1 Output[x] [Name] LPF
-> Y F = 20.0 Hz
2.1a. If selected a filter from Buttw_1st up to Bessel_4th, then
the filter's Cutting Frequency can be set as follow:
Output[x] [Name] LPF [Thousands Editor] [Hundreds Editor] [Units Editor]
-> Edit Freq = 250Hz [Freq.] 1000Hz [Freq.] 100Hz [Freq.] 1Hz
: : :
20000Hz 900Hz 100Hz
2.1b. If selected a Custom Filter (from 2nd up to 4th order), depending
from the filter's order, the cascade of second order Cells building
the filter are available for editing in their Freq and Q parameter,
independently.
For proceeding with the editing of a custom filter Cell, the Param.1 is
here used for the Cell selection.
So, a Custom Filter can be set in its parameters, as follow:
2.1b.1. If selected a Custom_2nd filter
Output[x] [Name] LPF
->Custom_2nd F = 250Hz [2nd order Cells selection]
→Filtx F= 250Hz Q = 0.3 [2nd Ord Cell x ] x=1 [Freq.] 20Hz [Q] 0.05
: : :
x=1 20kHz 10.00
2.1b.2. If selected a Custom_3rd filter
Output[x] [Name] LPF
->Custom_3rd F = 250Hz
→Filtx F= 250Hz Q = 0.3 [2nd Ord Cell x ] x=1 [Freq.] 20Hz [Q] 0.05
: : :
[Q not available] x=2 20kHz 10.00
2.1b.3. If selected a Custom_4th filter
Output[x] [Name] LPF
->Custom_4th F = 250Hz
→Filtx F= 250Hz Q = 0.3 [2nd Ord Cell x ] x=1 [Freq.] 20Hz [Q] 0.05
: : :
x=2 20kHz 10.00
Once editing the Cells “Filtx , pressing the Enter Button can be accessed also for the Custom Filters the page for the fast frequency setting, as available for the NOT Custom
Filters and which way of working is described at the point 1.1a.
3. Out-[x] EQ-[x] (X from 1 to 5)
Byp = Off Type = Y (Y = Peaking_Eq, Hi-Shelv_1, Hi-Shelv_2, Hi-Shelv_Q, Lo-Shelv_1, Lo-Shelv_2, Lo-Shelv_Q,
Lo-Pass_1, Lo-Pass_2, Lo-Pass_Q, Hi-Pass_1, Hi-Pass_2, Hi-Pass_Q, All Pass_1, All Pass_2,
Band Pass, Notch Filt)
-> Byp = Off Type = Y Param.1 N/A Off Peaking_Eq
: :
On Notch Filt
Through the Param.2, it is possible to Byp the single selected filter.
Through the Param.3, it is possible to select one of the 17 available
filters' type.
Once selected the filter Type and NOT in Byp mode, pressing
again the ENTER button can be accessed the selected filter's editing page.
3.1 Out-[x] EQ-[x] (X from 1 to 5)
-> Byp = Off Type = Y
3.1a. If selected a Peaking_Eq filter, then the filter can be set by
the following parameters
Out-[x] EQ-[x] (up to 5 filters available)
[Freq] [Gain] [Q]
-> 1000Hz +0.0dB Q=1.00 [Freq.] 20Hz [Amp.] -15.0 dB [Q] 0.30
: : :
20kHz +15.0 dB 20.00
3.1b. If selected a Hi-Shelv_1 (first order High Shelving) filter,
then the filter can be set by the following parameters
Out-[x] EQ-[x] (up to 5 filters available)
[Freq] [Gain] [Q]
-> 1000Hz +0.0dB Q= ---- [Freq.] 20Hz [Amp.] -15.0 dB [Q] ----
: : :
20kHz +15.0 dB ----
3.1c. If selected a Hi-Shelv_2 (second order High Shelving) filter,
then the filter can be set by the following parameters
Out-[x] EQ-[x] (up to 5 filters available)
[Freq] [Gain] [Q]
-> 1000Hz +0.0dB Q= ---- [Freq.] 20Hz [Amp.] -15.0 dB [Q] ----
: : :
20kHz +15.0 dB ----
3.1d. If selected a Hi-Shelv_Q (variable Q High Shelving) filter,
then the filter can be set by the following parameters
Out-[x] EQ-[x] (up to 5 filters available)
[Freq] [Gain] [Q]
-> 1000Hz +0.0dB Q=1.00 [Freq.] 20Hz [Amp.] -15.0 dB [Q] 0.30
: : :
20kHz +15.0 dB 20.00
ENTER
ESC
ENTER
ESC
ENTER
ESC

3.1e. If selected a Lo-Shelv_1 (first order Low Shelving) filter,
then the filter can be set by the following parameters
Out-[x] EQ-[x] (up to 5 filters available)
[Freq] [Gain] [Q]
-> 1000Hz +0.0dB Q= ---- [Freq.] 20Hz [Amp.] -15.0 dB [Q] ----
: : :
20kHz +15.0 dB ----
3.1f. If selected a Lo-Shelv_2 (second order Low Shelving) filter,
then the filter can be set by the following parameters
Out-[x] EQ-[x] (up to 5 filters available)
[Freq] [Gain] [Q]
-> 1000Hz +0.0dB Q= ---- [Freq.] 20Hz [Amp.] -15.0 dB [Q] ----
: : :
20kHz +15.0 dB ----
3.1g. If selected a Lo-Shelv_Q (variable Q Low Shelving) filter,
then the filter can be set by the following parameters
Out-[x] EQ-[x] (up to 5 filters available)
[Freq] [Gain] [Q]
-> 1000Hz +0.0dB Q=1.00 [Freq.] 20Hz [Amp.] -15.0 dB [Q] 0.30
: : :
20kHz +15.0 dB 20.00
3.1h. If selected a Lo-Pass_1 (first order Low Pass) filter,
then the filter can be set by the following parameters
Out-[x] EQ-[x] (up to 5 filters available)
[Freq] [Gain] [Q]
-> 1000Hz -----dB Q= ---- [Freq.] 20Hz [Amp.] ----- [Q] ----
: : :
20kHz ----- ----
3.1i. If selected a Lo-Pass_2 (second order Low Pass) filter,
then the filter can be set by the following parameters
Out-[x] EQ-[x] (up to 5 filters available)
[Freq] [Gain] [Q]
-> 1000Hz ----- Q= ---- [Freq.] 20Hz [Amp.] ----- [Q] ----
: : :
20kHz ----- ----
3.1l. If selected a Lo-Pass_Q (variable Q Low Pass) filter,
then the filter can be set by the following parameters
Out-[x] EQ-[x] (up to 5 filters available)
[Freq] [Gain] [Q]
-> 1000Hz ----- Q=1.00 [Freq.] 20Hz [Amp.] ----- [Q] 0.30
: : :
20kHz ----- 20.00
3.1m. If selected a Hi-Pass_1 (first order High Pass) filter,
then the filter can be set by the following parameters
Out-[x] EQ-[x] (up to 5 filters available)
[Freq] [Gain] [Q]
-> 1000Hz -----dB Q= ---- [Freq.] 20Hz [Amp.] ----- [Q] ----
: : :
20kHz ----- ----
3.1n. If selected a Hi-Pass_2 (second order High Pass) filter,
then the filter can be set by the following parameters
Out-[x] EQ-[x] (up to 5 filters available)
[Freq] [Gain] [Q]
-> 1000Hz ----- Q= ---- [Freq.] 20Hz [Amp.] ----- [Q] ----
: : :
20kHz ----- ----
3.1o. If selected a Hi-Pass_Q (variable Q High Pass) filter,
then the filter can be set by the following parameters
Out-[x] EQ-[x] (up to 5 filters available)
[Freq] [Gain] [Q]
-> 1000Hz ----- Q=1.00 [Freq.] 20Hz [Amp.] ----- [Q] 0.30
: : :
20kHz ----- 20.00
3.1p. If selected an All-Pass_1 (first order All Pass) filter,
then the filter can be set by the following parameters
Out-[x] EQ-[x] (up to 5 filters available)
[Freq] [Gain] [Q]
-> 1000Hz -----dB Q= ---- [Freq.] 20Hz [Amp.] ----- [Q] ----
: : :
20kHz ----- ----
3.1q. If selected an All-Pass_2 (second order, variable Q All Pass) filter,
then the filter can be set by the following parameters
Out-[x] EQ-[x] (up to 5 filters available)
[Freq] [Gain] [Q]
-> 1000Hz ----- Q=1.00 [Freq.] 20Hz [Amp.] ----- [Q] 0.30
: : :
20kHz ----- 20.00
3.1r. If selected a Band Pass filter, then the filter can be set by
the following parameters
Out-[x] EQ-[x] (up to 5 filters available)
[Freq] [Gain] [Q]
-> 1000Hz +0.0dB Q=1.00 [Freq.] 20Hz [Amp.] -15.0 dB [Q] 0.30
: : :
20kHz +15.0 dB 20.00
3.1s. If selected a Notch Filt filter,
then the filter can be set by the following parameters
Out-[x] EQ-[x] (up to 5 filters available)
[Freq] [Gain] [Q]
-> 1000Hz ----- dB Q=1.00 [Freq.] 20Hz [Amp.] ----- [Q] 0.30
: : :
20kHz ----- 20.00

4. Output[x] [Name] Vu-Meter
Vu-Meter = Level
-> Vu-Meter = Level Param.1 N/A Level Same as PAR2
Limiter Act.
RMS Cmp Act.
5. Output[x] [Name] Name
Name = [Name]
-> Name = _ (For Editing the Device's Name, refer to the Details on the“Utility Menus Use Section)
6. Output[x] [Name] Source
Source = InA
-> Source = InA Param.1 N/A. InA (Channel A) Same as PAR2
InB (Channel B)
InA+InB (Channel A+ Channel B)
7. Output[x] [Name] Gain
Gain = + 0.0 dB
-> Gain = + 0.0 dB Param.1 N/A -12 db Same as PAR2
:
+6 dB
8. Output[x] [Name] RMS Cmp
Thr: +12.0dBu Rto: 1:1
-> Thr: +12.0dBu Rto: 1:1 Param.1 N/A [Threshold] +20.0dBu [Ratio] 1:1
: :
-10.0dBu 32:1
9. Output[x] [Name] RMS Cmp
A: 5ms R: 0.2s Kn= 2%
-> A: 5ms R: 0.2s Kn= 2% [Atk time] 10ms [Rel time] 0.1s [Knee.] Hard (00%)
: : :
4s 3.0s Soft (100%)
10. Output[x] [Name] Limiter
A: 5ms R: 0.2s +20dB
-> A: 5ms R: 0.2s +20dB [Atk time] 2ms [Rel time] 20ms [Amp.] -10.0 dB
: : :
50ms 200ms
+20.0dB (OFF)
11. Output[x] [Name] Delay
Delay = 0.000 ms
-> Delay = 0.000 ms Param.1 N/A 000.0000mS 000.0000mS
[1 ms steps] [20.8 us steps]
848.0000mS 000.9984mS
12. Output[x] [Name] Polarity
Polarity = Normal
-> Polarity = Normal Param.1 N/A Normal Same as PAR2
Invert
ENTER
ESC
ENTER
ESC
ENTER
ESC
ENTER
ESC
ENTER
ESC
ENTER
ESC
ENTER
ESC
ENTER
ESC
ENTER
ESC

Menu “UTILITY [access by pushing the “UTILITY button]
From the “Default Screen”, it is possible access the “UTILITY” menu pushin the “UTILITY” button
and the Sub-Menus pa es can be selected just rotatin clockwise and counter-clockwise the
“NAV/Param.1” encoder.
Once selected the sub-menu pa e, usin the “ENTER” button can be accessed the Sub-Menus
pa es, a ain “scrollable” usin the “NAV/Param.1” encoder and accessible for the parameters'
editin pushin a ain the “ENTER' button.
Throu h the “ESC” button, it is any time possible to o back to the action and pa e precedin the
“ENTER” button use.
Once inside the Sub-Menus pa es, the several options can be scrolled and usin the Param.2 or
Param.3 encoders and selected/confirmed pushin the “ENTER” button.
Note: In every Sub-Menu the option currently selected/runnin will have an asterisk “*” showin
to the ri ht of the description on the LCD screen.
Options that are not selected/runnin will be displayed with NO Asterisk.
Pushin the ENTER button on an unselected option will mean an asterisk will then appear and this
option will now take over as the currently selected/runnin option.
System Utilities Sub-menu – this sub-menu allows to access several operations related to the
DLM26 Start Up and General Confi uration:
From the “System Utilities Sub-menu”, pushin “ENTER” and then usin the “NAV/Param.1”
encoder for scrollin will ive access to the followin pa es:
−System Mode: this pa e allows the selection of the operatin mode of the DLM26:
This is very important pa e, allowin to select between to completely different ways of operate
of the DLM26, so to confi ure it as Standard 2x6 Channels Speaker Mana ement System
featurin on each output channel ONE RMS Compressor and ONE Peak Limiter, or as up to 2x3
Channels Speaker Mana ement System where on each Output of 3 available the device is
featurin a 2 Band RMS Compressor and a 2 Band Peak Limiter.
By pressin ENTER on the System Mode pa e and rotatin the “Param.2” or “Param.3”
encoder, it is possible to select the desired Mode of operatin .
When the “Standard Mode” is selected, i.e., the “System Mode” pa e will appear as follows:
UTILITY MENU
-- S stem Utilities --
SYSTEM UTILITY
-- S stem Mode --
S stem Mode
Mode: Standard *

To chan e the desired operatin mode for the DLM26, the screen must reflect the Mode
required and then simply pressin the “ENTER” button will brin up the followin screen askin
for confirmation to load the selected operatin mode:
If confirmed by pressin ENTER the selected mode will load. While the device is confi urin
the Xover for the chosen Mode, the followin screen will be appear:
The new operative Mode will now be shown with an asterisk.
−System Setup: this pa e allows the selection of the operatin setup of the DLM26:
Enterin this pa e, will allow to chose between 3 available operative Modes (if previously
selected the “Custom” option within the System mode Pa e, or 3 available operatin Setups.
If selected the “Standard Mode” within the System Mode pa e, the operatin Setup can be
chosen from a selection of 3 X-overs options:
2x2 WAY + SUB........... in this setup, the DLM26 is performin a 2 Input to 4 Outputs X-
Over, plus a SUB confi uration, where the 2 Inputs are automatically assi ned to the Outputs
as follows:
−Input A to Outputs 1/3 [Out1=Low-A and Out3=Hi h-A]
−Input B to Outputs 2/4 [Out2=Low-B and Out4=Hi h-B]
−Input A + Input B to Outputs 5/6 [Out5=Sub-A and Out6=Sub-B]
2x WAY..XOVER......... in this setup, the DLM26 is performin a 2 Input to 6 Outputs X-
Over, where the 2 Inputs are automatically assi ned to the Outputs as follows:
−Input A to Outputs 1/3/5 [Out1=Low-A , Out3=Mid-A and Out5=Hi h-A]
−Input B to Outputs 2/4/6 [Out2=Low-B , Out4=Mid-B and Out6=Hi h-B]
6 WAY ..XOVER....... in this setup, the DLM26 is performin a Mono Input to 6 Outputs X-
Over, where the Input A is automatically assi ned to the Outputs as follow:
−Input A to Outputs 1/2/3/4/5/6 [Out1=Near-1, Out2=Near-2, Out3=Mid-1 and Out4=Mid-
2, Out5=Far-1, Out6=Far-2]
By pressin ENTER on the System Setup pa e and rotatin the “Param.2” or “Param.3”
encoder, it is possible to select all the available X-Over preset setups.
SYSTEM UTILITY
-- S stem Setup --
New Mode
[ENTER] to confirm
Please Wait .....
Changing Mode

When the “2x3 WAY XOVER” is selected, the “System Setup” pa e will appear as follows:
To chan e the desired operatin mode for the DLM26, the screen must reflect the X-over
required and then simply pressin the “ENTER” button will brin up the followin screen askin
for confirmation to load the selected operatin setup:
If confirmed by pressin ENTER the selected preset mode will load. While the device is
confi urin the Xover the followin screen will be appear:
The new preset setup will now be shown with an asterisk.
If selected the “Custom Mode” within the System Mode pa e, the operatin Mode can be
chosen from a selection of 3 options:
DCL........... in this operatin mode, the DLM26 is performin a 2 Input to 3 “Full Band”
confi uration, where the 3 available Outputs (Ch1/Ch3/Ch5) are mono output but each one
performin a 2 bands Rms Compressor and Peak Limiter, where the splittin frequency of the 2
bands can be custom selected:
−Outputs 1 [5 Bands Eq +2Bands Rms Compressor + 2 bands Peak Limiter]
−Outputs 3 [5 Bands Eq +2Bands Rms Compressor + 2 bands Peak Limiter]
−Outputs 5 [5 Bands Eq +2Bands Rms Compressor + 2 bands Peak Limiter]
−Outputs 2/4/6 [Muted]
2x2 DCL......... in this operatin mode, the DLM26 is performin a 2 Input to 4 Outputs X-Over
confi uration, where 2 of the available Outputs (Ch1/Ch3) are “Full Band” Mono output but
each one performin a 2 bands Rms Compressor and Peak Limiter, where the splittin
frequency of the 2 bands can be custom selected.
The Outputs of the Channels 5/6 are performin as in Standard Mode:
−Outputs 1 [5 Bands Eq +2Bands Rms Compressor + 2 bands Peak Limiter]
−Outputs 3 [5 Bands Eq +2Bands Rms Compressor + 2 bands Peak Limiter]
−Outputs 5/6 [ 5 Bands Eq +Rms Compressor + Peak Limiter]
−Outputs 2/4 [Muted]
New Xover
[ENTER] to confirm
Please Wait .....
Changing Xover
S stem Setup
Setup: 2x3 WAY XOVER *

4+1 DCL......... in this operatin mode, the DLM26 is performin a 2 Input to 5 Outputs X-
Over confi uration, where 1 of the available Outputs (Ch1) is “Full Band” Mono output but
performin a 2 bands Rms Compressor and Peak Limiter, where the splittin frequency of the 2
bands can be custom selected.
The Outputs of the Channels 3/4/5/6 are performin as in Standard Mode:
−Outputs 1 [5 Bands Eq +2Bands Rms Compressor + 2 bands Peak Limiter]
−Outputs 3/4/5/6 [ 5 Bands Eq +Rms Compressor + Peak Limiter]
−Outputs 2 [Muted]
When the “3 DCL” is selected, the “System Setup” pa e will appear as follows:
To chan e the desired operatin mode for the DLM26, the screen must reflect the mode
required and then simply pressin the “ENTER” button will brin up the followin screen askin
for confirmation to load the selected operatin mode:
If confirmed by pressin ENTER the selected preset mode will load. While the device is
confi urin the Xover the followin screen will be appear:
The new preset mode will now be shown with an asterisk.
New Xover
[ENTER] to confirm
Please Wait .....
Changing Xover
S stem Setup
Setup: 3 DCL *

−Input Routing: the DLM26 Processor is equipped with 2 Analo Inputs (Balanced Female
XLR) and a stereo S/PDIF Di ital Input (RCA connector).
The “Routin Options” pa e allows you to select the desired Input type:
By pressin ENTER on Input Routin and then rotatin the “Param.2” or “Param.3” encoders,
it is possible to select the Main Inputs for the DLM26, allowin the User to choose between
Analo or S/PDIF Di ital.
The selection can be confirmed by pressin the “ENTER” button.
The followin screen shows that the Analo Input has been selected:
−Power-On Procedure: this ives you the ability to select the option that will apply when the
DLM26 powers up after bein switched on:
By pressin ENTER and rotatin the “Param.2” or “Param.3” encoder, it is possible to choose
between two options: ”Fade In On” or “Fade In Off”.
The currently runnin option will be displayed with an asterisk to the ri ht of the option
description.
To chan e the option simply ENTER on the option not displayin the Asterisk and that option
will become active and an Asterisk will now appear to the ri ht of the option description.
The followin two options are available:
FADE-In = Off... when the DLM26 is turned on all Outputs re ard of their status before the
Unit was switched off, will be MUTED or UNMUTED automatically, meanin the DLM26 will
have no active Outputs or active Outputs, durin the start-up process, dependin from the
Outputs' previous status.
FADE-In = On... when the DLM26 is turned on all Outputs not previously muted before the
Unit was switched off will be active, meanin the DLM26 outputs will be controlled by a volume
ramp to avoid any sudden sound.
If the option “Fade-In=On” is selected, the screen will show the followin :
Power-On Procedure
Fade-In: On *
Input Routing
Source: Analog *
SYSTEM UTILITY
-- Input Routing --
SYSTEM UTILITY
-- Power-On Procedure --

−Delay Time/Distance: this pa e allows you to select the measurement unit to be used for
the Delays: Time (in milliseconds “ms”) or Distance (in meters “m”):
By pressin ENTER and rotatin the “Param.2” or “Param.3” encoder, it is possible to select
the measurement unit to be used for the delay, which will be confirmed by pushin the ENTER
button.
The followin screen shows the selected delay measurement is Time (milliseconds)
−Ramps on changes: this pa e allows you to activate or de-activate Fadin -in and Fadin -out
ramps on the input/output volumes when any parameter chan es:
When connected to the DLM26 by the PC remote control software, it is possible to request
sudden parameter chan es where the difference between the old parameter and the new one
can cause unwanted “click” noises (bi differences in volume chan es) or “bumps” (bi
differences in Hp/Lp filters cuttin frequency values) as the DSP reconfi ures.
The Fadin -In and Fadin -Out ramps eliminate any potential clicks and bumps.
This function can be de-activated when the unit needs to be used in “live” conditions and small
parameter adjustments are requested “on the fly” durin live performance.
The followin screen shows the Fadin ramps function is Off and therefore de-activated:
−Software Version: this pa e allows you to confirm the Software Version runnin on the
DLM26:
The correct Software Version is “V1.00”
SYSTEM UTILITY
-- Dela Units --
Dela Units
Unit : Time (ms) *
SYSTEM UTILITY
-- Ramps on Changes --
Ramps on changes
Ramps : Off *
SYSTEM UTILITY
-- Software Version --

Program Utilities Sub-menu – this sub-menu allows you to access several options related to
the DLM26 operatin mode and to mana e the presets stored and recallable within the Unit:
By pressin the ENTER button and then usin the “NAV/Param.1” encoder the followin pa es can
be accessed:
−Recall a Program: this pa e allows the Loadin of a preset pro ram. You can store up to 64
presets in the DLM26 memory:
By pressin ENTER and rotatin the “Param.2” or “Param.3” encoders, it is possible to scroll
throu h all current available user presets.
If NO USER PRESETS are stored yet, the screen will show the followin :
If presets have previously been stored by the user, anyone of them can be recalled:
By usin the “Param.2” or “Param.3” encoder it is possible to scroll throu h the stored
presets. Once the desired preset appears on the screen select it by pressin the “ENTER”
button and this will force the DLM26 to be in to load this selected preset and the followin
transitory screen will appear:
Once loaded the DLM26 will exit to the “Recall a Pro ram” screen automatically and the above
screen will disappear:
Note: at any time it is possible to quit the recall action by pressin the “ESC” button.
Recall a Program
No Stored Xovers.
[ENTER] to Recall.
01: PRESET 1
Loading New Program ......
01: PRESET 1
PROGRAM UTILITY
-- Recall a Program --
UTILITY MENU
-- Program Utilities --
PROGRAM UTILITY
-- Recall a Program --

−Save a Program: this pa e allows you to store a new preset in the DLM26’s memory:
By pressin the ENTER button and rotatin the “Param.2” or “Param.3” encoder, it is possible
to scroll throu h the previously saved presets and the available empty locations (identified by
“Empty Memory”).
If no user presets are stored, the “Save a Pro ram” screen will show empty memory locations
for all 1-64 presets as shown in the example below for location 10:
When storin an edited confi uration for the DLM26, select the location for a preset from the
64 available by usin the “Param.2” or “Param.3” encoders.
Once the desired location appears on the screen press ENTER a ain to reach the “Set
Program Name” pa e.
In this pa e the User can enter a Preset Name (up to 16 Characters) by usin the “Param.2”
or “Param.3” encoder to choose a character and the “NAV/Param.1” encoder to move between
the 16 available locations for the character’s positionin .
The current position of the cursor is shown by a “blinkin underscore”.
The followin is an example of a screen while enterin the preset name “Sta e 1 2x2” in
location 10:
To store the Preset Name press the “ENTER” button a ain.
The above action will take you to the “Enter to Save” pa e showin the selected location for
the preset and the final edited name:
Pressin “ENTER” a ain, will store the preset in the selected location with the chosen name
and the followin transitory screen will appear on the LCD:
Save a Program
10: Empt Memor
Set Program Name.
10: Stage 1 2x2 ?
Saving to Memor .....
10: Stage 1 2x2
PROGRAM UTILITY
-- Save a Program --
[Enter] to Save
10: Stage 1 2x2 ?

Once the preset is stored, the above screen will disappear returnin to the followin screen:
If durin the Preset Storin process you want to overwrite an existin memory location select
this location in the “Save a Program” pa e, then ENTER and you will be asked if you want to
overwrite this preset with the followin “[ENTER] to Overwrite” screen displayin the
currently stored preset and location:
If you wish to proceed press “ENTER” a ain and the DLM26 will o ahead with the “Set
Program Name” pa e and the subsequent overwrite on completion of the previously
described storin process..
Note: at any time it is possible to quit the storin action by pressin the “ESC” button.
−Delete a Program: this pa e allows you to delete a preset already stored in the DLM26
memory:
By pressin the ENTER button and rotatin the “Param.2” or “Param.3” encoder, it is possible
to scroll throu h the previously saved presets and the available empty locations (identified by
“Empty Memory”).
If no user presets are stored, the “Delete a Pro ram” screen will show empty memory
locations for all 1-64 presets as shown in the example below for location 10:
If Presets are available they will be shown in the “Delete a Pro ram” pa e as follows:
By usin the “Param.2” or “Param.3” encoder it is possible to select a preset to be deleted.
Pressin the “ENTER” button on a selected preset will brin up the “[Enter] to Delete.” pa e
showin the selected preset.
Delete a Program
10: Stage 1 2x2
PROGRAM UTILITY
-- Save a Program --
[Enter] to Overwrite
10: Stage 1 2x2 ?
PROGRAM UTILITY
-- Delete a Program --
Delete a Program
10: Empt Memor

For example, if we want to delete the preset 10, “Sta e 1 2x2”, the screen will be the
followin :
Confirmin the deletion by pressin “ENTER” a ain, will force the DLM26 to erase the selected
preset and the followin transitory screen will appear:
Once the preset is deleted, the above screen will disappear returnin to the followin screen:
Note: At any time it is possible to quit the deletin action by pressin the “ESC” button.
Interface Utilities Sub-menu – this sub-menu allows you to define the remote control interface
[USB or RS485] to be used for controllin the DLM26 :
.
From “Interface Utilities”, press “ENTER” to access the Interface Setup.
−Interface Setup: this screen allows you to choose the remote control protocol for the DLM26.
By pressin “ENTER” and then usin the Param.2 or Param.3 encoders you can choose
between the two possible interfaces (USB or RS485) for the DLM26.
Pressin ENTER on a selected source will make an asterisk appear to the ri ht of the
description on the LCD as in the followin example which shows the selected interface as USB.
[ENTER] to Delete.
10: Stage 1 2x2
Erasing Xover Memor ......
10: Stage 1 2x2
Interface Setup
Source: USB *
PROGRAM UTILITY
-- Delete a Program --
UTILITY MENU
-- Interface Utilities --
INTERFACE UTILITY
-- Interface Setup --
Table of contents
Other Fbt Controllers manuals
Popular Controllers manuals by other brands
Eaton
Eaton XTPAXTPC Series instruction manual

Marathon Electric
Marathon Electric DVR 2000E+ Installation, operation and maintenance manual
Siemens
Siemens SIMATIC MICRO-DRIVE PDC1000 Equipment manual
Sensia
Sensia CLIF MOCK TC2000 ASSEMBLY, INSTALLATION, OPERATION & MAINTENANCE MANUAL
Beta Three
Beta Three EC4800 user manual
Matelec
Matelec FPC-15007-CON Owner's operation
Tech Controllers
Tech Controllers EU-20 user manual
Emerson
Emerson DIXELL XR30CHC Installing and operating instructions
ESKA
ESKA ERG-H5 Installation use and care manual
Hubbel
Hubbel Metron MP15 Set up and operating instructions

Albatron
Albatron SIL 3112 user manual

Hobart Welders
Hobart Welders GMAW manual
