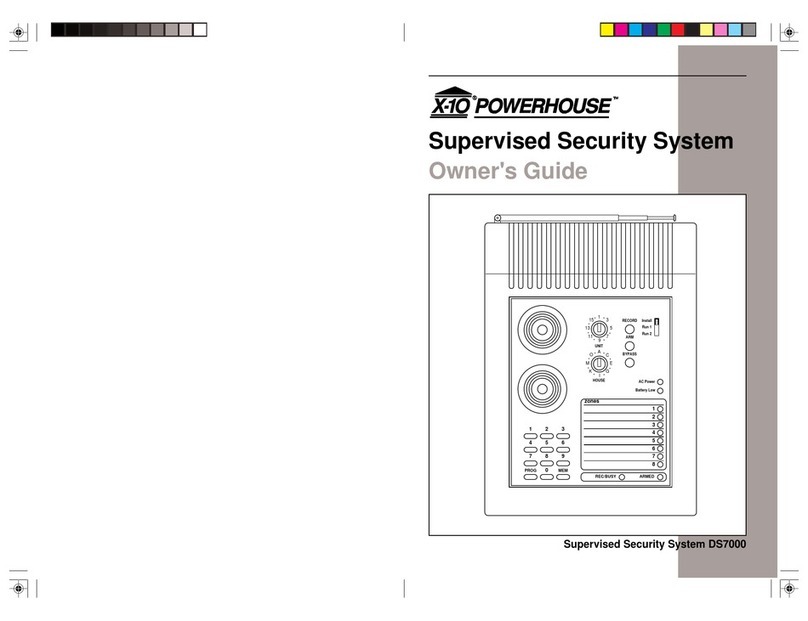
FCI FireVac 7200 Series Installation and operating instructions

301 2nd Ave. Waltham, MA 02451-1133 USA TEL:(781) 487-0088 FAX: (781) 370-4132
Copyright 1998 Part Number: 9000-0405
All Rights Reserved Version: 1.3
Published in the U.S.A.
FireVac®7200 SERIES
EMERGENCYVOICE/ALARM
FIRE ALARM CONTROL
INSTALLATION/OPERATING
ADDENDUM
Technical Manuals Online! - http://www.tech-man.com

Technical Manuals Online! - http://www.tech-man.com

TABLE OF CONTENTS
Page
IMPORTANT INFORMATION/FOREWORD 3
SECTION ONE: OVERVIEW 9
1.1 Description...............................................................................................................................9
1.2 Configurations..........................................................................................................................9
1.2.1 Selective Signaling System................................................................................................9
1.2.2 Fire Alarm System with General Voice Evacuation............................................................9
1.2.3 Fire Alarm System with Two Way Telephone Communications..........................................9
1.2.4 Fire Alarm System with Manually Controllable Process Monitoring...................................10
1.3 Audio Evacuation Unit (AEU)...................................................................................................10
1.4 Command Center ....................................................................................................................10
1.5 System Backplane...................................................................................................................11
1.6 Plug-in Modules.......................................................................................................................11
A. Command Control Unit, Single-Channel (CCU-S).............................................................11
B. Command Control Unit, Dual-Channel (CCU-D) ...............................................................11
C. Switch Input Module-Speaker, Single-Channel (SIM-SS)..................................................11
D.Switch Input Module-Speaker, Dual-Channel (SIM-SD)....................................................11
E. Switch Input Module-Auxiliary Circuit (SIM-A)...................................................................11
F. Circuit Switch Input Module-Phone Circuit (SIM-P)............................................................12
G. Telephone Control Unit (TCU) ...........................................................................................12
H.Telephone Control Unit-Remote (TCU-R)..........................................................................12
J. Status Indicator Board (SIB-10R or 10Y) ...........................................................................12
1.7 Microphone and Telephone Handset .......................................................................................12
1.8 Cabinets ..................................................................................................................................12
1.9 Basic System Amplifier............................................................................................................12
1.10 Peripheral Devices.................................................................................................................12
1.10.1 Addressable Output Modules...........................................................................................12
1.10.2 Remote Amplifiers............................................................................................................12
1.10.3 Power Supply Module for Amplifiers (FCI-PSM) ..............................................................12
1.10.4 Addressable Amplifier Interface Module...........................................................................13
1.10.5 Remote Command Center...............................................................................................13
A. Push-to-Talk Driver Module (PTT-D) ..................................................................................13
B.Push-to-Talk Receiver Module (PTT-R)..............................................................................13
1.11 Amplifier Driver Card (ADC)................................................................................................13
1.12 Bulk Amplifier Unit (BAU)....................................................................................................13
1.13 Amplifier, 120 Watt (PA-120R).............................................................................................13
1.14 Amplifier, 250 Watt, (PA-250R)............................................................................................13
SECTION TWO:INSTALLATION/TERMINAL DESCRIPTIONS 16
2.1 Audio Evacuation Unit (AEU)...................................................................................................17
2.1.1 Address Switch .................................................................................................................17
2.1.2 Audio Signaling Line Circuit Wiring....................................................................................18
A. Class A, Style 6 Wiring Instructions...................................................................................18
B.Class A, Style 7 Wiring Instructions...................................................................................19
2.2 Backplane................................................................................................................................20
2.3 Card Cage Module(s) ..............................................................................................................24
2.4 Basic System Amplifier............................................................................................................30
2.4.1 FCI-Motherboard (FCI-MB)................................................................................................30
2.4.2 Audio Amplifier Module, 25-Watt (FCI-AAM-25) ...............................................................33
9000-0405 1 of 61
Technical Manuals Online! - http://www.tech-man.com

TABLE OF CONTENTS (Continued)
Page
2.5 Distributed Amplification..........................................................................................................36
2.5.1 Addressable Amplifier Interface Module (AAI) ...................................................................36
A. Single Channel Distributed Amplification...........................................................................36
B. Dual Channel Distributed Amplification..............................................................................36
C. AAI Addressing Information...............................................................................................36
2.5.2 Power Supply Module & Transformer (FCI-PSM)...............................................................40
2.6 Remote Command Center.......................................................................................................42
2.6.1 Push-to-Talk Driver Module (PTT-D) ..................................................................................43
2.6.2 Push-to-Talk Receiver Module (PTT-R)..............................................................................45
A. PTT-R Addressing Information...........................................................................................45
2.7 Fire Alarm System with General Voice Evacuation..................................................................47
2.8 Fire Alarm System with Two Way Telephone Communications................................................47
2.9 Fire Alarm System with Manually Controllable Process Monitoring ........................................47
2.10 Notification Appliances ..........................................................................................................54
2.10.1 Speakers..........................................................................................................................54
2.10.2 Strobes ...........................................................................................................................54
2.11 Two-Way Telephone System Hardware..................................................................................54
2.11.1 Warden Station.................................................................................................................54
2.11.2 Telephone Receptacle......................................................................................................54
2.12 Power Limited Field Wiring Circuits .......................................................................................55
SECTION THREE: POWER UP/TEST PROCEDURE 57
3.1 General ..................................................................................................................................59
3.2 Power Up.................................................................................................................................59
3.3 Software Programming............................................................................................................59
3.3.1 Passwords.....................................................................................................................59
3.4 System Test .............................................................................................................................59
3.5 Dual Mode Walk Test Procedure..............................................................................................59
3.5.1 General.........................................................................................................................59
3.5.2 Walk Test Activation (KDU/KDU-L)................................................................................60
3.5.3 Device Testing ..............................................................................................................60
A.Alarm Test..........................................................................................................................60
B.Supervisory/Tamper Test ...................................................................................................60
C. Supervision Test ..............................................................................................................60
3.5.4 System Restoration............................................................................................................60
3.6 Fire Drill Procedure..................................................................................................................61
3.6.1 General ...........................................................................................................................61
3.6.2 Fire Drill Activation (KDU)..................................................................................................61
2 of 61 9000-0405
Technical Manuals Online! - http://www.tech-man.com

IMPORTANT INFORMATION
This manual is designed for use by factory trained installers and operators of the Fire Control Instruments, Inc.
(FCI) 7200 Series Fire Alarm Control. All illustrations, functional descriptions, operating and installation
procedures, and other relevant information are contained in this manual.
The contents of this manual are important, and the manual must be kept with the fire alarm control panel
at all times.If building ownership is changed, this manual, including any testing and maintenance information,
must be passed along to the new owner(s).
The fire alarm control panel is part of a system.Manuals and instructions for other devices forming part of
the system should be kept together.Purchasers who install this system for use by others must leave the
instructions with the user. A copy of these instructions is included with each product and is available from
the manufacturer.
This equipment is Listed by various listing agencies for use in fire alarm systems.Use only components which
are compatible with the FCI system. The installation MUST be in accordance with the instructions in this manual.
THEREFORE:
•DO NOT deviate from the procedures described in this manual.
•DO NOT assume any details not shown in the instructions.
•DO NOT modify any electrical or mechanical features.
•DO comply with all codes and standards set forth by the authority having jurisdiction.
The term “Authority Having Jurisdiction” has become a standard term in the fire alarm industry. An acceptable
definition of “Authority Having Jurisdiction” is:
Fire alarm systems installed in the USA fall under the jurisdiction of some authority.In some areas this may be
a local fire department;in other areas it may be a building inspector, insurance firm, etc. Different authorities
may have their own local requirements for the way the fire alarm system is installed and used. Most local
authorities base their requirements on the NFPA codes, but there may be important differences.You must install
this system in the way in which the authority having jurisdiction requires.If you do not know which authority
has jurisdiction in your area, contact your local fire department or building inspector for guidance.
It is important that you tell users to be aware of any requirements defined by the authority having jurisdiction.
The installation MUST be in accordance with the following standards:
•National Fire Alarm Code (NFPA 72)
•National Electrical Code (NFPA 70)
•Life Safety Code (NFPA 101)
WARNING:Touching components which are improperly installed, applied or operated could be
hazardous and possibly fatal. Short circuits could cause arcing that could result in molten metal injuries.
Therefore, only qualified technicians familiar with electrical hazards should perform checkout
procedures.Safety glasses should be worn, and test equipment used for voltage measurements should be
designed for this purpose and be in good working order.
ENVIRONMENTAL CONSIDERATIONS:
It is important that this equipment be operated within its specifications:
Recommended operating temperature range: 60 to 80oF (15 to 27oC)
Absolute maximum operating temperature range: 32 to 120oF (0 to 49oC)
Operating humidity: not to exceed 85%,
non-condensing at 90oF (32oC)
Operating this equipment within the recommended temperature range will extend the useful life of the system
standby batteries.
!
9000-0405 3 of 61
Technical Manuals Online! - http://www.tech-man.com

INSTALLATION CONSIDERATIONS:
Check that you have all the equipment you need to make the installation.Follow the field wiring diagrams
and installation notes in this manual.
Install the equipment in a clean, dry environment (minimal dust).Avoid installing equipment where vibrations
will occur.
Remove all electronic assemblies prior to drilling, filing, reaming, or punching the enclosure.When possible,
make all cable entries from the sides, being careful to separate the power limited conductors from the
non-power limited conductors.Before making modifications, verify that they will not interfere with battery,
transformer and printed circuit board location.
Do not over-tighten screw terminals.Over-tightening may damage threads, resulting in reduced terminal
contact pressure and difficulty with screw terminal removal.
Disconnect all sources of power before servicing, removing, or inserting any circuit boards. Control unit
and associated equipment may be damaged by removing and/or inserting cards, modules, or interconnecting
cables while the unit is energized.
WIRING CONSIDERATIONS:
This fire alarm control panel contains power limited circuits.You cannot connect external sources
of power to these circuits without invalidating their approval.
Verify that wire sizes are adequate for all initiating device and notification appliance circuits. Most devices
cannot tolerate more than a 10% drop from the specified device voltage.
The installer must make sure that the wiring and devices installed in the system meet the current National
Electrical Code, NFPA 70, and all applicable state and local building code requirements.
Use the conductor size and type required by local codes.(see NFPA 70, Article 760).Wiring resistance must
not be more than that shown on the field wiring diagrams.
To reduce errors and help in servicing the system, all conductors should be tagged or otherwise coded and
logged at installation to identify circuit assignment and polarity.If the conductors are logged with a code, keep
the log that explains the code with the manual, so that it is available to other people working on the panel.
Like all solid state electronic devices, this system may operate erratically or be damaged when subjected
to lightning induced transients. Although no system is completely immune to lightning transients and interfer-
ence, proper grounding will reduce susceptibility.We do not recommend the use of overhead or outside
aerial wiring due to the increased susceptibility to nearby lightning strikes.Consult with the FCI Technical
Support Department if any problems are anticipated or encountered.
To prevent the spread of fire, use proper patching materials to areas where system wiring passes through
fire-rated walls or floors.
OTHER CONSIDERATIONS:
The equipment was tested according to EC directive 89/336/EEC for Class A equipment and was verified
to the limits and methods of EN 55022.
NOTE: System Reacceptance Test after Software Changes: To ensure proper system operation, this
product must be tested in accordance with NFPA 1996, Chapter 7 after any programming operation or change
in site-specific software. Reacceptance testing is required after any change, addition or deletion of system
components, or after any modification, repair or adjustment to system hardware or wiring.
All components, circuits, system operations, or software functions known to be affected by a change must be
100% tested. In addition, to ensure that other operations are not inadvertently affected, at least 10% of initiating
devices that are not directly affected by the change, up to a maximum of 50 devices, must also be tested and
proper system operation verified.
4 of 61 9000-0405
Technical Manuals Online! - http://www.tech-man.com

FCC WARNING: This equipment generates, uses, and can radiate radio frequency energy and, if not installed
and used in accordance with the instruction manual, may cause interference to radio communications.It has
been tested and found to comply with the limits for Class A computing device pursuant to Subpart B of Part 15
of FCC Rules, which is designed to provide reasonable protection against such interference when operated
in a commercial environment. Operation of this equipment in a residential area is likely to cause interference,
in which case the user will be required to correct the interference at his own expense.
If these instructions are not clear, or if additional information or clarification is needed, please consult your
local authorized Fire Control Instruments, Inc. distributor.
Because of design changes and product improvements, the information in this manual is subject to change
without notice.FCI reserves the right to change hardware and/or software design, which may subsequently
affect the contents of this manual.FCI assumes no responsibility for any errors that may appear in this manual.
Neither this manual nor any part of it may be reproduced without the advance written permission of Fire
Control Instruments, Inc.
FIRE ALARM SYSTEM LIMITATIONS
An automatic fire alarm system - Typically made up of smoke detectors, heat detectors, manual pull
stations, audible/visual warning devices, and a fire alarm control panel with remote notification capability - can
provide early warning of a developing fire. Such a system, however, does not assure protection against property
damage or loss of life resulting from a fire.
Any fire alarm system may fail for a variety of reasons:
Smoke detectors may not sense fire where smoke cannot reach the detectors such as in chimneys, in walls,
on roofs, or on the other side of closed doors. Smoke detectors also may not sense a fire on another level
or floor of a building. A second floor smoke detector, for example, may not sense a first floor or basement fire.
Furthermore, all types of smoke detectors - both ionization and photoelectric types - have sensing limitations.
No type of smoke detector can sense every kind of fire caused by carelessness and safety hazards such as
smoking in bed, violent explosions, escaping gas, improper storage of flammable materials, overloaded
electrical circuits, children playing with matches, or arson.
Audible/visual warning devices such as horns, bells or strobes may not alert people if these devices
are located on the other side of closed or partly closed doors or are located on another floor of the building.
A fire alarm system will not operate without any electrical power. If AC power fails, the system will operate
from standby batteries only for a specified time.
Rate-of-rise heat type detectors may be subject to reduced sensitivity over time.For this reason, the rate-of-
rise feature of each heat detector should be tested at least once per year by a qualified fire protection specialist.
Equipment used in the system may not be technically compatible with the control panel.It is essential
to use only equipment listed for service with this control panel.
Telephone lines required to transmit alarm signals from the premise to a central monitoring station may be
out of service or temporarily disabled.
The most common cause of fire alarm malfunctions, however, is inadequate maintenance.All devices and
system wiring should be tested and maintained by professional fire alarm installers following written procedures
supplied with each device.System inspection and testing should be scheduled monthly or as required by
National and/or local fire codes. Adequate written records of all inspections should be kept.
While installing a fire alarm system may make lower insurance rates possible, it is not a substitute for fire
insurance!
CAUTION
To keep your fire alarm system in excellent working order, ongoing
maintenance is required per the manufacturer’s recommendations and UL
and NFPA Standards. At a minimum, the requirements of Chapter 7 of
NFPA 72, The National Fire Alarm Code, shall be followed.A preventive
maintenance agreement should be arranged through the manufacturer’s
local representative.Though smoke detectors are designed for long life, they
may fail at any time.Any smoke detector, fire alarm system or any
component of that system which fails shall be repaired or replaced
immediately.
NOTICE - Do not attempt to install, service, or operate this control panel until this manual is read and understood.
!
9000-0405 5 of 61
Technical Manuals Online! - http://www.tech-man.com

FOREWORD
The information in this manual is organized as follows:
Chapter 1: Overview: Provides an overview of the FireVac®7200 system audio specific components
and related NFPA Standards.
Chapter 2: Installation/Terminal Descriptions: Furnishes descriptions of each major FireVac®7200 System
component requiring installation and typical interequipment drawings.
Chapter 3: Power Up/Testing: Provides initial power-up and testing procedures for the FireVac®7200 system.
Chapter 4: Glossary: Includes commonly used FireVac®7200 related terms and definitions.
6 of 61 9000-0405
Technical Manuals Online! - http://www.tech-man.com

SECTION ONE
OVERVIEW
9000-0405 7 of 61
Technical Manuals Online! - http://www.tech-man.com

8 of 61 9000-0405
Technical Manuals Online! - http://www.tech-man.com

SECTION ONE: OVERVIEW
This section provides an overview of the FireVac®7200 system audio-specific components and related NFPA
standards.
1.1 Description
The FCI FireVac®7200 Audio Evacuation System is an integral part of the 7200 Series Fire Alarm Control.For
7200 Series system details and FireVac®7200 battery calculation information, see FCI manual
P/N 9000-0176.
•Important audio evacuation capabilities supplied by the FireVac®7200 System include:
•Voice/alarm signaling service in accordance with NFPA 72
•Two-way telephone communications service in accordance with NFPA 72
•Manually controllable process monitoring system
The FireVac®7200 System is a microprocessor-based, field configurable fire alarm control unit that operates
according to a user defined set of instructions. These instructions take the form of general alarm lists and input-
to-output relationships among alarm initiating points, notification appliance circuits, and control points such as
addressable output modules (AOM-2s). The general alarm lists and the input-to-output relationships are stored
in the system non-volatile memory and become the basis of its automatic operation. For a description of how to
create general alarm lists, input-to-output relationships and how to store these instructions in non-volatile mem-
ory, refer to FCI manual P/N 9000-0360, Field Configuration Program (FCP).
1.2 Configurations
The FireVac®7200 system can be configured in the following basic individual or combined systems:
•A selective signaling single or dual channel fire alarm system.
•A fire alarm system with general alarm voice evacuation signaling.
•A fire alarm system with two way telephone communications.
•A fire alarm system with manually controllable process monitoring.
NOTE: Dual Channel systems require a second amplifier.
1.2.1 A Selective Signaling Single or Dual Channel System
As a minimum, a single channel system notifies the occupants on the floor of fire origin to evacuate, while a
dual channel system notifies ALL building occupants of the fire emergency. The minimum components for this
system are:
•Basic System Unit (BSU) with Switching Power Supply Unit (SPSU-V)
•Audio Evacuation Unit, (AEU)
•Command Center with backplane, one (1) CCU-S/D, one (1) SIM-S/D and microphone
•Cabinet
•Basic System Amplifier(s)
1.2.2 Fire Alarm System with General Voice Evacuation Signaling.
The minimum components of a Fire Alarm System with General Voice Evacuation Signaling are:
•Basic System Unit (BSU) with Switching Power Supply Unit (SPSU-V)
•Cabinet
•Basic System Amplifier with microphone
1.2.3 Fire Alarm System with Two Way Telephone Communications
The minimum components of a Fire Alarm System with stand-alone telephone system are:
•Basic System Unit (BSU) with Switching Power Supply Unit (SPSU-V)
•Audio Evacuation Unit (AEU)
•Command Center with one (1) TCU, one (1) CCU-S, one (1) SIM-P and handset
•Cabinet
9000-0405 9 of 61
Technical Manuals Online! - http://www.tech-man.com

1.2.4 Fire Alarm System with Manually Controllable Process Monitoring.
The minimum components of a fire alarm system with process monitoring are:
•Basic System Unit (BSU) with Switching Power Supply Unit (SPSU-V).
•Audio Evacuation Unit (AEU)
•Command Center with backplane, one (1) CCU-S and one (1) SIM-A.
•Cabinet
1.3 Audio Evacuation Unit (AEU)
The Audio Evacuation Unit (AEU) provides a signaling line circuit for communication with the 7200 Series
System, the Command Control Units (CCUs), Telephone Control Units (TCUs) and the Switch Input Modules
(SIMs).
The Signaling Line Circuit (SLC) monitors and communicates with up to 20 plug-in modules for a total of 100
control switches, and up to 99 output modules.Thus it can address up to 199 total points.
The AEU can be located in any available mounting position in the 7200 Series main or remote cabinets,
and it occupies one unit space in the cabinet.
1.4 Command Center
The Command Center contains the controls used by the FireVac®7200 system.Figure 1-1 illustrates the 7200
Series command controls.The operator has manual control over the following fire alarm functions:
•System reset
•Event acknowledgment
•Alarm silence
The Command Center consists of the following basic components:
•Keyboard Display Unit (KDU)
•System Backplane with modules
•Card cage for plug-in modules with brackets for the command center
•Microphone and telephone handset (if required)
ALARM
SUPERVISORY
TROUBLE
SILENCE
J2
W1
123
456
789
*0#
<
<
<
<
<<<<<<<<<< <<<<<<<<<< <<<<<<<<<<
<<<<<<<<<<<<<<<<<<<<<<<<<<<<<<
1
2
3
4
5
6
7
8
MENU RESET/ SILENCE ACKNOWLEDGE PREVIOUS
EVENT NEXT
EVENTLAMPTEST
SYSTEM
SYSTEM
K
E
Y
P
A
D
SW1
J4
J1
KDU / -L
TB1
J7
3
D
E
0
F
1
2
9
8
7
BA
C
456
RESET SWITCH
(HOLD FOR 5 SECONDS)
ALARM-SILENCE SWITCH
(TOGGLES SILENCEABLE ALARM CIRCUITS AND DEVICES
OFF AND ON)
ACKNOWLEDGMENT SWITCH
(SILENCES THE INTERNAL AUDIBLE SIGNAL AFTER EACH
CHANGE OF STATE FROM THE NORMAL OPERATING STATE)
LAMP TEST
PRESS TO
SWITCH
ALARMSIGNALS
PRESS TO SILENCEHOLD TO
RESET PRESS TO SILENCE
PANELBUZZER
NORMAL
SUPERVISORY
CIRCUIT 1
TROUBLE
RESET/
PROGRAMMING
DISPLAY
CENTER
DIAGNOSTIC
PROGRAMMING
NORMAL
LAMP TEST SILENCE
NORMALOFF OFF
CIRCUIT 2
TROUBLE
NOTIFICATION
APPLIANCE
SYSTEM
TROUBLE DEGRADE
APPLIANCE
NOTIFICATION
GROUND
FAULT
SILENCE
SIGNAL
ALARM
ACKNOWLEDGE
OFF
TROUBLE
MUNICIPAL
PROGRAM 2
PROGRAM 1
¯¯
SCU
J6 W9
W4
W6
J4
J1
W8
W5
W3
W1
W2
W7
TB1
J7
W10
RESET SWITCH
(HOLD FOR 5 SECONDS)
ALARM-SILENCE SWITCH
(TOGGLES SILENCEABLE ALARM CIRCUITS AND DEVICES
OFF AND ON)
ACKNOWLEDGMENT SWITCH
(SILENCES THE INTERNAL AUDIBLE SIGNAL AFTER EACH
CHANGE OF STATE FROM THE NORMAL OPERATING STATE)
Figure 1-1 7200 Series Command Controls
10 of 61 9000-0405
Technical Manuals Online! - http://www.tech-man.com

1.5 System Backplane
The System Backplane accepts individual modules.The modules plug into connectors on the backplane,
which holds seven (7) modules.It also furnishes connections for the telephone handset and microphone, if re-
quired.
There are two types of backplanes, depending on the type of communication service.The first backplane has
six (6) module connectors and one (1) TCU connector if the FireVac7200 System is providing two-way tele-
phone service. The second backplane has seven (7) module connectors if two-way service is not provided, or if
additional backplanes are required to accommodate all the plug-in modules.
1.5.1 Card Cage for Plug-in Modules
The Card Cage for the plug-in modules attaches to the 7200 Series cabinet. It provides the framework to hold
the modules in place
1.6 Plug-in Modules
The following plug-in modules can be used with the system Backplane:
•Command Control Unit, Single Channel (CCU-S)
•Command Control Unit, Dual Channel (CCU-D)
•Switch Input Module-Speaker, Single Channel (SIM-SS)
•Switch Input Module-Speaker, Dual Channel (SIM-SD)
•Switch Input Module-Phone (SIM-P)
•Switch Input Module-Auxiliary (SIM-A)
•Telephone Control Unit (TCU)
•Telephone Control Unit-Remote (TCU-R)
•Status Indicator Board-10 Red (SIB-10R)
•Status Indicator Board-10 Yellow (SIB-10Y)
A. Command Control Unit, Single Channel (CCU-S)
The Command Control Unit, Single Channel (CCU-S) provides system wide, manual control of all the speaker
circuits and alarm tones that are broadcast by these circuits. One CCU-S is required for each system that
provides selective single channel signaling.
B. Command Control Unit, Dual Channel (CCU-D)
The Command Control Unit, Dual Channel (CCU-D) provides system wide, manual control of all the speaker
circuits and alarm tones that are broadcast by these circuits. One CCU-D is required for each system that
provides selective dual channel signaling.
C. Switch Input Module-Speaker, Single Channel (SIM-SS)
The Switch Input Module-Speaker, Single Channel (SIM-SS) has five, (5) two-position toggle switches for man-
ual activation of one or more output devices such as addressable output modules.Each SIM-SS can
manually activate up to five (5) evacuation zones.
D. Switch Input Module-Speaker, Dual Channel (SIM-SD)
The Switch Input Module-Speaker, Dual Channel (SIM-SD) has five, (5) three-position toggle switches for man-
ual activation of one or more hardware devices such as addressable output modules. Each SIM-SD can manu-
ally activate up to five (5) evacuation zones.
E. Switch Input Module-Auxiliary Circuit (SIM-A)
The Switch Input Module-Auxiliary Circuit (SIM-A) has five, (5) three-position toggle switches for manual
activation or deactivation of one or more output devices.Each SIM-A can manually activate or deactivate
up to five (5) auxiliary circuits for functions such as fan control and elevator recall.
9000-0405 11 of 61
Technical Manuals Online! - http://www.tech-man.com

F. Circuit Switch Input Module-Phone Circuit (SIM-P)
The Switch Input Module-Phone Circuit (SIM-P) has five (5) two-position toggle switches for manual control
of remote telephone handsets or warden stations. Detection of the plug-in handset connection or the off-hook
condition at the warden station is initiated by the telephone system addressable output module (AOM-2).The
AOM-2 also connects the portable handset or warden station to the two-way communications riser. Up to five
(5) remote telephone handsets or warden stations can be actively connected to the system at any one time.
G. Telephone Control Unit (TCU)
The Telephone Control Unit (TCU) provides telephone preamplification for the telephone riser. It also includes
a two-position toggle switch to permit selective or all call paging from a remote telephone handset or warden sta-
tion.
H. Telephone Control Unit-Remote (TCU-R)
The Telephone Control Unit-Remote (TCU-R) is used in Remote Command and Control Centers.
J. Status Indicator Board (SIB-10R, SIB-10Y)
The Status Indicator Board (SIB-10R for red LEDs, SIB-10Y for yellow LEDs) is a programmable, 10-point
LED module.Each LED on the SIB-10 can be programmed via the Field Configuration Program (FCP) to pro-
vide a status indication.
1.7 Microphone and Telephone Handset
Included with the card cage is a bracket for the command centers local microphone.The Telephone handset, if
used, attaches to a bracket mounted below the card cage.
1.8 Cabinets
The FireVac7200 cabinets consist of a backbox, cabinet doors and mounting plate for the 7200 Seriesunits.
The doors are half-size, and two are required for a full-size enclosure.The doors are available with one or two
windows and can be either right or left-hinged.
1.9 Basic System Amplifier
The Basic System Amplifier broadcasts alarm signals, recorded messages, or voice instructions to all remote
distributed amplifiers. It consists of the following:
•FCI Motherboard (amplifier main circuit)
•One 25-watt modular amplifier
Options to the Basic System Amplifier include additional 25-watt modular amplifier(s).
1.10 Peripheral Devices
1.10.1 Addressable Output Modules (AOM)
Addressable Output Modules (AOMs) used for control functions such as speaker circuit switching, telephone
control, and HVAC (Heating Ventilation Air Conditioning), are installed on the AEU signaling line circuit (SLC).
1.10.2 Remote Amplifiers
The system uses Remote Amplifiers whenever the power required to supply the system speakers exceeds 50
watts.Remote Amplifiers are similar to the basic system amplifier described earlier. The Remote Amplifier is acti-
vated by the Addressable Amplifier Input module (AAI).
1.10.3 Power Supply Module for Amplifiers (FCI-PSM)
Each distributed and dual channel amplifier requires a power supply (FCI-PSM). The integral battery charger
can maintain batteries up to 17-AH capacity, and the remote amplifier cabinet can house two 17-AH batteries.
An optional 240 VAC transformer is available.
12 of 61 9000-0405
Technical Manuals Online! - http://www.tech-man.com

1.10.4 Addressable Amplifier Interface Module (AAI)
An Addressable Amplifier Interface Module (AAI) serves as the interface between the main basic system unit
and a remote distributed amplifier. The primary function of the AAI is to supervise and activate the remote ampli-
fier, and to switch the alarm tone and/or recorded message from the basic system amplifier.
1.10.5 Remote Command Center
The system can accommodate a maximum of five (5) auxiliary Remote Command Centers with Audio Evacu-
ation Units, manual controls (CCUs, TCU-R, SIMs), and a remote microphone and/or telephone.These Remote
Command Centers mimic the functioning of the main Command Center.
A. Push-to-Talk Driver Module (PTT-D)
The Push-to-Talk Driver Module (PTT-D) pre-conditions and amplifies the voice instructions for the optional
microphone in the Remote Command Center.
B. Push-to-Talk Receiver Module (PTT-R)
The Push-to-Talk Receiver Module (PTT-R) receives the preamplified signals from remote PTT-Ds. It is housed
in the main basic system unit.
1.11 Amplifier Driver Card (ADC)
The Amplifier Driver Card (ADC) replaces the FCI-AAM-25 Amplifier Module in systems requiring higher
power audio amplifiers.It provides the interface with the Bulk Amplifier Unit (BAU).
1.12 Bulk Amplifier Unit (BAU)
The Bulk Amplifier Unit (BAU) controls the operation of 120 and 250 watt audio amplifiers in systems using
large, rack mounted amplifiers.
1.13 Amplifier, 120 Watt (PA-120R)
The PA-120R amplifier provides 120 watts of audio power at 25 or 70.7 VRMS.
1.14 Amplifier, 250 Watt (PA-250R)
The PA-250R amplifier provides 250 watts of audio power at 25 or 70.7 VRMS.
NOTE: For systems using the ADC, BAU and high power amplifiers, see Installation/Operating Manual,
P/N 9000-0445.
9000-0405 13 of 61
Technical Manuals Online! - http://www.tech-man.com

14 of 61 9000-0405
Technical Manuals Online! - http://www.tech-man.com

SECTIONTWO
INSTALLATION/TERMINAL DESCRIPTIONS
9000-0405 15 of 61
Technical Manuals Online! - http://www.tech-man.com

W2
DISCONNECT
TROUBLEALARM
W1
<<
<<
<<
<<
8
7
6
5
4
3
2
1
<
2
EA
6
0
C
8
4
5
SW1
7
9
B
D
F
13
J4
AEU
TB1
J7
<
<
<
<
<
<
<
<
<
<
<
<
<
<
Audio Evacuation Unit (AEU)
16 of 61 9000-0405
Technical Manuals Online! - http://www.tech-man.com

SECTION TWO:INSTALLATION/TERMINAL DESCRIPTIONS
2.1 Audio Evacuation Unit (AEU)
The Audio Evacuation Unit (AEU) provides one (1) Class A, Style 6/7 or Class B, Style 4 signaling line circuit
(SLC). The signaling line circuit can accommodate 20 CCU/SIM (Switch Input Modules) with 5 points each and
99 addressable modules (AOM-2, AAI, PTT-R), for a maximum of 199 points per AEU. See Table 2-1. The AEU
is a full-size unit. Additional AEUs can be added to a maximum of fifteen (15) AEUs per system.
2.1.1 Address Switch
The Address Switch, SW1, is a 16-position rotary switch labeled “0" through ”9" and “A”through “F” (A=10,
B=11 ...F=15). It is located in the lower left section of the AEU. If only one AEU is installed, the switch must be
set to position “1" (one).The address switch must not be set to position ”0" (zero), and multiple AEU switches
must not be set to the same address.
NOTE: An additional system power supply is required for every five (5) AEU/ALUs. The Distributed Intelligent Unit
(DIU) with its associated power supply meets this requirement.
Designation Description Comments
FIELD WIRING CONNECTIONS
TB1-1 Loop 1 Class B, Style 4, (+) positive, power limited.See Figure 2-1.
TB1-2 Class A, Style 6 (+) positive return, power limited.
TB1-3 Class A, Style 6 ( - ) negative return, power limited.
TB1-4 Class B, Style 4 ( - ) negative out, power limited.
TB1-5 thru-8 Not used.
JUMPERS
W1 Factory use.(Out)
W2 3-pin (2 position) AOM/ AOM-2/AAI Degrade Operation:
Jumper OUT - Modules do not energize during degrade.
Jump Pins 1, 2 - Modules energize, can be silenced (SIL)
Jump Pins 2, 3 - Modules energize, cannot be silenced (NSIL).
LEDs
Trouble Yellow Lights to indicate trouble in the Signaling Line Circuit.
Alarm Red Lights to indicate alarm in the Signaling Line Circuit.
SWITCHES
SW-1 rotary 16-position address switch. See 2.1.1
DISCONNECT
(SW-2) 2-pos.slide Disconnect/walk test switch for Signaling Line Circuit.
CONNECTORS
J4 FCINET®Communication from J4 of previous unit to J4 of next unit.
J7 4-wire .
(rd-blk-yel-gry) Power from J7 of previous unit to J7 of next unit
Table 2-1 AEU Connections, Jumpers, LEDs, Switches
9000-0405 17 of 61
Technical Manuals Online! - http://www.tech-man.com

2.1.2 Audio Signaling Line Circuit Wiring
A. Class A Wiring Instructions (similar to NFPA Style 6)
•Connect an electronic EOL device (consisting of an AMM-2 module, Address “99") (red and black wires)
to the AEU as shown in Figure 2-1.(Yellow and violet wires are not used.)
•Be sure to observe polarity.
•Maximum allowable field wiring resistance is 40 ohms per circuit. Use unshielded, twisted pair cable.
•Maximum circuit capacitance is 0.5 uf.
RATINGS
Voltage 24 VDC (nominal)
Current 0.065 amp. max. (supervisory)
0.085 amp. max. (alarm)
0.750 amp. max. (short ckt.)
Power limited
Supervised
7
8
2
3
4
6
5
1
AEU TERMINALS
21 7653 4 8
AUDIO-SYSTEM BACK-PLANE
TERMINAL STRIP TB2
TYPICAL AOM-2 MODULE
(CAN BE CONFIGURED AS A
SPEAKER, TELEPHONE, OR
AUXILIARY CIRCUIT)
7
AMM-2
545
90
6
8
32
19
8
764
01
2
3
RED
EOL DEVICE (CLASS-A WIRING ONLY)
(AMM-2 WITH ADDRESS SET AT 99)
NOTE: VIOLET & YELLOW WIRES NOT USED.
BLK
(+)
45
(-)
(-)
1
(-)
3
(+)
2
(+)
(-)
AOM-2
(+)
8
7
9
6
(+)
45
(-)
(-)
1
(-)
3
(+)
2
(+)
(-)
AOM-2
(+)
8
7
9
6
(+)
45
(-)
(-)
1
(-)
3
(+)
2
(+)
(-)
AOM-2
(+)
8
7
9
6
(+)
45
(-)
(-)
1
(-)
3
(+)
2
(+)
(-)
AOM-2
(+)
8
7
9
6
123456 789101112
123 4
TB1
TB2 P5
123456 789101112
123 4
TB1
TB2 P5
(+)
45
(-)
(-)
1
(-)
3
(+)
2
(+)
(-)
AOM-2
(+)
8
7
9
6
(+)
45
(-)
(-)
1
(-)
3
(+)
2
(+)
(-)
AOM-2
(+)
8
7
9
6
TYPICAL AAI MODULE
(FOR REMOTE AMPLIFIER
SUPERVISION AND ACTIVATION)
NOTE: DOTTED LINES ONLY FOR CLASS-A WIRING.
Figure 2-1
18 of 61 9000-0405
Technical Manuals Online! - http://www.tech-man.com
Table of contents
