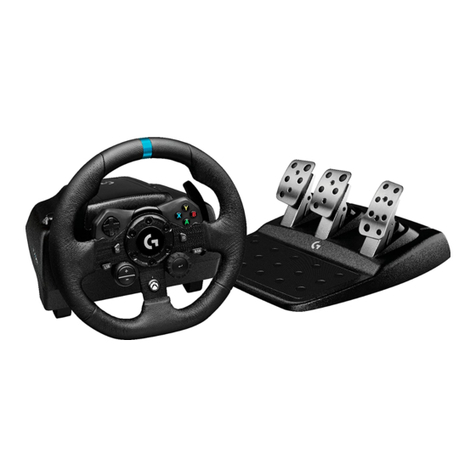
FEEL-VR Pedals One User manual

Manual
Pedals One

Feel VR
Thank you for choosing
Please, read this manual carefully to know about all of the features that Pedals One is capable of.

2 15
15
15
15
16
16
17
18
3
3
4
4
6
7
8
9
10
10
11
12
12
13
1
Index

1. Introduction
2
If you have any questions which are not covered in this manual, feel free to send us an email
at support@feelvr.game

1.1 Package contents
3
(WM)

4
2. Adjustments
2.1 Two pedals (Formula style) configuration
Installing the brake pedal in place of the clutch pedal.
Formula cables setup Default cables setup
1. Loosen 5 bolts of the heel rest plate, slide it away from the pedals.
Then tighten the bolts to keep the plate in position. Use hex key 2,5mm (B).
2. Unscrew the bolt in the middle of the mainboard cover.
Use hex key 2,5mm (B) and spanner 7mm (not included).
3. Unscrew 4 bolts that hold
the mainboard cover.
Use hex key 4mm (D) spanner (E)
4. Carefully remove hot-melt adhesive from the top
of the circuit board connector. Then unplug Clutch
and Brake cable from the mainboard.

5
5. Unscrew 4 bolts that hold Brake and Clutch pedal in place.
Use hex key 4mm (D). Then remove these pedals, carefully
pulling out the cables.
Take off the preload system and initial angle bolt if necessary to have
better access to bolts that hold the pedal.
Use hUse hex key 4mm (D), spanner (E)
6. Put the brake pedal into the left slot substituting the Clutch pedal.
To do so, put the cable back into the left slot and screw the
Brake pedal back to the left slot instead of the central one.

2.2 Recommended settings for initial angle and max travel
6

7
2.2.1 Initial angle
Use : spanner (E) and hex key 4mm (D)
1. Loosen the nut and pull out the bolt.
2. Slide the sleeve to the position you need,
line it up in between two holes.
3. Put the bolt back, fasten the nut.
1. Loosen the nut and pull out the bolt.
2. Slide the sleeve to the position you need,
line it up in between two holes.
3. Put the bolt back, fasten the nut.
Use : spanner (E) and hex key 4mm (D)
2.2.2 Max travel

2.3 Pedal force adjustment
8
Use : 2x hex key 3mm (C)
Choose between one of five setups.
Lower position to reduce the force or
set it up higher to increase the force.
Reference illustrations
Setup types:
•Hard
•Semi-hard
•Medium
•Semi-soft
•Soft

1. Relieve the preload spring before making adjustments to release
the pressure on the pedal force engaging area.
2. Loosen button heads from both sides of the lever at the same time.
2.A) Lower the rod spacer to make the pedal easier to press.
2.B) Raise the rod spacer to make the pedal harder to press.
3. Adjust preload pressure.
4. Make sure that rod spacer screws firmly
fixed in the hole.
5. After adjusting the rod spacer at your
preference, tighten the button heads
with hex key 3mm (C).
1. Release the outer locking nut.
2. Tighten the main nut to increase preload force
or untighten to decrease.
3. Tighten outer locking nut.
The reference below shows the length of the spring on different pedals.
Preload adjustment illustration
Pedal force adjustment illustration
2.3 Pedal force adjustment ( Part two ) 2.4 Preload
Use : 2x hex key 3mm (C) Use : spanner (E)
9

10
2.5 Face plate position
Note: Current design allows only
pedal plate height adjustment
Note: if it's hard to reach the engagement area due to short tool
handle - consider removing the preload spring and rod.
Use : hex key 3mm (C)
1. Loosen the screws.
2. Adjust the pedal plate height.
3. Tighten the screws.
Use : Spanner (E) and Hex Key 4mm (D)
1. Release four pedal mounting screws and slide the pedal
left or right as needed.
2.Tighten the screws back.
2.6 Lateral adjustment (left-right)

2.7 Heel rest position (forward-backward)
Use: Hex Key 2.5mm (B)
Loose five bolts and slide the heel rest plate as desired. Tighten bolts back when done with adjustment.
11

3.1 Rig
Use: Hex Key 2.5mm (B)
To assemble the Pedals One to your rig insert the screw from the
bottom through the feet and tighten with a nut from the top.
12
3.Mounting the Pedals

13
3.2 Wall mount

14
3.2 Wall mount
1. Attach side panels first, using spanner (E) and hex key 3mm (C)
2. Now attach the back panel and rubber legs (F)
using spanner (E) and hex key 4mm (D)

4. Feel-VR control (Calibration Software)
4.2 Сonnection
1. Connect pedals usb wire into PC usb A port.
2. Wait a few seconds until the device is detected
and setted up automatically.
http://feelvr.game/pe0/control
1. Press the FEEL-VR icon located
in the system tray.
2. Select Calibrate from the
dropdown menu.
3. Under each axis there is a
Calibrate button.
To calibrate pedals you need to press
the Calibrate button and press on the
pedal pad all the way.
Then release the pedal of this axis,
press the Done (1) butpress the Done (1) button again
when done.
4. Press Save (2) button when
you are done.
5. Close the calibration window.
4.3 Calibration
15

16
4.4 Updating firmware
1. Press the FEEL-VR icon located in
the system tray.
2. Press Update Firmware button.
1. Press Update Firmware button.
2. Find your serial number in the upper
part of the Update Firmware window.
3. Press Update Firmware button.
4.5 Serial number

5. Maintenance
The recommended lubricant for the throttle and clutch is PTFE Dry Spray.
A good service interval would be to lubricate every 100 hours of use.
Apply lubricant to a spring rod.
Apply lubricant to pedal lever axis
in between pedal lever and pedal base lever.
17

6. Gratitude
18
