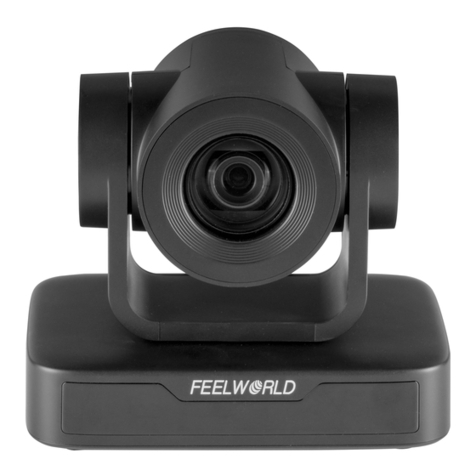
Feelworld UHD4K12X User manual

4K PTZ Camera
User Manual

4K PTZ Camera User Manual
i
Preface
This manual is to ensure that the user can use the product properly and avoid danger
while operating. Before using this product, please read the user manual carefully and
keep it properly for future reference
Overview
This manual is about 4K PTZ camera operation
Graphic Symbols
Description of graphic symbols used in this manual
Symbols
Description
This symbol indicates that the words are clarification or
supplement to this article.
This symbol indicates that negligence of the instructions may lead
to mishandling that may cause injury or property damage.
This symbol indicates a risk that may result in damage to this
machine or documents.
Follow the instructions to avoid property damage.

4K PTZ Camera User Manual
ii
Attention
This manual introduces functions, installations and operations for this product in
details. Please read this manual carefully before installation and use.
Precautions:
This product can only be used in the specified conditions in order to avoid any
damage to the camera:
1) Do not expose the product to rain or moisture.
2) To prevent the risk of electric shock, do not open the case. Installation and
maintenance should only be carried out by qualified technicians.
3) Do not use the product beyond the specified temperature, humidity or power
supply specifications.
4) Please use a soft dry cloth to clean the camera. If the camera is very dirty, clean it
with diluted neutral detergent; do not use any type of solvents, which may damage
the surface.
Electrical Safety:
Installation and use of this product must strictly comply with local electrical safety
standards.
Transportation:
Avoid any stress, vibration, or moisture during transportation, storage, installation and
operation
Installation:
1) Do not rotate the camera head violently, otherwise it may cause mechanical
failure;
2) This product should be placed on a stable desktop or other horizontal surface. Do
not install the product obliquely, otherwise it may display inclined image;
3) Ensure there are no obstacles within rotation range of the holder.
4) Do not power on before completely installation.
Do Not Dismantle Camera:
We are not responsible for any unauthorized modification or dismantling.

4K PTZ Camera User Manual
iii
Magnetic Interference
Electromagnetic fields at specific frequencies may affect the video image. This
product is Class A. It may cause radio interference in household application.
Appropriate measure is required.

4K PTZ Camera User Manual
iv
Content
1. Quick Start ......................................................................................................................... 1
1.1 Interface ................................................................................................................1
1.2 Power-on Self-Test ..................................................................................................1
1.2.1 Power on .......................................................................................................1
1.2.2 Self-Test ........................................................................................................ 2
1.3 Video Output ......................................................................................................... 2
1.3.1 Network Output .............................................................................................2
1.3.2 HDMI Output ................................................................................................. 2
1.3.3 USB-C3.0 Output ............................................................................................2
1.4 Bracket ..................................................................................................................2
1.4.1 Steps of Wall Mount ....................................................................................... 2
1.4.2 Steps of Ceiling Mount ....................................................................................4
2. Product Overview ............................................................................................................... 7
2.1 Product Overview ...................................................................................................7
2.1.1 Product Dimension .........................................................................................7
2.2 Product Feature ..................................................................................................... 7
2.3 Technical Specification ............................................................................................ 9
2.4 Interface Introduction ...........................................................................................12
2.4.1 Interface Diagram .........................................................................................12
2.4.2 RS-232 ........................................................................................................ 13
3. How to Use ...................................................................................................................... 14
3.1 Video Output ....................................................................................................... 14
3.1.1 Power-on Self-test ........................................................................................14
3.1.2 Video Output ............................................................................................... 14
3.2 Remote Control ....................................................................................................14
3.2.1 IR Remote Control ........................................................................................ 15
3.2.2 Remote Control Usage .................................................................................. 17
3.3 Menu Setting ....................................................................................................... 19
3.3.1 Main Menu ..................................................................................................19

4K PTZ Camera User Manual
v
3.3.2 Monocular Tracking ..................................................................................... 20
3.3.3 System Setting ............................................................................................. 21
3.3.4 Camera Parameter Setting ............................................................................ 21
3.3.5 P/T/Z ...........................................................................................................25
3.3.6 Video Format ............................................................................................... 26
3.3.7 Version ........................................................................................................27
3.3.8 Restore Default ............................................................................................ 27
4. NETWORK CONNECTION ................................................................................................... 28
4.1 Connection Method ..............................................................................................28
4.2 Camera Web Interface .......................................................................................... 30
4.2.1 Web Login ................................................................................................... 30
4.2.2 Preview ....................................................................................................... 30
4.2.3 Monocular AI Tracking Function Web Page Configuration .................................30
4.2.4 Configuration ...............................................................................................32
4.2.5 Audio Configuration ..................................................................................... 33
4.2.6 Video Configuration ......................................................................................33
4.2.7 Network Configuration ................................................................................. 37
4.2.8 System Configuration ....................................................................................39
4.2.9 Logout .........................................................................................................41
5. Serial Port Communication Control .....................................................................................42
5.1 VISCA Protocol List ............................................................................................... 42
5.1.1 VISCA Protocol List ....................................................................................... 42
5.1.2 Device Control Command ............................................................................. 43
5.1.3 Inquiry Command .........................................................................................52
5.2 Pelco-D Protocols Command List ............................................................................56
5.3 Pelco-P Protocols Command List ............................................................................ 58
6. Maintenance and Troubleshooting ..................................................................................... 60
6.1 Camera Maintenance ............................................................................................60
6.2 Unqualified Applications ....................................................................................... 60
6.3 Troubleshooting ................................................................................................... 60

4K PTZ Camera User Manual
1
1. Quick Start
1.1 Interface
Figure1-1 Interface
Interface:
1. Lens
6. Screw Hole for Tripod
11. LAN Jack
2. Power Indicator
7. USB-C 3.0
12. Power Input Socket(DC12V)
3. Statue Indicator
8. HDMI
4. Audio Voice Pickup
9. RS232 Input
5. Fixation Hole for
Tripod
10. Line-IN
When using the camera, please put the plastic pad on the
center bottom of device
1.2 Power-on Self-Test
1.2.1 Power on
Connect device to power socket with DC12V power adapter.

4K PTZ Camera User Manual
2
1.2.2 Self-Test
After power on, the receiver light will start flashing and camera will do a brief pan-tilt
tour and return to the home position. When light stop flashing, the self-test is finished.
Default address of the remote control is 1#. When menu restore default setting, the
address of IP remote control will restore 1#.
If preset 0 is set, the camera will return to the preset 0 position after self-test
1.3 Video Output
This series camera can output video through network, HDMI, and USB-C 3.0.
1.3.1 Network Output
a, Network connection: Shown as diagram 1.1 #11
b, Log in: You can reach the Web Interface by typing in the camera’s IP
address(default 192.168.5.163) into a web browser. To log in, type in “admin” into the
username and password fields. From the Web Interface, you can adjust many of your
camera’s settings via this IP interface, like PTZ control, and configuration setting.
1.3.2 HDMI Output
a, HDMI connection: Shown as diagram 1.1 #8
b, Connect camera to the display device via HDMI cable.
1.3.3 USB-C 3.0 Output
USB-C3.0 connection: Shown as diagram 1.1 #7. Open video software and select
image device to output video.
1.4 Bracket
Bracket can only be wall mounted or upside down mounted on template and
concrete wall, but can not be installed on plasterboard.
1.4.1 Steps of Wall Mount

4K PTZ Camera User Manual
3
Figure1-2 Steps of Wall Mount

4K PTZ Camera User Manual
4
1.4.2 Steps of Ceiling Mount

4K PTZ Camera User Manual
5

4K PTZ Camera User Manual
6
Figure1-3 Steps of Ceiling Mount

4K PTZ Camera User Manual
7
2. Product Overview
2.1 Product Overview
2.1.1 Product Dimension
Figure1-4 Product Dimension
2.2 Product Feature
The ultra HD camera series has complete functions, excellent performance, and rich
interfaces; advanced ISP processing technology and algorithms make the image
effect vivid, uniform picture brightness, strong light and color layering, high definition,
and color reproduction. it supports H.265/H.264/MJPEG encoding, making the picture
smoother and clearer under low bandwidth.
4K UHD Resolution: 8.51 million pixel high-quality SONY CMOS image sensor,
the maximum resolution can reach 4K (3840×2160) at 30 frames per second.

4K PTZ Camera User Manual
8
True-to-life Ultra HD video that vividly shows the expressions and movements of
characters, delivering image quality with superb clarity and resolution.
Optical Zoom Lens: 12X optical zoom 80.5°wide-angle lens.
Leading Auto Focus Technology: Fast, accurate and stable auto focusing
technology.
Low Noise and High SNR: Super high SNR image is achieved with low noise
CMOS. Advanced 2D/3D noise reduction technology further reduces the noise
while ensuring high image clarity.
Multiple Video Output Methods:Support HDMI, USB-C3.0, wired LAN; Support
POE power supply
Multiple Video Compression Standards: Support YUY2, MJPEG, H.264, H.265,
NV12 video encoding formats, MJPEG, H.264, H.265 support up to 3840×2160
resolution 30 frames/second compression; support AAC audio compression.
Audio Input Interface: Support AAC audio encoding, support 16000、32000、
44100、48000 sampling rate.
Two Methods of Voice Pickup: Users can use the built-in microphone to have
the effect of picking up sound without connecting other devices, or connect the
sound pickup device through LINE IN
Built in Gravity Sensor: Built in gravity sensor.
Multiple Network Protocol: Support ONVIF、GB/T28181、RTSP、RTMP、VISCA
OVER IP、IP VISCA、RTMPS、SRT protocols; Support RTMP push mode, easy
to be connected to streaming server (Wowza, FMS); Support RTP multicast
mode;
Control Jack: RS232 input
Low Power Sleep Mode: Support low power sleep/awake mode, and the power
consumption is less than 400mW.
Multiple Control Protocol: Support VISCA, PELCO-D, PELCO-P protocols;
Support automatic identification protocols.
Multiple Presets: Up to 255 presets (10 presets via remote control).
AI Human Detection: Built in high speed processor and advanced image
processing and analysis algorithm, and real-time tracking and zone tracking
modes are available.

4K PTZ Camera User Manual
9
Multiple Application: Online-education, Lecture Capture, Webcasting, Video
conferencing, Tele-medicine, Unified Communication, Emergency command and
control systems, etc.
2.3 Technical Specification
Table1-1 Camera Lens Parameter
Parameter
12X
Device, Lens Parameter
Image Sensor
1/2.8 inch high quality CMOS sensor
Effective
Pixel
8.51M, 16:9
Video Signal
HDMI:
4KP30、4KP25、1080P60、1080P50、1080P30、1080P25、720P60、
720P50、1080P59.94、1080P29.97、720P59.94
USB-C3.0
Main Stream:YUY2/NV12:
1920×1080@10/5fps;1280×720@25/20/15/10/5fps;
1024×576/800×600/800×448/640×360/480×270/320×180@30/25/
20/15/10/5fps;
MJPG/H264:
3840x2160/2560×1440/1920×1080/1600×896/1280×720/1024×57
6/960×540/800×600/800×448/720×576/720×480/640×360/640×48
0/480×270/352×288/320×240@30/25/20/15/10/5fps;
Sub Stream:YUY2/NV12:
1280×720/1024×576/800×600/800×448/640×360/640×480/480×2
70/320×180@30/25/20/15/10/5fps;
MJPG/H264:
1920×1080/1600×896/1280×720/1024×576/960×540/800×
600/800×448/720×576/720×480/640×360/640×480/480×
270/352×288/320×240@30/25/20/15/10/5fps;

4K PTZ Camera User Manual
10
Optical Zoom
12X Optical
Viewing
Angle
H:7.6°(N)~ 80.5°(W)
Iris Value
F1.8 – F3.6
Digital Zoom
X15
Minimum
Illumination
0.5Lux(F1.8, AGC ON)
DNR
2D﹠3D
White
Balance
Auto/Manual/One-push/Specified color temperature
Focus Mode
Auto/Manual/One-push
Exposure
Mode
Auto, manual, shutter priority, iris priority, brightness priority
Aperture
F1.8 ~F11, CLOSE
Shutter
Speed
1/25~1/20000
BLC
On/Off
Dynamic
Range
Off, 1 ~8
Video
Adjustment
Brightness, Hue, Saturation, Contrast, Sharpness, W&B Mode,
Gama Curve
SNR
>50dB
Table1-2 Interface Parameter
Back Panel Overview
Interface
HDMI、LAN(POE)、USB-C3.0、A-IN、RS232-IN、
DC12V power supply
Video Connection
HDMI、LAN、USB-C3.0
Video Compression
Formats
LAN:H.264、H.265
USB 3.0:MJPG、H264、YUY2、NV12
Audio Input Jack
Dual channel 3.5mm linear input
Audio Output Jack
HDMI、LAN、USB-C 3.0
Audio Compression
AAC

4K PTZ Camera User Manual
11
Formats
LAN Port
10M/100M/1000M adaptive Ethernet port, support POE
power supply, support audio and video output
Network Protocols
RTSP、RTMP、ONVIF、GB/T28181、VISCA OVER IP、
IP VISCA、RTMPS、SRT,support remote upgrade, remote
restart, remote reset
Control Jack
RS232-IN
Serial Port
Communication
Protocols
VISCA/Pelco-D/Pelco-P;Baud Rate
115200/38400/9600/4800/2400
USB Communication
Protocols
UVC(Video Communication Protocols),UAC(Audio
Communication Protocols)
Power Supply
HEC3800 Power Socket(DC12V)
Power Adapter
Input: AC110V~AC220V ;Output: DC12V/2.5A
Input Voltage
DC12V±10%
Input Currency
<1A
Power Consumption
<12W
Table1-3 PTZ Parameter
PTZ Parameter
Pan Move
-170°~+170°
Tilt Move
-30°~+30°
Pan Speed
0.1°/s~45°/s
Tilt Speed
0.1°/s~30°/s
Preset Speed
Pan: 45°/s, Tilt: 30°/s

4K PTZ Camera User Manual
12
Preset Quantity
Up to 255 preset (10 via remote control)
Table1-4 Other Parameter
Other Parameter
Storage Temperature
-10℃~+70℃
Storage Humidity
20%~95%
Working Temperature
-10℃~+50℃
Working Humidity
20%~80%
Dimension
130.46x118.44x165.34mm
Weight
1.025kg
Environment
Indoors
Optional Accessory
Ceiling / Wall Mount (Extra Cost)
Table1-5 AI Function
AI Function
Real-time tracking
The longest tracking distance can reach 6 to 7 meters,
which can support the speaker to walk at a speed of 3
to 4 mph
Zone tracking
Support setting 4 tracking areas, support horizontal
-170°~+170°, vertical -30°~+30°
Select Tracking Target
Select and frame tracking target through clicks and
dragging with mouse on webpage
2.4 Interface Introduction
2.4.1 Interface Diagram
The external interfaces of this product include: HDMI interface, USB-C3.0 interface
and audio input interface, network interface, RS232 input. The external interface
diagram is shown in Figure 2.5:

4K PTZ Camera User Manual
13
Figure1-5 Interface Diagram
2.4.2 RS-232
1)RS-232 Diagram
RS232 Connection Method
1.GND
2. TXD
3. RXD
Figure1-6 RS-232 Diagram

3. How to Use
3.1 Video Output
3.1.1 Power-on Self-test
After powering on, camera will have initial configuration and receiver light will be
flashing. Camera will do a brief pan-tilt tour and return to the home position, or if
preset 0 is set, the camera will return to the preset 0 position).
3.1.2 Video Output
1)Network output: connect this product and your computer through network cable,
then open the browser, enter the camera IP address (factory default 192.168.5.163)
in the address bar, then to the login page and input a user name and password
(factory default are “admin”) ,Finally enter the preview page, and the image comes
out.
If you forget your user name, password, IP address, you can manually restore the
default by the remote controller key combination * #
2)HDMI Output: Connect the monitor with the corresponding video output interface.
3)USB-C3.0 Output: Connect this product with computer USB3.0 interface, open the
Device Manager to see whether there is an image device and whether the Universal
Serial Bus controllers recognize USB3.0 device. After properly identified, open the
software, choose the image device and then it will output image.
3.2 Remote Control
Remote control using instruction: There are wireless remote control and IR remote
control for options.
Steps for wireless remote control usage are as below:
1)Code Pairing
Press the "Settings" + "*" button for 3 seconds, the LED will turn off to flashing, after
releasing the button, the LED light will keep flashing to start the code pairing, the
receiver is powered on, and the LED will be off when the code pairing is successful; If
you use other remote control, you need to clear the code of this remote control, or
Table of contents
Other Feelworld Security Camera manuals
