Feider Machines FSDT75 User manual

INSTRUCTIONS ORIGINALES
PETROL BLOWER
FSDT75
USER GUIDE
CAUTION : Read the instructions before using the machine !

CONTENTS
1. SAFETY WARNINGS 3
2. TECHNICAL SPECIFICATIONS 7
3. DESCRIPTION 8
4. ASSEMBLY 9
5. ADDING FUEL 10
6. OPERATION 11
7. MAINTENANCE 16
8. DECLARATION OF CONFORMITY 21
9. WARRANTY 22
10.PRODUCT FAILURE 23
11.WARRANTY EXCLUSIONS 24

1. SAFETY WARNINGS
WARNING: For your own safety, please read this manual before attempting to operate your
new unit. Failure to follow instructions can result in serious personal injury. Spend a few
moments to familiarize yourself with your blower before each use. If you give this tool to
another person, also hand over this manual.
Use this tool as described in this manual. Any mishandling and any use contrary to the
instructions will not in any way engage the liability of the manufacturer.
Non-compliance with safety instructions and use can cause a risk of electric shock, fire and
/or injury to persons.
READ YOUR USER MANUAL THOROUGHLY BEFORE OPERATING YOUR UNIT.
This appliance is not intended for use by persons (including children) with reduced physical,
sensory or mental capabilities, or lack of experience and knowledge, unless they have been
given supervision or instruction concerning use of the appliance by a person responsible for
their safety.
Children should be supervised to ensure that they do not play with the appliance.
Never allow children, persons with reduced physical, sensory or mental capabilities or lack
of experience and knowledge or people unfamiliar with these instructions to use the
machine, local regulations may restrict the age of the operator.
Never use the machine when people, especially children, or pets are nearby.
Remember that the operator or user is responsible for accidents or hazards occurring to
persons or their belongings.
Do not disassemble the tool yourself. Disassembly, repair or verification must be made
exclusively by qualified personnel.
WEAR CLOSE FITTING, TOUGH WORK CLOTHING that will provide protection, such as
long slacks or trousers, safety work shoes, heavy duty work gloves, hard hat, a safety face
shield, or safety glasses for eye protection. The tool is extremely noisy and requires the use
of ear protection, such as a good grade of ear plugs or other sound barriers.
Always carry the machine by its handle; never use any other part of the machine.
REFUEL IN A SAFE PLACE. Open fuel cap slowly to release any pressure which may have
formed in fuel tank. Always wipe unit of fuel or oil spills before starting. To prevent a fire
hazard, move at least 10 feet (3meters) from fueling area before starting.
TURN UNIT OFF before setting it down and also before installing or removing attachments.
KEEP ALL SCREWS AND FASTENERS TIGHT and the unit in good operating condition.
Never operate this equipment if it is improperly adjusted or not completely and securely
assembled.
KEEP HANDLES DRY, clean and free of fuel mixture.
STORE EQUIPMENT AWAY FROM POSSIBLE IGNITION SOURCES, such as gas-
powered water heaters, clothes dryers, or oil-fired furnaces, portable heaters, etc.
ALWAYS KEEP the engine free of debris build-up.
OPERATION OF EQUIPMENT should always be restricted to mature and properly
instructed individuals.
ALL PERSONS WITH RESPIRATORY PROBLEMS and persons operating blower in very
dusty environments, should wear a dust particle mask at all times. Paper dust masks are
available at most paint and hardware stores.
Operate the machine only at reasonable hours - not early in the morning or late at night
when people might be disturbed. Comply with times listed in local ordinances.
Avoid using the machine in bad weather, especially when there is a risk of thunderstorms
and lightning.
3

In case of accident, immediately stop using the machine. Turn the machine off and check
the problem. Do not use the machine while the machine is damaged.
If the machine should start making any unusual noise or vibration, immediately shut off the
power source and allow the machine to stop. Take the following steps before restarting and
operating the machine:
a) Inspect for damage;
b) Replace or repair any damaged parts;
c) Check for and tighten any loose parts.
If the machine becomes clogged, shut-off the power source before cleaning debris.
Never operate the machine with defective guards or shields, or without safety devices in
place.
Keep the power source clean of debris and other accumulations to prevent damage to the
power source or possible fire.
Do not carry this machine while it is in operation. Always switch off the tool and always
transport it by its handle and in order to avoid accidents and a fuel leak.
Stop the machine and make sure that all moving parts have come to a complete stop
a) Whenever you leave the machine;
b) Before clearing blockages or unclogging chute;
c) Before checking, cleaning or working on the machine.
Do not tilt the machine while the power source is running.
Operate the machine at the lowest possible engine speed to do the job. Like this, vibration
and noise levels as well as the tool’s wear can be kept to a minimum.
Use rakes and brooms to loosen debris before blowing.
In dusty conditions, slightly dampen surfaces.
Use the full blower nozzle extension so the air stream can work close to the ground.
Watch out for children, pets, open windows etc. and blow debris safety away.
WARNING: DO NOT USE ANY OTHER FUEL than that recommended in your manual.
Always follow instructions in the Fuel and Lubrication section of this manual. Never use
gasoline unless it is properly mixed with 2-cycle engine lubricant. Permanent damage to
engine will result, voiding manufacturer’s warranty.
DO NOT SMOKE while refueling or operating equipment.
DO NOT OPERATE UNIT WITHOUT A MUFFLER and properly installed muffler shield.
DO NOT TOUCH or let your hands or body come in contact with a hot muffler or spark plug
wire.
DUE TO THE DANGER of exhaust fumes, never operate blower in a confined or poorly
ventilated area.
NEVER POINT BLOWER in the direction of people, animals, buildings, automobiles, or
open windows, etc.
DO NOT operate unit without inlet cover installed to prevent contact with impeller.
DO NOT set a hot engine down where flammable material is present.
DO NOT OPERATE UNIT FOR PROLONGED PERIODS. Rest periodically to prevent
damage from vibration, damage to ears or damage to the appliance.
Operate the machine in a recommended position and only on a firm, level surface.
Do not operate the machine on a paved or gravel surface where ejected material could
cause injury.
WARNING: DO NOT ADD, REMOVE OR ALTER ANY COMPONENTS OF THIS PRODUCT.
Doing so could cause personal injury and/or damage the unit, voiding the
manufacturer’s warranty.
DO NOT OPERATE UNIT WHILE TIRED, SICK OR UNDER THE INFLUENCE OF
ALCOHOL OR DRUGS.
DO NOT operate your unit near or around flammable liquids or gases whether in or out of
doors. An explosion and/or fire may result.
DO NOT WEAR loose clothing, scarfs, neck chains, unconfined long hair, and the like.
4

Doing so could cause injury associated with objects being drawn into the rotating parts.
DO NOT refuel a running engine or an engine that is hot.
Before using, always visually inspect to see that fasteners are secure, the housing is
undamaged and that guards and screens are in place. Replace worn or damaged
components in sets to preserve balance. Replace damaged or unreadable labels.
Before starting the machine, make certain that the tube is empty.
Keep your face and body away from the nozzle.
Do not allow hands or any other part of the body or clothing inside the discharge chute or
near any moving part.
Keep proper balance and footing at all times. Do not overreach. Never stand at a higher
level than the base of the machine when blowing material with it.
Always stand clear of the discharge zone when operating this machine.
To reduce the risk of hearing loss associated with sound level, hearing protection is required.
To reduce the risk of injury associated with contacting rotating parts, stop the engine before
installing or removing attachments. Do not operate without guard in place. Always disconnect
the spark plug before performing maintenance or accessing any movable parts.
Do not point the blower nozzle in the direction of people or pets.
Never run the unit without the proper equipment attached. When used as a blower, always
install the blower tubes.
operate the machine only at reasonable hours –not early in the morning or late at night when
people might be disturbed;
Do not to operate the machine near open windows.
use rakes and brooms to loosen debris before blowing
slightly dampen surfaces in dusty conditions or use mister attachment;
Limit the time of use of the tool. Take a time of rest between 2 operations. Do not work earlier
or later in the night. Do be exposed to noise and vibration for a prolonged time. Noise can
bring damage to the ears.
This machine is extremely noisy. Always wear a hearing protection when use the tool.
In the event of accident or breakdown, stop to use the machine. Switch off the tool and wait
until it completely stops. Check the problem. In case of blockage, clear the blockage carefully.
In case of breakdown, bring the tool to an after sales service for inspection and reparation.
Only use the tool when it is safely unblocked.
operate the machine only at reasonable hours –not early in the morning or late at night when
people might be disturbed;
WARNING –there is danger from rotating parts; do not enter in contact with them.
Maintenance and storage
When the machine is stopped for servicing, inspection, or storage, or to change an accessory,
shut off the power source and make sure that all moving parts have come to a complete stop.
Allow the machine to cool before making any inspections, adjustments, etc. Maintain the machine
with care and keep it clean.
Store the machine in a dry place out of the reach of children.
Always allow the machine to cool before storing.
Replace worn or damaged parts for safety. Use only genuine replacement parts and
accessories.
Never attempt to override the interlocked feature of the guard.
Residuals risks
Even if you use this product in compliance with all safety requirements, potential risks of injury and
damage remain. The following hazards may arise from the structure and design of this product.
Always be vigilant when using this product, so you can recognize and manage the risks early.
Rapid intervention can prevent serious injury and property damage. Turn off the tool if there are
any malfunctions. Have it checked by a qualified professional and have repairs carried out, if
5
necessary, before using it again.
There are harmful health consequences resulting from the emission of vibrations if the
product is used for long periods of time or not properly managed and properly maintained.
There is risk of injury and property damage due to attachments or broken the sudden
impact of hidden objects.
Risk of injury to persons and property caused by flying objects.
Prolonged use of this product exposes the operator to vibration and can produce so-called
"white finger" disease. To reduce the risk, wear gloves and keep your hands warm.
If any of the symptoms of "white finger syndrome" occur, seek immediate medical attention.
Symptoms of the "white finger" include numbness, loss of sensitivity, tingling, tingling, and
pain, loss of strength, color changes or skin condition. These symptoms usually appear on
the fingers, hands or wrists. Risk increases at low temperatures.
Inhalation of particles of material blown.
Unattended projections.
Contact with foreign objects.
Contact with the tool in operation.
Hearing loss in the absence of correct hearing protection.
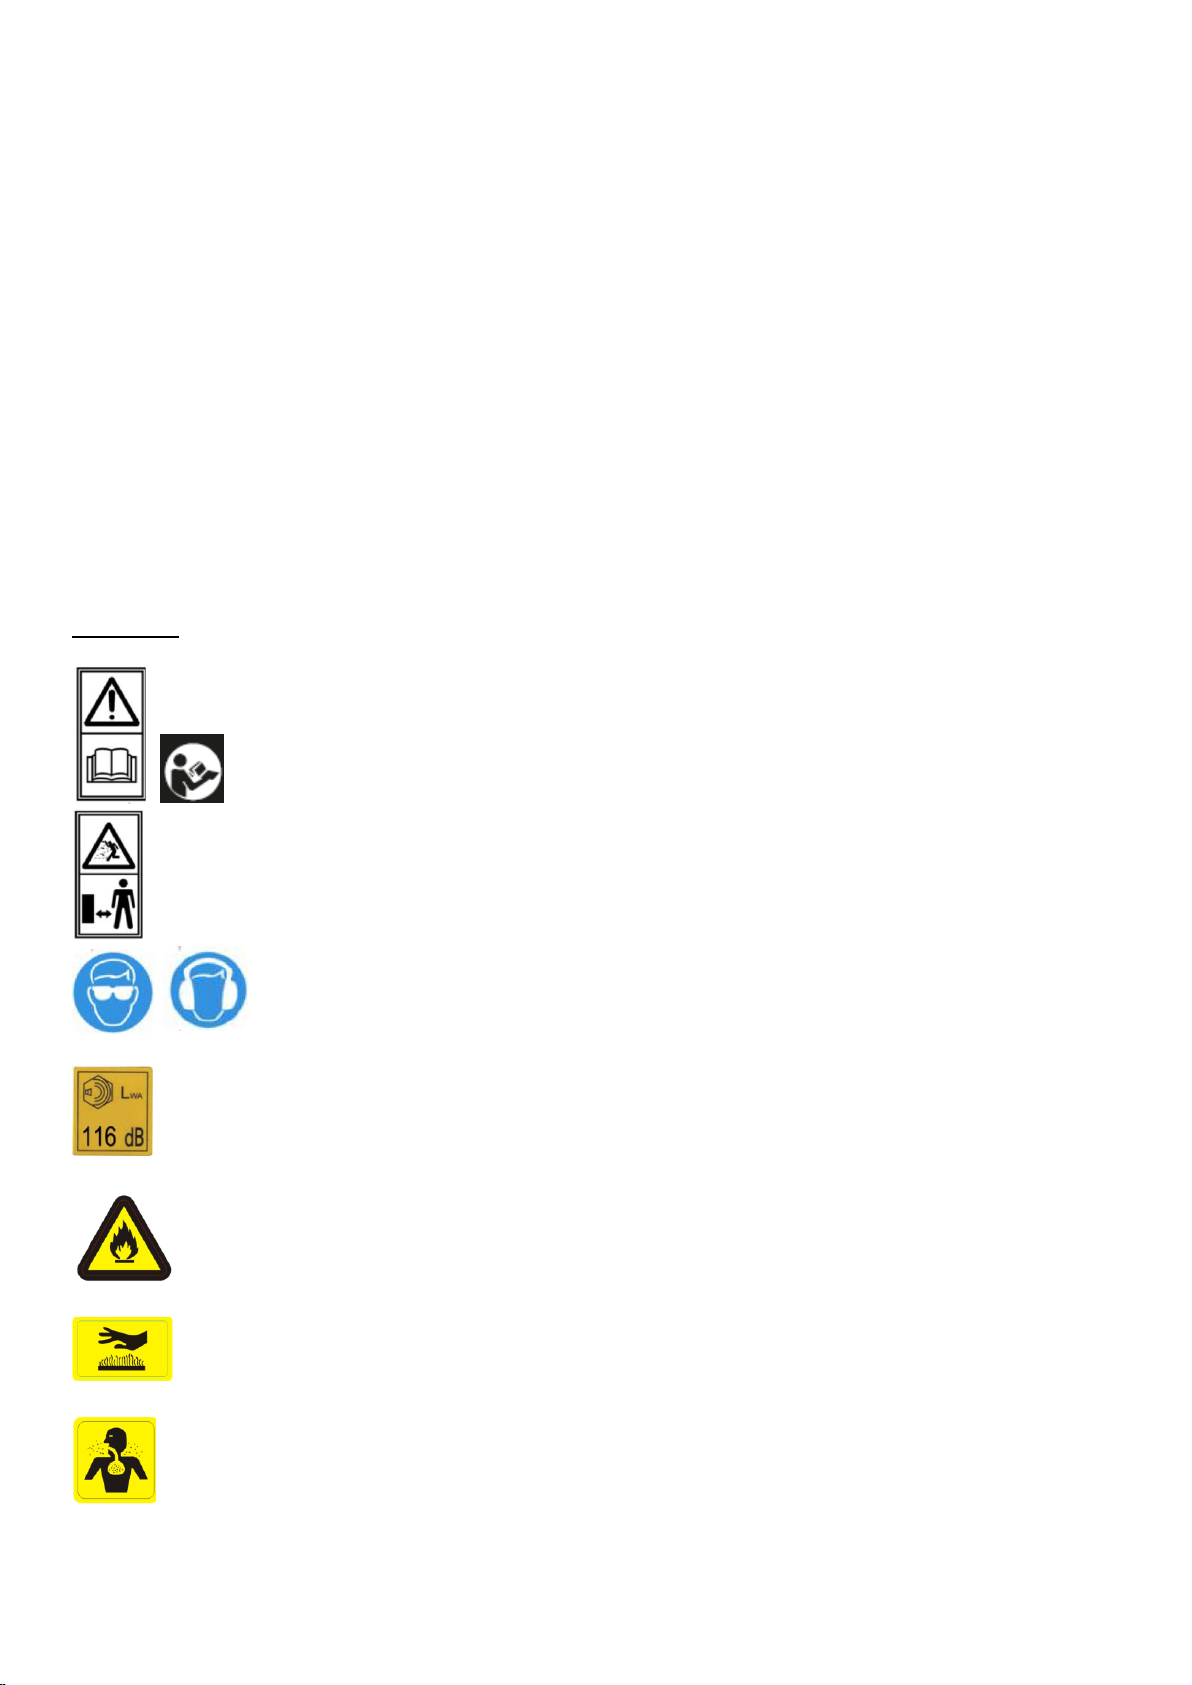
Symbols
Read instruction handbook.
Risk of projection, keep bystanders away.
Wear ocular protection and hearing protection .
Guarantee sound power level.
Risk of fire .
Hot surface.
Risk of inhalation of exhausted gas.
6

Intended use
This blower is meant to be used for blowing leaves, dust or garden debris into a desired
direction. It must not to be used for blowing water, chemical products, flammable material,
metal or wood and other dangerous objects.
This product is intended for private domestic use only. It must be used outdoors.
This product is not intended to be used in a closed room and places where exhausted gas
and flames can be present.
The use of this product in case of rain or humid environments is prohibited.
Any other use might lead to damage of the appliance, property or personal injury.
2. TECHNICAL SPECIFICATIONS
Model:
FSDT75
Input power
2,2 kW
Maximum engine speed
7000/min
Idling speed
3000/min
Engine displacement
75.6 cm³
Engine type
Air cooled, 4-stroke, single cylinder
Fuel tank capacity
1900 cm³
Engine oil
SAE 10W-30 oil
(automobile 4-stroke engine oil)
Engine oil volume
220 cm³
Carburetor
Diaphragm type
Spark plug
CMR7H
Electrode gap
0.028″ - 0.031″ (0.7 mm - 0.8 mm)
Measured sound power level LPA
110,3 dB(A) K= 3 dB(A)
Measured sound pressure level LWA
99,3 dB(A) K= 3 dB(A)
Guarantee sound power level
116 dB(A)
Vibration
4,681 m/s²K= 1,5 m/s²
7

3. DESCRIPTION
1
Stop switch
9
Starter rope
17
Oil cap
25
Hose band
2
Control handle
10
Fuel tank
18
Oil drain bolt
26
Flat nozzle tube
3
Throttle trigger
11
Fuel tank cap
19
Elbow
4
Stop control lever
12
Muffler
20
Flexible pipe
5
Primer pump
13
Shoulder strap
21
Swivel pipe
6
Air cleaner cover
14
Air inlet screen
22
Long pipe 1
7
Knob bolt(of air
cleaner cover)
15
Spark plug cover
23
Long pipe 2
8
Throttle lever
16
Spark plug
24
Hose band
8

4. ASSEMBLY
CAUTION: Before performing any work on the blower, always stop the engine and
pull the spark plug cap off the spark plug.
CAUTION: Start the blower only after having assembled it completely.
CAUTION: Always wear protective gloves.
Assemblingblowerpipes
1. Insert the swivel pipe into the flexible pipe and tighten them with the hose band.
►(1). Flexible pipe (2). Hose band (3). Swivel pipe
2. Install the control handle / handle assembly (4)onto the swivel pipe and tighten them with
the clamp screw (5).
►( 4). Control handle / handle assembly (5). Clamp screw
3. Attach the flexible pipe to the elbow
►(6). Elbow (7). Hose band
9
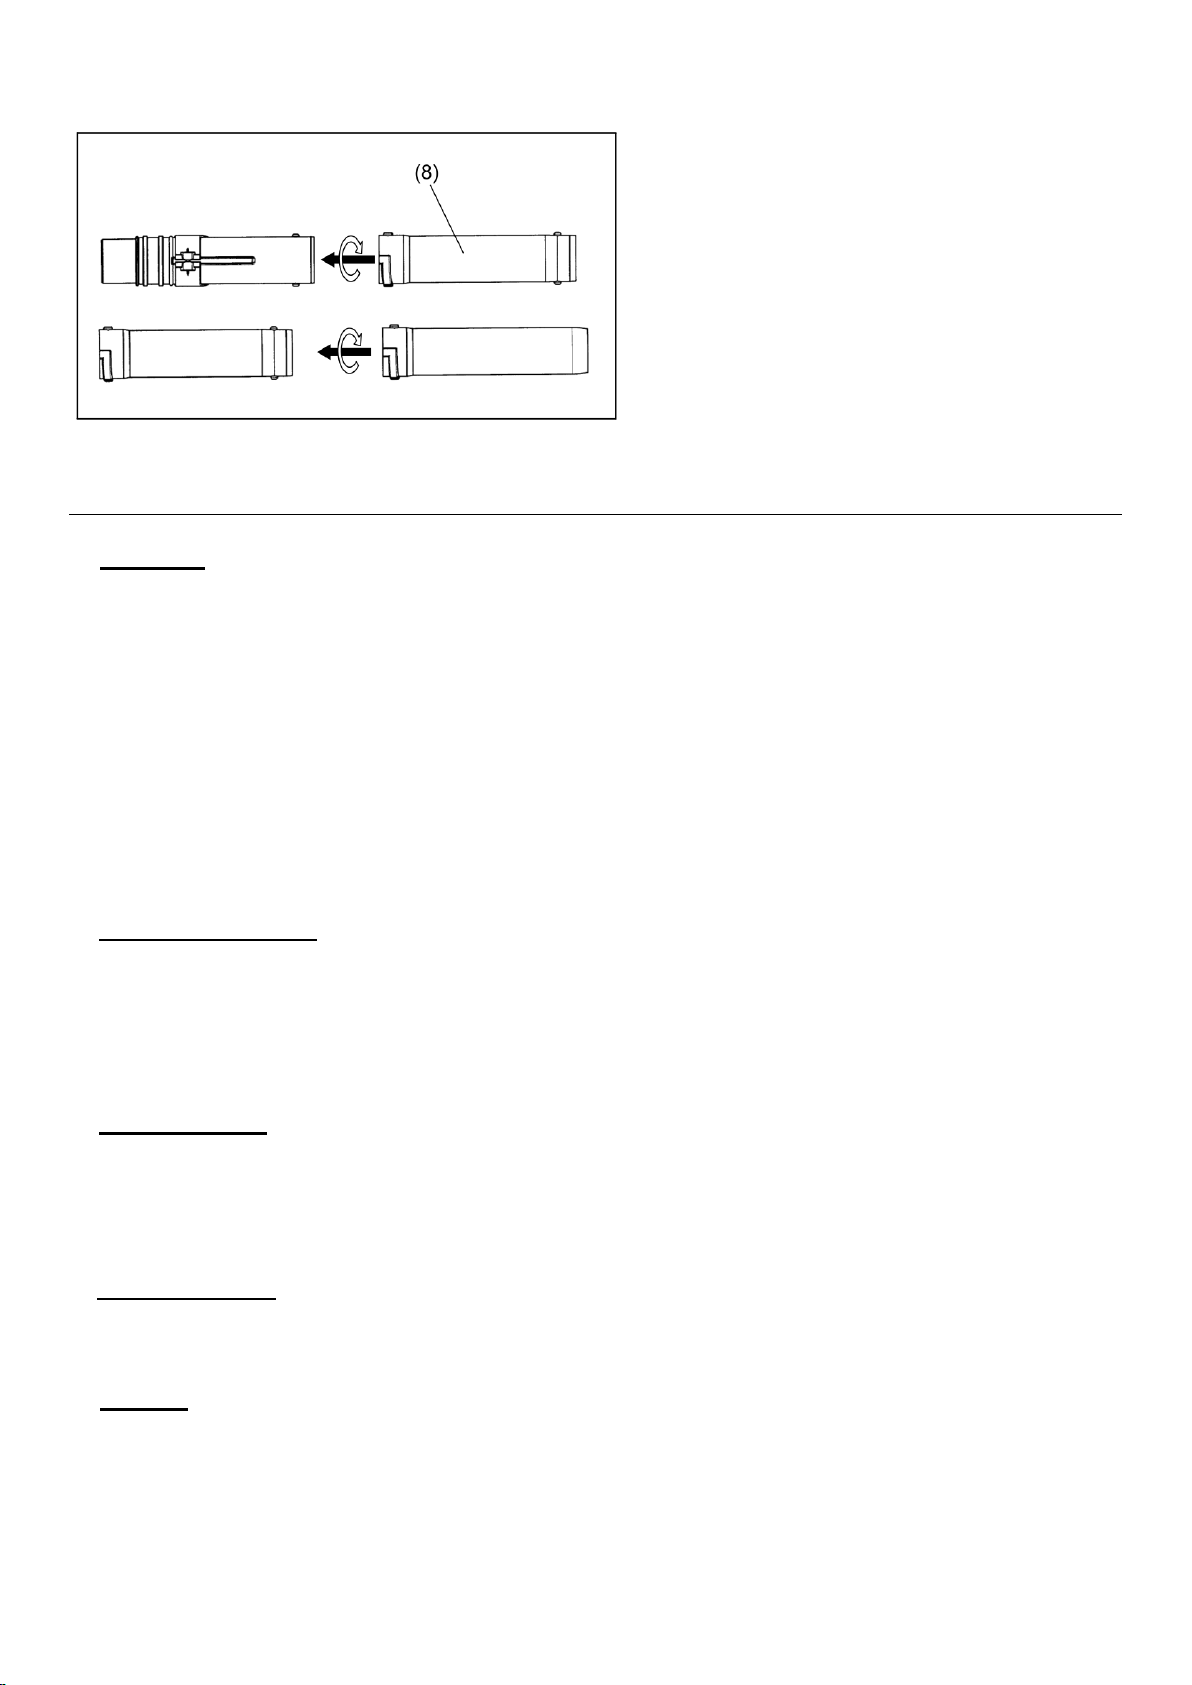
4. Attach long pipe 1 to the swivel pipe,Turn it clockwise to lock it in place. Then attach the
second long pipe,Turn it clockwise to lock it in place.
5. ADDING FUEL AND OIL
1) Fuel tank
WARNING: When filling the tank:
- The tool should always be stopped and cooled.
- Never smoke during refueling. It must not have flames or sparks near the fuel
- Do not attempt to refuel when the engine is hot.
- If fuel has been spilled, immediately stop refueling and do not start the engine.
Clean up the spill and fill the machine in another location.
- Do not refuel in a closed and unventilated area.
Always use unleaded with the tool, Do not use fuel containing ethanol or methanol.
Unleaded gasoline is a quality gasoline type,This will help to avoid damaging the fuel lines of the
engine and other engine parts.
a. Filling the fuel tank
- Unscrew the fuel tank cap and remove it.
- Fill the tank slowly with the mixture. Do not exceed the maximum capacity(fill to 80% of its
capacity preferably).
- Refit the cap on the fuel tank and tighten it.
- Wipe any spillage around the unit if necessary.
b. Storage of fuel
- The fuel must be kept in a clean and safe container and always closed.
- If you are not using the product for a long time, remove the fuel and add it to a container.
- Do not leave the fuel for a long time in the product. The fuel may clog the carburetor and the
engine will not operate properly.
c. Disposal of fuel
When the fuel is no longer used or worn, please dispose of it in an authorized location.
Check local laws regarding disposal of fuels.
2) Oil tank
- Unscrew the oil tank
- Fill the tank, Do not overfill.
- Refit the cap on the tank,Wipe any spillage if necessary.
10
6. OPERATION
Starting theengine
WARNING: Never attempt engine start in a place where the fuel has been supplied. It may
cause ignition or fire. When starting the engine, keep a distance of at least 3 meters from fuelling
place.
WARNING: Exhaust gas from the engine is toxic. Do not operate the engine in a poorly-
ventilated place, such as in a tunnel, building, etc. Operating the engine in the poorly-
ventilated place may cause poisoning by exhaust gas.
WARNING: In case of detection of any abnormality in sound, odor, vibration after
starting, stop the engine immediately and carry out inspection. If the engine is operated
without attending such abnormality, an accident may occur.
WARNING: Do not touch hot engine cover. Otherwise skin burn may result.
WARNING: Make sure that there is no fuel leakage before starting the engine.
WARNING: Make sure that the engine stops when the stop switch is set to “O” position.
When the engine is cold or after refueling (cold start)
1. Put the blower on a flat surface.
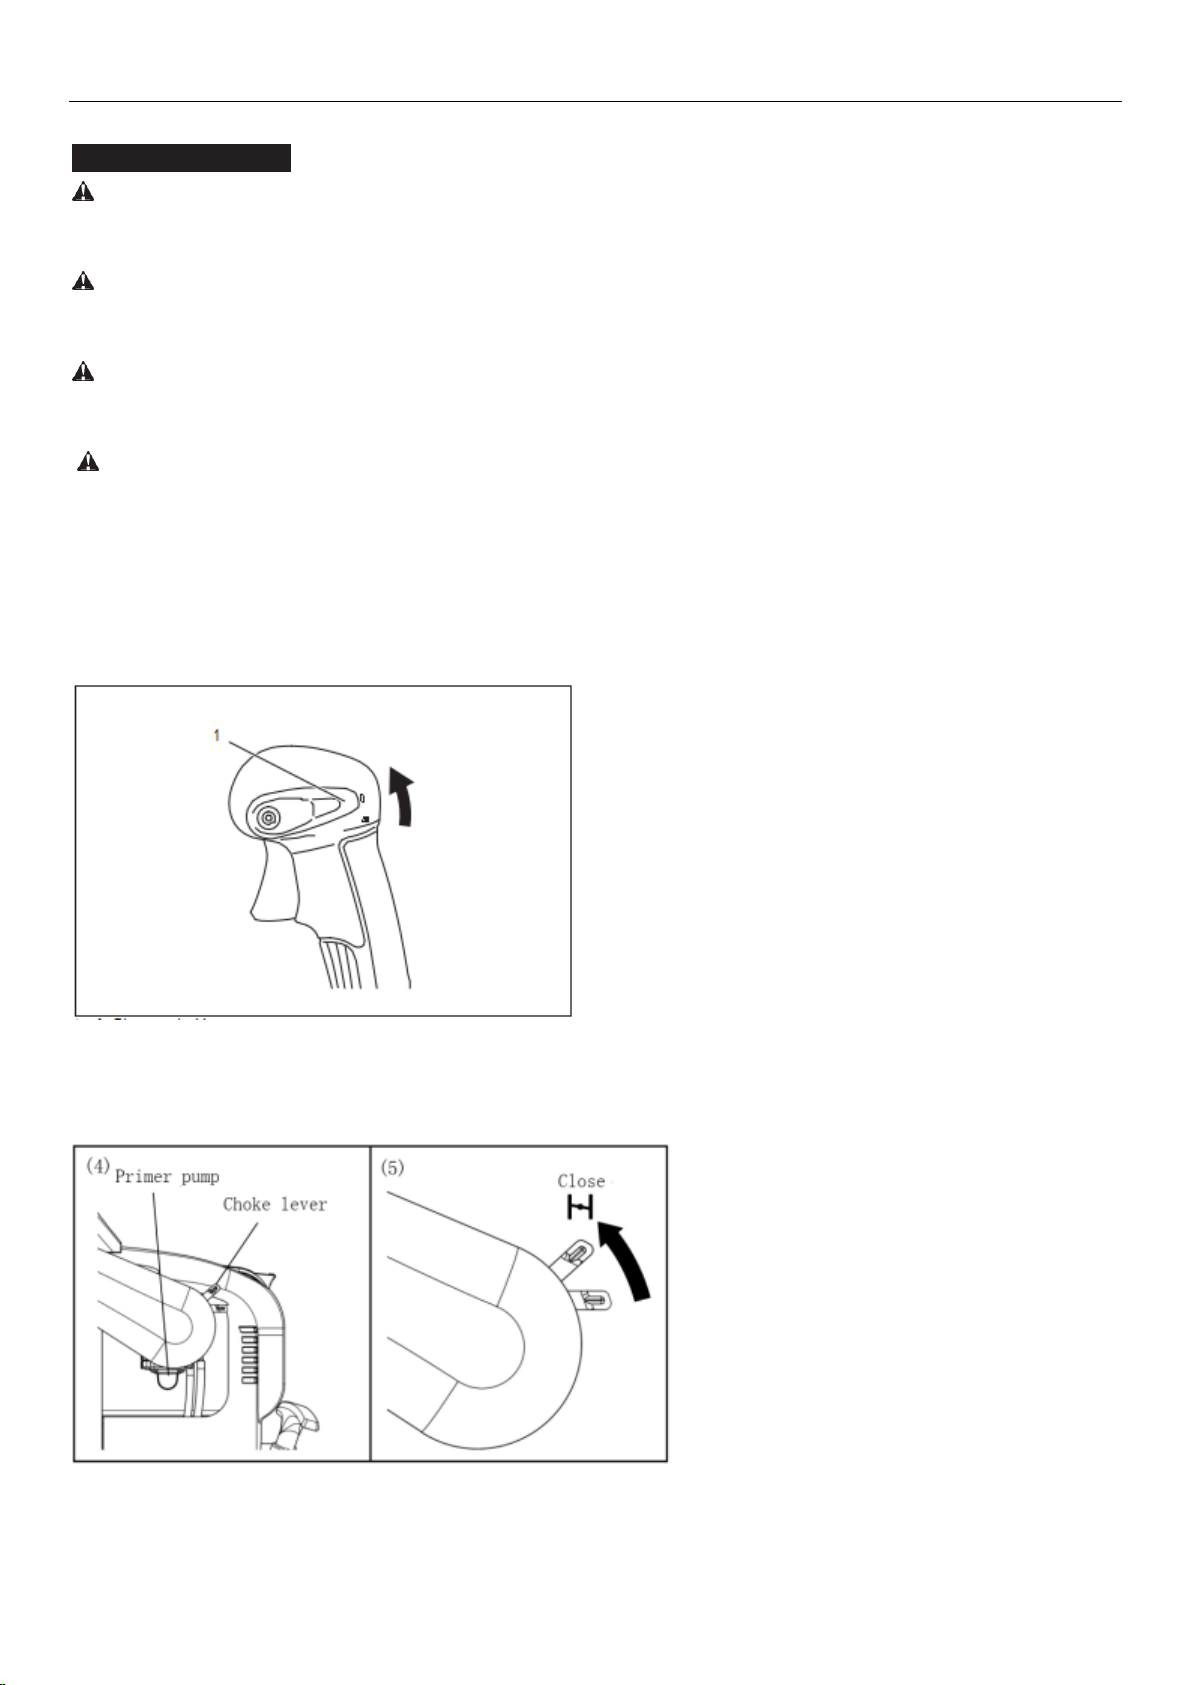
2. Set the stop control lever to “I” position.
►1. Stop control lever
3. Continue to push the primer pump until fuel comes into the primer pump.
►(4). Primer pump (5). Choke lever
NOTE: In general, fuel comes into the carburetor by 7 to 10 pushes.
NOTE: Even the primer pump is pushed excessively, an excess of gasoline returns to the fuel
tank.
11
4. Lift the choke lever to the closed position.
5. Pull out slowly the starter handle till feeling compression. Then pull it strongly.
NOTICE: Never pull the rope to the full extension.
NOTICE: Return the starter knob gently into the housing. Otherwise released starter knob
may hit your body or it may not rewind appropriately.
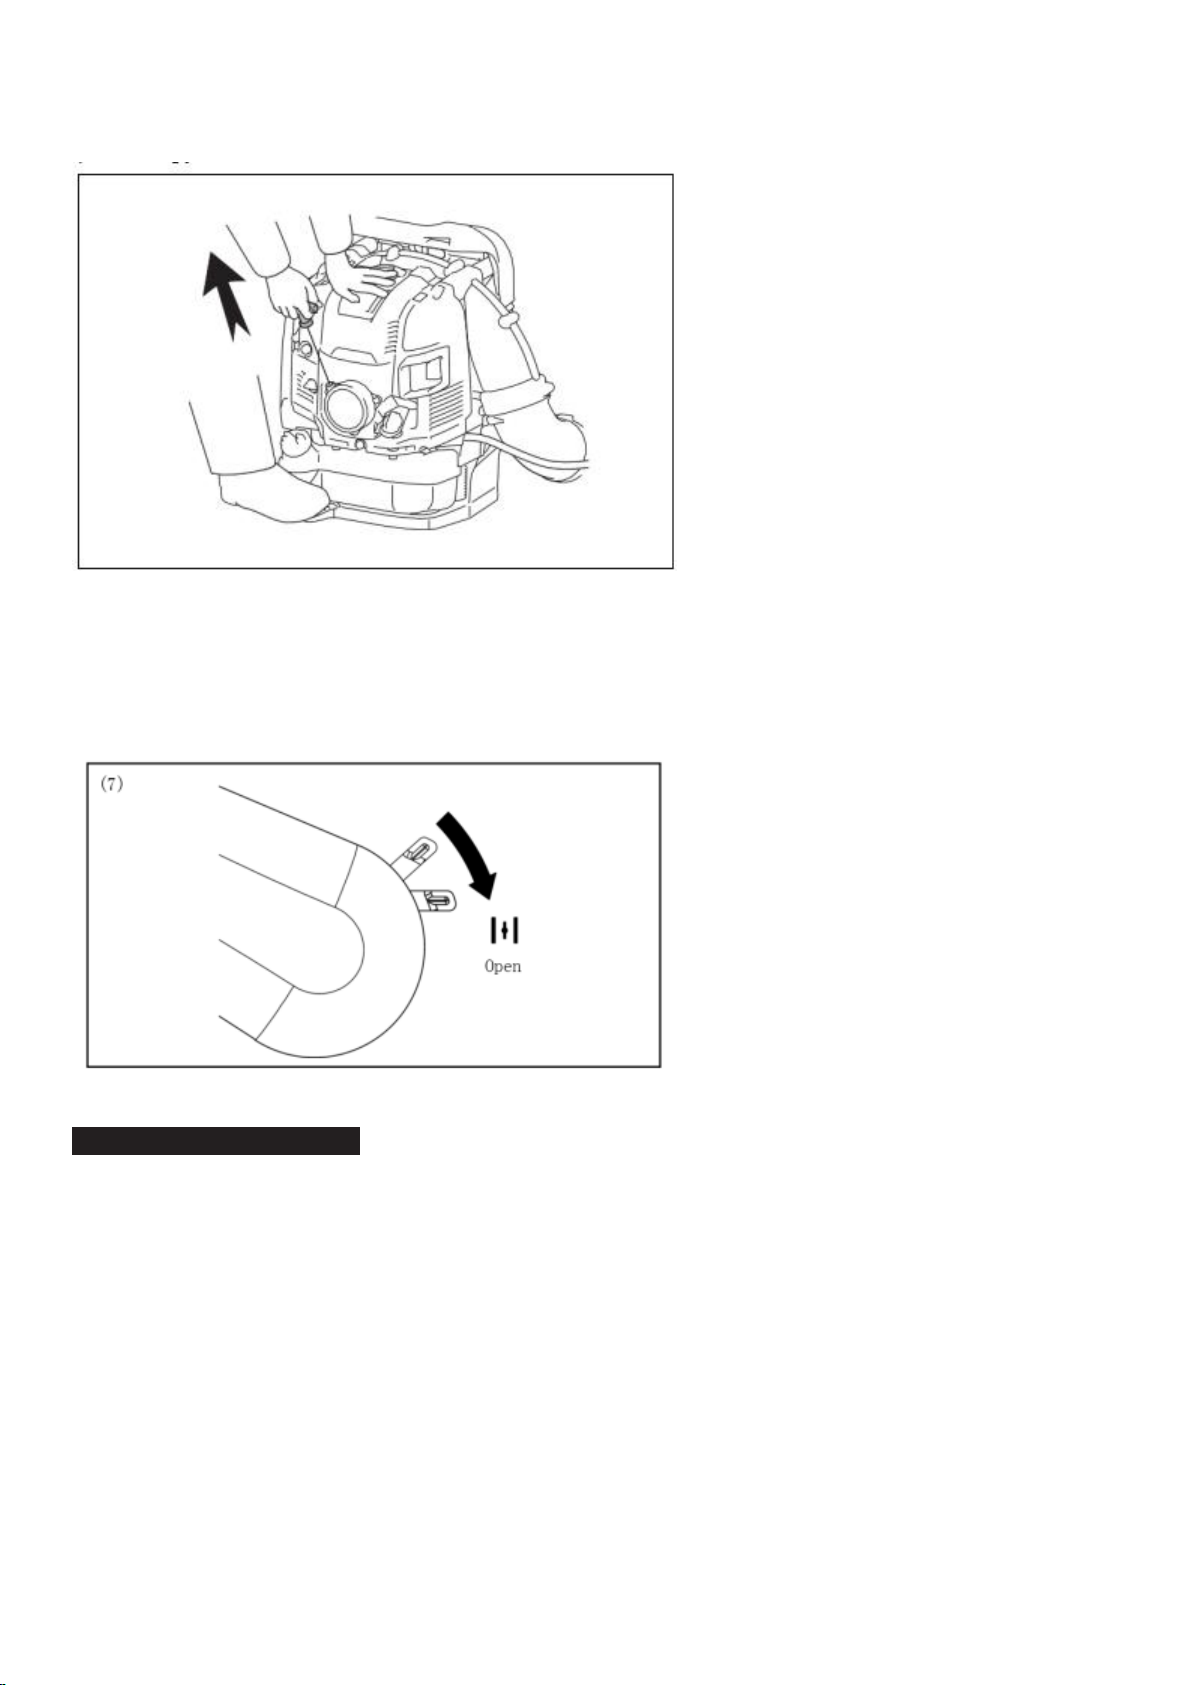
6. When the engine starts, down the choke lever to open position.
►1. Throttle trigger 2. Stop control lever
Transporting theblower
CAUTION: When transporting the blower, be sure to stop the engine.
NOTE: Open the choke lever fully before pulling the throttle.
NOTE: In cold temperature or when the engine is not warm enough, never open the choke lever
suddenly. Otherwise, the engine may stop.
7. Warm-up for 2 to 3 minutes with engine speed idle or low.
8. Warm-up is complete when quick engine acceleration from low rpm to full throttle is felt.
NOTE: If the operator keeps pulling the starter handle several times with the choke lever
left in the “CLOSE” position, the engine may be difficult to start because of flooding of the
fuel. In case of flooding of the fuel, remove the spark plug and pull the handle several times
rapidly to discharge any excess fuel. Dry the spark plug electrode.
12

When the engine is warm (warm start)
1. Put the blower on a flat surface.
2. Push the primer pump several times.
3. Make sure that the choke lever isopen.
4. Stump the pedal with your right foot, and hold the top of the unit cover with left hand to
prevent the engine frommoving.
5. Pull out slowly the starter handle till feeling compression. Then pull it strongly.
6. When the engine is difficult to start, open the throttle by about 1/3.
Stoppingtheengine
For tube throttle model: Release the throttle trigger and then set the stop control lever to “O”
position.
►1. Throttle trigger 2. Stop control lever
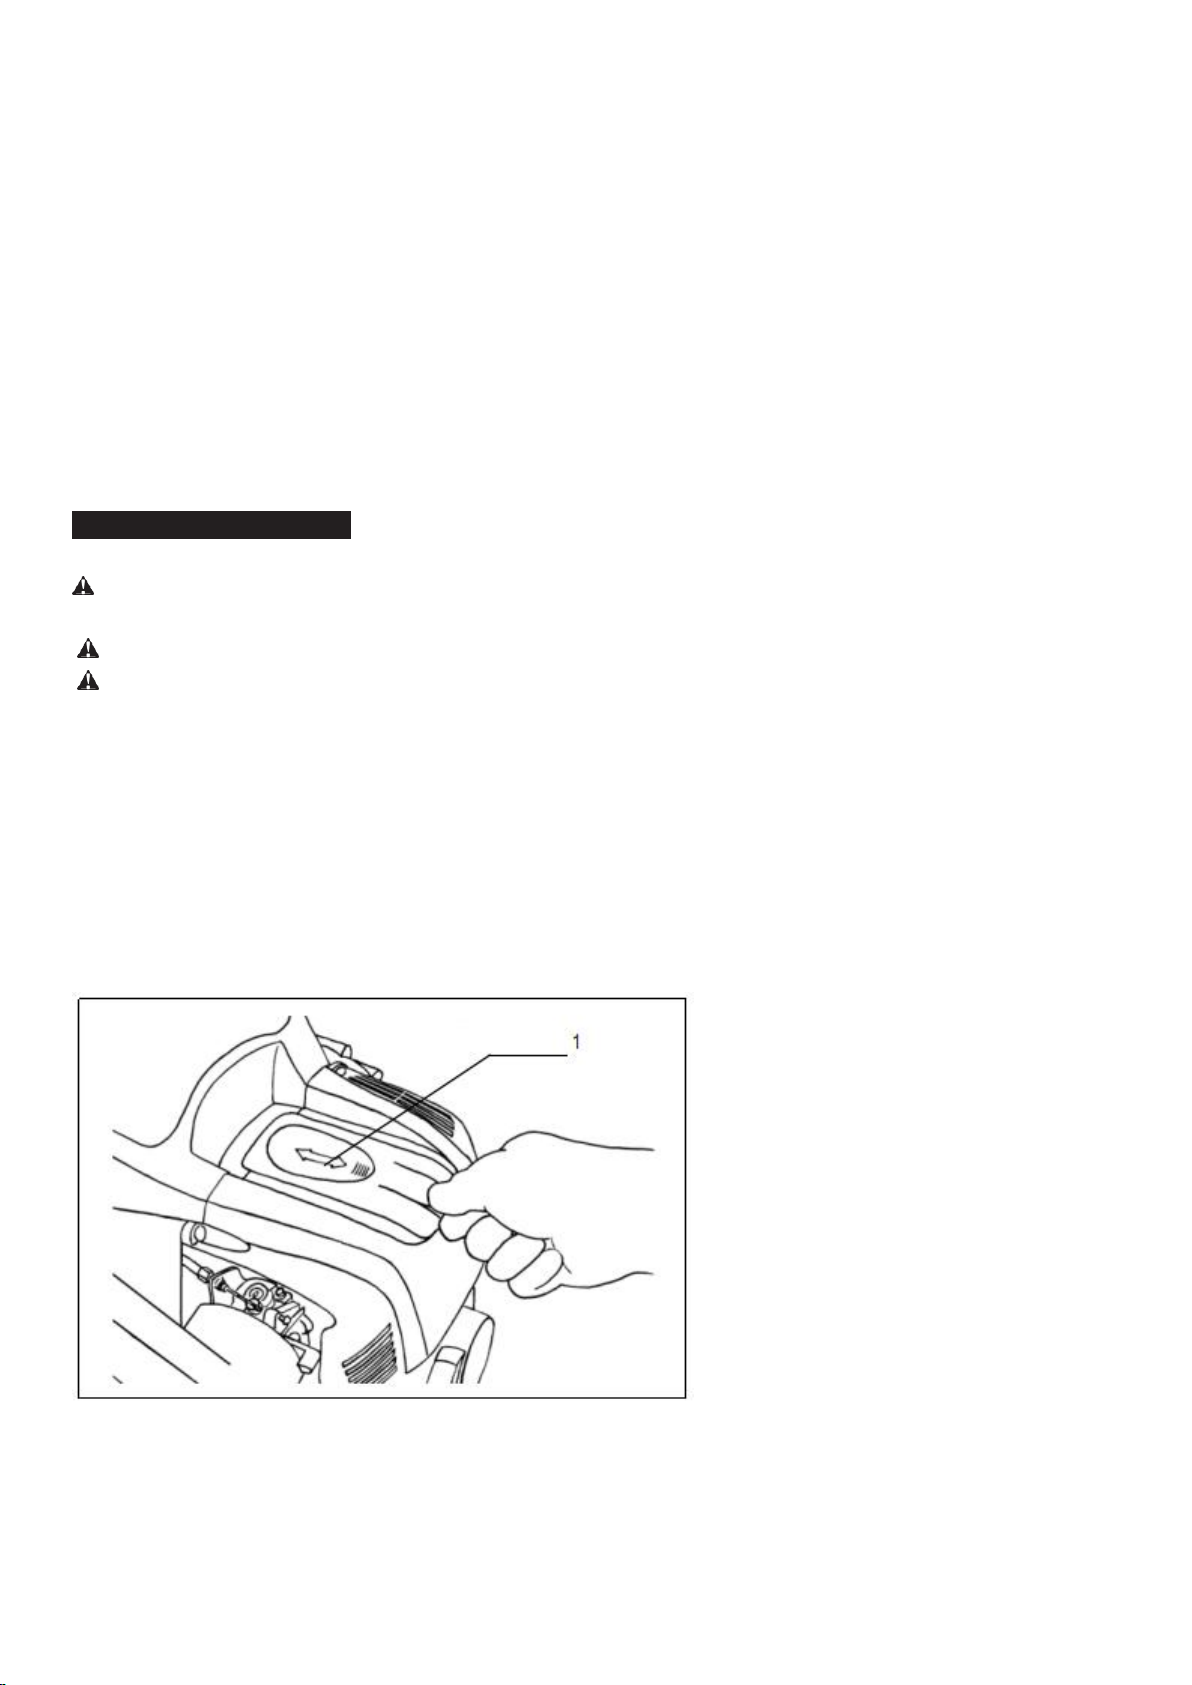
Adjusting shoulder strap
1. Adjust the shoulder strap to a length that is comfortable to work while carrying the blower.
To fasten the strap, pull the end of the strap downwards.
►1. Shoulder strap
To loosen the strap, pull up the end of the fastener.
13

2. Pull the stabilizer strap until there are no space left between your back and the blower housing.
To fasten the strap, pull the end of the strap downwards.
►1. Stabilizer strap
To loosen the strap, pull up the end of the fastener.
►1. Fastener
Hip belt
Optional accessory
The hip belt enables the operator to carry the tool more stably
14

Adjustingthecontrolleverposition
For tube throttle model: Move the control handle along the swivel pipe to the most comfortable
position. Then tighten the control handle with the screw
►1. Screw
Blower Operation
1. While operating the blower, adjust the throttle trigger so that the wind force is appropriate for
the work location and conditions.
2. Adjusting engine speed.
For tube throttle model: Engine speed increases by pulling the throttle trigger. To decrease
the engine speed, loosen the throttle trigger.
The cruise control function allows the operator to maintain a constant engine speed without
pulling the trigger lever. To increase the engine speed, turn the stop control lever to high speed.
To decrease the engine speed, turn the stop control lever to low speed.
15

►1. Throttle trigger 2. Stop control lever
Transporting theblower
CAUTION: When transporting the blower, be sure to stop the engine.
NOTICE: Do not sit or stand on the blower nor put a heavy object on it. It may damage the
machine.
NOTICE: Maintain the blower in an upright position whenever transporting or storing.
Transporting or storing in a position that is not upright may cause oil to spill inside the blower
engine. This may result in oil leaks and white smoke from burning oil, and the air cleaner may
become dirty with oil.
NOTICE: Do not drag the blower when transporting. Otherwise the blower housing may be
damaged.
7. MAINTENANCE
CAUTION: Before inspection and maintenance, stop the engine and allow it to cool down.
Remove the spark plug and plug cap. Otherwise the operator may suffer burn or serious injury
due to an accidental start-up.
CAUTION: After inspection and maintenance, make sure that all parts are assembled.
Replacingengineoil
CAUTION: The engine main unit and engine oil still remain hot just after the engine is
stopped. When replacing engine oil, make sure that the engine main unit and engine oil are
suffi- ciently cooled down. Otherwise, there may remain a risk of scald. Allow sufficient time
after stopping engine for the engine oil to return to the oil tank to ensure accurate reading of the
oil level indicator.
CAUTION: If the oil filled above the limit, it may become dirty or may catch fire with
whitesmoke.
NOTICE: Never discard replaced engine oil in garbage, ground or sewage. Disposal of oil is
regulated by law. In disposal, always follow the relevant laws and regulations. For any points
remaining unknown, contact Authorized Service Agent.
NOTICE: Oil will deteriorate even when it is kept unused. Perform inspection and
replacement at regular intervals (replace with new oil every 6 months).
Deteriorated engine oil shortens the life of the sliding and rotating parts to a great extent. Be
sure to check the period and quantity of replacement.
Interval of replacement
After first 20 operating hours, followed by every 50 operating hours
16

Recommended oil
•API grade SF class or higher, SAE 10W-30 oil(automobile 4-stroke engine oil)
Oil replacement procedure
Change the oil as follows:
1. Drainage hole 2. Oil drain bolt 3. Gasket (Iron washer) 4. Oil cap 5. Oil cap gasket 6. Oil port
1. Put the blower down on a levelsurface.
2. Put a waste oil container under the drainage hole to catch the oil as it drains out. The
container should have a capacity of at least 220 ml (7.4 fl oz) to catch all of theoil.
3. Loosen the oil drain bolt to let the oil drain out. Be careful not to allow oil to get on the fuel
tank or otherparts.
NOTICE: Be careful not to lose the gasket. Put the oil drain bolt in a location where it does
not get dirt.
4. Remove the oil cap. (Removing the oil cap allows the oil to drain easily.)
NOTICE: Be sure to set the oil cap down in a location where it does not get dirt.
5. As the level of the oil being drained decreases, tilt the blower over on to the side with the
drain so that the oil will completely drain out.
6. After the oil has completely drained out, tighten the oil drain bolt securely. If the bolt is not
tightly fastened, it may result in oil leakage.
NOTICE: Do not forget to put the gasket back on when reattaching the drain plug
7. Pour approximately 220 ml (7.4 fl oz) oil into the oil refill port up to the upper limit of the oil
gauge.
8. After filling with oil, tighten the oil cap securely to prevent oil leaks.
NOTICE: Do not forget to put the oil cap gasket back on when reattaching the oil cap.
Cleaning of air cleaner
WARNING: INFLAMMABLES STRICTLY PROHIBITED
Interval ofCleaning and Inspection Daily (every 10 operating hours)
Cleaning procedure
17
►1. Knob bolts 2. Air cleaner cover 3. Filter 4. Breather
1. Loosen the knob bolts.
2. Remove the air cleaner cover.
3. Remove the filter, clean off any dirt from the filter with a cloth or air blow. Replace the filter
with a new one if it is dam- aged or very dirty.
NOTE: The filter is a dry type and should not get wet. Never wash with water.
3. Wipe off any oil around the breather with a rag or cloth.
4. Install the element in the air cleaner case.
5. Attach the air cleaner cover and tighten the knob bolts.
NOTICE: Clean the filter several times a day, if excessive dust adheres to it due to dusty
environment.
NOTICE: If operation continues with the filter remaining not cleared of oil, oil in the air
cleaner may fall outside, resulting in oil contamination.
Checking the spark plug
CAUTION: Do not touch the spark plug while the engine is running. Otherwise electrical
shock may result.
CAUTION: Set the stop control lever/stop switch to OFF “O” position.
CAUTION: Check the spark plug cord regularly. If it is dam- aged or torn, replace it.
Otherwise electrical shock mayresult.
NOTICE: When removing the spark plug, clean the spark plug and cylinder head first,
so that no dirt, sand, etc will enter the cylinder.
NOTICE: Remove the spark plug after the engine has cooled down in order to avoid
damaging the threaded hole in the cylinder.
NOTICE: Install the spark plug properly into the threaded hole. If installed at an angle,
the threaded hole in the cylinder will get damaged.
1. To open the plug cover, pull it.
►1. Plug cover
2. Use the box wrench provided as an standard accessory to remove and install the spark
plug.
18
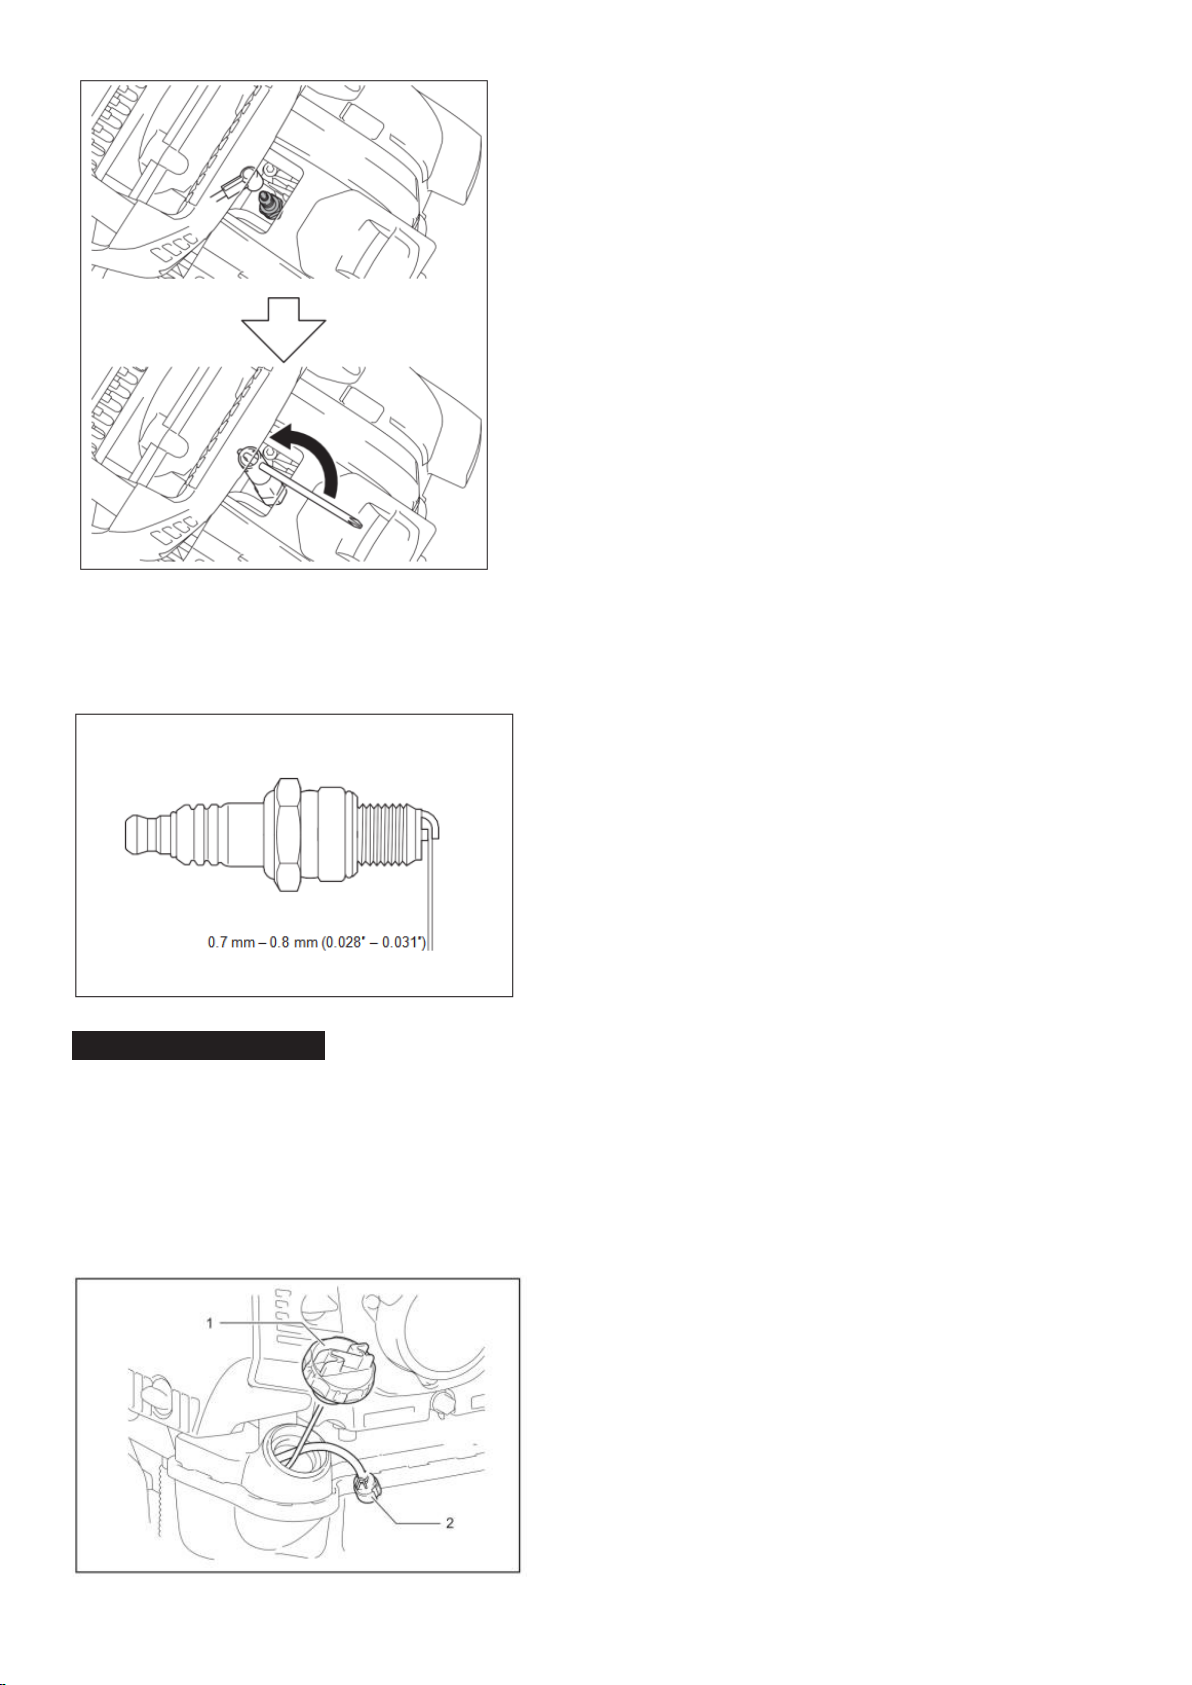
4. The appropriate clearance between two electrodes of spark plug is 0.7 to 0.8 mm (0.028″ to
0.031″). Adjust to the correct clearance when it is too wide or toonarrow.
Clean thoroughly or replace the spark plug if it has accumulated car- bon or contaminated.
Cleaning the fuelfilter
CAUTION: Make sure there is no damage on the fuel tank. If there is any damage on the fuel
tank, ask authorized service center immediately for repair.
NOTICE: Clean the fuel filter regularly. Clogged fuel filter may cause difficulty of start-up or
failure of engine speed increase.
Check the fuel filter regularly as follows:
►1. Fuel tank cap 2. Fuel filter
19

1. Remove the fuel tank cap, drain the fuel to empty the tank. Check the tank inside for any
foreign materials. If any, wipe clean such materials.
2. Pull out the fuel filter with wire through the fuel filling port.
3. If the fuel filter surface is contaminated, clean it withgasoline.
NOTICE: Follow the method specified by each local authority for disposing the gasoline
used for cleaning the fuel filter.
NOTICE: Replace the fuel filter if it is excessively contaminated.
After checking, cleaning or replacing, insert the fuel filter into the fuel pipe and fix it with the hose
clamp. Reset the fuel filter in the fuel tank and tighten firmly the fuel tank cap.
Inspecting bolts, nuts and screws and other parts
Retighten loose bolts, nuts, etc. Check for fuel and oil leakage.
Replace damaged parts with new ones for safety operation.
Cleaning engine, cooling air inlet
Cleaning engine, cooling air inlet
Keep engine clean by wiping down with a clothrag.
Keep the cylinder fins free of dust or dirt. Dust or dirt adhering to the fins may cause engine
overheat and pistonseizure.
Blowing air is taken in from the air inlet vent. When airflow drops down during operation, stop
engine and inspect the air inlet vent for any blockages. Clean it if necessary. Such a blockage
may cause overheat and damage the engine.
Others maintenance
Any maintenance of adjustment work that is not included and described in this manual is
only to be performed by Authorized Service Agent.
Storage
WARNING: When draining the fuel, stop the engine and wait for the engine to cool down.
Failure to do so may cause burns or fire.
CAUTION: When you store the machine for a long time, drain all fuel from the fuel tank
and carburetor, and keep it at a dry and clean place.
Drain fuel from the fuel tank and carburetor before storing the
machine as follows:
20
Table of contents
Other Feider Machines Blower manuals


