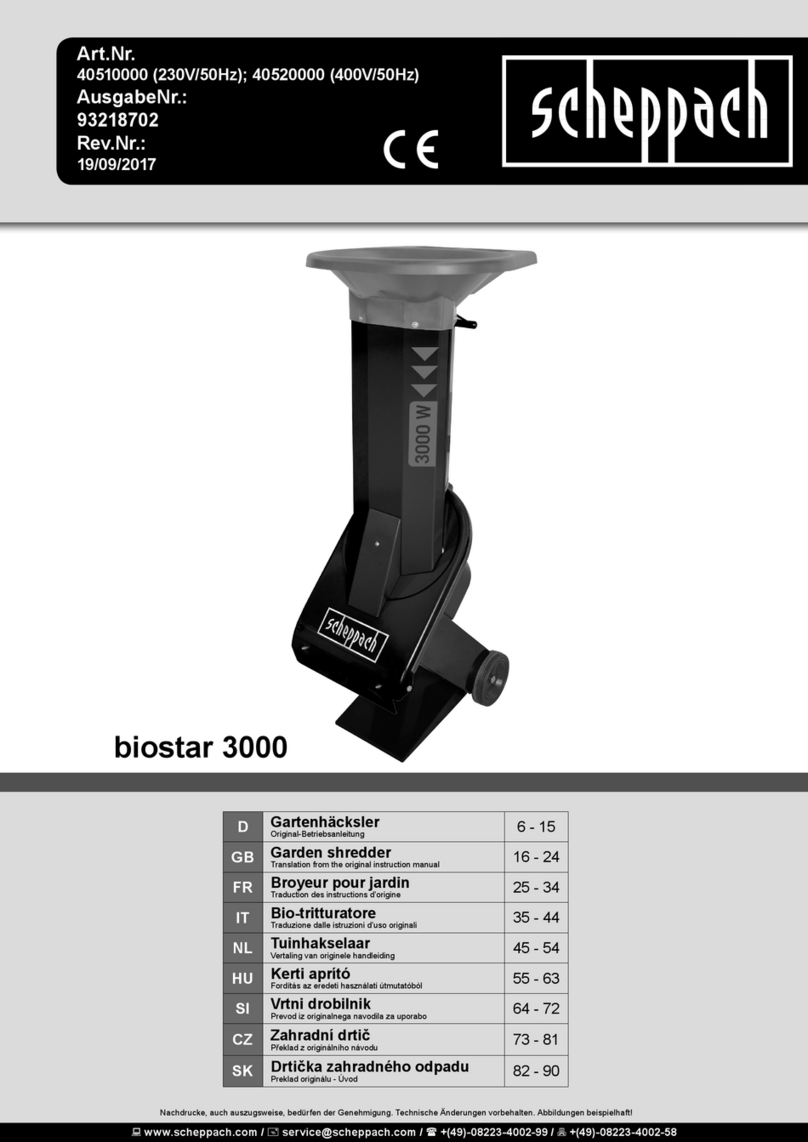
Feider Machines FBVE3000 User manual

ORIGINAL INSTRUCTIONS
INSTRUCTION MANUAL
SILENT SHREDDER
FBVE3000
READ THIS INSTRUCTIONS MANUAL BEFORE USE THE TOOL
FEIDER
32, rue Aristide Bergès - ZI 31270 Cugnaux – France
Made in PRC


DEFINITONS OF SYMBOLS
Caution! Read the instruction manual and follow the warning and safety instructions!
Keep bystanders away!
Danger – Rotation blades. Keep hands and feet out of openings while machine is
running.
Wear eye and ear protection
Caution! Remove plug from the mains immediately if cable is damaged or cut.
Degree of protection against water: IPX4
Sound power level, measured according to 2000/14/EC

Safety instructions
Warning! Please read and follow the safety instructions
carefully.
1. The shredder must be assembled correctly before use.
2. Warning! This appliance must be earthed!
3. Warning! Use only three-core extension cables with
the earth wire connected.
4. Only use extension cables that are approved for outdoor
use and check that they are in good condition before use.
5. Protect the cables from any damage by excessive
mechanical stress, sharp edges, contact with moving parts
and corrosive liquids, etc.
6. Warning! Do not use an extension cable that shows any
signs of damage. Fit a complete new cable - do not
undertake any permanent or temporary repairs. Have the
cable replaced by a qualified technician.
7. Before inserting the plug into the mains socket, make sure
that the socket ratings are correct and correspond to those
indicated on the rating label of the shredder.
8. Never move the shredder by pulling the cables.
9. Always disconnect the machine from the mains supply
before transporting it to other places.
10.Always switch off the shredder before disconnecting any
plug and socket connector or extension cables.
11.Explanation of the safety switch on the collection box: The
switch is in the “Lock is on” position: The collection box is
locked. The shredder can be switched on. The switch is in
the “Lock is off” position: The collection box is not locked
and can be removed. The shredder cannot be switched on.
12.Never leave the shredder unattended while it is switched
on.

13.Before leaving the shredder, switch off the motor and
unplug the connection cable. Proceed in the same way in
the event of a power failure.
14.Keep children and pets away. All onlookers should be kept
at a safe distance away from the shredder when it is in use.
15.Do not allow children or any person who has not read this
instruction leaflet, or who is not familiar with the shredder,
to operate it.
16.The operator is responsible for any third parties while
working with the shredder.
17.Only use the shredder for its designated purposes.
18.Caution! This machine contains a rotating chopping
knife.
19.Caution! This knife does not stop immediately after
switching off.
20.Always switch off the shredder, unplug the connection
cable and wait until the chopping knife comes to stop
before carrying out any maintenance or cleaning work.
21.Be careful when cleaning the shredder or performing any
maintenance. DANGER! Watch your fingers! Wear
gloves!
22.It is forbidden to move or modify any of the electrical and
mechanical safety devices.
23.The shredder must stand on level and solid ground during
operation.
24.Use it only in daylight or good artificial light.
25.Wear gloves and safety goggles while shredding.
26.We recommend the use of earmuffs.
27.Caution! The hopper must be completely fitted and
tightened before use.
28.Neither put your hands in the feed funnel nor in the
discharge chute.
29.During operation, ensure that no foreign objects (such as
stones, glass, metal, earth, plastics) are fed into the

shredder as such foreign bodies could cause blunting of
the chopping knife and seriously damage the motor. Do
not use your shredder for any purposes other than having
been designed for.
30.If the shredder should start to vibrate abnormally,
immediately switch off the motor and check for the cause.
In general, vibration is a warning of trouble.
31.Ensure the chopping knife is secure before shredding any
material. Do not operate the shredder if the chopping knife
is not properly mounted.
32.The shredder should be checked carefully before use.
Never work with a shredder that is not in good repair. If
you notice any defect of the machine that may cause
danger to the operator, do not use the shredder until such
defects have been rectified.
33.Replace any worn-out or damaged parts for your safety.
Use original spare parts only. Parts not produced by the
manufacturer may fit poorly and can possibly cause
injuries.
34.Work with your shredder only in places where it is
protected from water and never use it outdoors in rainy
weather.
35.Store it in a dry and safe place out of the reach of children.
36.Caution! Always wear safety goggles, ear muffs, protective
gloves and heavy-duty work clothes! We recommend use
of headgear.
37.WARNING! This machine produces an electromagnetic
field during operation. This field may under some
circumstances interfere with active or passive medical
implants. To reduce the risk of serious or fatal injury, we
recommend persons with medical implants to consult their
physician and the medical implant manufacturer before
operating this machine.

38.Attention!
Through poor conditions of the electrical MAINS, shortly
voltage drops can appear when starting the EQUIPMENT.
This can influence other equipment (eg. Blinking of a
lamp). If the MAINS-IMPEDANCE Zmax<0.376OHM(MK-
L772), such disturbances are not expected. (In case of
need, you may contact your local supply authority for
further information).
Description (Fig. 1)
1. Overload protector
2. On/off switch
3. Reversing switch
4. Feeding tunnel
5. Electric plug
6. Adjuster
7. Collection box
8. Base frame
9. Front wheel
10. wheel
11. Safety switch
Technical data
Mains voltage / frequency:
230 V ~ 50 Hz
Rated power:
2800 W S6(40%)
2300 W S1
No-load speed:
40 min-1
Branch diameter:
Max. 45 mm
Weight:
29.0 kg
Sound power level - measured:
86.80dB(A), K=1.93dB(A)
The guaranteed value
LWA= 89dB(A)
The S 6 duty cycle (40 %) indicates a load profile of 4 min. running under load and 6 min. of
idle time. The maximum branch diameter depends on the hardness of the wood.

Preparation
Warning!
1. Do not allow children to operate this equipment.
2. Do not operate this equipment in the vicinity of bystanders.
3. Wear ear protection and safety glasses at all times while operating this machine.
4. Avoid wearing clothing that is loose fitting or that has hanging cords or ties.
5. Only operate the machine in an open space (e.g. not close to a wall or to any other fixed
object) and on a firm, level surface.
6. Do not operate the machine on a paved or gravel surface where ejected material could
cause injuries.
7. Before starting the machine, check that all screws, nuts, bolts, and other fasteners are
properly secured and that guards and screens are in place. Replace damaged or
unreadable labels.
Assembling (Fig. 2)
Scope of delivery
1x Instruction manual
1x Spanner
1x Silent shredder
1x Collection box
1x Base frame
2x Wheel set
2x front wheel set
1x Small parts bag
1x Adjuster
1. Take all parts out of the package. Be sure four protruding supports in the bottom of the
motor unit pass through four notches in the upper face of the base frame. (Fig. 3)
2. Slide the collection box out of the base frame. (Fig. 4)
3. Fit the front wheel sets to the base frame with the aid of two screws. (Fig. 5)
4. Use the spanner to mount wheels to the base fame using two wheel shafts, two grommets,
two spring grommets and two screws. Assemble cap by pushing in on by hand. (Fig. 6)
5. Slide the collection box back to the base frame. Ensure that the collection box runs above
the guide rails. (Fig. 7)
6. Stand and put hands in position as shown in Fig. 8. Lay the motor unit on the base frame
by placing four protruding supports (Fig. 8/Item B) of the motor unit on the slots (Fig. 8-
1/Item A) of the base frame.
7. Fix the location plate to the base frame with two screws. (Fig. 9)
8. Lock the collection box with safety switch in position by pushing upwards. (Fig. 10-1)
Proper usage
This shredder has been designed for cutting fibrous and woody garden waste for the purpose of
compositing.

Always use the correct supply voltage
The power supply voltage must match the information quoted on your shredder's identification
plate. Shredders with a rating of 230 V can only be connected to a 230 V mains supply.
The shredder shall be supplied via a residual current device (RCD) with a tripping current of not
more than 30mA
An extension cable with a cross section that is too small causes a distinct reduction in the
performance capabilities of the machine. For cables up to 25 m in length, a cross section of at
least 3 x 1.5 mm2is required; for cables more than 25 m in length, the cross section must be at
least 2.5 mm2.
Training
Become familiar with the manufacturer's manual before attempting to operate this equipment.
Controls
On/off switch
Press the green button to switch on the shredder.
Press the red button to switch it off.
Note: This machine is equipped with an electromagnetic switch to prevent it from being
unexpectedly switched on when power source recovered.
Reversing switch
Caution! The reversing switch can only be operated when the shredder is switched off.
Position A (Fig. 1.A)
The reversing switch has been set to position A. The chopping knife will pull in the material and
chop it. The switch is set to position A after the manufacturer's test.
Position B (Fig. 1.B)
When the chopping knife is jammed so that the motor cannot keep running, first press the red
button of the on/off switch to stop the motor. Then completely turn the reversing switch to left
position B and press the on/off switch (the green button). Keep the green button of the on/off
switch pressed, the chopping knife will rotate into the reverse direction and release the material
to enable you to remove it. When you release the on/off switch the shredder will stop
automatically.
Overload protection
Overload (e.g. blocking up of the chopping knife) will lead to a standstill of the machine after a
few seconds. To protect the motor from getting damaged, the overload switch will automatically
cut off the mains supply.
Wait at least 1 minute before restarting by first pressing the reset button and then the on/off
switch.
If the chopping knife is blocked turn the reversing switch to left position B before switching on the
shredder again.
Disassembling
For certain purposes, e.g. storage after use, etc, you can disassemble the shredder in the
reverse order as described under "Assembling ".

Operation instructions
Warning
1. Before starting the machine, look into the feeding chamber to make sure that it is empty.
2. Keep your face and body away from the feed intake opening.
3. Do not allow your hands or any other part of your body or your clothing to get inside the
feeding chamber, discharge chute, or near any moving part.
4. Keep proper balance and footing at all times. Do not overreach. Never stand at a higher
level than the base of the machine when feeding material into it.
5. Always keep the discharge zone clear when operating this machine;
6. When feeding material into the machine be extremely careful that pieces of metal, rocks,
bottles, tins or other foreign objects are not included.
7. If the cutting mechanism strikes any foreign objects, or if the machine should start making
any unusual noise or vibration, shut off the motor and allow the machine to stop. Unplug
the connection cable (to disconnect the electric unit from the power supply) and take the
following steps:
a) inspect for damage;
b) check for and tighten any loose parts;
c) have any damaged parts replaced or repaired with parts having equivalent
specifications.
8. Do not allow processed material to build up in the discharge zone; this may prevent proper
discharge and can result in kickback of material through the feed intake opening.
9. If the machine becomes clogged, shut off the motor and unplug the connection cable (to
disconnect the electric unit from the power supply) before clearing any debris. Keep the
motor (ventilation slots) clear of debris and other accumulations to prevent damage to the
motor or possible fire.
10. Keep all guards and deflectors in place and in good working condition.
11. Do not transport this machine while the motor is running.
12. Shut off the motor and unplug the connection cable (to disconnect the electric unit from the
power supply) whenever you leave the work area.
13. Do not tilt the machine while the motor is running.
14. When using the device the collection box must be securely in position and the safety switch
is locked.
Feeding
Feed the material to be chopped into the right side of the feeding tunnel. The material is
automatically pulled in by the chopping knife.
Caution! Longer material standing out from the machine could lash out when being pulled
in by the chopping knife! Keep a safety distance!
Warning! Always use the pusher (Fig.11) if you try to push the material into the feeding
tunnel. Do not use your hands directly! Keep the pusher well after use.
Only insert as much material as will not block up the feeding tunnel.
Chop garden waste that has been stored for some days and is wilted and damp alternately with
branches.
This will prevent the chopping knife from getting blocked up.
Do not fill into the shredder any soft material such as kitchen waste instead of compositing it.
Widely branched material with leaves must be completely chopped before any new material is
fed in.
Take care that the chopped material can freely fall from the discharge chute – danger of backing
up!
The ventilation slots must not be covered by the waste bag or the chopped material.

Emptying the collection box
The level of shredded material debris in the collection box can be checked by looking through
the notches on the upper face of the base frame. Always empty the collection box in good time
to prevent it from overfilling.
To empty it, proceed as follows:
a) Switch off the device at the ON/OFF switch.
b) Press the safety switch down.
c) Release the collection box.
d) Take the collection box out at the front.
Adjusting the counter knife (Fig.13)
Counter knife B can be set from 0 to 0.75 mm away from chopping knife A. This distance should
be kept to achieve effective operation.
Soft materials or wet woody branches may be wrapped around the chopping knife or not cut off
clean, while a worn counter knife may cause the same problem after several operations.
There is an adjusting device on the right side of the lower shell. To adjust the distance, turn
handwheel C clockwise. Half a turn will move the counter knife 0.75 mm closer to the chopping
knife.
After adjusting, make some cutting tests to check if the best effect is achieved. Ensure that the
chopping knife is in contact with the counter knife, especially when shredding soft materials or
wet, woody branches. When you use strong and dry materials the counter knife should have a
corresponding distance to the chopping knife to avoid any damage to the shredder.
Positioning and moving
The machine should be placed on smooth and even ground. Caution! Do not move the machine
before you have disconnected it from the mains supply.
Tips
1. Heavy material or branches result in blocking of the chopping knife when being shredded
continuously.
2. Always feed the material to be chopped from the right corner of the feeding funnel.
3. Carefully check the material to be chopped. Make sure there is no contact with stones or
nails as these could seriously damage the shredder.
4. Check for signs of vibration. Heavy vibration is caused by damaged or worn-out knives.
Change the knives, if necessary.
5. Large objects or woody pieces can be removed by withdrawing the material and, at the
same time, changing between the cutting and releasing directions of the chopping knife.
Caution! Always wait for the shredder to be idle before switching it on again.
Longer material standing out from the shredder could lash out when being pulled in
by the chopping knife. Please keep a safe distance!

Troubleshooting
The motor does not run
The overload protection has responded
Set the reversing switch to position B and press the reset button, keep the on/off switch
pressed to switch on the shredder for a short period. After the blocking has been removed,
reset the reversing switch to position A.
Power failure
Check the power supply cord, the plug and your house connection fuse and RCD.
Safety switch on the collection box not locked in position
Ensure collection box is in position and locked.
The material to be chopped is not pulled in
The chopping knife is running backwards.
Change the direction of rotation.
The material is jammed in the feeding funnel
Set the reversing switch to position B and switch on the shredder. Pull the material from the
feeding funnel.
Re-feed thick branches such that the chopping knife does not immediately grasp the pre-
cut notches again.
The cutting blade is blocked
Set the reversing switch to position B and switch on the shredder The chopping knife will
now run backwards to release the blocked-up material.
Caution! Change the direction of rotation to the desired position after the shredder has
come to a complete standstill.
Maintenance and Storage
Take care of your machine and clean it regularly to obtain long-lasting efficiency and
performance.
Keep the air vents clean and free from dust.
Use only a warm damp cloth and a soft brush to clean your machine.
Never wet or spray water on the machine.
Do not use any detergents or solvents as these could cause irreparable damage to your
machine. Chemicals can destroy the plastic parts.
The tightness of the fastening screws of the undercarriage should be checked from time to
time.
To protect the shredder from corrosion when storing it for a longer period, treat the
chopping knife with some ecological oil.
When the machine is stopped for servicing, inspection, or storage, or to change any
accessories, shut off the motor, unplug the connection cable (to disconnect the electric
unit from the power supply), make sure that all moving parts have come to complete stop.
Allow the machine to cool down before making any inspections, adjustments, etc.
The shredded can be packed in the collection box for storage and transport. Follow below
steps:
a) Unlock the collection box by pushing the safety switch downwards. (Fig. 10-2)
b) Release the location plate by loosing the two screws. (Fig. 9)
c) Stand and put hands in position as shown in Fig. 12.
d) Push the motor unit horizontally to move protruding supports (Fig. 8/Item B) away from
slots (Fig. 8-2/Item A) of the base frame.

e) Put the motor unit down into the collection box. (Fig. 8-2))
Store the machine in a dry place. For extended storage periods, run the unit dry for a short
time. Always allow the machine to cool down before storing it.
When servicing the chopping knife assembly be aware that, even though the motor will not
start due to the interlock feature of the guard, the chopping knife assembly can still be
moved by a manual starting mechanism.
Environment, Recycling and Disposal
Packaging and products should be properly disposed by being brought to the
responsible disposal facility. Carton packaging and electric equipment can be
taken to a corresponding recycling materials receiving depot or be conveniently
disposed of through the manufacturer, for instance. With your cooperation, we
can contribute to protect our environment by recirculating recycled materials into
the production cycle. Please note: Do not dispose of this product into the
dustbin. Synthetic parts are suitably labelled for plastics recycling.
Spare Parts and Parts Subject to Wear
All spare parts and parts subject to wear may be purchased (at low cost) any time by contacting
the address mentioned in the warranty certificate. Our competent service team will be happy to
answer any questions that may come up and is receptive to your suggestions and criticism.


EXPLOSION DRAWING AND PART LIST
No.
Part Nr.
Description
Qty
1
KND2-12/2
Reversing switch
1
2
KJD17FT
On/off switch
1
3
Screw ST4.2X16
11
4
MK-L771-07
Switch location plate
1
5
Overload protector
1
6
MK-L771-05
Top cover
1
7
Mk-L771-20
Feeding funnel
1
8
MK-L79-12-0
Plug
1
9
MK-L771-01
Above shell
1
10
MK-L771-03
Front cover of shell
1
11
Screw ST4.2 X16
2
12
Screw M8x25
2
13
MK-L771-04
Location plate
1
14
MK-L771-02
Lower shell
1
15
GB/T894.1-1986
Circlip for shaft 8
2
16
GB845-85
Screw ST4.2X20-F
8
17
GB95-85
Flat grommet 6
2
18
GB93-87
Spring grommet 6
2
19
GB70-85
Screw M6x20
2
20
MK-L771-15-0
Supporting frame
1
21
GB/T862.2-1987
Locking grommet 6
5
22
GB70-85
Screw M6x12
4
23
GB/T5782-2000
Screw M6x16
1
24
GB845-85
Screw ST4.2X16-F
8
25
MK-L771-10
Trip Switch cover
1
26
Trip switch
1
27
GB818-85
Screw M4x10
1
28
GB93-87
Spring grommet 4
1
29
GB95-85
Flat grommet 4
1
30
GB/T862.2-1987
Locking grommet 5
1
31
Connection line set
1
32
Motor set
1

33
MK-L771-18
Adjuster
1
34
MK-L771-06
Cover of steel frame
1
35
Capacitor
1
36
MK-L771-13-0
Steel frame
1
37
GB/T96-85
Big grommet 5
4
38
MK-L771-08
Safety switch knob
1
39
MK-L771-14
Safety switch plate
1
40
GB/T846-85
Screw ST4.2X16
1
41
MK-L17-17
Wheel
2
42
MK-L771-16
wheel shaft
2
43
GB/T96-85
Grommet 8
2
44
GB93-87
Spring grommet 8
2
45
GB70-85
Screw M8x70
2
46
MK-L17-19
Cap
2
47
MK-L771-17
Collection box
1
48
MK-L771-09
Safety switch plate cover
1
49
GB/T12618-90
Screw 4x12
4
50
MK-L771-12
Front wheel cap
2
51
MK-L771-11
Front wheel body
2

Declaration of conformity
FEIDER
ZI, 32 rue aristide Bergès – 31270 Cugnaux - France
Declares that the machinery designated below:
SILENT SHREDDER
FBVE3000
Serial number: 20200735205-20200735604
Complies with the provisions of the Directive “machinery” 2006/42/EC and national laws
transposing it:
Also complies with the following European directives:
EMC Directive 2014/30/EU
ROHS Directive 2011/65/EU+(EU) 2015/863
Noise directive 2004/14/EC and 2005/88/EC
Sound power level - measured: 86.80dB(A), K=1.93dB(A)
The guaranteed value is: LWA= 89dB(A)
Also complies with European standards, with national standards and the following technical
provisions:
EN 62321 :2009
Responsible for the technical file: Mr. Olivier Patriarca
Signed in Cugnaux, on 01/07/2020
Philippe MARIE / PDG
Table of contents
Other Feider Machines Paper Shredder manuals

Feider Machines
Feider Machines FBT70-2 User manual

Feider Machines
Feider Machines FBT420-1 User manual

Feider Machines
Feider Machines FBVES2800-UK User manual
Feider Machines
Feider Machines FBT400-1 User manual

Feider Machines
Feider Machines FBT70 User manual
Feider Machines
Feider Machines FBT420 User manual
