Ferm VCM1004 User manual
WWW.FERM.COM
POWERED BY
VCM1004
20V CORDLESS
ASH VACUUM
CLEANER
EN
NL
FR
DE
PL
CS
SK
IT
ES
PT
Original instructions 5
Vertaling van de oorspronkelijke gebruiksaanwijzing
10
Traduction de la notice originale
16
Übersetzung der Originalbetriebsanleitung 22
Tłumaczenie instrukcji oryginalnej
28
Překlad původního návodu k používání 34
Preklad pôvodného návodu na použitie 40
Traduzione delle istruzioni originali 45
Traducción del manual original 52
Tradução do manual original 58

2
Fig. A
9
2
1
6
5
7
10
11
12
8
3
Fig. B1 18
14
17
3
15
Fig. B2
Fig. C
1716
2
1

4
Fig. E-1
Fig. F Fig. G
Fig. E-2
Fig. D
5
12
13
93 49
5
EN
Ash vacuum cleaner
VCM1004
Thank you for buying this FERM product. By doing
so you now have an excellent product, delivered
by one of Europe’sleading suppliers. All products
delivered to you by Ferm are manufactured
according to the highest standards of performance
and safety. As part of our philosophy we also
provide an excellent customer service, backed
by our comprehensive warranty. We hope you will
enjoy using this product for many years to come.
1. SAFETY INSTRUCTIONS
Read the enclosed safety warnings, the additional
safety warnings and the instructions. Failure to
follow the safety warnings and the instructions
may result in electric shock, fire and/or serious
injury. Save the safety warnings and the
instructions for future reference.
The following symbols are used in the user
manual or on the product:
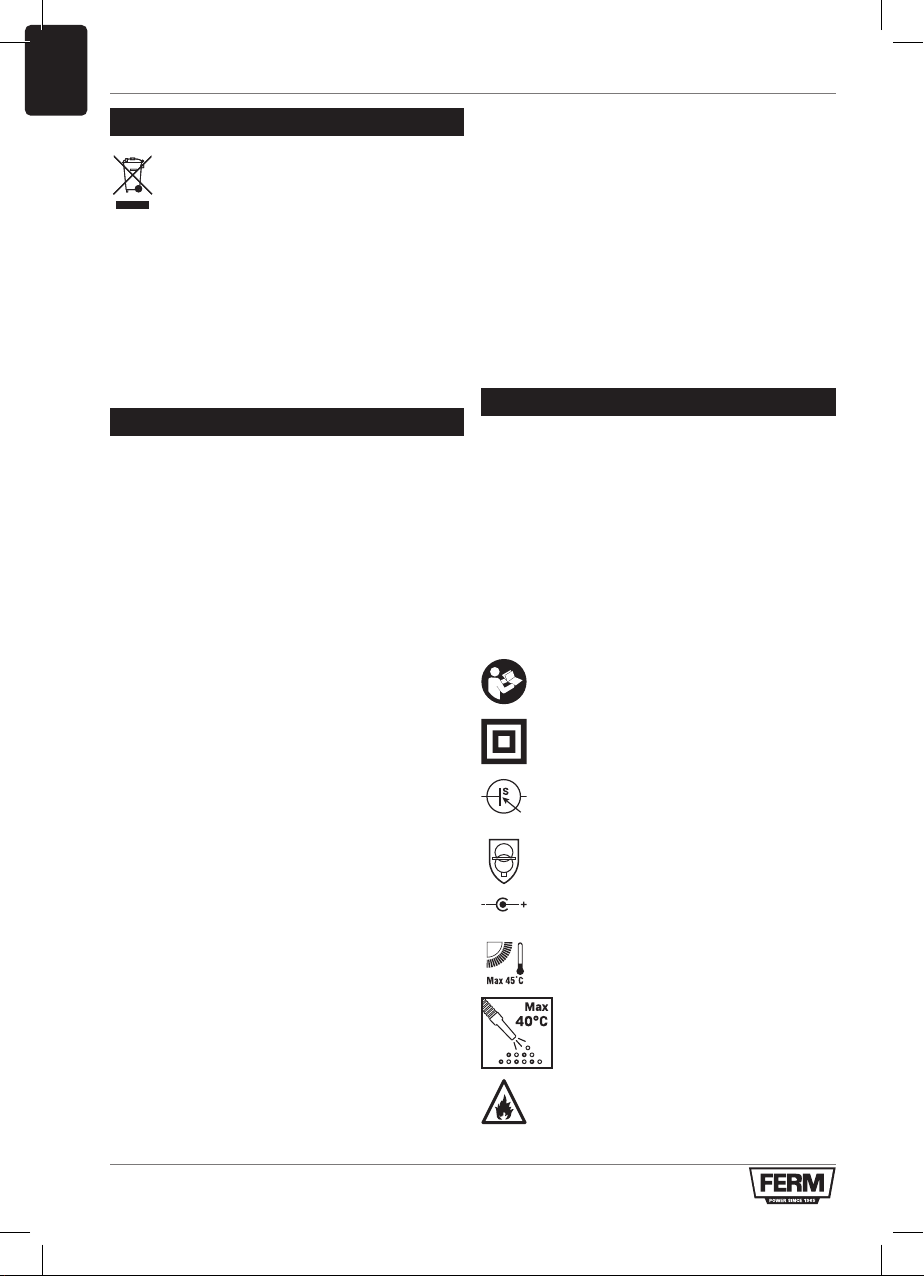
Read the user manual.
Class II machine - Double insulation -
Youdon’t need any earthed plug.
Switched-mode power supply.
In case of failure, the transformer is not
dangerous.
Polarity of adaptor.
Max temperature 45°C.
For cold ash only! There is arisk of
fire if the suction material exceeds
atemperature of 40°C (104°F)!
If the temperature of the material
exceeds 40°C, there is arisk of fire.
Do not throw the battery into fire.
Do not throw the battery into water.
Separate collection for Li-ion battery.
Do not dispose of the product in
unsuitable containers.
The product is in accordance with the
applicable safety standards in the
European directives.
SAFETY NOTES
THIS APPLIANCE CAN BE USED BY CHILDREN
AGED FROM 8 YEARS AND ABOVE AND
PERSONS WITH REDUCED PHYSICAL,
SENSORY OR MENTAL CAPABILITIES OR
LACK OF EXPERIENCE AND KNOWLEDGE IF
THEY HAVE BEEN GIVEN SUPERVISION OR
INSTRUCTION CONCERNING USE OF THE
APPLIANCE IN ASAFE WAY AND UNDERSTAND
THE HAZARDS INVOLVED. CHILDREN SHALL
NOT PLAY WITH THE APPLIANCE. CLEANING
AND USER MAINTENANCE SHALL NOT BE
MADE BY CHILDREN WITHOUT SUPERVISION.
• The ash cleaner should be properly assembled
before use.
• Do not leave the machine running without
supervision.
• Keep the nozzles and filters clean and
functional to ensure that the machine works
safe and has optimal performance.
• The user of the device is responsible for the
safety of others while using it.
• The machine should only be used for its
intended purposes.
• Only use the machine in areas that are dry
and protected from bad weather. Do not use it
outside when it is raining.
• Remove the battery pack from the vacuum
cleaner before maintaining or cleaning, making
any adjustments, changing accessories or
placing the vacuum cleaner aside. This safety
measure prevents accidental starting of the
vacuum cleaner.
• Provide good ventilation at the working place.
• Have the machine repaired only through
qualified specialists and only using original
spare parts. This ensures that the safety of
your vacuum cleaner is maintained.
6
EN
• When the machine is not in use, store it securely.
• The storage place must be dry and lockable.
This prevents the vacuum cleaner being
damaged when it is stored or being used by
inexperienced people.
SAFETY WARNINGS SPECIFIC FOR
VACUUMING ASHES
• The vacuum cleaner must not be used for the
separation of hazardous substances.
• Substance to be vacuumed - cold ashes from
fireplaces, wood/coal stoves, ashtrays, grill.
• Empty and clean vacuum cleaner before and
after vacuuming to avoid the collection of
materials that could pose afire hazard in the
vacuum cleaner.
• Do not vacuum up soot!
• Do not vacuum liquids.
• Only vacuum up the ash of permitted fuels!
• Do not vacuum up hot or burning objects or
embers (e.g. cigarettes, charcoal, ashes, etc.).
The temperature of the material must be below
40°C.
• Caution! If the temperature of the material
exceeds 40°C, there is arisk of fire.
• Attention! Material that appears to have cooled
down from the outside may still be very hot
inside. This can be determined by combing
the ashes with ametal tool before using the
device. There will no longer be noticeable heat
radiating from the cold ash.
• Hot ash particles may ignite again in the airflow.
• Temperatures exceeding 40°C may damage
the vacuum cleaner, the hoses and the filter.
• Please make sure that the oven is cold before
you vacuum clean ovens.
• Continuously check tubes, filter and vacuum
cleaner for excessive temperatures during the
vacuum cleaning.
• If you notice atemperature rise, switch off the
vacuum cleaner immediately. Remove the filter
and remove the material from the filter. Let the
vacuum cleaner cool down under supervision.
• Completely empty the vacuum cleaner after
vacuuming.
• “Cold Ash” is ash cooled down for asufficient
time without any pockets of embers inside.
• This can be confirmed by scouring the ash for
pockets of embers by using metal tools before
using the ash vacuum cleaner. Cold ash does
not emit any recognizable heat.
• Always empty and clean vacuum cleaner
before and after vacuuming.
• Do not use for the separation of health
hazardous dusts (dust classes L, M, H).
• Do not vacuum any flammable substances.
SAFETY WARNINGS SPECIFIC FOR
BLOWING
• Direct air discharge at work area only. Never at
people or animals.
• Risk of flying objects. Keep bystanders away
from the work area.
• Always wear safety goggles before using the
blowing function.
SAFETY WARNINGS FOR BATTERY
a) Do not open the battery. Danger of
shortcircuiting.
b) Protect the battery against heat, e. g.,
against continuous intense sunlight, fire,
water, and moisture. Danger of explosion.
c) In case of damage and improper use of the
battery, vapours may be emitted. Ventilate
the area and seek medical help in case
of complaints. The vapours can irritate the
respiratory system.
d) Use the battery only in conjunction with
your Ferm product. This measure alone
protects the battery against dangerous
overload.
e) The battery can be damaged by pointed
objects such as nails or screwdrivers or by
force applied externally. An internal short
circuit can occur and the battery can burn,
smoke, explode or overheat.
SAFETY WARNINGS FOR CHARGER
Intended use
Charge only CD801AA and CD803AA type
rechargeable Battery packs with the charger.
Other types of batteries may burst causing
personal injury and damage.
a) Do not recharging non-rechargeable
batteries!
b) During charging, batteries must be placed
in the well ventilated area!
7
EN
2. MACHINE INFORMATION
Intended use
The vacuum cleaner is intended for domestic
coldash vacuuming, for example, cleaning
afireplace, barbeque or other ash residue. The
vacuum cleaner is equipped with ablowing
function. It can be used to blow dust and debris
out of garages or of patios and driveways. The
device is not suitable for commercial or industrial
use.
Technical specifications
Model no VCM1004
Voltage battery 20V
Suction force 10 kPA, 10 kPA, 0.6m3/min
Container capacity Approx. Approx. 12L
Tube diameter Ø 35mm
Filter HEPA
Hose length 1.0m
Weight (incl. accessories) 2.4 kg
Sound power level LWA 76 dB(A)
Model no CDA1154
Battery Type Lithium-Ion
Voltage 20V
Capacity 2.0 Ah
Recommended charger CDA1156, CDA1157,
CDA1175, CDA1171
Weight 0.3 kg
Model no CDA1156
Charger input 100-240V~ 50/60Hz
Max 1A 20V
Charger output 21.5V 1.7A
Charging time 2.0Ah battery 90 minutes
Charging time 4.0Ah battery 120 minutes
Recomended batteries CDA1154, CDA1155
Weigth 0.15 kg
Only use the following batteries of the AX-POWER
20V battery platform. Using any other batteries
could cause serious injury or damage the tool.
CDA1154 20V, 2Ah Lithium-Ion (Included)
CDA1155 20V, 4Ah Lithium-Ion
The following chargers can be used to charge
these batteries.
CDA1156 Charger adapter (Included)
CDA1157 Quick charger
CDA1175 Quick charger
CDA1171 Quick charger
The batteries of the AX-POWER 20V battery
platform are interchangeable with all the FERM
AX-POWER battery platform tools.
DESCRIPTION
The numbers in the text refer to the diagrams on
page 2-4.
1. On/Off switch
2. Carrying handle
3. Vacuum port
4. Blowing port
5. Metal locking clamp
6. Nozzles storage
7. Container
8. Top section
9. Hose
10. Aluminium round nozzle
11. Aluminium crevice nozzle
12. HEPA Filter
13. Filter holder
14. Battery
15. Battery unlock button
16. Battery LED indicators button
17. Battery LED indicators
18. Charger
3. ASSEMBLY
Before any work on the power tool,
remove the battery.
The battery must be charged before first
use.
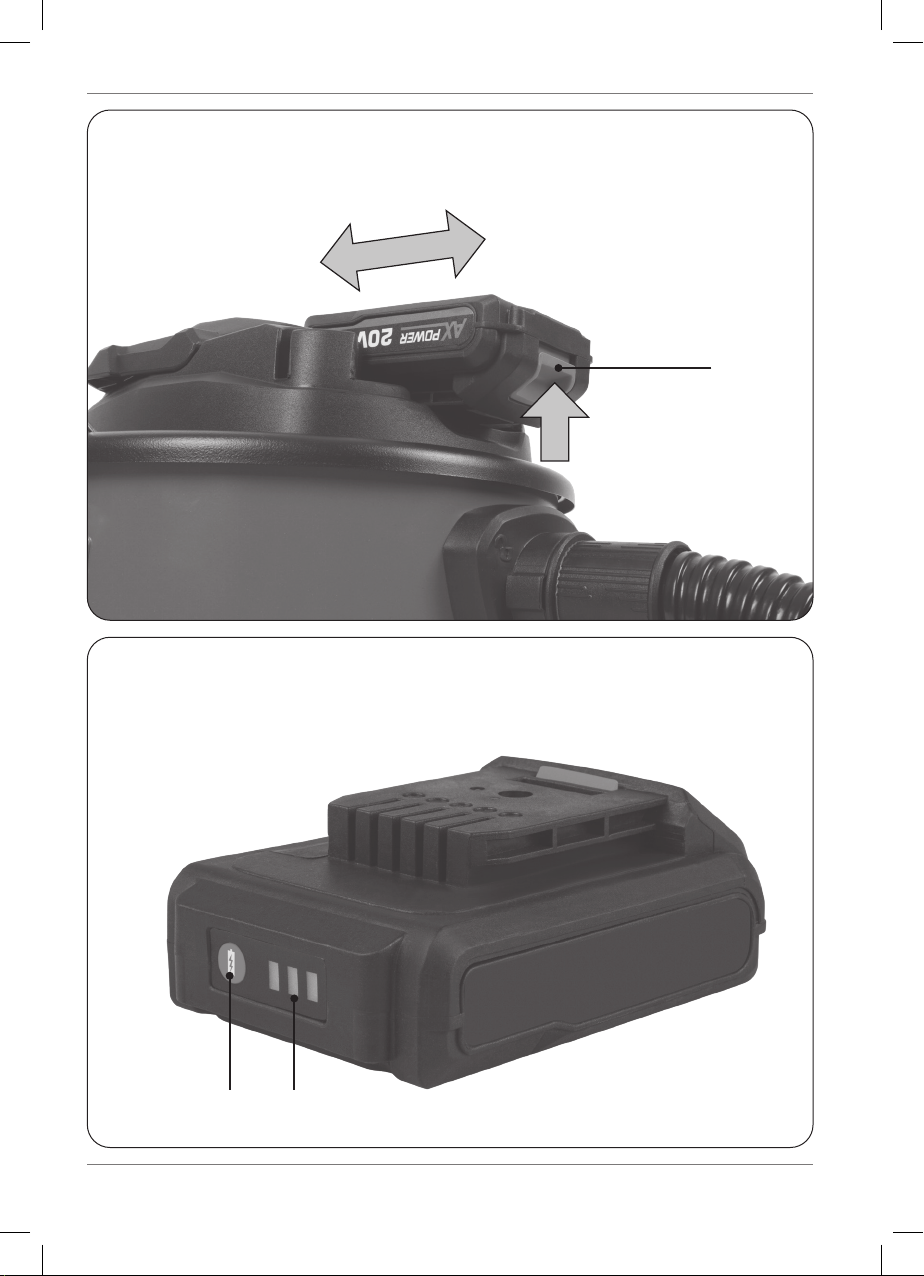
Removing the battery from the machine
Fig. B2
• Push the battery unlock buttons (15) and pull
the battery out of the machine like shown in
Fig. B2.
8
EN
Inserting the battery into the machine
Fig. B2
Ensure that the exterior of the battery is clean and
dry before connecting to the charger or machine.
• Insert the battery (14) into the base of the
machine.
• Push the battery further forward until it clicks
into place.
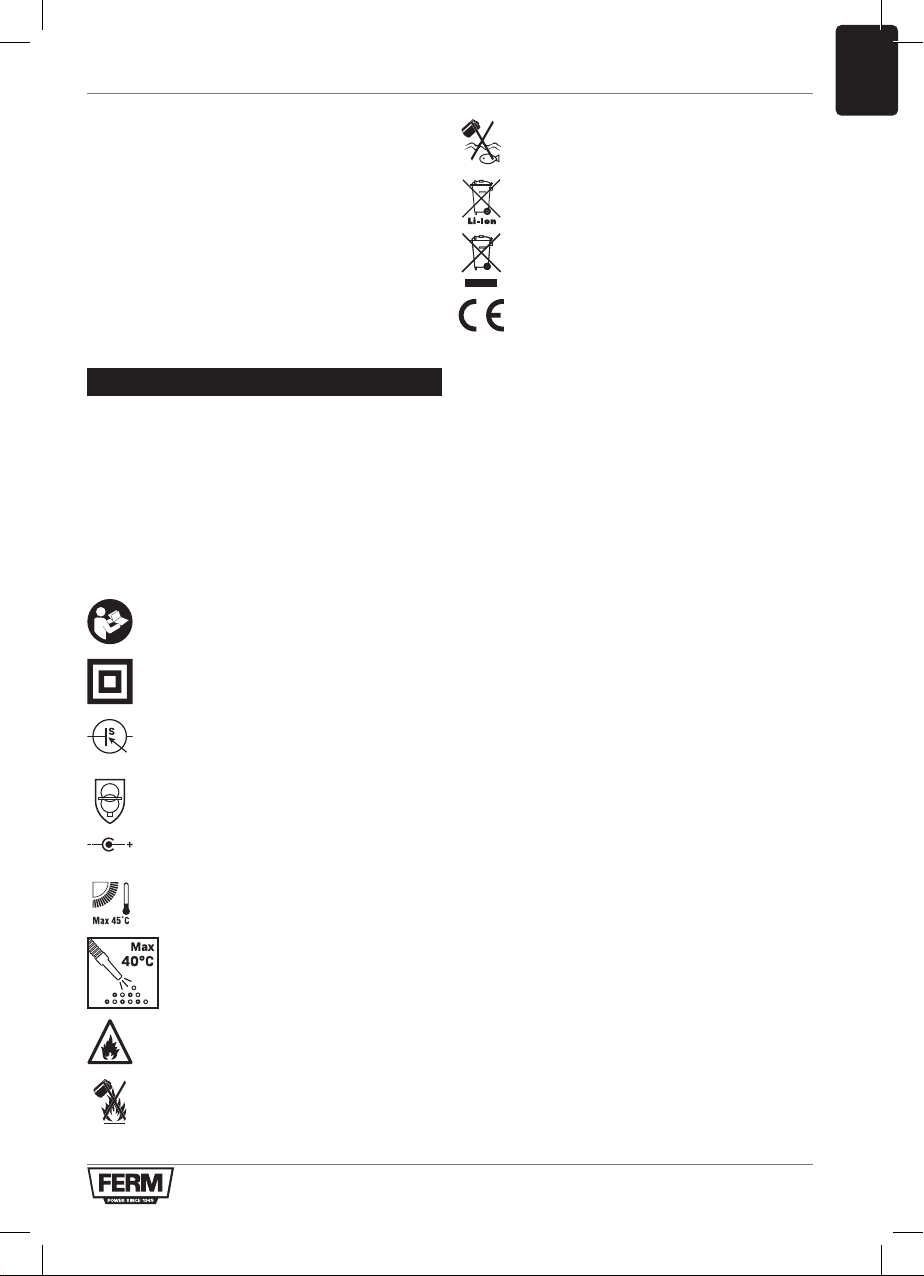
Checking the battery charging status
Fig. C
The included battery is delivered in partly charged
condition.
• To check the battery charge status, push the
button (16) on battery shortly.
• The battery has 3 lights indicating the charge
level, the more lights that burn, the more
charge the battery has left.
Charging the battery (with the charger)
Fig. B1
• Plug the charger plug into an electrical outlet
and wait for awhile.
• Plug the output of the charger into the round
socket of the battery. The LED indicator on
the battery (14) will lighten up and show the
charging status.
LED indicator (17)
Fig. C
The battery has 1 LED indicator (17) which
indicates the status of the charging process:
LED Charger status
Red Battery charging in progress
Green Battery charging finished, battery fully charged
• After the battery is fully charged remove the
charger plug from the outlet and remove the
battery from the charger.
When the machine is not being used
over alonger period of time it is best to
store the battery in charged condition.
After the battery is fully charged remove the
charger plug from the outlet and remove the
battery from the charger.
• Slide the HEPA filter (12) over the filter
holder(13) as shown in Fig. D.
Clean the HEPA filter (12) regularly and
after every heavy use to maintain the
suction power.
• Place the top section (8) on the container (7) as
shown in Fig. E-1.
• Secure the metal locking clamps (5) of the
container to the top section (8) as show in Fig.
E-2.
• Close the metal locking clamps (5) by pushing
them downwards.
• Connect the suction hose (9). For vacuuming
(Fig. F): Connect the suction hose (9) to the
vacuum port (3). For blowing (Fig. G): Connect
the suction hose (9) to the blowing port (4).
• Connect the round nozzle (10) or the crevize
nozzle (11) to the hose (9).
4. OPERATION
Switching the machine on/off
Fig.A
Do not vacuum without aHepa filter!
• To switch on the vacuum cleaner, move the
On/Off switch (1) forwards (direction ON).
• To switch off the vacuum cleaner, move the
On/Off switch (1) backwards (direction OFF).
Vacuuming
Fig. D, E-1, E-2, F
Clean the HEPA filter (12) regularly and
after every heavy use to maintain the
suction power.
Fine dust, such as dust from cement, soot
and plaster are too fine to be used. Risk
for getting into the motor and damaging it.
1. Switch off (1) the machine and remove the
battery (14).
2. Unlock the metal locking clamps (5) and
remove the top section (8).
3. Before vacuuming, remove all dirt and debris
from the container (7).
4. Fit the filter. Carefully slide the HEPA filter (12)
over the filter holder (13) as shown in Fig. D.

9
EN
5. Place the top section (8) on the container (7) as
shown in Fig. E-1.
6. Reattach the top section (8) again and lock the
locking clamps (5). Fig E-2.
7. Insert one end of the hose (9) into the
vacuuming port (3).
8. Place the battery (14).
9. Press the power switch (1) into the
“ON/1”position to start your ash cleaner.
10. The machine now is ready to use for vacuum
cleaning.
11. Press the power switch (1) into the “
OFF/0”position to switch off your ash cleaner.
Blow function
Fig. E-1, E-2, G
Operation without the use of afilter is
recommended.
Remove all dirt and debris from the
container(7) before you use the blow
function.
Always wear safety goggles before using
the blowing function.
Risk of flying objects. Keep bystanders
away from the work area.
Your ash cleaner is equipped with ablowing
function. This function can be used to blow ash
remains and dust out of corners and crevices
which are difficult to access with vacuuming.
1. Switch off (1) the machine and remove the
battery (14).
2. Unlock the locking clamp (5) and remove the
top section (8).
3. Before blowing, remove the filter (12) and
remove all dirt and debris from the container (7).
4. Reattach the top section (8) again and lock the
locking clamps (5). Fig. E-1, E-2.
5. Insert one end of the hose (9) into the blowing
port (4) on top of machine. Fig. G.
6. Place the battery (14).
7. Press the power switch (1) into the “
ON/1”position to start your ash cleaner.
8. The machine is now ready for blowing ashes
and dust.
9. Press the power switch (1) into the “
OFF/0”position to switch off your machine.
Finish operation
Fig. A
1. Turn off (1) the machine and remove the
battery (14).
2. Remove the top section (8) and empty the
container (7).
3. Clean the machine with asoft cloth.
4. Disconnect hose, tube and container.
5. Clean hose connectors, hose and tube after
use, and keep them unblocked.
6. Stow away the hose and accessory at the
machine. Store the appliance in adry room.
5. MAINTENANCE
Before cleaning and maintenance, always
switch off the machine and remove the
battery pack from the machine.
Clean the machine casings regularly with asoft
cloth, preferably after each use. Make sure that
the ventilation openings are free of dust and
dirt. Remove very persistent dirt using asoft
cloth moistened with soapsuds. Do not use any
solvents such as gasoline, alcohol, ammonia,
etc. Chemicals such as these will damage the
synthetic components.
Filters
Fig. D
For optimal performance it is
recommended to regularly change the
filter (12) depending on level of use.
1. Carefully remove HEPA filter (12).
2. Clean the dust on the HEPA filter (12) with
abrush, and if necessary, wash it.
3. Do not use cleaning products, solvents
or sharp objects for any cleaning of the
appliance, this includeds the washable HEPA
filter
4. Allow filter to air dry before installing and using
again.
5. Reinstall the filter.
10
NL
ENVIRONMENT
Faulty and/or discarded electrical or
electronic apparatus have to be collected
at the appropriate recycling locations.
Only for EC countries
Do not dispose of power tools into domestic
waste. According to the European Guideline
2012/19/EU for Waste Electrical and Electronic
Equipment and its implementation into national
right, power tools that are no longer usable must
be collected separately and disposed of in an
environmentally friendly way
WARRANTY
FERM products are developed to the highest
quality standards and are guaranteed free of
defects in both materials and workmanship for the
period lawfully stipulated starting from the date
of original purchase. Should the product develop
any failure during this period due to defective
material and/or workmanship then contact your
FERM dealer directly.
The following circumstances are excluded from
this guarantee:
• Repairs and or alterations have been made
or attempted to the machine by unauthorized
service centers.
• Normal wear and tear.
• The tool has been abused, misused or
improperly maintained.
• Non-original spare parts have been used
This constitutes the sole warranty made
by company either expressed or implied.
There are no other warranties expressed or
implied which extend beyond the face hereof,
herein, including the implied warranties of
merchantability and fitness for aparticular
purpose. In no event shall FERM be liable for
any incidental or consequential damages. The
dealers remedies shall be limited to repair or
replacement of nonconforming units or parts.
The product and the user manual are subject
to change. Specifications can be changed
without further notice.
Asstofzuiger
VCM1004
Wij danken uvoor uw aankoop van dit FERM-
product. Uhebt nu een uitstekend product,
dat wordt geleverd door een van de grootste
leveranciers van Europa. Alle producten die
Ferm levert, zijn vervaardigd volgens de hoogste
normen voor prestaties en veiligheid. Het is ook
onze filosofie een uitstekende klantenservice te
bieden, waar onze uitgebreide garantie achter
staat. Wij hopen dat udit product gedurende vele
jaren met genoegen zult gebruiken.
1. VEILIGHEIDSINSTRUCTIES
Lees de bijgesloten veiligheidswaarschuwingen,
de aanvullende veiligheidswaarschuwingen
en de instructies. Geeft ugeen gevolg aan de
veiligheidswaarschuwingen en de instructies
dan kan dat een elektrische schok, brand en/
of ernstig letsel tot gevolg hebben. Bewaar de
veiligheidswaarschuwingen en de instructies
zodat uze later ook nog kunt raadplegen.
De volgende symbolen worden gebruikt in de
gebruiksaanwijzing of op het product:
Lees de gebruiksaanwijzing.
Klasse II-apparaat - Dubbele isolatie-
Een geaarde stekker is niet nodig.
Overgeschakelde modus voeding.
In geval van defect, is de transformator
niet gevaarlijk.
Polariteit van de adapter.
Max temperatuur 45°C.
Alleen voor koude as! Brandgevaar
als het opgezogen materiaal warmer
is dan 40 °C (104°F)!
Risico op brand als de temperatuur van
het materiaal warmer is dan 40°C.

11
NL
Gooi de accu niet in het vuur.
Gooi de accu niet in het water.
Gescheiden inzameling voor Li-ion-accu.
Gooi het product niet weg in containers
die daarvoor niet geschikt zijn.
Het product voldoet aan de geldende
veiligheidsnormen in de Europese
richtlijnen.
VEILIGHEIDSWAARSCHUWINGEN
DIT APPARAAT MAG WORDEN GEBRUIKT
DOOR KINDEREN VANAF 8 JAAR EN
DOOR PERSONEN MET VERMINDERDE
LICHAMELIJKE, ZINTUIGLIJKE OF
GEESTELIJKE VERMOGENS, OF MET EEN
GEBREK AAN ERVARING EN KENNIS, MITS ZIJ
ONDER TOEZICHT STAAN OF GEÏNSTRUEERD
ZIJN BETREFFENDE HET VEILIG GEBRUIK VAN
HET APPARAAT EN ZICH BEWUST ZIJN VAN
DE ERMEE VERBONDEN RISICO’S. KINDEREN
MOGEN NIET MET HET APPARAAT SPELEN.
ZONDER TOEZICHT MOGEN REINIGING EN
ONDERHOUD NIET DOOR KINDEREM WORDEN
UITGEVOERD.
• De aszuiger moet op de juiste manier in elkaar
worden gezet voordat udeze gebruikt.
• Laat het apparaat niet zonder toezicht werken.
• Houd de mondstukken en filters schoon en
functioneel en zorg ervoor dat het apparaat
veilig werkt en optimaal presteert.
• De gebruiker van het apparaat is tijdens het
gebruik verantwoordelijk voor de veiligheid van
anderen.
• Het apparaat mag alleen worden gebruikt voor
de beoogde doeleinden.
• Gebruik het apparaat alleen op droge plaatsen
die bescherming bieden tegen slecht weer.
Gebruik het apparaat niet buiten als het regent.
• Neem het accupack uit de stofzuiger vóór
onderhoud of reiniging, het wisselen van
accessoires of het opbergen van de stofzuiger.
Deze veiligheidsmaatregel maakt dat de
stofzuiger niet per ongeluk kan worden
gestart.
• Zorg voor goede ventilatie op de werkplek.
• Laat het apparaat uitsluitend repareren
door gekwalificeerde specialisten die alleen
originele reserveonderdelen gebruiken.
Dit waarborgt dat de veiligheid van het product
gehandhaafd blijft.
• Berg het apparaat veilig op wanneer udit niet
gebruikt.
• De plaats waar ude stofzuiger opbergt moet
droog en afsluitbaar zijn. Zo voorkomt udat
de stofzuiger wordt beschadigd tijdens opslag
of wordt gebruikt door mensen die er geen
ervaring mee hebben.
VEILIGHEIDSWAARSCHUWINGEN VOOR HET
OPZUIGEN VAN AS
• De stofzuiger mag niet worden gebruikt voor
het scheiden van gevaarlijke stoffen.
• Op te zuigen materie - koude assen van open
haarden, hout-/kolenkachels, asbakken, grills.
• Maak de stofzuiger leeg en schoon voor en na
het stofzuigen, om het verzamelen van materie
te voorkomen dat een gevaar voor brand in de
stofzuiger kan veroorzaken.
• Zuig geen roet op!
• Zuig geen vloeistoffen op.
• Zuig alleen as op van toegestane brandstoffen!
• Zuig geen hete of brandende voorwerpen of
sintels op (bijv. sigaretten, kool, as, enz.).
De temperatuur van het materiaal moet lager
zijn dan 40°C.
• Voorzichtig! Brandgevaar als de temperatuur
van het materiaal warmer is dan 40 °C.
• Opgelet! Materialen waarvan het aan de
buitenkant lijkt dat ze zijn afgekoeld kunnen
van binnen nog erg heet zijn. Dit kunt
ucontroleren door eerst met een stuk metaal
door de as te vegen, voordat uhet apparaat
gebruikt. Van koude as ziet en voelt ugeen
warmte meer afkomen.
• Hete asdeeltjes kunnen door de luchtstroom
weer ontbranden.
• Temperaturen hoger dan 40°C kunnen de
stofzuiger, de stofzuigerslangen en het filter
beschadigen.
• Verzeker dat de oven goed is afgekoeld
voordat udeze stofzuigt.
• Controleer tijdens het stofzuigen voortdurend
de slangen, het filter en de stofzuiger op te
hoge temperaturen.
• Wanneer umerkt dat de temperatuur hoger

12
NL
wordt, schakel de stofzuiger dan onmiddellijk
uit. Verwijder het filter en neem het materiaal
uit het filter. Laat de stofzuiger onder toezicht
afkoelen.
• Maak de stofzuiger volledig leeg na het
stofzuigen.
• “Koude assen” zijn assen die voldoende lang
afgekoeld zijn, zonder sintels.
• Dit kan worden bevestigd door de assen
met een metalen hulpstuk om te woelen op
zoek naar sintels, vóór het gebruiken van
de asstofzuiger. Koude assen geven geen
restwarmte af.
• Maak de stofzuiger altijd leeg en schoon voor
en na het stofzuigen.
• Niet gebruiken voor het scheiden van stoffen
die gevaarlijk zijn voor de gezondheid
(stofklassen L, M, H).
• Geen brandbare stoffen opzuigen.
VEILIGHEIDSWAARSCHUWINGEN
VOOR HET BLAZEN VAN LUCHT
• Richt de luchtuitlaat lucht alleen op het
werkgebied. Nooit richting mensen of dieren.
• Risico op wegvliegende voorwerpen. Houd
omstanders weg van de werkplek.
• Draag altijd een veiligheidsbril wanneer ude
blaasfunctie gebruikt.
VEILIGHEIDSWAARSCHUWINGEN
VOOR DE ACCU
a) Open de accu niet. Gevaar voor kortsluiting.
b) Bescherm de accu tegen hitte, bijv. continu
intens zonlicht, vuur, water en vocht. Gevaar
voor ontploffing.
c) In geval van beschadiging en verkeerd
gebruik van de accu kunnen dampen
vrijkomen. Ventileer de omgeving en zoek
medische hulp in geval van klachten. De
dampen kunnen tot irritatie van de luchtwegen
leiden.
d) Gebruik de accu alleen in combinatie met
uw Ferm-product. Deze maatregel beschermt
de accu tegen gevaarlijke overbelasting.
e) De accu kan beschadigd raken door
puntige voorwerpen zoals spijkers of
schroevendraaiers of door krachten van
buitenaf. Er kan interne kortsluiting optreden
en de accu kan gaan branden, roken,
exploderen of oververhit raken.
VEILIGHEIDSWAARSCHUWINGEN
VOOR DE LADER
Bedoeld gebruik
Uitsluitend CD801AA en CD803AA-type
oplaadbare accu’smet de lader opladen. Alle
andere accu’skunnen openbarsten waardoor
persoonlijk letsel en materiële schade ontstaat.
a) Niet-oplaadbare accu’sniet opladen!
b) Tijdens het opladen moeten de accu’sin
een goed geventileerde ruimte worden
geplaatst!
2. INFORMATIE OVER HET
APPARAAT
Bedoeld gebruik
De stofzuiger is bedoeld voor het opzuigen
van koude as in een huishoudelijke omgeving,
bijvoorbeeld, het schoonmaken van een open
haard, een barbecue of het opzuigen van andere
asresten. De stofzuiger is voorzien van een
blaasfunctie. Deze functie kan worden gebruikt
om stof en vuil uit garages, hofjes en opritten
te blazen. Dit apparaat is niet geschikt voor
commercieel of industrieel gebruik.
Technische specificaties
Modelnr. VCM1004
Spanning accu 20V
Zuigkracht 10 kPA, 10 kPA, 0,6 m3/min
Inhoud van de container bij
benadering Ca. 12 liter
Slangdiameter Ø 35mm
Filter HEPA
Lengte van de slang 1,0 m
Gewicht (incl. accessoires) 2,4 kg
Geluidsdrukniveau LWA 76 dB(A)
Modelnr. CDA1154
Type accu Lithium-ion
Spanning 20V
Vermogen 2,0 Ah
Aanbevolen lader CDA1156, CDA1157,
CDA1175, CDA1171
Gewicht 0,3 kg
13
NL
Modelnr. CDA1156
Ingang lader 100-240V~ 50/60Hz
Max 1 A 20V
Uitgang lader 21,5 V 1,7 A
Laadtijd 2,0 Ah accu 90 minuten
Laadtijd 4,0 Ah accu 120 minuten
Aanbevolen accu's CDA1154, CDA1155
Gewicht 0,15 kg
Gebruik uitsluitend de volgende accu’svan het
AX POWER 20V accu-platform. Gebruik van
andere accu’skan leiden tot ernstig letsel of tot
beschadiging van het gereedschap.
CDA1154 20 V, 2 Ah Lithium-Ion (Inbegrepen)
CDA1155 20 V, 4 Ah Lithium-ion
De volgende laders kunnen worden gebruikt voor
het opladen van deze accu’s.
CDA1156 Laderadapter (Inbegrepen)
CDA1157 Snellader
CDA1175 Snellader
CDA1171 Snellader
De accu’svan het AX POWER 20V accu-platform
kunnen worden gebruikt in combinatie met alle
gereedschappen van het FERM AX POWER accu-
platform.
BESCHRIJVING
De nummers in deze tekst verwijzen naar de
diagrammen op pagina 2-4.
1. Aan/Uit-schakelaar
2. Draaghandgreep
3. Stofpoort
4. Luchtpoort
5. Metalen sluitklem
6. Opslag mondstukken
7. Container
8. Motorbehuizing
9. Slang
10. Aluminium - rond mondstuk
11. Aluminium - spleetmondstuk
12. HEPA-filter
13. Filterhouder
14. Accu
15. Ontgrendelingsknop accu
16. Knop LED-indicatielampjes accu
17. LED-indicatielampjes accu
18. Lader
3. MONTAGE
Verwijder de accu voordat
uwerkzaamheden aan het elektrisch
gereedschap gaat uitvoeren.
De accu moet voor het eerste gebruik
worden opgeladen.
De accu uit de machine nemen
Afb. B2
• Druk op de accu-ontgrendelingsknoppen (15)
en trek de accu uit het apparaat, zoals wordt
weergegeven op Afb. B2.
De accu in de machine plaatsen
Afb. B2
Controleer of de buitenzijde van de accu schoon
en droog is voordat ude accu in de lader of de
machine steekt.
• Steek de accu (14) in de voet van het apparaat.
• Duw de accu verder naar voor tot deze op z’n
plaats klikt.
Het controleren van de laadstatus van de accu.
Afb. C
De inbegrepen accu wordt in gedeeltelijk
opgeladen toestand geleverd.
• Ukunt de laadstatus van de accu controleren
door kort op de knop (16) op de accu te
drukken.
• De accu heeft 3 indicatielampjes die de
laadstatus aanduiden, hoe meer lampjes er
branden, des te meer lading de accu nog
heeft.
De accu opladen (met de lader)
Afb. B1
• Steek de stekker van de lader in een
stopcontact en wacht een ogenblik.
• Steek de uitgang van de lader in de ronde
aansluiting van de accu. De LED-indicator
op de accu (14) gaat branden en geeft de
laadstatus aan.
LED-indicator (17)
Afb. C
De accu heeft 1 LED-indicator (17) die de status
van het laadproces aangeeft:
14
NL
LED Lader - Status
Rood Bezig met het laden van de accu
Groen Opladen van de accu voltooid, accu volledig
opgeladen
• Als de accu volledig is geladen, trekt ude
stekker van de lader uit het stopcontact en
neemt ude accu uit de lader.
Wanneer de machine gedurende langere
tijd niet wordt gebruikt, kunt ude accu
het beste in geladen toestand opbergen.
Als de accu volledig is geladen, trekt ude stekker
van de lader uit het stopcontact en neemt ude
accu uit de lader.
• Schuif het HEPA-filter (12) over de filterhouder
(13), zoals wordt weergegeven op Afb. D.
Maak het HEPA-filter (12) regelmatig
schoon, ook altijd na intensief gebruik,
zodat de zuigkracht behouden blijft.
• Plaats het bovenste deel (8) op de container
(7), zoals wordt weergegeven op Afb. E-1.
• Zet de metalen vergrendelklemmen (5) van de
container goed vast op het bovenste deel (8),
zoals wordt weergegeven op Afb. E-2.
• Sluit de metalen vergrendelklemmen (5) door
ze omlaag te duwen.
• Sluit de zuigslang (9) aan. Voor het
stofzuigen (Afb. F): Verbind de zuigslang
(9) met de stofopening (3). Voor het blazen
(Afb. G): Verbind de zuigslang (9) met de
uitblaasopening (4).
• Sluit het ronde mondstuk (10) of het
spleetmondstuk (11) aan op de slang (9).
4. GEBRUIK
De machine in-/uitschakelen
Afb. A
Stofzuig nooit zonder het Hepa-filter!
• Schakel de stofzuiger in door de aan/uit-scha-
kelaar (1) naar voor te bewegen (richting AAN).
• Schakel de stofzuiger uit door de aan/uit-
schakelaar (1) naar achter te bewegen
(richting UIT).
Stofzuigen
Afb. D, E-1, E-2, F
Maak het HEPA-filter (12) regelmatig
schoon, ook altijd na intensief gebruik,
zodat de zuigkracht behouden blijft.
Fijn stof zoals stof afkomstig van cement,
roet en gips is te fijn om opgezogen te
worden. Hierdoor ontstaat het risico dat
het fijne stof in de motor komt en deze
zal beschadigen.
1. Schakel het apparaat uit (1) en verwijder de
accu (14).
2. Zet de metalen vergrendelklemmen (5) los en
verwijder het bovenste deel (8).
3. Verwijder voor ugaat stofzuigen alle stof en
vuil uit de container (7).
4. Plaats het filter. Schuif het HEPA-filter (12)
voorzichtig over de filterhouder (13), zoals
wordt weergegeven op Afb. D.
5. Plaats het bovenste deel (8) op de container
(7), zoals wordt weergegeven op Afb. E-1.
6. Plaats het bovenste deel (8) terug en zet de
vergrendelklemmen (5) vast. Afb. E-2.
7. Steek één uiteinde van de slang (9) in de
stofzuigpoort (3).
8. Plaats de accu (14).
9. Druk de aan/uit-schakelaar (1) in de stand
‘AAN/1’ om uw aszuiger in te schakelen.
10. Het apparaat is nu klaar voor gebruik als
stofzuiger.
11. Druk de aan/uit-schakelaar (1) in de stand
‘UIT/0’ om uw aszuiger uit te schakelen.
Blaasfunctie
Afb. E-1, E-2, G
Gebruik van deze functie zonder filter
wordt aanbevolen.
Verwijder alle stof en vuil uit de container
(7) voordat ude blaasfunctie gebruikt.
Draag altijd een veiligheidsbril wanneer
ude blaasfunctie gebruikt.
Risico op het wegslingeren van
voorwerpen. Houd omstanders weg van
de werkplek.
15
NL
Uw aszuiger is voorzien van een blaasfunctie.
Deze functie kan worden gebruikt om de
restanten van as uit hoeken en spleten te blazen,
die niet bereikbaar zijn tijdens het zuigen.
1. Schakel het apparaat uit (1) en verwijder de
accu (14).
2. Ontgrendel de vergrendelingsklem (5) en
verwijder het bovengedeelte (8).
3. Verwijder het filter (12) en verwijder alle
stof en vuil uit de container (7) voordat ude
blaasfunctie gebruikt.
4. Plaats het bovenste deel (8) terug en zet de
vergrendelklemmen (5) vast. Afb. E-1, E-2.
5.
Steek één uiteinde van de slang (9) in de
uitblaaspoort (4) bovenop het apparaat. Afb. G.
6. Plaats de accu (14).
7. Druk de aan/uit-schakelaar (1) in de stand
’AAN/1’ om uw aszuiger in te schakelen.
8. Het apparaat is nu klaar om stof en vuil weg te
blazen.
9. Druk de aan/uit-schakelaar (1) in de stand
‘UIT/0’ stand om uw apparaat uit te schakelen.
Werking beëindigen
Afb. A
1. Schakel het apparaat uit (1) en verwijder de
accu (14).
2. Verwijder bovengedeelte (8) en leeg de
container (7).
3. Reinig de machine met een zachte doek.
4. Maak de slang, de buis en de container los.
5. Maak de verbindingsstukken van de slang,
de slang en de buis na gebruik schoon, en let
erop dat ze niet verstopt raken.
6. Berg het netsnoer en alle hulpstukken op in het
apparaat. Berg het apparaat op in een droge
ruimte.
5. ONDERHOUD
Voorafgaand aan het reinigen en het
onderhoud dient de machine te allen tijde
uitgeschakeld te worden en moet de
stekker uit het stopcontact worden
genomen.
Maak de behuizing van de machine
regelmatig schoon met een zachte doek, bij
voorkeur na ieder gebruik. Controleer of de
ventilatieopeningen vrij zijn van stof en vuil.
Verwijder hardnekkig vuil met een zachte doek,
vochtig gemaakt met een zeepoplossing. Gebruik
geen oplosmiddelen zoals benzine, alcohol,
ammoniak, enzovoorts. Chemicaliën zoals
deze kunnen de synthetische componenten
beschadigen.
Filters
Afb. D
Voor de beste prestaties raden wij aan
om het filter (12) regelmatig te
vervangen, hetgeen afhankelijk is van de
frequentie van het gebruik.
1. Voorzichtig het HEPA-filter (12) verwijderen.
2. Veeg met een kwast het stof van het HEPA-
filter (12) en was het filter, indien nodig.
3. Gebruik geen schoonmaakmiddelen,
oplosmiddelen of scherpe voorwerpen voor
het reinigen van het apparaat en het wasbare
HEPA-filter
4. Laat het filter goed drogen voordat uhet filter
weer gebruikt.
5. Het filter opnieuw installeren.
MILIEU
Niet goed functionerende en/of
afgedankte elektrische of elektronische
apparaten moeten bij de juiste
inzamelpunten voor recycling worden
aangeboden.
Alleen voor landen in de EG
Gooi geen elektrisch gereedschap bij het huisvuil.
Volgens de Europese richtlijnen 2012/19/
EU betreffende afgedankte elektrische en
elektronische apparatuur en de implementatie
hiervan in nationaal recht, moeten elektrische
gereedschappen die niet langer gebruikt worden
apart ingezameld en weggegooid worden op een
milieuvriendelijke manier
GARANTIE
Producten van FERM worden op basis van de
hoogste kwaliteitsnormen ontwikkeld en zijn
gegarandeerd vrij van defecten, zowel voor wat
betreft het materiaal als de afwerking, gedurende
de door de wet bepaalde periode, startend vanaf

16
FR
de datum van de originele aankoop. Mocht het
product gedurende deze periode enige storingen
vertonen als gevolg van gebrekkig materiaal en/of
gebrekkige afwerking, dient direct contact met uw
FERM-dealer opgenomen te worden.
De volgende omstandigheden zijn uitgesloten van
de garantie:
• Reparaties en/of wijzigingen die door niet
erkende servicecentra werden uitgevoerd of
waartoe een poging werd ondernomen.
• Normale slijtage.
• Het gereedschap werd misbruikt, verkeerd
gebruikt of niet goed onderhouden.
• Er werden niet-originele reserveonderdelen
gebruikt. Dit vormt de enige garantie die
door het bedrijf wordt gegeven, expliciet of
impliciet. Geen andere garanties, impliciet
noch expliciet, die verder strekken dan deze
garantie, inclusief de impliciete garanties
inzake de verkoopbaarheid en geschiktheid
voor een specifiek doel. In geen geval zal
FERM aansprakelijk zijn voor incidentele
schade of gevolgschade. De oplossingen van
de dealers zullen beperkt zijn tot de reparatie
of het vervangen van niet-conforme eenheden
of onderdelen.
Het product en de gebruiksaanwijzing kunnen
worden gewijzigd. Specificaties kunnen
zonder voorafgaande kennisgeving worden
gewijzigd.
Aspirateur de cendres
VCM1004
Merci d’avoir acheté ce produit FERM. Grâce
àlui, vous possédez maintenant un produit
d’excellente qualité, proposé par l’un des
fournisseurs leaders en Europe. Tous les produits
proposés par Ferm sont fabriqués conformément
aux plus hautes normes en matière de
performance et de sécurité. Notre philosophie
d’entreprise prévoit également un excellent
service clientèle, renforcé par notre garantie
complète. Nous espérons que vous apprécierez
l’utilisation de ce produit pendant de nombreuses
années.
1. CONSIGNES DE SÉCURITÉ
Veillez àbien lire les avertissements de sécurité,
les avertissements supplémentaires de sécurité
ainsi que toutes les instructions jointes. Le
non-respect des avertissements de sécurité et
des consignes peut entraîner des décharges
électriques, des incendies et/ou de graves
blessures. Conservez tous les avertissements et
toutes les instructions liées àla sécurité afin de
pouvoir vous yréférer dans le futur.
Les symboles qui suivent sont utilisés dans la
notice ou sur le produit :
Lisez la notice d’utilisation.
Machine de classe II - À double isolation
- Aucune liaison àla terre n’est
nécessaire.
Alimentation àdécoupage.
En cas de panne, le transformateur n’est
pas dangereux.
Polarité de l’adaptateur.
Température maxi 45°C.
Pour les cendres froides uniquement
! Un risque d’incendie est possible si
la matière aspirée dépasse une
température de 40°C (104°F) !

17
FR
Si la température des substances
aspirées dépasse 40°C, un risque
d’incendie est possible.
Ne jetez pas la batterie au feu.
Ne jetez pas la batterie dans l’eau.
Recyclez la batterie Li-Ion.
Ne jetez pas le produit de façon
inappropriée.
Le produit est conforme aux normes de
sécurité en vigueur des directives
européennes.
REMARQUES LIÉES À LA SÉCURITÉ
CET APPAREIL PEUT ÊTRE UTILISÉ PAR DES
ENFANTS ÂGÉS DE 8 ANS ET PLUS ET PAR DES
PERSONNES AUX CAPACITÉS PHYSIQUES,
SENSORIELLES OU INTELLECTUELLES
RÉDUITES, OU QUI MANQUENT D’EXPÉRIENCE
ET DE CONNAISSANCES, À CONDITION
QU’ILS SOIENT SUPERVISÉS OU QU’ILS
AIENT ÉTÉ FORMÉS SUR LA FAÇON
SÛRE D’UTILISER L’APPAREIL ET QU’ILS
COMPRENNENT LES RISQUES ENCOURUS.
LES ENFANTS NE DOIVENT PAS JOUER
AVEC L’APPAREIL. LE NETTOYAGE ET LES
OPÉRATIONS DE MAINTENANCE À RÉALISER
PAR L’UTILISATEUR NE DOIVENT PAS
ÊTRE EXÉCUTÉS PAR DES ENFANTS SANS
SURVEILLANCE.
• L’aspirateur de cendres doit être assemblé
correctement avant l’utilisation.
• Ne laissez pas la machine en marche sans
surveillance.
• Gardez les embouts et les filtres propres et en
bon état de fonctionnement afin de garantir
que la machine fonctionne en toute sécurité et
au mieux de ses performances.
• L’utilisateur de l’appareil est responsable de
la sécurité des autres personnes pendant
l’utilisation.
• La machine ne doit être utilisée qu’aux fins
pour lesquelles elle aété conçue.
• N’utilisez la machine que dans des zones
sèches et protégées des intempéries. Ne
l’utilisez pas àl’extérieur s’il pleut.
• Retirez le bloc-batterie de l’aspirateur avant
d’effectuer la maintenance ou de le nettoyer,
avant de procéder àdes réglages, avant de
changer un accessoire et avant de le ranger.
Cette mesure préventive permet d’éviter la
mise en marche accidentelle de l’aspirateur.
• Veillez àce que la pièce dans laquelle
l’aspirateur est utilisé soit bien aérée.
• Ne faites réparer la machine que par des
spécialistes qualifiés qui n’utilisent que des
pièces détachées d’origine. Cela permet de
garantir la sûreté de l’aspirateur.
• Lorsqu’elle n’est pas utilisée, rangez la
machine dans un endroit sûr.
• Le lieu de rangement doit être sec et il
doit fermer àclé. Cela permet d’éviter
l’endommagement de l’aspirateur ou qu’il soit
utilisé par une personne inexpérimentée.
AVERTISSEMENTS LIÉS À LA SÉCURITÉ
PROPRES À L’ASPIRATION DE CENDRES
• L’aspirateur ne doit pas servir pour séparer
des substances dangereuses.
• Substances pouvant être aspirées - cendres
froides des cheminées, bois/charbon des
poêles, cendriers, barbecue.
• Videz et nettoyez l’aspirateur avant et après
avoir aspiré, afin d’éviter l’accumulation
de matières qui pourraient créer un risque
d’incendie àl’intérieur de l’aspirateur.
• N’aspirez pas de suie !
• N’aspirez pas de liquides.
• N’aspirez que les cendres des matières
autorisées !
• N’aspirez aucun objet chaud ou brûlant ni
aucune braise (ex : cigarettes, charbons,
cendres, etc.). La température ne doit pas
dépassée 40°C.
• Attention ! Si la température des substances
aspirées dépasse 40°C, un risque d’incendie
est possible.
• Attention ! Les matières qui semblent avoir
refroidi àl’extérieur peuvent être toujours très
chaudes àl’intérieur. Il est possible de s’en
apercevoir en remuant les cendres avec un
objet métallique avant d’utiliser l’appareil. Plus
aucun signe de chaleur ne doit être perceptible
si les cendres sont froides.

18
FR
• Les particules de cendres chaudes peuvent
s’enflammer de nouveau dans l’air.
• Les températures dépassant 40°C peuvent
endommager l’aspirateur, les tuyaux et le filtre.
• Veillez àce que le poêle soit froid avant
d’aspirer àl’intérieur.
• Contrôlez régulièrement la température des
tubes, du filtre et de l’aspirateur pendant
l’aspiration.
• Si vous vous apercevez que la température
grimpe, éteignez immédiatement l’aspirateur.
Retirez le filtre et retirer les substances
du filtre. Laissez refroidir l’aspirateur en le
surveillant.
• Videz complètement l’aspirateur après
l’aspiration.
• Les “cendres froides” sont des cendres
ayant refroidi pendant un délai suffisant et ne
contenant plus aucune poche de braises.
• Cela doit être vérifié en raclant les cendres
àl’aide d’un outil métallique, avant d’utiliser
l’aspirateur de cendres. Les cendres froides ne
diffusent pas de chaleur.
• Veillez àtoujours vider et nettoyer l’aspirateur
avant et après avoir aspiré.
• N’utilisez pas l’aspirateur pour récupérer
des poussières dangereuses pour la santé
(poussières de classe L, M, H).
• N’aspirez jamais aucunes substances
inflammables.
AVERTISSEMENTS LIÉS À LA
SÉCURITÉ PROPRES AUX
OPÉRATIONS DE SOUFFLAGE
• Ne dirigez l’échappement d’air que vers
la zone de travail. Jamais vers d’autres
personnes ou des animaux.
• Risque de projection d’objets. Éloignez les
personnes àproximité de la zone de travail.
• Portez systématiquement des lunettes de
protection pour utiliser la fonction Soufflage.
AVERTISSEMENTS DE SÉCURITÉ
CONCERNANT LA BATTERIE
a) N’ouvrez pas la batterie. Risque de court-
circuit.
b) Protégez la batterie de la chaleur, des
rayons directs du soleil continus et
intensifs, du feu, de l’eau et de l’humidité.
Risque d’explosion.
c) En cas de dommage ou de mauvaise
utilisation, la batterie peut émettre des
vapeurs. Aérez la zone et faites appel àun
médecin en cas de contamination. Les
vapeurs peuvent irriter le système respiratoire.
d) N’utilisez la batterie qu’avec votre produit
Ferm. Cette seule mesure permet de protéger
la batterie des surcharges dangereuses.
e) La batterie peut être endommagée par
des objets pointus comme des clous ou
des embouts de tournevis ou si elle subit
une force extérieure excessive. Un court-
circuit interne est alors possible et la batterie
peut alors s’enflammer, fumer, exploser ou
surchauffer.
AVERTISSEMENTS DE SÉCURITÉ
CONCERNANT LE CHARGEUR
Utilisation prévue
Avec ce chargeur ne rechargez que les blocs-
batteries rechargeables CD801AA et CD803AA.
Les autres types de batteries peuvent éclater et
provoquer des blessures ou des dommages.
a) Ne rechargez jamais des piles non
rechargeables !
b) Pendant la charge, les batteries doivent
être placées dans un endroit bien aéré !
2. INFORMATIONS SUR LA
MACHINE
Utilisation prévue
L’aspirateur est destiné àaspirer les cendres
froides des cheminées, des barbecues ou autres,
dans le cadre domestique. L’aspirateur intègre une
fonction Soufflage. Elle peut servir pour souffler
les poussières et les débris hors des garages,
des patios ou des allées. Cet appareil n’est pas
destiné àun usage commercial ou industriel.
Caractéristiques techniques
N° de modèle VCM1004
Tension Batterie 20 V
Force d'aspiration 10 kPA, 10 kPA, 0,6m3/min
Capacité approx. du bac Environ 12L
Diamètre du tube Ø 35mm
Filtre HEPA
Longueur du tuyau 1,0 m
Poids (avec les accessoires) 2,4kg
Niveau de puissance sonore LWA 76 dB(A)
19
FR
N° de modèle CDA1154
Type de batterie Lithium-Ion
Tension 20V
Capacité 2.0 Ah
Chargeur recommandé CDA1156, CDA1157,
CDA1175, CDA1171
Poids 0,3kg
N° de modèle CDA1156
Entrée chargeur 100-240V~ 50/60Hz
Maxi 1A 20 V
Sortie chargeur 21,5V 1,7A
Durée de charge batterie 2.0Ah 90 minutes
Durée de charge batterie 4.0Ah 120 minutes
Batteries recommandées CDA1154, CDA1155
Poids 0,15kg
N’utilisez que les batteries suivantes de la
plateforme Batterie AX-POWER 20V. L’utilisation
de toute autre batterie pourrait provoquer de
graves blessures ou endommager l’outil.
CDA1154 20V, 2Ah Lithium-Ion (fournie)
CDA1155 20V, 4Ah Lithium-Ion
Les chargeurs suivants peuvent être utilisés pour
recharger ces batteries.
CDA1156 Adaptateur pour chargeur(fourni)
CDA1157 Chargeur rapide
CDA1175 Chargeur rapide
CDA1171 Chargeur rapide
Les batteries de la plateforme AX-POWER 20V
sont interchangeables pour tous les outils de la
plateforme Batterie FERM AX-POWER.
PRÉSENTATION
Les numéros dans le texte renvoient aux
diagrammes des pages 2 à4.
1. Interrupteur Marche/Arrêt
2. Poignée de transport
3. Prise Aspiration
4. Prise Soufflage
5. Attache métallique
6. Rangement des embouts
7. Bac
8. Section haute
9. Tuyau
10. Embout rond en aluminium
11. Suceur plat en aluminium
12. Filtre HEPA
13. Porte-filtre
14. Batterie
15. Bouton de libération de la batterie
16. Témoins de la batterie
17. Voyants LED de la batterie
18. Chargeur
3. ASSEMBLER L’APPAREIL
Avant d’intervenir d’une quelconque
façon sur l’outil électrique, retirez la
batterie.
La batterie doit être chargée avant la
première utilisation.
Retirer la batterie de la machine
Fig. B2
• Enfoncez les boutons de déverrouillage de
la batterie (15) et tirez la batterie hors de la
machine, comme illustré par la Fig. B2.
Installer la batterie dans la machine
Fig. B2
Veillez àce que l’extérieur de la batterie soit
propre et sec avant de la raccorder au chargeur
ou àla machine.
• Insérez la batterie (14) àla base de la machine.
• Enfoncez la batterie vers l’avant jusqu’àce
qu’elle s’enclenche en place.
Contrôler le niveau de charge de la batterie
Fig. C
La batterie fournie est livrée partiellement
chargée.
• Pour contrôler le niveau de charge de la
batterie appuyez brièvement sur le bouton (16)
sur la batterie.
• La batterie intègre 3 voyants qui indiquent
le niveau de charge. Plus il yade voyants
allumés, plus le niveau de charge restant est
élevé.
Recharger la batterie (àl’aide du chargeur)
Fig. B1
• Branchez la prise du chargeur dans une prise
de courant et patientez un moment.
20
FR
• Branchez la prise de sortie du chargeur dans
la prise ronde sur la batterie. Le voyant sur
batterie (14) s’allume et indique l’état de la
charge.
Voyant (17)
Fig. C
Le batterie intègre 1 voyant (17) qui indique le
statut du processus de charge :
Voyant État du chargeur
Rouge Batterie en cours de charge
Vert Charge de la batterie terminée, batterie
complètement rechargée
• Une fois la batterie complètement rechargée,
retirez la prise du chargeur de la prise murale
et retirez la batterie du chargeur.
Si la machine n’est pas utilisée pendant
une longue période, il est préférable de
ranger la batterie complètement
rechargée.
Une fois la batterie complètement rechargée,
retirez la prise du chargeur de la prise murale et
retirez la batterie du chargeur.
• Glissez le filtre HEPA (12) par-dessus le porte-
filtre (13), comme illustré par la Fig. D.
Nettoyez régulièrement le filtre HEPA
(12) et après chaque utilisation intensive
afin de conserver une bonne puissance
d’aspiration.
• Installez la section haute (8) sur le bac (7),
comme illustré par la Fig. E-1.
• Fixez les attaches métalliques (5) du bac sur la
partie haute (8), comme illustré par la Fig. E-2.
• Refermez les attaches métalliques (5) en les
poussant vers le bas.
• Raccordez le tuyau d’aspiration (9).
Pour aspirer (Fig. F) : Raccordez le tuyau
d’aspiration (9) àla prise Aspiration (3).
Pour souffler (Fig. G) : Raccordez le tuyau
d’aspiration (9) àla prise Soufflage (4).
• Raccordez l’embout rond (10) ou le suceur plat
(11) au tuyau (9).
4. FONCTIONNEMENT
Mettre en marche et éteindre la machine
Fig. A
N’aspirez rien si le filtre HEPA n’est pas
installé !
• Pour mettre l’aspirateur en marche, déplacez
l’interrupteur Marche/Arrêt (1) vers l’avant (vers
le ON).
• Pour éteindre l’aspirateur, déplacez
l’interrupteur Marche/Arrêt (1) vers l’arrière
(vers le OFF).
Aspirer
Fig. D, E-1, E-2, F
Nettoyez régulièrement le filtre HEPA
(12) et après chaque utilisation intensive
afin de conserver une bonne puissance
d’aspiration.
Les poussières fines comme la poussière
de ciment, la suie et le plâtre sont trop
fines pour cet équipement. Elles risquent
de pénétrer dans le moteur et de
l’endommager.
1.
Éteignez la machine (1) et retirez la batterie (14).
2. Déverrouillez les attaches métalliques (5) et
retirez la section haute (8).
3. Avant d’aspirer, retirez toute la poussière et
tous les débris du bac (7).
4. Installez le filtre. Glissez le filtre HEPA (12)
avec précaution par-dessus le porte-filtre (13),
comme illustré par la Fig. D.
5. Installez la section haute (8) sur le bac (7),
comme illustré par la Fig. E-1.
6. Réinstallez la section haute (8) et verrouillez les
attaches (5). Fig. E-2.
7. Insérez une extrémité du tuyau (9) dans la prise
Aspiration (3).
8. Installez la batterie (14).
9. Enfoncez l’interrupteur (1) sur la position
“Marche/1” pour allumer votre aspirateur de
cendres.
10. La machine est alors prête àaspirer.
11. Enfoncez l’interrupteur (1) sur la position
“Arrêt/0” pour éteindre votre aspirateur de
cendres.
Table of contents
Languages:
Other Ferm Vacuum Cleaner manuals


