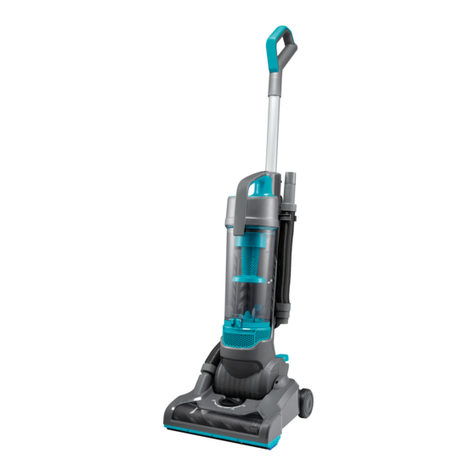
Beko 01M-8834453200-2117-06 User manual

VCO 6325 AB
Vacuum Cleaner
User Manual
01M-8834453200-2117-06
EN TR BG CS HU RO
SL SV PL IT FR

Please read this manual first!
Dear Valued Customer,
Thank you for preferring this Beko appliance. We hope that you get the best results
from your appliance which has been manufactured with high quality and state-of-the-
art technology. For this reason, please read this user manual and all other provided
documents carefully before using the appliance and keep it as a reference for future
use. If you hand over the appliance to someone else, give the user manual as well.
Follow the instructions by paying attention to all the information and warnings in the
user manual.
Remember that this user manual may also apply to other models. Differences between
models are explicitly described in the manual.
Meanings of the Symbols
Following symbols are used in various sections of this manual:
C
Important information and useful
hints about usage.
AWARNING:
Warnings against
dangerous situations concerning the
security of life and property.
Protection class for electric shock.
This product has been manufactured in environmental friendly modern plants without giving any harm
to the nature.
It does not contan PCB.
Made n P.R.C.

Vacuum Cleaner / User manual 3 / EN
CONTENTS
ENGLISH 4-10
TÜRKÇE 11-18
BULGARIAN 19-27
ČESKY 28-35
MAGYAR 36-43
ROMANIAN 44-53
SLOVENŠČINA 54-61
SVENSKA 62-69
POLSKI 70-82
ITALIANO 83-92
FRANÇAIS 93-100

4 / EN Vacuum Cleaner / User manual
Ths secton contans safety
nstructons that wll help protect
from rsk of personal njury or
property damage.
Falure to follow these
nstructons nvaldates the
granted warranty.
1.1 General safety
•Ths applance comples wth
nternatonal safety standards.
•Ths applance can be used by
chldren aged from 8 years and
above and personswth reduced
physcal, sensory or mental
capabltes or lack of experence
and knowledge f they have
been gven supervson or
nstructon concernng use of
the applance n a safe way
and understand the hazards
nvolved. Chldren shall not play
wth the applance. Cleanng
and user mantenance shall not
be made by chldren wthout
supervson.
•If the power cable or the
applance tself s damaged, do
not use t. Contact an authorsed
servce.
1Important safety and envronmental nstructons
•Your mans power supply should
comply wth the nformaton on
the ratng plate of the applance.
•The mans supply on whch you
wll use the applance must
be secured wth a 16 A fuse
mnmum.
•Do not use the applance wth
an extenson cable.
•To avod any damage to the
power cable, prevent t from
beng squeezed, bent or rubbed
on sharp edges.
•Do not touch the plug when the
applance s plugged n f your
hands are damp or wet.
•Do not pull the power cable
when unpluggng the applance.
•Do not vacuum flammable
materals and when vacuumng
cgarette ash, make sure that t
has cooled down.
•Do not vacuum water or other
lquds.
•Protect the applance from ran,
humdty and heat sources.
•Never use the applance n or
near places where combustble
or nflammable ambence or
places are present.

Vacuum Cleaner / User manual 5 / EN
1Important safety and envronmental nstructons
•Unplug the applance before
cleanng and mantenance.
•Do not mmerse the applance
or ts power cable n water for
cleanng.
•Check the hose of the applance
regularly. Do not use f t s
damaged and contact an
authorsed servce.
•Do not dsmantle the applance.
•Only use the orgnal parts or
parts recommended by the
manufacturer.
•Do not use the applance
wthout flters; otherwse, t can
get damaged.
•When vacuum-cleanng the
stars, the applance should be
located below the user.
•If you keep the packagng
materals, store them out of the
reach of chldren.
1.2 Complance wth the WEEE
Drectve and Dsposng of the
Waste Product
This product complies with EU WEEE Directive
(2012/19/EU). This product bears a classification
symbol for waste electrical and electronic
equipment (WEEE).
This product has been manufactured
with high quality parts and materials
which can be reused and are suitable
for recycling. Do not dispose of the
waste product with normal domestic
and other wastes at the end of its service life. Take
it to the collection center for the recycling of
electricalandelectronic equipment.Pleaseconsult
your local authorities to learn about these
collection centers.
1.3 Complance wth RoHS
Drectve
The product you have purchased complies with EU
RoHS Directive (2011/65/EU). It does not contain
harmful and prohibited materials specified in the
Directive.
1.4 Package nformaton
Packaging materials of the product are
manufactured from recyclable materials
in accordance with our National
Environment Regulations. Do not
dispose of the packaging materials together with
the domestic or other wastes. Take them to the
packaging material collection points designated by
the local authorities.

6 / EN Vacuum Cleaner / User manual
2.1 Overvew
2Your vacuum cleaner
1. On/Off button
2. Dust contaner
3. Sucton nozzle
4. Hose cap
5. Hose
6. Dust contaner removal button
7. Parquet/carpet brush parkng hook
8. Brush adjustment latch
9. Hgh performance parquet/carpet brush
10. Telescopc tube adjustment latch
11. Telescopc tube
12. Vacuum control
13. Handle
14. Specal Turbo/Anmal Brush
2.2 Techncal data
Supply voltage :
220-240 V~, 50/60 Hz
Power :
800 W
Cable length :
7 m
Techncal and desgn modfcaton rghts are
reserved.
1
54
6
2
3
10
11
12
13
98
7
The values whch are declared n the markngs affxed on your applance or other prnted documents suppled wth t represent
the values whch were obtaned n the laboratores pursuant to the pertnent standards. These values may vary accordng to the
usage of the applance and ambent condtons.
14

Vacuum Cleaner / User manual 7 / EN
3Usage
3.1 Intended use
The applance was desgned for household use
and s not sutable for ndustral use.
3.2 Attachng/removng the
hose
1. To attach the hose (5), push the hose cap (4) n
the drecton of arrow untl t s algned wth the
housng (you wll hear a clck).
•Projectng parts on the hose cap should be
algned correspondngly.
2. To remove the hose (5), press the unlockng
buttons on the sdes of the hose cap (4) and
pull the hose.
3.3 Attachng/removng the
telescopc tube
1. Attach the telescopc tube (11) to the handle
(13).
2. Pull the telescopc tube (11) from the handle
(13) to remove t.
3. You can extend or shorten the telescopc tube
(11) by sldng the telescopc tube adjustment
latch (10) back and forth.
3.4 Attachng/removng the
parquet/carpet brush
1. Attach the telescopc tube (11) to the parquet/
carpet brush (9) n the arrow drecton.
2. You can remove the telescopc tube (11) from
the parquet carpet brush (9) by pullng t.
3. We suggest you to use your specal turbo brush
(14) n order to easly clean the har shed from
your pet from your carpets/parquet.

8 / EN Vacuum Cleaner / User manual
3.5 Adjustng the parquet/
carpet brush
Perform the followng actons on the adjustment
latch (10) located on the parquet/carpet brush (9);
•Vacuum on frm ground and parquet; extend the
brush before vacuumng.
•Vacuum on carpets and rugs; retract the brush
before vacuumng.
3.6 Operaton
1. Plug n the applance after pullng the power
plug located at the back of the applance.
A
WARNING:
Stop pullng the
applance cable when t comes to
the yellow mark located on t. After
the yellow mark, the red mark wll
come. Do not pull any more after
reachng the red mark.
2. Press the on/off button (1) to swtch on your
applance.
3.7 Adjustng the sucton power
You can ncrease the sucton power of the
applance by turnng the sucton power
adjustment knob located on the body of the
applance clockwse accordng to the type of the
surface to be cleaned. To decrease the sucton
power, turn the sucton power adjustment knob
ant-clockwse.
3.8 Accessores
Upholstery tool
Sutable for cleanng the floorngs,
star steps, nsde of the cars,
sofas, armchars etc.
Dust brush
Sutable for cleanng the curtans,
and senstve and fragle objects.
Crevce tool
Sutable for cleanng the surfaces
whch are dffcult to clean, such as
areas remanng under sofas and
furnture.
AWARNING:
Donotmakecleanng
by usng the handle's (13) end part.
3.9 Warnngs regardng the
energy label
Ths s a general-purpose vacuum cleaner.
In order to reach the hghest energy effcency
and cleanng performance class specfed n
carpet and parquet cleanng, please use the
hgh-performance parquet/carpet brush (9).
We suggest you to use your specal turbo
brush (14) n order to easly clean the har shed
from your pet from your carpets/parquet.
The specfed values regardng the energy label
were determned accordng to the predefned
measurement methods (n lne wth EN60312-1).
3Usage

Vacuum Cleaner / User manual 9 / EN
3Usage
3.10 Swtchng off the
vacuum cleaner and parkng
feature
1. Swtch off the applance wth the on/off button
(1) and unplug t.
2. Insert the parkng hook (7) of the parquet/
carpet brush nto the parkng groove located at
the rear secton of the applance.
4Cleanng and care
Swtch off and unplug the applance before
cleanng t.
AWARNING:
Never use gasolne,
solvent, abrasve cleanng agents,
metal objects or hard brushes to
clean the applance.
4.1 Emptyng the dust
contaner
1. Press the dust contaner removal button (6) to
remove the dust contaner (2) and remove the
dust contaner n the drecton of the arrow
by holdng from the dust contaner carryng
handle.
2. Uncap the dust contaner (2) and empty t.
3. When you have empted dust, close the dust
contaner cap (2); a clck sound wll be heard.
4. Insert the dust contaner (2) nto ts place by
holdng t from the handle.
4.2 Cleanng the flters
AWARNING:
Donotuseapplances
producng hot ar such as har dryer
or heater to dry the flters.
A
WARNING:
Do not nstall the
flters wthout completely dryng
them; otherwse, smell of mosture
may occur durng use, water can
leak from the back of the applance
or the flters may get damaged.
AWARNING:
Attach the flters nto
ther places after they are dred.
4.2.1 Motor protecton flter and
HEPA flter
Ths flters are located under the dust contaner
(2) compartment.
1. Press the dust contaner removal button (6) and
remove the dust contaner (2).

10 / EN Vacuum Cleaner / User manual
4Cleanng and care
2. Remove the HEPA flter and motor protecton
flter found at the back of the dust contaner (2).
3. After washng the sponge protecton flter
under runnng water, wrng t out slghtly and
leave t to dry (for 24 hours mnmum).
4. Shake off the HEPA nlet flter to elmnate
the dusts on t. After that, you can wash t by
holdng ts clean sde under runnng cool water.
5. If you wash the HEPA flter, dry t at room
temperature (for 24 hours mnmum). Do not
use t before ensurng that t s completely dry.
4.2.2 HEPA flter
HEPA outlet flter s located on the rear sde of the
applance.
1. Remove the HEPA flter by pullng t from ts
handle.
2. Shake off the HEPA outlet flter to elmnate
the dusts on t. After that, you can wash t by
holdng ts clean sde under runnng cool water.
3. If you wash the HEPA flter, dry t at room
temperature (for 24 hours mnmum). Do not
use t before ensurng that t s completely dry.
4.3 Mantenance
Hand turbo brush
AWARNING:
Ensure the cleaner
s not connected to the mans
power supply when performng any
mantenance procedures.
1. Unlock the neck on the hand turbo brush by
twstng ant-clockwse.
2. Push the release buttons on the sde of the
Hand Turbo Brush down to unlock the external
brstles. Rotate ths brstle attachment
upwards.
3. Remove the clear cover.
4. Remove any drt or har from the roller brush.
5. Replace the clear cover.
6. Lock the neck on the hand turbo brush by
twstng clockwse.
7. Rotate the external brstles down and lock the
sde release buttons by pushng upwards.
4.4 Storage
•If you do not ntend to use the applance for a
long tme, store t carefully.
•Unplug the applance.
•Keep the applance out of the reach of chldren.
4.5 Handlng and
transportaton
•Durng handlng and transportaton, carry
the applance n ts orgnal packagng. The
packagng of the applance protects t aganst
physcal damages.
•Do not place heavy loads on the applance or on
the packagng. The applance may get damaged.
•Droppng the applance may render t non-
operatonal or cause permanent damage.

Lütfen önce bu kılavuzu okuyun!
Değerli Müşterimiz,
Beko ürününü tercih ettiğiniz için teşekkür ederiz. Yüksek kalite ve teknoloji ile üretilmiş
olan ürününüzün size en iyi verimi sunmasını istiyoruz. Bunun için, bu kılavuzun
tamamını ve verilen diğer belgeleri ürünü kullanmadan önce dikkatle okuyun ve bir
başvuru kaynağı olarak saklayın. Ürünü başka birisine verirseniz, kullanma kılavuzunu
da birlikte verin. Kullanma kılavuzunda belirtilen tüm bilgi ve uyarıları dikkate alarak
talimatlara uyun.
Bu kullanma kılavuzunun başka modeller için de geçerli olabileceğini unutmayın.
Modeller arasındaki farklar kılavuzda açık bir şekilde belirtilmiştir.
Sembollerin anlamları
Bu kullanma kılavuzunun çeşitli kısımlarında aşağıdaki semboller kullanılmıştır:
C
Cihazın kullanımıyla ilgili önemli
bilgiler ve faydalı tavsiyeler.
AUYARI:
Can ve mal güvenliğiyle ilgili
tehlikeli durumlar konusunda uyarılar.
Elektrik çarpmasına karşı koruma
sınıfı.
Bu ürün çevreye saygılı modern tesislerde doğaya zarar vermeden üretilmiştir.
AEEE Yönetmelğne Uygundur. PCB çermez.
Menşe P.R.C.

12 / TR Elektrikli Süpürge / Kullanma Kılavuzu
Bu bölümde, yaralanma ya
da madd hasar tehlkelern
önlemeye yardımcı olacak
güvenlk talmatları yer
almaktadır.
Bu talmatlara uyulmaması
halnde her türlü garant geçersz
hale gelr.
1.1 Genel güvenlk
•Bu chaz, uluslararası güvenlk
standartlarına uygundur.
•Chaz, 8 yaş ve üzer çocuklar
ve fzksel, algısal ve zhnsel
yetenekler azalmış veya
tecrübe ve blg eksklğ olan
kşler tarafından gözetm
altında veya chazın güvenl
br şeklde kullanımına ve
karşılaşılan lgl tehlkelern
anlaşılmasına dar talmat
verlrse kullanılablr. Çocuklar
chazla oynamamalıdır. Temzlk
ve kullanıcı bakım şlemler,
başlarında br büyük olmadığı
sürece çocuklar tarafından
yapılmamalıdır.
•Elektrk kablosu veya chaz
hasarlıysa kullanmayın. Yetkl
servse başvurun.
•Şebeke güç kaynağınız chazın
tp etketnde belrtlen blglere
uygun olmalıdır.
•Chazı kullanacağınız şebeke
en az 16 A’lık br sgorta le
emnyete alınmış olmalıdır.
•Chazı uzatma kablosuyla
kullanmayın.
•Elektrk kablosunun hasar
görmesn önlemek çn
sıkışmasını, kıvrılmasını veya
keskn kenarlara sürtünmesn
engelleyn.
•Chaz elektrğe bağlıyken
ellernz neml veya ıslaksa,
chazın fşne dokunmayın.
•Chazın fşn przden çıkartırken
kablosundan çekmeyn.
•Yanıcı maddeler süpürmeyn
ve sgara külünü süpürürken
soğumuş olmasına dkkat edn.
•Su veya dğer sıvı maddeler
süpürmeyn.
•Chazı yağış, nem ve ısı
kaynaklarından koruyun.
•Chazı patlayıcı veya yanıcı
ortamların ve maddelern
bulunduğu yerde veyayakınında
kullanmayın.
1Öneml güvenlk ve çevre talmatları

Elektrikli Süpürge / Kullanma Kılavuzu 13 / TR
•Temzlk ve bakım önces chazın
fşn przden çekn.
•Chazı veya elektrk kablosunu
temzlemek çn suya
daldırmayın.
•Chazın hortumunu düzenl
olarak kontrol edn. Hasar
durumunda kullanmayın, yetkl
servse başvurun.
•Chazı parçalarına ayırmayın.
•Sadece orjnal parçaları veya
üretc tarafından tavsye edlen
parçaları kullanın.
•Chazı fltreler olmadan
kullanmayın, zarar göreblr.
•Merdvenler süpürürken
chaz kullanıcının aşağısında
bulunmalıdır.
•Ambalaj malzemelern
saklıyorsanız çocukların
ulaşamayacağı br yerde
muhafaza edn.
1Öneml güvenlk ve çevre talmatları
1.2 AEEE yönetmelğne
uyum ve atık ürünün elden
çıkarılması
Bu ürün T.C. Çevre ve Şehrclk Bakanlığı
tarafından yayımlanan “Atık elektrkl ve
Elektronk eşyaların Kontrolü
Yönetmelğ’nde belrtlen zararlı ve yasaklı
maddeler çermez. AEEE Yönetmelğne
uygundur. Bu ürün, ger dönüşümlü ve tekrar
kullanılablr ntelktek yüksek kaltel parça ve
malzemelerden üretlmştr. Bu nedenle, ürünü,
hzmet ömrünün sonunda evsel veya dğer
atıklarla brlkte atmayın. Elektrkl ve elektronk
chazların ger dönüşümü çn br toplama
noktasına götürün. Bu toplama noktalarını
bölgenzdek yerel yönetme sorun. Kullanılmış
ürünler ger kazanıma vererek çevrenn ve doğal
kaynakların korunmasına yardımcı olun.
1.3 Ambalaj blgs
Ürünün ambalajı, Ulusal Mevzuatımız
gereğ ger dönüştürüleblr
malzemelerden üretlmştr. Ambalaj
atığını evsel veya dğer atıklarla brlkte
atmayın, yerel otortenn belrttğ ambalaj
toplama noktalarına atın.

14 / TR Elektrikli Süpürge / Kullanma Kılavuzu
2.1 Genel bakış
2Elektrkl süpürgenz
1. Açma/Kapama düğmes
2. Toz haznes
3. Emş ağzı
4. Hortum başlığı
5. Hortum
6. Toz haznes çıkarma düğmes
7. Parke halı fırçası park kancası
8. Fırça ayar mandalı
9. Yüksek performanslı parke halı fırçası
10. Teleskobk boru ayar mandalı
11. Teleskobk boru
12. Vakum ayar sürgüsü
13. Tutma sapı
14. Özel Turbo/Anmal Fırça
2.2 Teknk verler
Besleme gerlm :
220-240 V~, 50/60 Hz
Güç :
800 W
Kablo uzunluğu :
7 m
Teknk ve tasarım değşklkler yapma hakkı
saklıdır.
1
54
6
2
3
10
11
12
13
98
7
Ürününüz üzernde bulunan şaretlemelerde veya ürünle brlkte verlen dğer basılı dökümanlarda beyan edlen değerler, lgl
standartlara göre laboratuvar ortamında elde edlen değerlerdr. Bu değerler, ürünün kullanım ve ortam şartlarına göre değşeblr.
14

Elektrikli Süpürge / Kullanma Kılavuzu 15 / TR
3Kullanım
3.1 Kullanım amacı
Chaz ev tp kullanım çn tasarlanmıştır, sanay tp
kullanım çn uygun değldr.
3.2 Hortumu takma/çıkarma
1. Hortumu (5) takmak çn hortum başlığını (4)
yuvaya denk gelecek şeklde ok yönünde tn
(“klk” ses duyulur).
•Hortum başlığı üzerndek çıkıntılı parçalar
karşılıklı hzalanmalıdır.
2. Hortumu (5) çıkarmak çn hortum başlığının (4)
yan tarafında bulunan klt açma düğmelerne
basın ve hortumu çekn.
3.3 Teleskobk boruyu takma/
çıkarma
1. Teleskobk boruyu (11) tutma sapına (13) takın.
2. Teleskobk boruyu (11) çıkarmak çn tutma
sapından (13) teleskobk boruyu çekn.
3. Teleskobk borunun (11) uzunluğunu ayarlamak
çn teleskobk boru ayar mandalını (10) ler ger
kaydırarak uzatıp kısaltablrsnz.
3.4 Parke halı fırçasını takma/
çıkarma
1. Teleskobk boruyu (11) parke halı fırçasına (9) ok
yönünde takın.
2. Parke halı fırçasından (9) teleskobk boruyu (11)
çekerek çıkarablrsnz.
3. Evclhayvanınızdandökülennatçıtüyler sehalı
ve parkelernzden kolaylıkla temzleyeblmek
çn özel turbo fırçanızı (14) kullanmanızı tavsye
ederz.

16 / TR Elektrikli Süpürge / Kullanma Kılavuzu
3.5 Parke halı fırçasını
ayarlama
Parke halı fırçasının (9) üzernde bulunan ayar
mandalına (10 ) basarak;
•Sert zemn ve parke çn kıl fırçalar üzernde
temzlk yapın.
•Halı ve klmler çn kıl fırçalar gzl konumda
temzlk yapın.
3.6 Çalıştırma
1. Chazın arka kısmında yer alan fş çekerek prze
takın.
A
UYARI:
Chazın kablosunu
üzernde bulunan sarı şarete
geldğnde çekmey durdurun,
sarı şaretten sonra kırmızı şaret
gelecektr, kırmızı şaretten daha
fazla çekmeyn.
2. Chazınızı çalıştırmak çn açma/kapama
düğmesne (1) basın.
3.7 Emş gücünün ayarlanması
Chazın emş gücünü, temzlenecek yüzey cnsne
göre gövde üzernde bulunan emş gücü ayar
düğmesn saat yönünde çevrerek artırablrsnz.
Emş gücünü azaltmak çn se saat yönünün
tersne çevrn.
3.8 Aksesuarlar
Genş ağızlı uç
Döşemelern, merdven
basamaklarının, otomobl çnn,
kanepelern, koltukların vb.
süpürülmes çn uygundur.
Toz fırçası
Perde, hassas ve kırılablr csmlern
süpürülmes çn uygundur.
Dar ağızlı uç
Koltuk ve moblya araları gb,
ulaşılması zor bölgelern
süpürülmes çn uygundur.
AUYARI:
Tutma sapının (13) uç
kısmınıkullanaraktemzlk yapmayın.
3.9 Enerj etketne lşkn
uyarılar
Bu elektrk süpürges genel amaçlı br elektrk
süpürgesdr.
Halılarda ve sert zemn temzlğnde belrtlen
en yüksek enerj vermllğne ve temzlk
performans sınıfına ulaşmak çn lütfen yüksek
performanslı parke halı fırçasını (9) kullanın. Evcl
hayvanınızdan dökülen natçı tüyler se halı ve
parkelernzden kolaylıkla temzleyeblmek çn
özelturbofırçanızı(14)kullanmanızıtavsyeederz.
Enerj etketne lşkn belrtlen değerler, önceden
tanımlanmış ölçüm yöntemlerne (EN60312-1
uyarınca) göre tespt edlmştr.
3Kullanım

Elektrikli Süpürge / Kullanma Kılavuzu 17 / TR
3Kullanım
3.10 Süpürgenn kapatılması
ve park özellğ
1. Açma/kapama düğmesnden (1) chazı kapatın
ve fşn przden çekn.
2. Chazın arka kısmında bulunan park kanalına,
parke halı fırçasının parka kancasını (7) takın.
4Temzlk ve bakım
Temzlk yapmadan önce chazı kapatın ve fşn
przden çekn.
AUYARI:
Chazı temzlemek çn
kesnlkle benzn, solvent, aşındırıcı
temzleycler, metal nesneler veya
sert fırçalar kullanmayın.
4.1 Toz haznesnn
boşaltılması
1. Toz haznesn (2) çıkarmak çn toz haznes
çıkarma düğmesne (6) basın ve toz haznes
taşıma sapından tutarak ok yönünde çıkartın.
2. Toz haznesnn (2) kapağını açın ve boşaltın.
3. Toz boşaldığında, toz haznes (2) kapağını
kapatın, tık ses duyulur.
4. Toz haznes tutma sapından tutarak toz
haznesn (2) yerne yerleştrn.
4.2 Fltrelern temzlenmes
AUYARI:
Fltreler kurutmak çn saç
kurutma maknes, soba vb. sıcak
hava veren chazlar kullanmayın.
A
UYARI:
Fltreler tam olarak
kurumadan yerne takmayın, aks
haldekullanımesnasındaetrafa nem
kokusu yayılablr, arka kısmından su
sıçrayablr ve fltreler zarar göreblr.
AUYARI:
Fltreler kuruduktan sonra
yerlerne yerleştrn.
4.2.1 Motor koruma fltres ve
HEPA fltre
Bu fltreler toz haznes (2) bölmesnn alt kısmında
yer alır.
1. Toz haznes çıkarma düğmesne (6) basın ve toz
haznesn (2) çıkarın.
2. Toz haznesnn (2) arkasında bulunan HEPA
fltre ve motor koruma fltresn çıkartın.

18 / TR Elektrikli Süpürge / Kullanma Kılavuzu
4Temzlk ve bakım
3. Sünger koruma fltresn suyun altında
yıkadıktan sonra haffçe sıkıp kurumaya bırakın
(en az 24 saat).
4. HEPA grş fltresnn tozunu slkeleyerek dökün.
Daha sonra temz tarafını akan soğuk suyun
altına tutarak yıkayablrsnz.
5. Yıkamanız halnde HEPA fltrey oda sıcaklığında
kurutun (en az 24 saat). Tamamen kuru
olduğundan emn olmadan kullanmayın.
4.2.2 HEPA fltre
HEPA çıkış fltres, chazın arka tarafındadır.
1. HEPA çıkış fltresn tutma yernden çekerek
çıkartın.
2. HEPA çıkış fltresnn tozunu slkeleyerek dökün.
Daha sonra temz tarafını akan soğuk suyun
altına tutarak yıkayablrsnz.
3. Yıkamanız halnde HEPA fltrey oda sıcaklığında
kurutun (en az 24 saat). Tamamen kuru
olduğundan emn olmadan kullanmayın.
4.3 Bakım
Turba el fırçası
AUYARI:
Herhang br bakım şlem
gerçekleştrrken chazın şebeke güç
kaynağına bağlı olmadığından emn
olun.
1. Saat yönünün tersne çevrerek turbo el fırçası
üzerndek boynun kldn açın.
2. Harc fırçanın kldn açmak çnse turbo
el fırçasının kenarında bulunan çıkarma
butonlarına basın. Harc fırçayı yukarı doğru
çevrn.
3. Kapağı çıkarın.
4. Rulo fırçaya yapışmış pslkler veya kılları
temzleyn.
5. Kapağı tekrardan yerne takın.
6. Saat yönüne çevrerek turbo el fırçası üzerndek
boynu kltleyn.
7. Harc fırçayı aşağı doğru çevrn ve yukarı doğru
basarak kenardak çıkarma butonlarını kltleyn.
4.4 Saklama
•Chazı uzun süre kullanmayı düşünmüyorsanız,
dkkatl br şeklde saklayın.
•Chazın fşn çekn.
•Chazı, çocukların ulaşamayacağı br yerde
muhafaza edn.
4.5 Taşıma ve naklye
•Taşıma ve naklye sırasında chazı orjnal
ambalajı le brlkte taşıyın. Chazın ambalajı,
chazı fzksel hasarlara karşı koruyacaktır.
•Chazın veya ambalajının üzerne ağır csmler
koymayın. Chaz zarar göreblr.
•Chazın düşürülmes durumunda chaz
çalışmayablr veya kalıcı hasar oluşablr.

Моля, първо прочетете настоящото ръководство!
Уважаеми клиенти,
Благодарим Ви, че избрахте този уред на „Беко“. Надяваме се да получите
отлични резултати от нашия уред, произведен от висококачествени материали по
най-модерна технология. По тази причина, преди да преминете към употребата
на уреда, Ви молим, първо да прочетете цялото ръководство за употреба, както
и другата придружителна документация и да ги запазите за справка в бъдеще.
Ако уредът смени собственика си в бъдеще, то предайте и ръководството за
употреба заедно с него. Следвайте указанията, като обръщате внимание на
цялата информация и предупреждения в инструкцията за употреба.
Не забравяйте, че това ръководство за употреба може да важи за няколко различни
модела. Разликите между моделите са описани подробно в ръководството.
Значение на символите
В различните раздели на ръководството са използвани следните символи:
C
Важна информация и полезни
съвети за употребата.
AПРЕДУПРЕЖДЕНИЕ:
Предупреждения срещу опасни
ситуации относно здравето и
собствеността.
Защитен клас за токов удар.
Продуктът е произведен в екологични, съвременни съоръжения, които не вредят на природата.
Не съдържа полихлорбифенили (РСВ).
Произведено в НРК

20 / BG Прахосмукачка / Ръководство за употреба
Този раздел съдържа инструк-
ции за безопасност, които ще
ви помогнат да се защитите от
риск от нараняване или мате-
риална повреда.
Неспазването на инструкциите
води до отмяна на предоставе-
ната гаранция.
1.1 Обща
безопасност
•Този продукт съответства на
международните стандарти за
безопасност.
•Този уред може да се из-
ползва от деца над 8-годишна
възраст и от хора с намалени
физически, сетивни или ум-
ствени способности или от
хора, които нямат опит и зна-
ния, стига те да се наблюдават
и да им се дадат указанията
по отношение на безопасната
употреба на уреда и среща-
ните опасностите. Децата не
трябва да играят с уреда. По-
чистването и поддържката не
трябва да се извършват от
деца, освен ако не са контро-
лирани от възрастни.
1 Важни инструкции за безопасност и опазване на
околната среда
•Никога не използвайте уреда,
ако захранващият кабел или
самият уред е повреден.
Свържете се с оторизиран
сервиз.
•Проверете дали данните за
местното електрозахранване
отговарят на информацията
върху табелката с данни.
•Захранването на уреда трябва
да бъде обезопасено с пред-
пазител от минимум 16 A.
•Не използвайте уреда с удъл-
жител кабел.
•За да избегнете евентуални
повреди на захранващия
кабел, не го притискайте, не
го прегъвайте и не го търкайте
по остри ръбове.
•Никога не пипайте уреда или
щепсела, когато са включени,
с мокри или влажни ръце.
•Не изключвайте от контакта
дърпайки кабела на уреда.
•Не почиствайте с прахосму-
качката запалими материали
и когато почиствате остатъци
от цигари, уверете се, че са
изгаснали.
•Не всмуквайте вода или други
течности.
This manual suits for next models
1
Table of contents
Other Beko Vacuum Cleaner manuals

Beko
Beko VCO 32804 AW User manual

Beko
Beko VCC34818WD User manual

Beko
Beko BKS 9220 T User manual

Beko
Beko VRR 84314 VB User manual

Beko
Beko 01M-8834203200-1117-01 User manual

Beko
Beko BKS 2422 User manual

Beko
Beko VRT 84225 VI User manual

Beko
Beko VRT 84225 VB User manual

Beko
Beko VCO 42701 AB User manual

Beko
Beko VRT 74225 VI User manual

Beko
Beko VRT 71920 VR User manual

Beko
Beko 01M-8838033200-1319-04 User manual

Beko
Beko BKS 1210 User manual

Beko
Beko VCC 6480 User manual

Beko
Beko BKS 9218 User manual

Beko
Beko VCO 20713 WV User manual

Beko
Beko BKS 1410 EY User manual

Beko
Beko VRW 80318 VB User manual

Beko
Beko VRT 82821 BV User manual

Beko
Beko VCO32801AR User manual