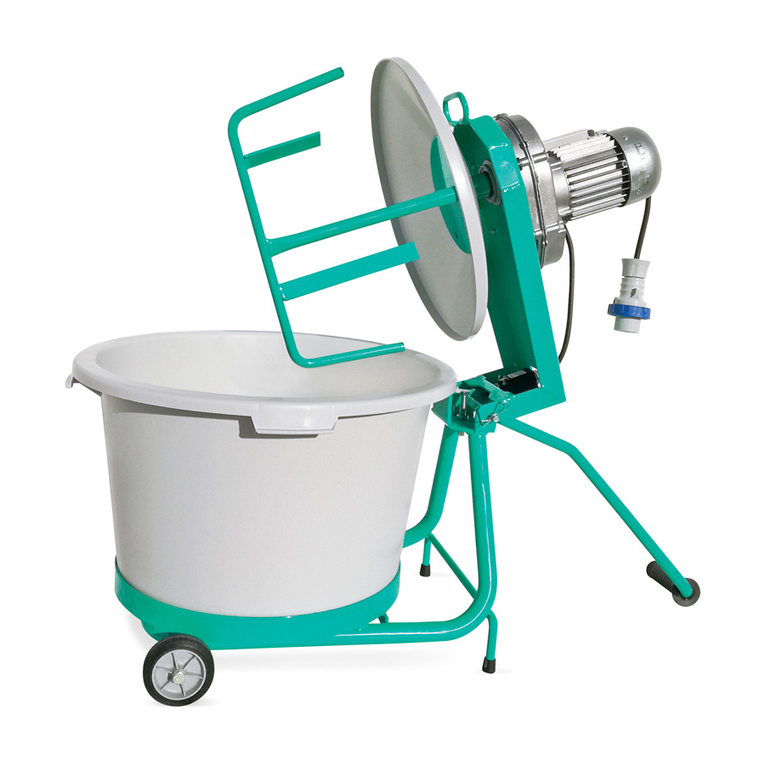
FERREX MIX125 User manual

Contents
Original instructions
Vers.No. 200225
CONCRETE MIXER
MODEL: MIX125 PRODUCT CODE: 703353 08/2020
AFTER SALES SUPPORT
00800 4003 4003
Great care has gone into the manufacture of this product and it should
therefore provide you with years of good service when used properly. In
the event of product failure within it´s intended use over the course of
the first 3 years after date of purchase, we will remedy the problem as
quickly as possible once it has been brought to our attention. In the
unlikely event of such an occurrenece, or if you require any information
about the product, please contact us via our helpline support services,
details of which are to be found both in this manual and on the product
itself.
PRODUCED IN CHINA FOR:
ALDI STORES LTD., PO BOX 26, ATHERSTONE,
WARWICKSHIRE, CV9 2SH.
ALDI STORES (IRELAND) LTD.
PO BOX 726, NAAS, CO. KILDARE.
Visit us at www.aldi.com
3
Overview 04
Utilisation 05
Pack contents/Parts 06
Handling pictures 07
Explanation of symbols 10
Introduction 11
Layout 12
Scope of delivery 12
Intended use 13
Safety instructions 13
Technical data 15
Assembly 16
Operation 17
Cleaning and Maintenance 18
Troubleshooting 18
Storage and transport 19
Disposal and recycling 19
Declaration of conformity 22

UtilisationOverview Pack contents/parts
Pack contents/parts
1Concrete Mixer
Supporting stand front (with handle)
Motor casing
Frame
Swivel wheel
Drum upper section
1
1
1
1
1
1Bearing bracket
Drum lower section
Mixer
Mounting material
Supporting stand, rear with wheel axle
1
1
1
1
4 5 6
Fig. 1a
0
1
Fig. 1
Fig. 3
Wheels
Locking plate
Instruction manual
Warranty card
2
1
1
1
Accessory bag (A)
Fig. 4
Accessory bag (B)
1
2
3
4
5 6 7 8
9
1011
12
13
2
6
2
2
2
2
4
M8 70
M8 70
M8 65
M8 20
M8 16
M8 20
2
M8 25
1
M10 65
4
M8
142
1
Fig. 3 (A)
Fig. 4 (B)
Fig. 5 (C)
Fig. 6 (D)
Fig. 7 (E)
Fig. 8 (F)
Fig. 9 (G)
Fig. 10 (H)
Fig. 11 (I)
Fig. 2

7
Fig. 5 Fig. 6
Fig. 7 Fig. 8
Accessory bag (C) Accessory bag (D)
Accessory bag (E) Accessory bag (F)

8
1
2
Fig. 9 Fig. 10
H
Fig. 11
I
Accessory bag (G) Accessory bag (H)
Accessory bag (I)

9
Loading/Mixing Position
For Mortar For Concrete
Emptying Position Storage Position
Fig. 12
Fig. 13
I

10
Explanation of symbols
Explanation of symbols
Read the operating instructions to reduce the risk of injury.
Wear safety goggles.
Wear ear defenders. The impact of noise can cause damage to hearing.
Wear a dust mask.
Wear safety shoes.
Wear gloves.
Do not put your hands into the moving drum!
Place the concrete mixer horizontally on even and firm ground!
Keep unauthorised persons and children away from the device!
Pull the power plug out before cleaning or maintenance!
Installation help!
See: Installation, installing the upper section of the drum (Fig.8)
Caution!
Risk of getting crushed at the sprocket.
Warning! Class II equipment. To ensure adequate protection, use origi-
nal insulation material for repair and maintain insulation distances.

11
Introduction
I. Introduction
Congratulations on choosing to buy a FERREX®product.
All products brought to you by FERREX®are manufactured to the highest standards of per-
formance and safety, and as part of our philosophy of customer service and satisfaction, are
backed by our comprehensive 3Year Warranty.
We hope you will enjoy using your purchase for many years to come.
Note:
According to the applicable product liability law the manufacturer of this machine is not liable
for damages which arise on or in connection with this machine in case of:
• improper handling,
• non-compliance with the instructions for use,
• repairs by third party, non-authorised skilled workers,
• installation and replacement of non-original spare parts,
• improper use,
• failures of the electrical system due to the non-compliance with the electrical specifications
and the European regulations.
Recommendations:
Read the entire text of the operating instructions prior to the assembly and operation of the
machine.
These operating instructions are intended to make it easier for you to get familiar with your
machine and utilise its intended possibilities of use.
The operating instructions contain important notes on how to work safely, properly and eco-
nomically with your machine and how to avoid dangers, save repair costs, reduce downtime,
and increase the reliability and working life of the machine.
In addition to the safety regulations contained herein, you must in any case comply with the
applicable regulations of your country with respect to the operation of the machine.
Put the operating instructions in a clear plastic folder to protect them from dirt and humidity,
and store them near the machine. The instructions must be read and carefully observed by
each operator prior to starting the work. Only persons who have been trained in the use of
the machine and have been informed on the related dangers and risks are allowed to use the
machine. The required minimum age of 16 years must be met.
In addition to the safety notes contained in the present operating instructions and the special
regulations of your country, the generally recognised technical rules for the operation of this
machine must be observed.

12
Layout/ Scope of delivery
II. Layout (Fig. 1)
1. Supporting stand, front (with handle)
2. Motor casing
3. Frame
4. Swivel wheel
5. Drum upper section
6. Bearing bracket
7. Drum lower section
8. Instruction manual
9. Mixer
10.Mounting material
11. Supporting stand, rear with wheel axle
12. Wheels
13. Locking plate
III. Scope of delivery
• Open the packaging and take out the machine carefully.
• Remove the packaging material as well as the packaging and transport bracing
(if available).
• Check that the delivery is complete.
• Check the machine and accessory parts for transport damage.
• If possible, store the packaging until the warranty period has expired.
mATTENTION! The machine and packaging materials are not toys! Children must not be al-
lowed to play with plastic bags, film and small parts! There is a risk of swallowing and suffo-
cation!
1x Supporting stand, front
1x Motor casing
1x Frame
1x Swivel wheel
1x Drum upper section
1x Bearing bracket
1x Drum lower section
1x Mixer
1x Mounting material
1x Supporting stand, rear with wheel axle
2x Wheels
1x Locking washer
1x Instruction manual
1x Warranty card

13
Intended use/ Safety instructions
IV. Intended use
• This concrete mixer can be used for mixing concrete and mortar both professionally and
non-professionally.
• Proper use includes adherence to the operating, maintenance and repair instructions of the
manufacturer and observance of the safety instructions they contain.
• Any other utilisation counts as improper use, especially mixing combustible or explosive
materials (fire and explosion hazard) and use with foodstuffs. The manufacturer is not liable
for damages resulting from improper use, the user alone shall bear the risk.
• Unauthorised modifications on the device exclude a liability of the manufacturer for dam-
ages of any kind resulting from it.
• Only persons who are familiarised with the device and informed about possible risks are
allowed to prepare, operate and service this device. Repair works may only be carried out
by us or by a customer service agent nominated by us.
V. Safety instructions
mATTENTION!Take note of the following instructions to protect yourself and others from
hazards and injuries.
mWARNING! Inhalation of mixing fumes and/or dust can lead to long term lung damage.
• Observe local accident prevention and safety regulations in the work area.
• Do not touch (risk of skin sensitisation and allergic reaction), inhale (risk of lung damage) or
eat the cement or additives (risk of poisoning). Wear personal, protective clothing (gloves,
goggles and a dust mask) when filling and emptying the mixing drum.
• Set up and run the concrete mixer on a solid, level base only (where it will not tip over).
• Make sure that there is no danger of tripping near the mixer.
• Be sure that there is enough light.
• The operator is responsible for third parties in the work area.
• Keep children away from mixer.
• Persons younger than 16 years of age are not allowed to operate the mixer.
• Only use the mixer for the functions listed in "Intended use".
• Do not alter the machine or any of its parts.
• Replace defective or damaged parts on the machine immediately.
• Only start up the mixer if the protective devices are complete and undamaged.
• Do not reach into mixer when it is running ( rotating mixing apparatus). Observe enough safety
distance to the concrete mixer. Prevent any contact to rotating or moving parts of the machine.
• Fill or empty the mixing drum only when the motor is running.
• Observe the mixer's direction of rotation.
• Do not alter the revolution speed of the motor, since this controls the safe maximum operating
speed, and protects the motor and all rotating parts against damage due to excess speed.
• Concrete mixers which the manufacturer has not intended for towed vehicle operation may
only be moved by the handle.

14
Safety instructions
• Be absolutely sure to pull the plug before:
- moving or transport
- cleaning, maintenance or repair work
- eliminating faults
- checking connecting lines, whether these are knotted or damaged
- leaving unattended (even during short interruptions)
• Check the machine for possible damage:
- Before further use of the machine the safety devices must be checked carefully for their
proper and intended function.
- Check whether movable parts function perfectly and do not stick or whether parts are
damaged. All parts must be correctly installed and fulfil all conditions to ensure perfect
operation of the machine.
- Damaged safety devices and parts must be properly repaired or exchanged by a recog-
nized, specialist workshop; insofar as nothing else is stated in the instructions for use.
- Damaged or illegible safety labels have to be replaced.
• Store unused equipment in a dry, locked place out of the reach of children.
Electrical safety
Danger to life and limb if not observed!
• Connecting attachments must be designed in conformance with IEC 60245-4:1980 (DIN 57 282)
and marked H 07 RN-F, or comparable models. Cross section of wires at least 3 x 1.5 mm² up to
a maximum length of 25 m. Wire cross-section at least 2.5 mm² for lengths of more than 25 m.
• Use only connecting attachments with a rubber plug device for severe requirements that is
protected against spraying water.
• Long and thin connection lines result in a potential voltage drop. The motor does not reach
any longer its maximal power; the function of the device is reduced.
• Unwind the cable completely when using a cable drum.
• Do not use the power cords for purposes they are not intended for. Protect the cable against
heat, oiland sharp edges. Donotjerkon thepowercable when pulling the plug from thesocket.
• Check connecting attachments for defects or ageing before using them.
• Never use defective connecting attachments.
• When laying the connecting attachments, be sure that they do not get crushed or bent, and
that the plug-and-socket connection does not get wet.
• Do not use any improvised electrical connections.
• Never bridge over protective devices or put them out of operation.
• Only hook up the machine by means of a fault-current circuit breacker: 30 mA!
mATTENTION! A licensed professional electrician must make all electrical connections and re-
pairs,andobservelocalregulationsindoingso,especially thoseregardingprotectivemeasures.
mATTENTION! The manufacturer or a company designated by the manufacturer must attend
to the repair of all electrical parts on the machine.
mATTENTION!Use only original spare parts. Accidentscanarise forthe user throughthe use ofoth-
er spare parts. The manufacturer is not liable for any damage or injury resulting from such action.

15
Safety instructions/Technical data
Residual risks
Even if used properly, residual risks can exist even if the relevant safety regulations are com-
plied with due to the design determined by the intended purpose.
Residual risks can be minimised if the “Safety instructions” and the “Intended use” as well as
the whole of the operating instructions are observed.
Observing these instructions, and taking proper care, will reduce the risk of personal injury
or damage to the equipment.
• Risk of injury to fingers and hands when reaching with the hand into the running mixing
drum. Providing protection against the danger of getting caught in the rotating stirring
grating would not be practicable.
• Risk from electricity when using improper electrical connections.
• Touching live parts of opened electrical components.
Inaddition, inspiteof all theprecautionary measurestaken, non-obvious residual riskscan stillexist.
VI. Technical data
Mains connection 230 V~ / 50 Hz
Power consumption 550 W S6 30%*
Safety class II
Drum capacity 120L (+/-5l)
Drum opening 385 mm
Drum speed 26.6 min-1
*S6 30%, continuous operation periodic duty: time of one load cycle is 10 minutes, operation
time at constant load is 3 minutes, operation time at no-load is 7 minutes.
NOISE
Test environment
• In the open air on the natural concrete ground.
• Environmental correction K2A= 0 dB.
Position where the declared highest A-weighted emission sound pressure level has been ob-
tained. Position 6.
A-weighted sound pressure level (LpA)67 dB(A)
Guaranteed sound power level (LWA)97 dB(A)
The values have been obtained in accordance with the EN 12151 Annex III Noise Test Code.
Wear ear protection.
The impact of noise can cause damage to hearing.
Sound and vibration values were measured with a standardized test method.
Keep the noise emissions to a minimum:

16
Assembly
• Only use appliances which are in perfect working order.
• Service and clean the appliance regularly.
• Adapt your working style to suit the appliance.
• Do not overload the appliance. Rated capacity of drum is 64l.
• Have the appliance serviced whenever necessary.
• Switch the appliance off when it is not in use.
VII. Assembly
mATTENTION! Ensure the machine is correctly and completely assembled before use.
mCAUTION! The concrete mixer should be used only after it is installed fully.
1. Installing wheels Fig.3 (Accessory bag A)
Install wheels on both sides, washer, wheel (12), washer, split-pin on the supporting stand rear with
wheel axle (11). Bend the longer leg of the split pin away from the shorter, to hold the wheel in place.
2. Installing the front supporting stand with frame Fig.4 (Accessory bag B)
Install front supporting stand (1) with 2 M8x70 screws, 2 8mm washers, 2 lockwashers, 2 M8
nuts on the frame (3) and tighten the screws. Choose the upper setting where the front sup-
porting stand has the same height as the wheel support.
3. Installing the frame with the wheel supports Fig. 5 (Accessory bag C)
Install frame and wheel supports fully with 2 M8x70 hexagon bolts, 2 8mm washers, 2 lock-
washers and 2 M8 nuts. Tighten the screws.
4. Installing the lower section of drum with frame Fig.6 (Accessory bag D)
Set the lower section of the drum (7) with bearing bracket (6) on the pre-installed framework,
tighten with 2 M8x65 hexagon bolts, 2 washers, 2 lockwashers and 2 M8 nuts.
Secure with a Ø42 split-ring.
5. Installing mixer Fig.7 (Accessory bag E)
Lock mixer (9) with 2 M8x20 cross-head screws to the lower section of the drum with each 1
washer, 1 sealing washer, 1 lockwasher and 1 M8 nut. Have a second person hold the mixer in
place while the bolt is tightened.
6. Installing upper section of drum Fig.8 (Accessory bag F)
Place rubber ring on the lower section. Place the upper section of drum on it.
mATTENTION! The pasted arrows mark the exact direction of the upper or lower section of
the drum. Align the upper section of the drum and install it on the lower section with 6 M8x16
cross-head screws with washers and tighten. Lock mixer (9) with 2 M8x20 cross-head screws
to the upper section of the drum with each 1 washer, 1 sealing washer, 1 lockwasher and 1 M8
nut. Have a second person hold the mixer in place while the bolt is tightened.
Assembly

17
Assembly / Operation
7. Installing lock plate Fig.9 (Accessory bag G)
Install locking plate (13) with 2 M8x25 hexagon bolts, 2 washers, 2 lockwashers on the swivel axis
and tighten.
8. Installing swivel wheel Fig.10 (Accessory bag H)
Insert the solid washer and spring into the tube on the tipping wheel. Slide the wheel over
the larger diameter shaft until the holes in the bracket line up with the hole drilled. Insert a
M10X65 hex bolt with a flat washer and screw on a nut with a flat washer from the other side.
Screw the nut up against the bracket firmly, but not so tightly so as to prevent the wheel from
pivoting about the bolt. Tighten the M10X30 socket head cap screw on the sleeve to adjust the
spring tension. Note: The wheel must be allowed to pivot about the bolt so that the lugs on the
bracket can be engaged or disengaged from the slots in the locking plate.
9. Installing motor casing. Fig.11 (Accessory bag I)
Place the motor casing on the retaining plate, secure with 4 M8 safety nuts and flat washers.
VIII. Operation
Electrical connections
• Before you connect the machine to the power supply make sure that the data on the rating
plate are identical to the supply voltage.
• If you use any extension cables, make sure that they are suitable for outdoor use and have
large enough wires:
Insert the power plug on the power cable into the socket outlet.
Starting the machine (Fig.1)
mATTENTION! Always start the mixer before loading the drum. Load the drum with drum
rotating.
1 Switching on: Press the green On switch
2 Switching off: Press the red Off switch
Moving/Filling/Emptying the drum (Fig.12+13)
mATTENTION!Do not turn mixer off while full of load. Empty the drum while the machine
is running.
• To move the drum, pull back the hand wheel so that the drum can be moved.
• When the drum is in the desired position, lock the hand wheel again.
• Before filling the drum, ensure that the opening is aligned in such a way that the mixture
cannot fall out of the drum. (Fig. 13)
• Put the mixture in when the drum is rotating (do not overfill the drum, rated capacity of
drum is 64l)

Kapitelüberschrift
18
mATTENTION! Risk of moving parts.
• Swivel the drum in the downward direction to empty it.
• Ensure that there is an adequate container under the drum (e.g., wheelbarrow).
• Ensure that no mixture falls on the ground.
IX. Cleaning and Maintenance
Pull out the power plug before every maintenance operation. There is a risk of electrocution
or of injury from moving parts.
Cleaning
mATTENTION! Never put hands inside the drum with drum rotating.
Thoroughly clean the machine at the end of each day’s operation. Keep your machine clean. The
slightest trace of material left in the drum will harden and attract more each time you use it until
the machine is useless. Dried cement should be scraped out of the drum. Do not throw bricks
into the machine drum to clean it out. Do not beat on the drum with a shovel, a hammer or other
tools to break up accumulations of dried cement mix, as damage to the machine may result.
Maintenance
Before plugging in the machine, check all nuts and bolts are tight, that the drum turns freely
and there is no damage to the motor casing cable or plug. Do not use if any part is broken or
missing.
X. Troubleshooting
Problem Possible Cause Action
Engine does not
start.
No power supply.
Check the voltage. Technical data
given on the type label must
correspond with electric network
voltage.
Broken cable. Any checks or replacements to
be provided by a professional
electrician.
Equipment star-
ting but getting
blocked under
small load and
switching auto-
matically off.
The extension cable is too long or
with a small cross section. Extension cable to be at least 1.5
mm2for a length of up to 25 m.
The socket is too far from the main
line and the extension cable has a
small cross section.
Cross section of at least 2.5 mm2
for longer cables.
Cleaning and Maintenance / Troubleshooting

19
Storage and transport/Disposal and recycling
XI. Storage and transport
Storage
In order to increase the service life of the concrete mixer and operate it without glitches, the
rotating mechanism should be treated with an environmentally compatible spray oil before
the mixer is put into storage for unusually long periods.
Transport
mATTENTION! Never transport the machine while its running.
Pull the power plug out, every time, before transporting the machine.
1. Set the filling opening downwards.
2. Lock the mixer with a strap to prevent displacement.
3. Do not lift the concrete mixer with the help of a crane.
4. The concrete mixer can be moved with the handle (below the wheel).
XII. Disposal and recycling
The equipment is supplied in packaging to prevent it from being damaged in transit. The raw mate-
rials in this packaging can be reused or recycled. The equipment and its accessories are made of var-
ious types ofmaterial,suchas metaland plastic. Neverplacedefective equipment inyour household
refuse. The equipment should be taken to a suitable collection center for proper disposal.
If you do not know the whereabouts of such a collection point, you should ask in your local
council offices.
Old devices must not be disposed of with household waste!
This symbol indicates that this product must not be disposed of together with domes-
tic waste in compliance with the Directive (2012/19/EU) pertaining to waste electrical
and electronic equipment (WEEE). This product must be disposed of at a designated
collection point. This can occur, for example, by handing it in at an authorised collect-
ing point for the recycling of waste electrical and electronic equipment. Improper handling
of waste equipment may have negative consequences for the environment and human health
due to potentially hazardous substances that are often contained in electrical and electron-
ic equipment. By properly disposing of this product, you are also contributing to the effective
use of natural resources. You can obtain information on collection points for waste equipment
from your municipal administration, public waste disposal authority, an authorised body for
the disposal of waste electrical and electronic equipment or your waste disposal company.

20

21

22
CE - Konformitätserklärung Originalkonformitätserklärung
CE - Declaration of Conformity
CE - Déclaration de conformité
DE erklärt folgende Konformität gemäß EU-Richtlinie und Normen für den Artikel
GB hereby declares the following conformity under the EU Directive and standards for the
following article
FR déclare la conformité suivante selon la directive UE et les normes pour l’article
IT dichiara la seguente conformità secondo le direttive e le normative UE per l‘articolo
HU az EU-irányelv és a vonatkozó szabványok szerinti következo megfeleloségi nyilatkozatot
teszi a termékre
SI izjavlja sledeco skladnost z EU-direktivo in normami za artikel
Marke / Brand: FERREX
Art.-Bezeichnung / Article name: CONCRETE MIXER - MIX125
Art.-Nr. / Art. no.: 703353
X2014/30/EU
X2011/65/EU*
X2006/42/EC
Standard references:
EN 12151; EN ISO 3744; EN 60204-1; EN 55014-1; EN 55014-2; EN 61000-3-2; EN 61000-3-3
* Der oben beschriebene Gegenstand der Erklärung erfüllt die Vorschriften der Richtlinie 2011/65/EU des
Europäischen Parlaments und des Rates vom 8. Juni 2011 zur Beschränkung der Verwendung bestimmter
gefährlicher Stoe in Elektro- und Elektronikgeräten.
The object of the declaration described above fulls the regulations of the directive 2011/65/EU of the
European Parliament and Council from 8th June 2011, on the restriction of the use of certain hazardous
substances in electrical and electronic equipment.
Die alleinige Verantwortung für die Ausstellung dieser Konformitätserklärung trägt der Hersteller.
This declaration of conformity is issued under the sole responsibility of the manufacturer.
Ichenhausen, den 25.02.2020 __________________________
Unterschrift / Markus Bindhammer / Technical Director
Subject to change without notice
Technische Dokumentation verfügbar bei:
Documents registar: Georg Kohler
Scheppach, Fabrikation von Holzbearbeitungsmaschinen GmbH
Günzburger Str. 69, D-89335 Ichenhausen
X2000/14/EC_2005/88/EC
X
Annex V
measured LWA = 87 dB(A); guaranteed LWA = 97 dB(A)
P = 0,55 kW
Notied Body:
TÜV Rheinland LGA Products GmbH
Tillystraße 2
90431 Nürnberg - Germany
Notied Body No.: 0197
This manual suits for next models
1
Table of contents
Popular Mixer manuals by other brands
Santint
Santint Perfitall Series user manual

Black Diamond Equipment
Black Diamond Equipment BDPM-10 instruction manual
Anvil
Anvil MIX8140 Specifications
Esmach
Esmach SPI 30 Instructions for use and maintenance

Central Machinery
Central Machinery 67536 Owner's manual & safety instructions

Raider
Raider Pro RDP-SHM20 SOLO user manual

