Festivo CITYCOLD 072023 User manual

Rev 072023
CITYCOLD
Installation and operation manual


3EN
Contents
Intended use 4
Models 4
Reception 4
Before using the appliance 5
Precautions 5
Installation 6
Buttons on the control panel and indicator lights on the display screen 8
Switching on 9
Switching off 10
Review of temperature setting values 10
Temperature control: C refrigerator drawer 11
Temperature control: F freezer drawer 11
Automatic defrosting 11
Additional manual defrosting 11
Interior light 11
Storing foodstuffs 12
Cleaning 13
Normal sounds of the appliance 14
Malfunctions and repairing small faults 15
Service 17
Warranty conditions in Finland 18
Disposal of the equipment 18
Notes 19

4
EN
Intended use
Citycold cold frost is a drawer device, located underneath
the worktop or independent unit, which is suitable for both
cold storage and freezing storage. The equipment is intended
for use in households. The use of the plant must take into
account the regulations of the sector.
Festivo refrigeration equipment has been designed
and tested in accordance with current regulations and
regulations.
Festivo refrigerator may only be serviced by an authorized
service company. Unqualified repairs can be a danger to the
user or environment of the device.
Models
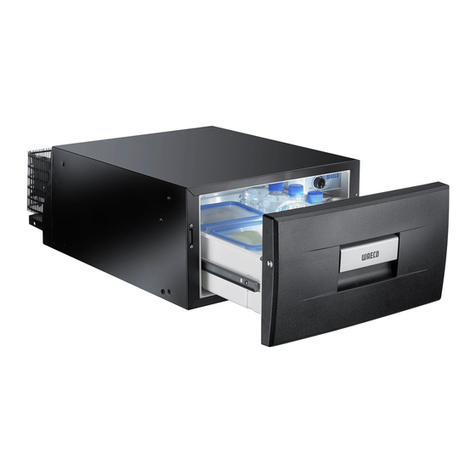
The Citycold refrigerator-freezer is available in two models, 600 CF and 800 CF. The appliance includes both a
refrigerator temperature (C) and a freezer temperature (F).The refrigerator-freezer contains two drawers, the top
one for foods requiring cold storage and the bottom one for frozen products. The top drawer also has an inner
drawer for small packages.
Reception
Examine the product carefully as soon as you receive it. If you notice that it has suffered from damages during
transportation, you must indicate this in the delivery document and report to the carrier and the retailer.
Note!
The manufacturer’s guarantee does not cover damages caused by transportation!
Citycold 600 CF Citycold 800 CF
Refrigerator temperature (C) +4...+8°C
Freezer temperature (F) -18...-20°C

5EN
Before using the appliance
Read the installation and operating manual carefully. It includes important information about the installation, use
and maintenance of the appliance.
Do not start to use the appliance immediately after transportation or after it has been kept in a cold place, but let
it stand in its final location for a few hours so that the oil has time to flow down into the compressor.
Precautions
Before cleaning, turn off the appliance from the power switch and unplug it from the socket.
Leave the drawers open when the appliance is not in use.
Alcoholic substances and conserves containing alcohol e.g. gherkins, pickled beetroot and lingonberry puree must
be stored upright in a tightly sealed container.
Do not store opened sparkling wine bottles in a drawer, because the motion of opening the door can loosen the
bottle cork at a high pressure and it can cause damage with its trajectory.
Do not store glass bottles with freezing liquids in the freezer. The bottle can break.
Do not store explosive substances in the appliance.
Warning!
It is not allowed to install the appliance in a space that is too small because of
possible leakage of refrigerant forming an explosive mixture of gas. The room
size should be at least 8 m².
The unit contains a small quantity environment friendly but flammable refrigerant,
R600a, which does not damage the ozone layer or cause the greenhouse effect. Check the
refrigerant piping for damages in transit or during installation. Leaking refrigerant can injure eyes
or ignite.
When noticing a refrigerant leakage:
• do not let open fire into the room
• turn off power to the appliance from the main switch
• unplug the appliance from the socket
• air the room for several minutes
• contact the Festivo service center
Note!
Keep the air circulation vents free of obstacles both up and down.
Do not use mechanical tools to speed up melting the ice or other than recommended methods by the
manufacturer.
Do not damage the refrigerant piping.
Do not use any electrical equipment inside the refrigerator-freezer unless they are recommended by the
manufacturer.

6
EN
Installation
INSTALLATION LOCATION
The intended environmental temperature classification has been indicated on the appliance nameplate. The rating
plate is located on the right-hand interior wall of the top compartment.
Place the appliance in a dry and properly ventilated room with a size of at least 8 m².
Do not place the appliance in the immediate proximity of a radiator, stove, or another heat source.
Note!
Do not cover the condenser air circulation in front of
the unit. The device sucks in air from the right edge of
the plinth board’s air intake opening and removes it
from the left edge.
Note!
Manufacturer’s warranty does not cover damages
that are caused by faulty installation. Check that the
cooling air circulation meets at least the instruction
requirement.
The placement floor must be even, horizontal, and at the same
level with the finished floor.
The frost that is formed in the refrigerator evaporator will be
defrosted automatically by the appliance. The defrosting water is led to an evaporating pan in the compressor
space. Water evaporates from the evaporation vessel automatically.
In the case of a malfunction of the unit some water can be spilled onto the floor.
We recommend installing a protective basin, which is available at Festivo service.
Alternatively, the location of the appliance can be made watertight in other ways. A watertight base will be raised
up onto the wall so that the possible leakage water cannot enter the structure via the floor or wall joints.
The refrigerator-freezer can be placed against the back and side surfaces. In case the appliance’s side surface is
next to another cooling unit or outer wall, a ventilation gap of 1 cm width should be left in between the surfaces.
Other furniture should not be fastened to the refrigerator-freezer as it should be possible to pull it out for
cleaning and maintenance.
Adjust the appliance directly using the adjustment feet so that all adjustment feet touch the floor.
SN +10 ... +32 °C
N +16 ... +32 °C
ST +18 ... +32 °C
T +18 ... +43 °C

7EN
ENSURING AIR CIRCULATION IN THE APPLIANCE PLINTH
Ensure sufficient condensing air circulation if the Festivo appliance vent is replaced with a separate plinth vent.
I install a separate plinth vent on the upper left edge of the kitchen plinth, so that the air circulation is as
unobstructed as possible.
Note!
The total area of the air holes in the plinth vent must be at least 200 cm².
ATTACHING THE INDEPENDENT DEVICE TO THE WALL
Note!
The independent device must always be attached to the
wall, a fixed worktop or an adjacent piece of furniture.
Adjust the device to the desired height in a horizontal position.
Attach the angle iron (A) to the wall at the height required by the
device.
Push the device under the angle iron and fasten it at the back
corners with two 4.2x16 sheet metal screws (B).
Install the cover (C) in place so that the protrusions of the fixing iron
on the rear edge of the cover go through the holes (D) in the angle
iron of the frame.
Finally, screw the cover on its front edge with three 4.2x13 screws.
Festivo appliance vent installed
Plinth vent installed in the kitchen plinth
B
A
C
D
At least 50 cm
About 5 cm

8
EN
ATTACHING THE DEVICE TO THE BOTTOM SURFACE OF THE TABLE TOP OR TO AN ADJACENT FURNITURE
The device comes with mounting angles for the front edge. Attach
the device with a screw from both upper corners to the underside
of the work surface or to the adjacent piece of furniture.
ADJUSTING AND FIXING THE FRONT PLATE OF THE DRAWERS
The drawers have screw-fastened (5 pcs) finely adjustable mounting plates
(PICTURE 1). Loosen the M4 Torx fixing screws A of the mounting plate (PHOTO
4) and adjust the plates horizontally.
Leave a gap of at least 21 mm between the mounting plates of the model to be
integrated into the kitchen cabinet (PHOTO 2).
After fine-tuning the mounting plates, fasten the wooden front plates from the
mounting holes B of the adjustment plate (PHOTO 3) with the supplied Wronic
4.2x16 low head screws (6 pcs. upper drawer and 4 pcs. lower drawer). Drill
about 10 mm deep pilot holes for the screws. If necessary, use the dimensioning
picture (PICTURE 5) as help.
Note!
If the front plate is thinner than 20 mm, make sure that the screw does not puncture the outer
surface of the front plate. If necessary, use a shorter screw.
PICTURE 1
A
PICTURE 4
21-22 mm
PICTURE 2 PICTURE 3
B

9EN
APPLIANCE PROTECTIVE BASIN
Note!
Always install a protective basin under the appliance.
Alternatively, the location of the appliance can be made watertight in other ways. A watertight base will be raised
up onto the wall so that the possible leakage water cannot enter the structure via the floor or wall joints.
34
45167
Ø7
574 (Citycold 600) / 774 (Citycold 800)
3
3
281 (front plate)
69
425 (front plate)
51170170
PICTURE 5

10
EN
POWER CONNECTION
Connect the refrigerator-freezer power cord to a single-phase 230 V 50 Hz socket. The fuse size of the socket is
10 A.
Only an electrician may make changes to the connection method or change the connection lead.
Note!
The socket must be positioned in such a way that it is possible to pull the appliance’s plug from
the socket without having to move the appliance.
Due to danger of overheating the appliance should not be connected to the power grid by means of a branch
outlet or an extension cord.
Buttons on the control panel and indicator lights on the display screen
The control panel has an operating terminal and a main power switch.At the bottom of the terminal, there are
four buttons for various functions. The display has two separate display lines for top and bottom drawer functions.
BUTTONS
Button Short press Long press (4 seconds)
Main power switch. Turns on or off the
power of the whole device.
The light switch is not in use.
Exit button for the parameter programming
menu.
The stand-by switch of the device, ‘stand-by’.
In OFF mode, the appliance’s refrigeration circuit
is off, but features such as the lights are on. In ON
mode, the appliance operates normally.
Browsing adjustable parameters.
Decreases the value of the selected
parameter.
Browsing adjustable parameters.
Increases the value of the selected
parameter.
Starts an additional defrosting process.
Displays the value set on the temperature
controller.
Save button in the parameter programming
menu.

11 EN
INDICATOR LIGHTS ON THE DISPLAY SCREEN
On the screen The indicator light is on The indicator light is flashing
The operating terminal is in OFF mode. The indicator light flashes briefly when the
operating terminal is switched on or off by
pressing its own power button .
Displays the temperature of the C refrigerator
drawer.
Displays the value of the parameter to adjust in
the programming mode.
Displays the temperature of the F freezer
drawer.
Displays the value of the parameter to adjust in
the programming mode.
The defrosting function is running. The drying cycle is on (F freezer drawer only).
The compressor is running. The compressor is waiting for the end of the
start-up delay.
The evapoator fan is running. The evaporator fan is not running.
The appliance sounds an alarm, but the user
has seen and acknowledged the alarm.
The appliance sounds an alarm, but the alarm
has not yet been seen and acknowledged by
the user.
Switching on
Do not start to use the appliance immediately after transportation or after it has been kept in a cold
place, but let it stand in its final location for a few hours so that the oil has time to flow down into the
compressor.
Before using the appliance, clean its interior parts (see the chapter on ‘Cleaning’).
Push the plug on the connecting lead of the appliance into the electric socket.
Do not place food into the appliance before the drawer temperatures have reached their set values.
At the factory, the main switch of the appliance was left in the OFF position.
Push the main switch, and within 10 seconds, the interior temperature of the refrigerator will appear on
the display.
Inside temperatures of the appliance can be monitored from the controller display.

12
EN
Switching off
Switch off the appliance using the main switch .
The appliance refrigeration circuit can be switched off separately. Push the display main switch until the
display turns off.
Review of temperature setting values
RECOMMENDED FACTORY SET TEMPERATURE VALUES:
C refrigerator drawer +5 °C, the temperature may be set to +4...+8 °C
F freezer drawer -18 °C, the temperature may be set to -18...-20 °C
The key lock is automatically activated if the buttons on the screen are not touched for 30 seconds. The text ‘Loc’
is displayed for 4 seconds, and the key lock is active.
Press the button for 4 seconds to display the text ‘UnL’ and open the keypad lock.
Press the button again to display the set temperature value for the C refrigerator drawer.
Press the button , to display the set temperature value for the F freezer drawer.

13 EN
Temperature control: C refrigerator drawer
When the controller is in the temperature set value review phase for the refrigerator drawer, press , and
the set value will start flashing, and you can adjust the temperature by pressing and .
Press the button to confirm the change. Press or wait approximately 10 seconds for the controller
to return to normal mode.
Temperature control: F freezer drawer
When the controller is in the temperature set value review phase for the freezer drawer, press ,and the set
value will start flashing, and you can adjust the temperature by pressing and .
Press the button , to end the operation, and the controller will return to normal mode.
Automatic defrosting
Both the refrigerator and the freezer drawer have an automatic defrosting function which may be switched on as
required.
C refrigerator drawer:
During defrosting, the text ‘DEF’ appears on the display and the temperature of the refrigerator drawer may
temporarily rise slightly. The temperature returns to the set value when defrosting is complete.
F freezer drawer:
During defrosting, the text ‘dEF’ appears on the display, and the temperature may temporarily rise slightly.
Additional manual defrosting
Press the button for 4 seconds to start the additional defrosting function.
Note!
If the freezer drawer is warmer than its set value, the appliance will only defrost the refrigerator
drawer vaporiser (displayed as ‘dEF’ on the screen).
If the defrosting of the freezer drawer starts (displayed as ‘dEF’), the
defrosting of the refrigerator drawer will also be launched (displayed as ‘dEF’).
The appliance automatically returns to normal mode after a post-defrosting delay.
Interior light
The interior light of both the refrigerator and the freezer drawer will turn on automatically when you open the
drawer. The light will turn off within 20 seconds after closing the drawer. The light button on the controller is
not active.

14
EN
Storing foodstuffs
Note!
There is a fan behind both the refrigerator and freezer drawers on the rear interior wall. Please
ensure the unobstructed operation of fans.
C REFRIGERATOR DRAWER AND INNER DRAWER +4...+8 °C
The internal temperature of the refrigerator drawer has
been set at the factory to +5 °C. The temperature differs
slightly from the set value to layout value in various
parts of the drawer.
Note!
In damp weather, water may condense on inner
surfaces. Increasing the C refrigerator drawer
temperature by a few degrees may reduce
condensation.
Package or cover the foods if possible. When packaged
the food taste, humidity and freshness will keep the best
and other foods will not take on other tastes.
Juices and preserves can also be stored in the
refrigeration box for long periods of time. Foodstuffs for
day-to-day use will normally keep for a few days.
The coldest storage compartment of the C refrigerator
drawer is the inner drawer, making it ideal for storing
e.g. dairy products (butter, cream, yoghurt). We do not
recommend storing fruit and vegetables in the inner
drawer.
There is space for tall containers such as bottles on the
right-hand side of the refrigerator drawer.
F FREEZER DRAWER -18...-20 °C
The internal temperature of the freezer drawer
has been set at the factory to -18 °C. The
temperature differs slightly from the set
value to layout value in various parts of the drawer.
Note!
Warm products must not be placed in the freezer.
Instead, they but must be precooled in a refrigerated drawer before freezing.
The quality of frozen foods deteriorates if the maximum storage period is exceeded. The storage period depends
on the type of food.
C refrigerator drawer
Inner drawer
Inner drawer
F freezer drawer
C refrigerator drawer

15 EN
Cleaning
CLEANING THE REFRIGERATOR AND FREEZER DRAWERS
The insides of the refrigerator-freezer should be cleaned and defrosted approximately once every six months.
Turn off the main power switch for cleaning. Where necessary, store food supplies in another cold storage
space.
Note!
The main power switch switches off both the refrigerator and the freezer drawer.
Remove the bottom plates of both drawers to facilitate cleaning. For
instance, you can place a towel on the bottom of the freezer drawer
to absorb any water dripping down the walls.
Note!
Do not allow cleaning water to penetrate the controls or
LED lights.
Where necessary, protect the floor from splashing water and wait until
all the ice has melted.
Note!
It’s not allowed to use e.g. a knife or hot air blower to remove the ice.
You can clean all inner surfaces except for the drawer seal with warm water, adding a small amount of dish
washing liquid.Abrasive or dissolving agents are not suitable for cleaning. Clean the drawer seal with water only.
Carefully dry the interior and the seal and leave the drawer open for a while for ventilation.
Start the appliance after cleaning. Press the button . The appliance will switch on and the display indicates
the temperature inside the refrigerator-freezer. The engine runs until the inside temperature has reached its inside
set-point.
Note!
Leave the drawers open when the appliance is not in use.
CLEANING THE CONDENSER
Remove the socle plate by pulling the ends of the plate straight forward. Carefully vacuum the condenser, for
example with a vacuum cleaner brush nozzle, in the direction of the thin wires.

16
EN
Normal sounds of the appliance
The appliance uses the compressor-operated refrigeration system for cooling.The system makes sounds of varying
levels and they can increase especially during the defrosting phase. The volume of the noise is also affected i.e. by
the materials in the environment where it is placed (e.g. stone floors), the manner of positioning the appliance,
the way it is used and its age.
Resonance noise may be produced if the appliance is not completely straight, or if parts of the pipe system are
touching one another. The pipes can be bent apart carefully by hand.
During the operation of the appliance, sounds may be heard due to the different thermal expansion of metal
parts of various sizes.
REFRIGERATION SYSTEM
When the refrigerant flows through the pipelines one may hear hissing or bubbling noises. During the defrosting
phase a cracking sound can be heard.
THERMOSTAT
The compressor is started and stopped by a thermostat. When the thermostat switches on, it makes a low
cracking sound.The compressor is required to run more frequently if the doors are opened more often.
COMPRESSOR
When the refrigerant is being pumped, a droning or “snoring” noise is heard from the compressor motor and the
pump.

17 EN
Malfunctions and repairing small faults
All malfunctions do not necessarily need to be solved with the help of a technician. Thus, you should first check
whether you can clear the problem by following the instructions below. If the appliance does not have a fault you
will have to cover the cost of the service call even during the warranty period.
JIf the refrigerator engine does function, check the following:
• you have followed the operating manual instructions
• the plug is plugged properly into the socket
• the fuse is intact
• the main switch and power switches are in the ‘on’ position
• there are no disturbances in the power distribution
Note!
If the environment temperature becomes unusually high the compressor safety device can stop
the engine. Restarting can take ½ - 1 h depending on the circumstances.
If the cooling capacity is poor:
• Please check that the drawers are closed tightly.
• The doors have been opened often and kept open for too long
• too many products have been placed to cool at the same time
• air circulation is blocked either outside or inside
• check that the evaporators haven’t gathered thick ice on them
Note!
Thick ice in the refrigerator vaporisers should be defrosted by switching off the refrigerator until
the ice has melted completely. When defrosting large amounts it should be ensured that the
evaporator dishes at the appliance base will not overflow onto the floor.
Refrigerator-freezer LED lights:
The appliance has LED lighting with a long life cycle. In the event of a failure please contact Festivo service.

18
EN
The F freezer drawer indicates overheating (AHF). Check first if:
• The freezer has een filled with too many products to freeze without freezer function
Freezing goods temporarily rises the temperature inside the freezer, which may trigger the temperature alarm.
This is not a fault in the appliance and the alarm will disappear as the freezing continues.
• The freezer drawer has been left open. Switch on the additional defrosting function (where necessary, 2
times in succession). If the appliance capacity remains low even after this and the temperature is still high after
24 h of defrosting, please contact the Festivo service.
Alarms
ALARMS, C-REFRIGERATOR DRAWER
PrC = interior sensor failure
The refrigerator follows the set program despite a sensor failure.
However, the temperature can sometimes vary. The fault must be
repaired. Please contact Festivo service.
AHC = High temperature alarm
Please see first chapter ‘Malfunctions’. Please contact the Festivo
service in case the above mentioned points are in good order and the
appliance does not begin to cool within two hours.
ERROR MESSAGES, F FREEZER DRAWER
PrF = sensor failure
The freezer works despite the sensor fault with the set program.
However, the temperature can sometimes vary. The fault must be
repaired. Please contact Festivo service.
AHF = High temperature alarm
Please see first chapter ‘Malfunctions’. In case the above mentioned
points are in good order and the appliance temperature does not
return to normal within approximately two hours, please contact
Festivo service.

19 EN
Service
If you can’t remove the appliance malfunction, call the help of a technician. Do not try to repair the appliance by
yourself, especially not its electrical parts.
Unnecessary opening of the drawers will raise the temperature inside the appliance.
Warranty repairs can be done only by a service centers that are authorized by the factory.
Note!
When you order a warranty repair for the appliance please provide the unit warranty information:
• serial number and exact type number of the appliance. This information is available on the rating plate on the
right interior wall of the refrigerator.
• Appliance purchase and delivery date.
Note!
The warranty repairer should be presented with a properly filled in warranty certificate and a
receipt of the purchase.
In case the owner or holder of the appliance can´t present a valid warranty the repair will not be made as
warranty repair. Warranty period service will be made within a reasonable time period and during normal working
hours. If it is required for a technician to arrive immediately and outside normal working hours, it may cause
additional costs that the client is obliged to pay to the service center that made the repairs.
SERVICE IN FINLAND
The service of this product during the warranty period and thereafter is the responsibility of a nation wide service
network, which offers the best product knowledge, flexible service, and advantages of a large spare part storage.
For possible failures during bank holiday periods we recommend taking an additional insurance.
SERVICE CALLS IN FINLAND
Service of products manufactured by Suomen Kotikylmiö Oy in Finland is done by
Festivo Service Tel. (03) 553 8681
huolto@festivo.fi
A service call to that number by a client of Suomen Kotikylmiö Oy will be connected to a service center closest to
the client.

20
EN
Warranty conditions
The export sales warranty period for the raw material and components is one (1) years if not agreed otherwise.
The warranty applies to the equipment sold to the first buyer, i e goods have left the factory. The warranty does
not cover wear and conditions caused by normal use or the batteries of the appliance.
The warranty includes repairs reported to an authorized service center within the warranty period and confirmed
by the warranty provider to faults due to structural, manufacturing and raw material failures and damages caused
by those to the actual appliance free of charge. The service center will repair the above mentioned faults and
making the appliance to operational.
Note!
In case the appliance will be used for another purpose than normal domestic use the warranty
should be agreed upon separately and in writing with the manufacturer.
The warranty does not include faults that have been caused by
• transport
• user negligence
• appliance overload
• failure to follow the operating manual or neglecting maintenance
• voltage variation (allowed +/-10%)
• thunderstorm
• Maintenance, repairs and structural changes by other than authorized service centers
• repairs to faults that do not contribute to the functioning of the appliance e.g. surface scratches
• parts, that are more prone to break due to improper handling or normal wear and tear e.g. plastic parts that
touched by hand
Disposal of the equipment
Note!
Once the equipment becomes redundant it must not be disposed of with normal waste because
the equipment is governed by the WEEE directive. It has to be disposed of following the WEEE act
which became effective on August 13th 2005.
Warning!
When you dispose of your old cooling appliance be aware of the cooling system pipes. Pipes
are not allowed to break because then the cooling system refrigerant and compressor oil can leak
into nature. The refrigerant released from the pipes can cause injury to
eyes.
Table of contents
Other Festivo Refrigerator manuals

