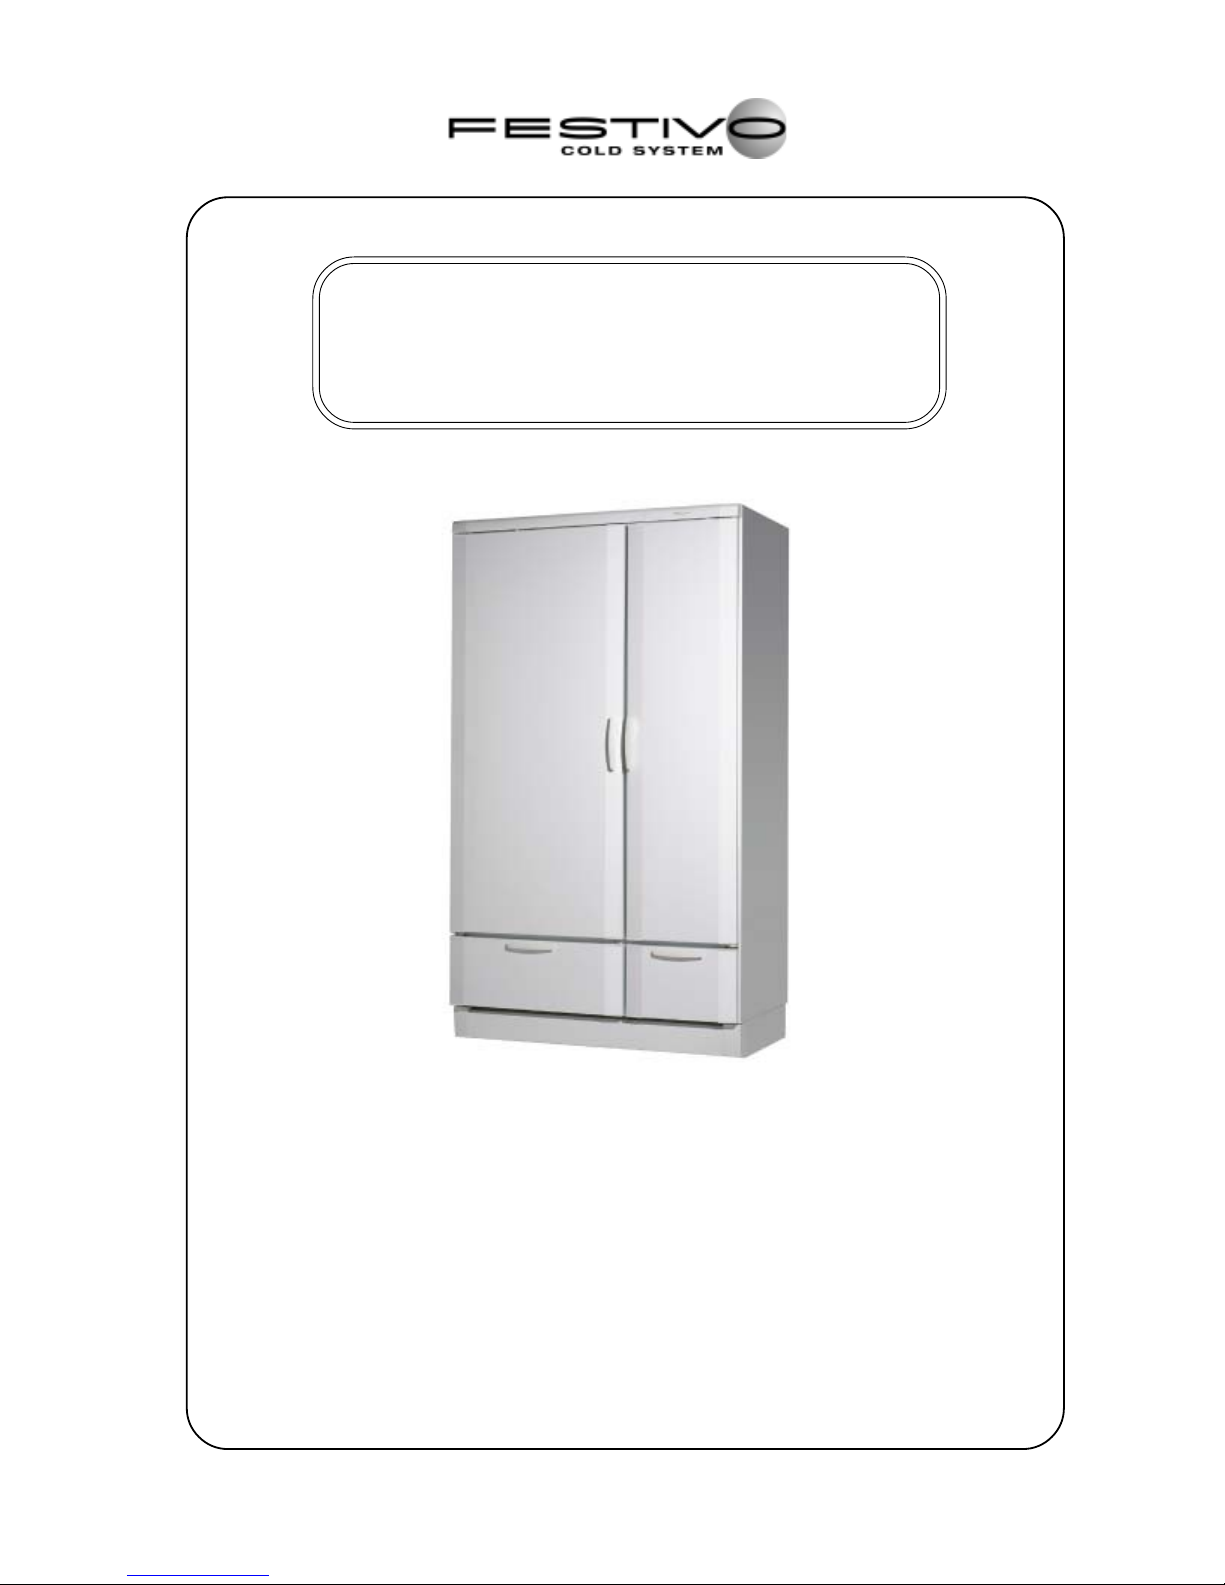
Festivo Cooling Cabinet / Freezer Combination User manual

INSTRUCTIONS FOR
INSTALLATION AND USE
This instruction for installation and
use must be read before starting to
install and use the appliance
Cooling Cabinet / Freezer
Combination

2
SAFETYPRECAUTIONS .................................................... 3
STIPULATIONS FOR USE .................................................. 3
SAFETYINFORMATION ..................................................... 4
INSTALLATION .................................................................. 4
Location ........................................................................ 4
Electric connection ....................................................... 5
Balancing and locking the castors ............................... 6
Prevention of tilting....................................................... 6
Fitting the bottom front plate ....................................... 6
Fitting the cooling cabinet shelves ............................... 7
Adjustment of the door ................................................. 7
Change between right- and left-hand door opening .... 7
FUNCTIONALDESCRIPTION ............................................ 8
Functioning of the cooling mechanism......................... 8
Air circulation ................................................................ 8
SWITCHESAND THERMOSTATS ...................................... 9
Switches ........................................................................ 9
Electronic thermostat ................................................... 9
Fresh storage thermostat, adjusting ............................ 9
USING THEAPPLIANCE .................................................. 10
SWITCHING ON ............................................................... 10
SWITCHING OFF ............................................................. 10
ADJUSTINGTHE TEMPERATURE .................................. 11
SPEEDY COOLING, REFRIGERATOR ............................. 11
SPEEDYFREEZING ......................................................... 11
SOUNDS PRODUCED DURING OPERATION ................. 12
STORAGE OF FOODSTUFFS ......................................... 12
Cool storage ................................................................ 12
Fresh storage .............................................................. 12
Frozen storage ............................................................ 13
Putting foods in the cooling cabinet /freezer ............. 13
Example of arrangement ............................................. 14
Freezing ...................................................................... 15
CLEANING ....................................................................... 16
Cleaning the cooling cabinet ...................................... 16
Cleaning the freezer .................................................... 17
Cleaningthe mechanism ............................................. 17
FUNCTIONALDISORDERS ............................................. 18
Correcting minor disorders ........................................ 18
Error messages ........................................................... 19
DISPOSAL OF THEAPPLIANCE ..................................... 20
KX33 0612
Table of Contents

3
120°
120°
TABLE TOP
In connection with installation, it is essen-
tial to fix a tilting guard also.
When cleaning the appliance, switch off
the voltage using the main switch and re-
move the plug from the socket.
Alcoholic substances, or preserves con-
taining them, e.g. pickled cucumber and
beetroot, must be kept in a tightly closed
container in a vertical position.
Opened bottles of sparkling wine must not
be kept in the door compartments, becau-
se vibration from opening the door may
make the cork pop out, which could cause
injury.
Materials that are liable to explode must
not be kept in the cooling cabinet.
The doors must not be opened beyond
120º, because this may cause the hinge
bushing to break on hitting the corner of a
table top, for example.
When the appliance is not in use, leave
the doors open a little.
The regrigerator-freezer combination is
suitable for cooling and freezing of food-
stuffs.
It is intended for use in households. For
use in other establishments, it is necessa-
ry to take into account the separate stipu-
lations concerning this.
The refrigerator-freezer has been
constructed and tested in accordance
with the regulations and statutes currently
in force.
Repairs to the appliance must only be
carried out by an authorized servicing
firm with training in that field. Incompetent
repairs may cause risk situations for the
user or the surroundings of the appliance.
Safety precautions Stipulations for use

4
Please read carefully the Instructions for
Installation and Use. They contain
important information about installing,
using and maintaining the appliance.
The manufacturer of the appliance will
bear no responsibility if the directions in
the Instructions for Use are not followed.
Note! The appliance must not be situated
in too small a space. This is because in
the event of any refrigerant leakage in a
small space an explosive gas mixture
could form.
The room space must be at least 8 m2.
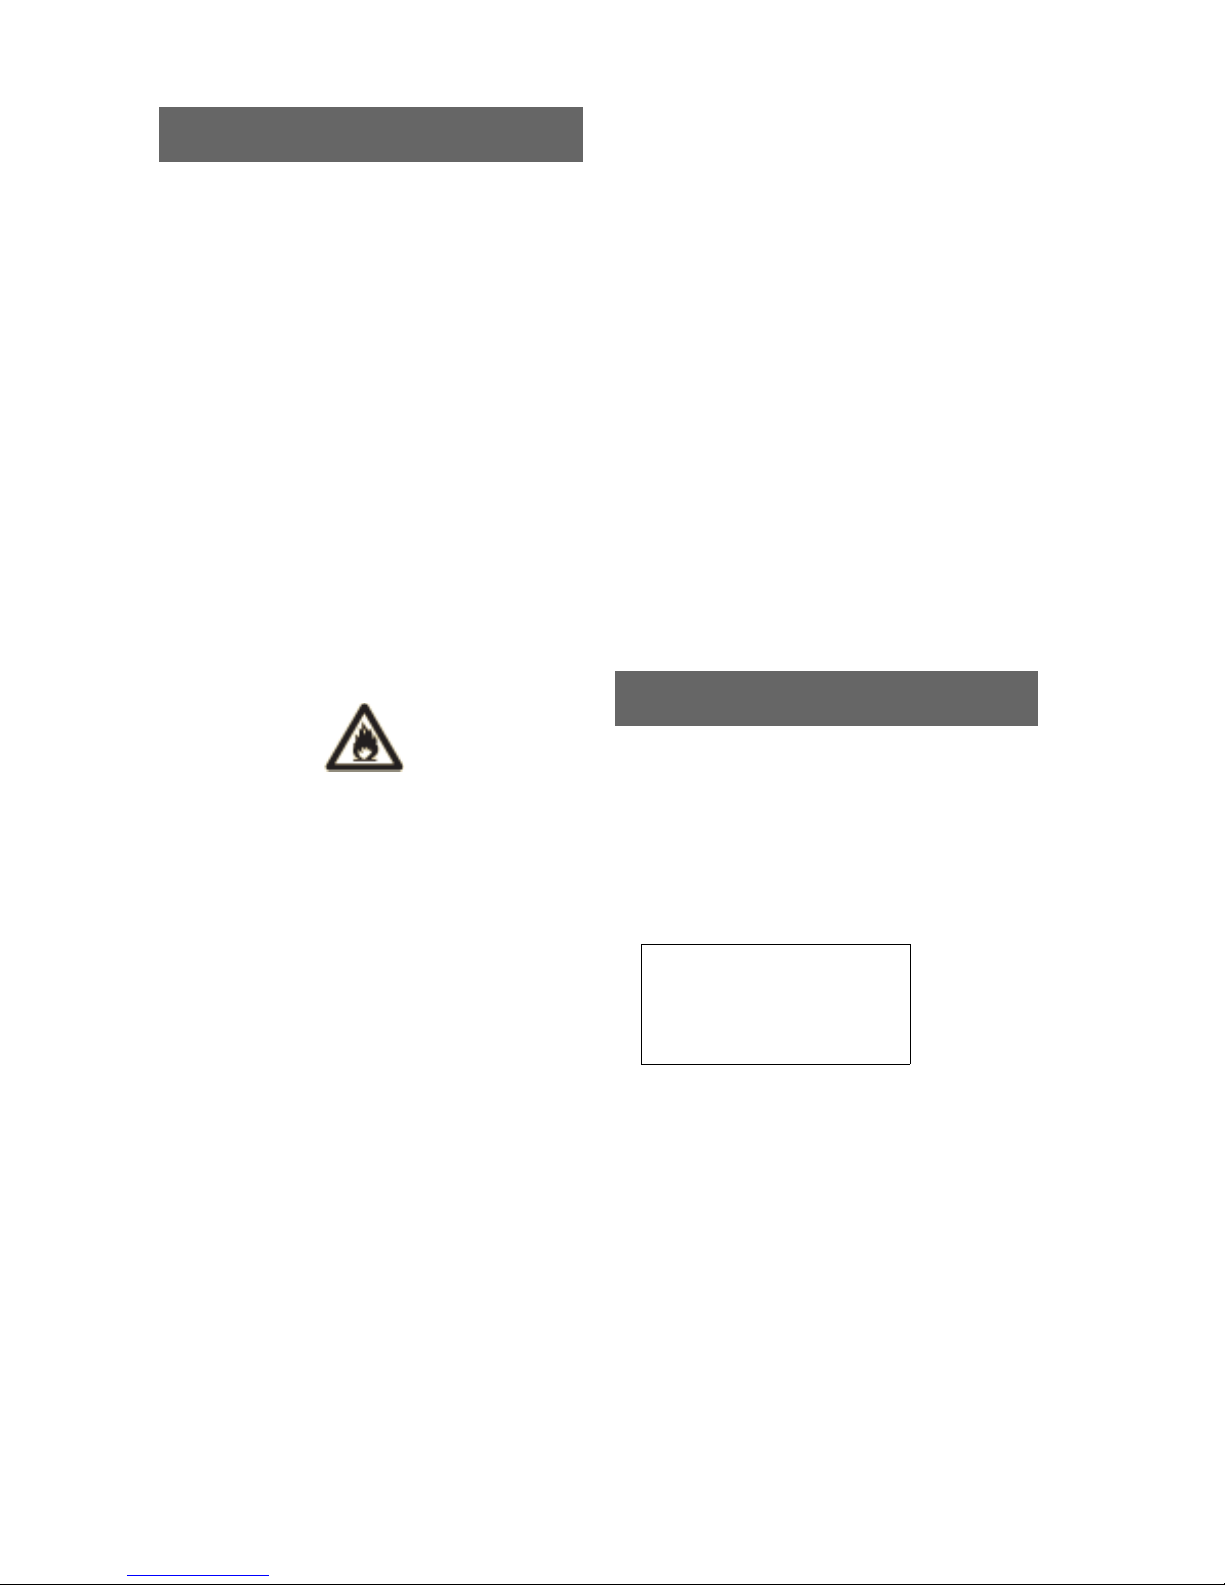
Warning!
The appliance contains a small
amount of environment friendly but
flammable refrigerant, isobutane
R600a.
This refrigerant will not damage the
ozone layer, nor will it cause a
greenhouse effect.
Please check that the refrigerant
circuit has not become damaged
during transportation or installation.
Leaking refrigerant may damage the
eyes or catch fire.
If you notice refrigerant leakage:
• do not allow open fire in the room
• take the plug of the appliance out of
the electric socket
• ventilate the room for several
minutes
• contact the Festivo-service organi-
zation.
Warning!
• The air inlet of bottom must not be co-
vered. Above the appliance must be left
at least 40mm blank (page 8, picture).
• Ice must not be detached using a knife
or any other mechanical tools.
• Do not damage the refrigerant circuit.
• Never use electrical appliances inside
the appliance unless they are approved
by the manufacturer.
• The appliance must be fixed to the wall
(page 6, picture)
Installation
LOCATION
Room temperature, where the cabinet can
be situated.
Climate range
SN +10 ... +32 °C
N +16 ... +32 °C
ST +18 ... +38 °C
T +18 ... +43 °C
The climate range of the appliance is on
the data plate. The data plate is situated
inside of the cabinet on right side of the
wall.
Situate the appliance to a dry, very well
ventilated room.
Do not situate the cabinet in the imme-
diate vicinity of a radiator, stove or other
heat source.
Safety information

5
ELECTRIC CONNECTION
The appliance is connected to the electric
socket (single phase, 230V, 50 Hz) using
the connecting lead of the appliance. The
fuse size for the socket is 10 A. Any alte-
rations to the connection method or chan-
ging of the connecting lead must only be
done by an electrician.
A suitable place for the socket is in the
back wall at the location of the refrigera-
tor, at a height of 2060 mm from the floor
to the lower edge of the socket. The
socket can also be situated at a corres-
ponding place in the ceiling, at a maxi-
mum of 500 mm from the back wall.
Any excess length of connecting lead
must not be pushed into the back cavity,
but must be left on top of the appliance.
Do not situate the appliance in a small,
poorly ventilated place. Faultless operati-
on of the mechanism requires good venti-
lation. The air inlet at the front of the app-
liance, below the door, must not be cove-
red.
AN AIR CIRCULATION GAP OF 40 mm
MUST BE LEFT ABOVE THE APPLIAN-
CE (see operational description / air cir-
culation, page 8, picture).
The floor where the appliance is situated
must be even and horizontal, and at the
same level as the surrounding floor.
In the cooling cabinet, ice formed on the
expansion coil melts automatically and the
resulting water is conducted to the evapo-
ration trough in the compressor area,
from which it evaporates automatically.
If there will be any functional disorder it is
possible that there will be water leakage
under the appliance.
That is why we recommend to install a
protective cover to the floor where the
appliance will be situated.
The floor cover can also be ordered from
Festivo-service.
The refrigerator-freezer combination can
be situated against the background surfa-
ce and side surfaces, but if the side surfa-
ce comes next to another cold storage
appliance or an outside wall, then a venti-
lation gap of at least 1 cm must be left bet-
ween the surfaces concerned.
No other appliances or furniture must be
fixed to the appliance, because it has to
be possible to pull it out for cleaning and
servicing.
If the appliance is situated to the corner,
there must be a gap between the cabinet
and wall. Otherwise the door doesn't open
90°.
Min.60mm

6
Fixing bracket
BALANCING, AND LOCKING THE
CASTORS
Push the appliance into place. The
appliance must be installed at the same
level as the surrounding floor surface.
See page 5.
• Adjust the appliance to a straight
position, using the 2 adjusting screws
(A). This requires a 10 mm open ended
spanner.
• Tighten the locking screws (C).
• Turn the adjusting leg - in front, in the
middle - so that it touches the floor
(only 120C).
FITTING THE BOTTOM FRONT PLATE
Fix the bottom front plate in place. The
front plate sticks onto the bottom part
by means of clamps (B).
PREVENTION OF TILTING
The appliance must also be fixed to the
wall so that it is not possible for it to tilt
forward.
The fixing is done by means of the fixing
bracket at the top of the cabinet. If a gap
remains between the fixing bracket and
the wall, then use a suitable connecting
piece.
A B
C

7
FITTING THE SHELVES
The cooling cabinet has 4 shelves as
standard equipment. Put the left-hand
edge of the shelf into the groove
provided for it. Lower the right-hand
end of the shelf onto the support. Then
move the shelf to the right, so that the
shelf goes into its place. The wire
shelves are to be fitted so that the
raised edge is towards the back.
The bottle racks are to be fitted so that
they hang down under the shelf.
ADJUSTMENT OF THE DOOR
If it is necessary to adjust the doors, the
hinges can be adjusted to some degree
by loosing the fixing screws and moving
them in the directions of the arrows.
If the upper edges of the doors are at dif-
ferent levels (drawing 1), loosen the sc-
rews of the upper hinge. Turn the hinge in
a sideways direction (arrows C) until the
upper edges of the doors are at the same
level, and tighten the screws.
Dimension A (drawing 2) must be same
both up and down. If it is not, move the
upper hinge in B arrows direction.
Check also the seals of the doors.
If it is too compressed, move the upper
hinge outwards.
A
A
Drawing 1 Drawing 2
M6 x 20
Lower hinge M5 x 16
B
C
C
Bearing
Bearing
Drawing 3
Upper hinge
If the seal has become pressed down,
warm it CAREFULLY with a hot-air blower
(hair dryer) and mould it with the fingers
to make it higher.
Note! If the door hinge is in the middle of
the cabinet, the protective cover on the
top must be released. Before the cover
will be released, the voltage of the applian-
ce must be switched off. Also the plug of
the appliance must be taken out of the
socket.
CHANGE BETWEEN RIGHT- AND
LEFT-HAND DOOR OPENING
If you want to change a door between
right- and left-hand opening, then we re-
quest you to kindly contact our factory,
tel. +358-3-5538600. We will send you a
mounting set and instructions on chan-
ging the opening direction.

8
80
80
40
The guarantee will become void if above instructions about cooling mechanism
is not conformed.
In the cooling cabinet, ice formed on the
expansion coil melts automatically and
the resulting water is conducted to the
evaporation trough in the compressor
area, from which it evaporates auto-
matically.
AIR CIRCULATION
Faultless functioning of the cooling
mechanism presupposes that the air
circulation outside and also inside the
appliance is good (see drawings below).
The air inlet of bottom must not be cove-
red.
Above the appliance must be left at least
40mm blank (dwg 2).
Other alternative is to leave at least 80mm
blank also above and behind the fixture
above the cooling cabinet (dwg 1).
FUNCTIONING OF THE COOLING
MECHANISM
The cooling mechanism consists of the
compressor, the condenser and the ex-
pansion coil; these form a closed circuit
in which the compressor circulates the
coolant.
In the expansion coil, the refrigerant is va-
porized and binds heat to itself, cooling
the cabinet. The heat bound to the refrige-
rant goes out via the condenser into the
surrounding air space.
FIXTURE
FIXTURE
Compressor
Condenser
Expansion
coil
Functional description
Drawing 1 Drawing 2

9
Main switch ( I )
This switches on the voltage for the
appliance.
Display C -button
refrigerator Main switch (I)
F -button
freezer
Guide
(not buttons)
Switches and thermostats
Red indicator
expresses wich
compartment is in
the display
Control knob of the fresh storage
Adjusting the fresh storage
temperature
If it is desired to alter the temperature, this
can be done by turning the thermostat
knob in the required direction.
The temperature of the fresh storage
compartment has been ready adjusted at
the factory to be as close as possible to 0
ºC.
The temperature range is 0 ... +2°C.
The temperature can be adjusted using
the control knob on the intermediate bar:
when it is turned clockwise, the tempera-
ture falls.
In order for the fresh storage com-
partment to be used, the freezer must be
on.

10
Using the appliance
Before using the appliance, clean its inte-
rior parts, following the instructions on p.
13.
Do not start to use the appliance imme-
diately after transportation or after it has
been kept in a cold place, but let it stand in
its final location for a few hours so that the
oil has time to flow down into the compres-
sor.
Push the plug on the connecting lead of
the appliance into the electric socket.
At the factory, the main switch of the
appliance was left in the OFF position.
Switch off the appliance using main
switch (I).
If the appliance remains unused during a
long period, then take the plug out of the
electric socket. Clean and dry the interior
parts of the appliance and leave the doors
slightly open.
Turning off the appliance by using the
display:
C-button refrigerator
F-button freezer
Press the button until the display flashes.
Then press enough times until the text
OFF appears on the display. The machine
will then go off.
Restart:
C-button refrigerator
F-button freezer
Press the button until the display flashes.
Then press enough times until the desired
temperature is in the display.
The selection has now been made, and no
separate confirmation is needed. The
display will return to showing the interior
temperature.
Main switch (I)
F -button
freezer
C -button
refrigerator
Note! Do not put foods into the appliance
before the temperature inside the applian-
ce is at the setpoint.
When the main switch is put to the ON
position, then - after about 10 seconds -
the temperature of the refrigerator
appears on the display.
The temperature set at the factory:
Refrigerator +5°C
Freezer -18°C
Temperatures of the refrigerator and
freezer are able to see in the display.
Normally the display expresses the
interior temperature of the refrigerator.
Temperature of the freezer can be seen
by pressing the F-button in short.
By pressing the C-button the display
returns to express the temperature of the
refrigerator.
Or waiting for a while the display also
returns to express the interior temperature
of the refrigerator.
Switching on
Switching off

11
ACTIVATION OF SPEEDY COOLING
(refrigerator)
The refrigerator can be activated to
operate for 4 hours at a temperature
colder than the set value (at about +2...+3
°C).
This is a good function to use if the
quantity of goods to be put into the cooling
cabinet at one time is greater than normal.
After four hours, the temperature returns
to the set value without any separate
action.
Activating the function:
Press the C-button of the display until the
display flashes.
Press enough times so that the text SC
appears on the screen; this text stays on
the screen throughout the speedy cooling
period.
During speedy cooling, the temperature
does not fall below +2°C at any stage.
Neither the set temperature value nor the
interior temperature can be checked on
the display by using the display buttons
during speedy cooling.
Actual temperature in the refrigerator/
freezer = display doesn't flash
Set point in the display = display flashes
Factory set point:
Refrigerator +5°C
Freezer -18°C
The recommended adjusted temperatures
are:
Refrigerator +5 ºC
Freezer -18°C
The valid set point can be brought into
view by pressing the C-button
(refrigerator) or F-button (freezer) about
2 sec until the display begins to flash.
After a while, the flashing will stop and the
set point temperature will remain in force.
Normally, the display shows the interior
temperature of the refrigerator.
Temperature ranges are:
Refrigerator +2 ... +7°C
Freezer -16 ... -24°C
Changing the temperature:
C-button refrigerator
F-button freezer
Press the display button until the display
begins to flash.
Then, using the button, select the desired
temperature and leave it visible.
The selection has now been made, and no
separate confirmation is needed.
The display will return to showing the
interior temperature.
Adjusting temperature Speedy cooling
The freezer can be activated to operate
the freezing process for 48 hours. This
function is used when freezing large
quantities (more than 2 kg).
After 48 hours, the temperature returns to
the set value without any separate action.
Speedy freezing

12
Activating the function:
Press the F-button of the display enough
times so that the text SF appears on the
screen; this text stays on the screen
throughout the speedy freezing period.
During speedy freezing, neither the set
temperature value nor the interior
temperature of the freezer can be
checked on the display using the display
buttons.
Normal sound of the appliance
The appliance acquires its coldness from
the compressor operated cooling system.
For this reason, it is completely normal
that the appliance makes a certain sound.
The sound level can vary. The loudness of
the sound is influenced by, for example,
how the cabinet has been installed in pla-
ce, how it is used, and how old it is.
Resonance noise may be produced if the
appliance is not completely straight - or if
parts of the pipe system are touching one
another, in which case the pipes can be
bent apart carefully by hand.
Cooling system
When the refrigerant is being pumped
into the piping, a hissing or bubbling
sound is heard.
Thermostat
The compressor starts up and stops un-
der the control of the thermostat. In con-
nection with this starting and stopping the
appliance shakes a little.
Compressor
When the refrigerant is being pumped, a
droning or “snoring” noise is heard from
the compressor motor and the pump.
Sounds during operation
COOL STORAGE
The internal temperature of the cooling
cabinet has been adjusted at the factory
to +5 ºC.
The temperature in the various parts of
the cabinet will vary from this value by a
few degrees.
The relative air humidity in the cabinet is
about 70-90%.
NOTE.In damp weather, water may con-
dense on the surface of the drip-water
trough or on the inside wall of the cooling
cabinet on the side next to the freezer.
This may be remedied if the cabinet tem-
perature is adjusted to be a few degrees
colder.
Juices and preserves can be stored in the
cooling cabinet for a long time.
Foodstuffs for day-to-day use will normal-
ly keep for a few days.
Vegetables keep best in the vegetable
drawer.
FRESH STORAGE
The temperature of the fresh storage
compartment continually stays close to
0 ºC. Low temperature ensures that fresh
foodstuffs will keep well.
Such foods include fresh meat, fresh fish,
and leftovers.
Foodstuffs that are sensitive to cold are
not suitable for keeping in the fresh stora-
ge compartment.
These include vegetables and fruit that
contain a lot of water, e.g. potatoes, cu-
cumber, vegetable marrow, pumpkin,
bananas and tomatoes.
Storage of foodstuffs

13
FROZEN STORAGE
Frozen foods can be stored at all levels
of the freezer. The length of time that
they will keep depends on the type of
foodstuff. (If frozen foods are kept for
longer than the maximum period allo-
wed, their quality will deteriorate.)
PUTTING FOODS IN THE COOLING
CABINET / FREEZER
Allow warm foods and drinks to go cold
before putting them into the cooling cabi-
net.
Warm goods must not be put in to freeze.
They must become cold first before free-
zing.
Pack or cover the foodstuffs wherever
possible. This is the best way to con-
serve their taste, moistness and fresh-
ness, and to ensure that their taste is
not transferred to other foods.
Vegetables, fruit and salad can be kept in
the vegetable drawer without packing.
Foodstuffs must not be pushed against
the back wall of the cooling cabinet, be-
cause a gap for air circulation must be
left between the wall and the back edge
of the shelf.
It is best to arrange the foods in the
cooling cabinet according to the tempe-
rature distribution there. In this way, the
best possible storage temperature for
them is assured.
(See the example of arrangement on p.
14.)

14
Vegetable drawers:
Temperature +8...+10 ºC.
Vegetables like cucumber, vegetable mar-
row and pumpkin keep best in the vegetable
drawers.
Door compartments:
The door compartments are
best suited for keeping day-to-
day items like soft drinks, milk,
milk products, and various
condiments.
Storage of heavy stuffs in
door compartments stress
hinges.
Drink crate carrier:
In the drink crate carrier, you can
keep e.g. soft drinks, a bag of
potatoes, or large containers of
preserves.
EXAMPLE OF ARRANGEMENT
Cooling cabinet:
Temperature +2 ... +7 ºC.
The upper two shelf levels of the cooling
cabinet are, for instance, suitable for sto-
ring products that keep a long time, e.g.
various preserves and juices. On the next
shelf levels, you can keep e.g. yogurt,
day-to-day convenience foods, unopened
milk cartons and soft drink bottles, and
large containers of preserves.
Freezer:
Temperature -16 ... -24 ºC.
The upper three shelves of the free-
zer are intended for freezing of
foodstuffs. These shelves can also
be used for storing frozen pro-
ducts, as can all the shelf levels
with pull-out baskets.
Fresh storage compartment:
Temperature continually close to 0ºC.
(0...+2°C)
Meat, meat products, fish, and leftovers are
best kept in the fresh storage compartment.
They keep considerably longer in this com-
partment than in the cooling cabinet.
(Note: Not for potatoes.)

15
Freezing takes place on the top three
shelves of the freezer compartment.
Before the freezing process is started, the
foods already in the freezer are cooled
down further to prevent them warming up
too much due to the effect of the products
being frozen.
If a lot of frost (more than 0,5 cm) has
accumulated in the freezer, it is advisable
to defrost it before starting the freezing
process.
To freeze:
1 The freezer can be activated to operate
the freezing process for 48 hours.
Switch the freezer to positive drive in
good time before starting the freezing
process. When freezing small amounts
(1-2 kg), no precooling is needed.
This function is used when freezing
large quantities.
Activating the function:
Press the F-button of the display
enough times so that the text SF
appears on the screen; this text stays
on the screen throughout the speedy
freezing period. During speedy
freezing, neither the set temperature
value nor the interior temperature of the
freezer can be checked on the display
using the display buttons.
Unnecessary precooling can be
stopped by resetting the storage
temperature for the freezer, using the
display buttons.
Press the F-button until the display
begins to flash. Then, using the button,
select the desired temperature and
leave it visible.
The selection has now been made, and
no separate confirmation is needed.
The display will return to showing the
interior temperature.
2 If the quantity to be frozen is the same
as that stated as the freezing efficiency
per day (max. 18 kg at a time), then
allow the mechanism to go through one
freezing cycle (48 hours) before
beginning the freezing.
After the 48-hour freezing cycle, the
electronic thermostat returns
automatically to the storage
temperature.
If the quantity to be frozen is half of
that, then about half a freezing cycle is
sufficient as the positive drive period.
3 Put the products to be frozen on the
freezing shelves (the 3 top levels) in
such a way that the level product
surface in contact with the shelf is as
large as possible. Leave a gap for air
circulation between the products to be
frozen; in this way, the products will
freeze more efficiently.
4 Reactivate the freezing cycle (48
hours) for the freezer. After the 48-
hour freezing cycle, the electronic
thermostat will return automatically
to the storage temperature.
If it is desired to stop the freezing cycle
before the 48 hours are over, this is
done by resetting the storage
temperature for the freezer, using the
display buttons.
The freezing time depends on the
quantity of products to be frozen, and
on other use of the freezer. In practice,
the freezing time is about ½ - 1 day.
5 Before freezing the next batch, transfer
the frozen products from the freezing
shelves to the storage baskets lower
down.
Freezing

A door compartment can be removed
for cleaning by lifting it upwards. The
door compartments withstand machine
washing.
The vegetable drawer can be removed
for cleaning. The plastic drawer is re-
moved by lifting though upwards and
pulling it out.
The drawers withstand machine washing.
When replacing the drawer , it is neces-
sary to care that it is horizontal and locks
to its place.
CLEANING THE COOLING CABINET
Stop the mechanism of the cooling cabi-
net using the operating switch ( C ), for
the period during which the interior surfa-
ces are being cleaned.
Press the C-button until the display flas-
hes. Then press enough times until the
text OFF appears on the display. The ma-
chine will then go off.
The interior parts should be cleaned
about once a month. The cleaning water
must not be allowed to get into the control
devices or the lighting.
You can clean all the interior surfaces,
except the door seal, using lukewarm wa-
ter with a little washing-up liquid added.
Scouring agents or solvents are not sui-
table for cleaning the appliance. Clean
the door seal with water only. Dry the inte-
rior and the seal thoroughly.
It is advisable to clean the expansion coil
trough once a year. The trough is de-
tached by undoing the two fixing screws
( A ), and it can then be lowered.
Restart:
Press the C-button until the display
flashes. Then press enough times until
the desired temperature is in the display.
The selection has now been made, and
no separate confirmation is needed. The
display will return to showing the interior
temperature.
A
Cleaning

CLEANING THE FREEZER
It is advisable to always do the cleaning of
the freezer part in connection with
defrosting. From the standpoint of usage,
it is beneficial to defrost when a frost layer
about 0.5 cm thick has accumulated.
Instructions on procedure:
• Before defrosting, cool down the
frozen products that are in the freezer
by activating its positive drive cycle (48
hours).
Press the F-button of the display
enough times so that the text SF
appears on the screen; this text stays
on the screen throughout the speedy
freezing period.
During speedy freezing, neither the set
temperature value nor the interior
temperature of the freezer can be
checked on the display using the
display buttons.
• Take the frozen products, in their
baskets, out of the freezer and transfer
them to the cooling cabinet - or, in
winter, outside. The basket is detached
by first pulling it into the outward
position and then lifting its front edge
upwards and pulling it out.
• Stop the mechanism of the freezer part
using the buttons on the control bar.
Press the F-button until the display
flashes. Then press enough times until
the text OFF appears on the display.
The machine will then go off.
• Take out the products being kept in the
fresh storage compartment. Defrosting
water from the freezer passes through
a hole in the freezer bottom into the
fresh storage compartment.
• Leave the freezer door open slightly,
and leave the drawer of the fresh
storage compartment closed. Wait until
all the ice has melted.
• Because the freezer door is open a
little during defrosting, ice melting from
the evaporator may cause splashes
onto the floor in front of the freezer. For
that reason, it may be necessary to
protect the floor with a large towel for
instance.
Check now and then to see if the towel
should be changed or wrung dry.
WARNING:
• Ice must not be detached using a knife
or a hot-air blower, for example.
• Empty out the water that has come into
the drawer of the fresh storage
compartment.
• Clean and dry the freezer and the fresh
storage compartment.
• Start the freezer by resetting the
storage temperature, using the display
buttons.
• Leave the doors open while the
appliance is not being used.
CLEANING THE MECHANISM
NOTE: Stop the mechanism by using the
main switch and always take the plug out
of the wall socket for the period during
cleaning or other maintenance work is
being done.
Cleaning the mechanism
Pull the cooling cabinet/freezer away
from the wall. Remove dust and other dirt
from the compressor area and from
around the condenser at the back of the
appliance. This should be done regularly,
once a year. The cleaning can be done
easily using the brush attachment of a
vacuum cleaner, for example. Dirt in the
compressor area and on the condenser
weakens the functioning of the
mechanism and increases its electricity
consumption.

18
While the appliance is drawed away from
the wall it would be advisable to check that
the water lock is clean. If there is much
dirt in the water lock is it possible that
water doesn't drain like it should.
The water lock can be loosened by
unscrewing the screw of the water lock.
The water lock is situated above the
compressor at the end of the drain pipe
behind the appliance.
Also the evaporation pan is advisable to
clean.
The doors are advisable to adjust if they
are not straigth and even.
Also the hinges are advisable to oil at the
same time.
Stainless steel doors and front parts
of the drawers are coated with Easy
Clean coating. It protects the surface
against dirt. Do not use cleaning agent
for steel surfaces because it damages
the protective coating.
•the main switch and operating switches
are in the ‘on’ position
•there are no interruptions in electricity
distribution
NOTE! If the temperature of the surroun-
dings becomes unusually high, the inter-
nal protective device of the compressor
may stop the mechanism. Depending on
the conditions, restarting may take ½ - 1
hour.
If the cooling capacity is poor:
•check that too much frost has not ac-
cumulated on the expansion coil
•check that the doors and drawers are
tightly closed
•the doors may have been opened often
or kept open for too long
•too many goods at a time may have
been put in to cool
•the air circulation outside or inside may
have been hindered
The light inside the cooling cabinet:
The light inside the cooling cabinet is
long-life 3 W LED-light.
If the light doesn't work, please contact
the Festivo-service organization.
The freezer displays excess tempera-
ture (E3):
Check first if:
• Too many goods at a time may have
been put in to freezing without SF-fun-
ction
Freezing the products arises the tem-
perature inside the freezer. That may
cause the display excess temperature.
In that case there is no malfunction in
the freezer and alarm disappears du-
ring freezing.
• The door of the freezer is open.
Functional disorders
CORRECTING MINOR DISORDERS
All functional disorders do not necessarily
require the help of service personnel. So
check first whether you can eliminate the
disorder with the aid of the following
instructions.
If there is no fault in the appliance, you
yourself will be obliged to pay the costs
arising from any servicing visits, also du-
ring the guarantee period.
If the cooling mechanism does not
work, check that:
•you have followed the advice in the
operating instructions
•the plug is properly in the socket
•the fuse is intact

19
Acknowledge and stop the sound signal
by pressing the C-button or F-button of
the display.
E7 will remain on the display.
The appliance will operate despite the
sensor fault according to the programme
set by using the control bar.
Temperature inside the appliance may
vary. The fault must be repaired.
You can try to stop the appliance for a
while.
Please contact the Festivo-service
organization.
Error messages, freezer
E2 + sound signal = sensor fault
Acknowledge and stop the sound signal
by pressing the F-button of the display.
E2 will remain on the display.
The freezer will operate despite the
sensor fault according to the programme
set by using the control bar.
Temperature inside the freezer may vary.
The fault must be repaired.
Please contact the Festivo-service
organization.
E3 + sound signal = excess temperature,
freezer.
The error message will appear 1½ hour
after the temperature exceeds -12 °C.
Acknowledge and stop the sound signal
by pressing the F-button of the display.
E3 will remain on the display.
If the above mentioned functions are in
order, but the appliance does not begin
cooling within about two hours, contact
the Festivo-service organization.
Cooling cabinet
E1 + sound signal = sensor fault
Acknowledge and stop the sound signal
by pressing the C-button of the display.
E1 will remain on the display.
The cooling cabinet will operate despite
the sensor fault according to the prog-
ramme set by using the control bar.
Temperature inside the cooling cabinet
may vary. The fault must be repaired.
Please contact the Festivo-service
organization.
E5 + sound signal = excess temperature,
cooling cabinet.
The error message will appear 1½ hour
after the temperature exceeds +14 °C.
Acknowledge and stop the sound signal
by pressing the C-button of the display.
E5 will remain on the display.
Look first at page 18, Functional
Disorders.
If the above mentioned functions are in
order but the appliance does not begin
cooling within about two hours, contact
the Festivo-service organization.
Error messages, cooling cabinet or
freezer
E7 + sound signal = contact fault between
display and adjuster.
Error messages
If the above mentioned functions are in
order, but the appliance does not begin
cooling within about two hours, contact
the Festivo-service organization.

20
Disposal of the appliance
DISCARDED COLD STORAGE
APPLIANCES ARE HAZARDOUS
WASTE
By a law amendment that came into force
on 1st January 2002, discarded cold
storage appliances are classed in the
whole EU area as hazardous waste.
Warning!
Do not damage the cooling unit!
Especially the pipes are not allowed to da-
mage because otherwise the refrigerant
and oil of the cooling unit will get to the
nature.
Table of contents
Other Festivo Refrigerator manuals