manuals.online logo
Brands
  1. Home
  2. •
  3. Brands
  4. •
  5. Festool
  6. •
  7. Saw
  8. •
  9. Festool CS 70 VB User manual

Festool CS 70 VB User manual

CS 70 VB
CS 70 VL
CS 70 LA
Montageanleitung CS 70 Zubehör 4 - 5
Assembly instructions CS 70 Accessories 6 - 7
Notice demploi CS 70 Accessoires 8 -9
Instrucciones de montaje CS 70 Accesorios 10 - 11
Istruzioni di montaggio CS 70 Accessori 12 - 13
Montagevoorschrift CS 70 Toebehoren 14 - 15
Monteringsanvisning CS 70 Tillbehör 16 - 17
Asennusohje CS 70 Tarvikkeet 18 - 19
Montagevejledning CS 70 Tilbehør 20 - 21
Bruksanvisning CS 70 Tilbehør 22 - 23
Monteringsveiledning CS 70 Acessórios 24 - 25
Ðóêîâîäñòâî ïî ýêñïëóàòàöèè CS 70 Êîìïëåêòóþùèõ äåòàëåé 26 - 27
Návod k montái CS 70 Pøísluenství 28 - 29
Instrukcja monta¿u CS 70 Osprzêt 30 - 31
Összeszerelési utasítás CS 70 Tartozék 32 - 33
Ïäçãßåò óõíáñìïëüãçóçò CS 70 ÁîåóïõÜñ 34 - 35
Festool GmbH Wertstr. 20 D-73240 Wendlingen (07024/804-0
460 832_001
Seen at Ideal Tools.
1.4
1.2 1.1 1.3


2.10 2.9 2.72.8
2.4
2.1 2.32.2
2.5
2.6
Seen at Ideal Tools.
3.63.10 3.6 3.8 3.7
3.1 3.2 3.3 3.4 3.5 3.4


4.74.8 4.64.94.104.11 4.8
4.1 4.2 4.3 4.4
3.9
4.5
Seen at Ideal Tools.
6
Assembly instructions Compact CS70
Accessories
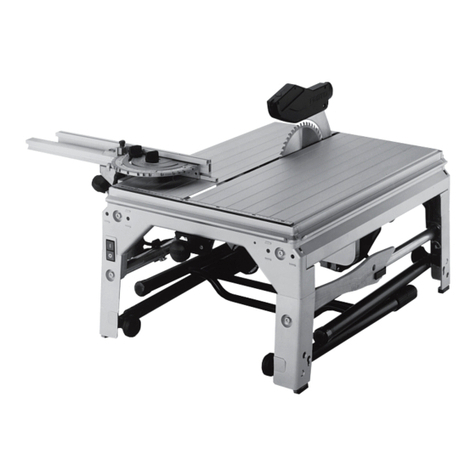
1Extension table CS 70 VB
2Extension table CS 70 VL
3Ripping-cut fence CS 70 LA
1Extension table CS 70 VB (1.1)
The extension table CS 70 VB can be fitted to
the base table to enable exact cuts with a stop
up to a cutting width of 680 mm.
The saw table is widened by 405 mm if an
extension table is fitted on a long side of the
table (usually the right).
Proceed as follows (Fig. 2):
Unfold supports (2.5) at a 90° angle to the
table top.
Turn rotary knobs (2.8) fully to the left.
Place the outer edge of the extension table
on the edge of the base table in a slightly
raised position (Fig. 2).
Lower extension table so that the peripheral
clamping edge (2.4) lies between the profile
edge (2.7) and clamping plate (2.7).
Insert the end of the front support (2.2) into
the slot (2.1) in the table frame, push down
and tighten with knurled nut (2.3).
Suspend rear support in slot. Push extension
table down and tighten rear knurled nut.
Adjust exact height. Place guide stop on base
table up to saw blade.
Adjust height of extension table to same
height as base table with screwdriver at the
adjusting screws (4.8).
Attention! Do not align with outer edge of
table since this may be 0.2-0.3 mm below
the rest of the table.
Fit angle fence (1.4) centrally over joint
between base table and extension table so
that when the fence is clamped the extension
table is aligned with the edge of the base
table.
Tighten front rotary knob (2.8).
Push extension table down on joint at rear
and tighten rear rotary knob.
Screw in adjusting screw (2.10) fully with
screw-driver. If the extension table is
removed and then re-mounted it must be
pushed back against this stop (adjusting
screw).
This fixation means that it no longer has to
be aligned with the angle fence.
Check that the extension table is exactly level
with the base table using the guide stop.
The flatness of the base table can be adjusted
by adjusting the fastening (2.6).
To enable the angle fence and ripping-cut fence
to be adjusted according to the existing scale,
the scale of the extension table must be fitted
directly onto the base tables scale (Fig. 4).
Proceed as follows:
Release the fastening bolts (4.11) for the
extension tables scale.
Slide scale to base table scale.
Re-tighten fastening bolts.
2Extension table CS 70 VL (1.2)
The extension table CS 70 VL can be mounted
on the rear of the CS 70 EB to provide a safe
support when sawing longer work pieces.
The saw table is thus extended by 530 mm.
Proceed as follows (Fig. 3):
Mount left and right fitting angle (3.6) to rear
of frame with enclosed bolts, square nuts and
washers. Only slightly tighten the bolts (3.10).
If a CS 70 ST sliding table is already fitted the
fitting angle for the extension table is placed
on the fitting angle for the sliding table on
the side of the sliding table and both fitting
angles fastened together (on top of one
another).
The enclosed 4 mm washer then has to be
inserted beneath the fitting angle on the other
side.
Unfold supports (3.4) at a 90° angle to the
tabletop.
Release left and right rotary knobs (3.8) by
approx. 3-4 rotations (turn anti-clockwise).
Suspend the extension table by the threaded
bolts of the rotary knobs (3.8) in the slots
(3.9) on the fitting angle in a slightly raised
position.
The fitting angle hereby lies between the
rotary knob (3.8) and bow (3.7).
Lower the extension table onto roughly the
same level as the saw table and insert the
end of the support (3.2) into the slot (3.1)
in the table frame, press down and fasten
with knurled nut (3.3).
Push extension table onto roughly the same
level as the saw table and fasten with left
and right rotary knobs (3.8). The threaded
bolts should hereby rest on the base of the
slots.
Align extension table so that it is approx. 0.3-
0.5 mm lower than the base table at the
direct joint (check by laying the stop guide
on the base table).
Fasten fitting angle with bolts (3.10).
Check that the entire surface of the extension
is flat with the stop guide.
Adjust at the fastenings (3.5).
Folding away the extension table:
Release rotary knobs (3.8).
Loosen knurled nuts (3.3).
Slightly raise the rear of the extension table
and remove ends of supports from slots.
Fold supports in crosswise.
Fold down extension table.
Seen at Ideal Tools.
7
3Ripping-cut fence CS 70 LA (1.3)
Precise sawing work with large work pieces is
only possible with a correctly fitted ripping-cut
fence CS 670 LA (Fig. 4).
The ripping-cut fence has separate clamps for
the front and rear edges of the table.
This prevents a lateral movement of the stop
surface.
The stop guide (4.7) can be fitted to the stop
rail (4.5) as a high or low guide surface.
Rotate the stop guide by 90° and fasten to
the corresponding guide grooves.
The following adjustments are possible
with the ripping-cut fence:
Handle (4.2): Clamp stop to front edge of
table
Claming lever (4.3): Clamp stop to rear edge
of table.
Clamping lever (4.1): Clamp fine adjustment.
Rotary knob (4.10): Stop adjustment with
fine adjustment
Rotary knobs (4.6): Clamp stop guide to stop
rail.
Open the following clamps fully in
preparation for fitting the fence:
Clamp on front edge of table (4.2)
Clamp on rear edge of table (4.3). (clamping
lever in a vertical upright position)
Clamp on fine adjustment (4.21). (clamping
lever points towards switch)
Then slid the fence over the table from the
right so that the clamp jaws of the front and
rear clamps lie below the peripheral table
clamping edge (4.4).
The adjustment range for the fine adjustment
an be seen in the inspection window (4.9).
Set a sufficiently large adjustment range for
subsequent adjustments with the rotary knob
(4.10).
Then slide the fence according to scale close
to the desired cutting width and clamp by
flipping the clamping lever (4.1) approx. 180°
to the fine adjustment.
If the clamp is too weak the clamping lever
can be moved as follows:
Bring clamping lever into maximum clamping
position.
Release bolt which holds the clamping lever
to the axis.
Set clamping lever back by one division on
the hexagon.
Re-tighten clamping lever.
Set fence to exact size with fine adjustment
using rotary knob (4.10). The fence is hereby
moved by 1/10 mm for every scale mark.
Tighten fence clamps (4.2 + 4.3) after final
adjustment.
Seen at Ideal Tools.
Festool GmbH
Postfach 1163
D-73236 Wendlingen
Wertstraße 20
D-73240 Wendlingen
)(07024) 804-0
Fax (07024) 804-608
http://www.festool.com
Seen at Ideal Tools.

Other Festool Saw manuals

Festool PRECISIO CS 70 EBG User manual

Festool

Festool PRECISIO CS 70 EBG User manual

Festool TS 55 REBQ User manual

Festool

Festool TS 55 REBQ User manual

Festool KS 60 E Installation instructions

Festool

Festool KS 60 E Installation instructions

Festool TSC 55 REB User manual

Festool

Festool TSC 55 REB User manual

Festool TS 75 EQ User manual

Festool

Festool TS 75 EQ User manual

Festool TS 55 REQ Owner's manual

Festool

Festool TS 55 REQ Owner's manual

Festool Precisio CS 70 EB Installation instructions

Festool

Festool Precisio CS 70 EB Installation instructions

Festool CS 70 ST User manual

Festool

Festool CS 70 ST User manual

Festool TS 55 REBQ Installation instructions

Festool

Festool TS 55 REBQ Installation instructions

Festool HK 55 EQ User manual

Festool

Festool HK 55 EQ User manual

Festool TS 55 EBQ User manual

Festool

Festool TS 55 EBQ User manual

Festool KAPEX KS 120 EB Installation instructions

Festool

Festool KAPEX KS 120 EB Installation instructions

Festool TSV 60 KEBQ User manual

Festool

Festool TSV 60 KEBQ User manual

Festool SYM 70 RE User guide

Festool

Festool SYM 70 RE User guide

Festool KSC 60 EB User manual

Festool

Festool KSC 60 EB User manual

Festool TS 75 EBQ User manual

Festool

Festool TS 75 EBQ User manual

Festool Carvex PSB 420 EBQ Installation instructions

Festool

Festool Carvex PSB 420 EBQ Installation instructions

Festool ISC 240 Li User manual

Festool

Festool ISC 240 Li User manual

Festool IS 330 EB Installation instructions

Festool

Festool IS 330 EB Installation instructions

Festool TS 75 EBQ Installation instructions

Festool

Festool TS 75 EBQ Installation instructions

Festool SSU 200 EB Installation instructions

Festool

Festool SSU 200 EB Installation instructions

Festool PRECISIO CS 70 EBG User manual

Festool

Festool PRECISIO CS 70 EBG User manual

Festool HK 55 EBQ Installation instructions

Festool

Festool HK 55 EBQ Installation instructions

Festool ATF 55E User manual

Festool

Festool ATF 55E User manual

Popular Saw manuals by other brands

Meec 278-445 operating instructions

Meec

Meec 278-445 operating instructions

Laguna Tools LT14 SEL manual

Laguna Tools

Laguna Tools LT14 SEL manual

Weka Frida WS75 operating instructions

Weka

Weka Frida WS75 operating instructions

Remington BRANCH WIZARD 111409-01 owner's manual

Remington

Remington BRANCH WIZARD 111409-01 owner's manual

Bosch GCO 2000 Professional Original operating instructions

Bosch

Bosch GCO 2000 Professional Original operating instructions

MK Diamond Products MK-101 PRO24 owner's manual

MK Diamond Products

MK Diamond Products MK-101 PRO24 owner's manual

Wido WD011220185 operating instructions

Wido

Wido WD011220185 operating instructions

Incra TS III owner's manual

Incra

Incra TS III owner's manual

Makita BLS820 manual

Makita

Makita BLS820 manual

BOIA CLASICA instruction manual

BOIA

BOIA CLASICA instruction manual

FERREX CHAINSAW 4-STROKE user manual

FERREX

FERREX CHAINSAW 4-STROKE user manual

GreenWorks G40CS30 20117UA Operator's manual

GreenWorks

GreenWorks G40CS30 20117UA Operator's manual

Jula 380-036 operating instructions

Jula

Jula 380-036 operating instructions

Erbauer EDD18-Li-2 Original instructions

Erbauer

Erbauer EDD18-Li-2 Original instructions

Alpha tools KS 205 operating instructions

Alpha tools

Alpha tools KS 205 operating instructions

Grizzly T32304 owner's manual

Grizzly

Grizzly T32304 owner's manual

Optimum Opti Saw S Bigh operating manual

Optimum

Optimum Opti Saw S Bigh operating manual

Wilton 7020/7040 Operating instructions & parts manual

Wilton

Wilton 7020/7040 Operating instructions & parts manual

manuals.online logo
manuals.online logoBrands
  • About & Mission
  • Contact us
  • Privacy Policy
  • Terms and Conditions

Copyright 2025 Manuals.Online. All Rights Reserved.