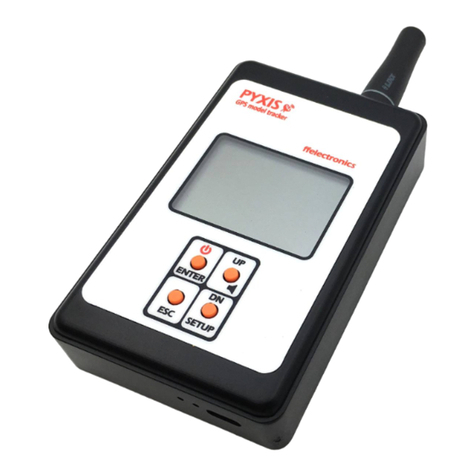
ffelectronics PYXIS GPS User manual

PYXIS GPS
model tracker
Quick Reference Guide V1.2
© ffelectronics –Sep 2017
Introduction
The PYXIS tracker is a free flight model retrieval system based on the Global Navigation Satellite
System (GNSS), that uses multiple satellite networks like GPS, GLONASS, Galileo, Beidou and other
regional systems. It does not require the user to transmit any data, operates independently on any
telephonic or internet reception and works anywhere on the Earth where there is an unobstructed
line of sight to four or more satellites.
The PYXIS tracker is made up of a receiver (hand-unit) and a beacon (transmitter installed on the
model). Each unit has its own GNSS module that makes it aware of its location. A long-range radio
link allows the transmission of the model position to the hand-unit, that in combination with the
data from a local electronic compass, displays the distance and the heading in a straight line to the
model, whatever the route followed to approach it.
PYXIS Receiver

Page 2 of 5
Switching the receiver ON/OFF
Press and hold the button (2 seconds approx) to switch the receiver ON/OFF
Displayed icons
Multifunction keyboard operation
Press and hold SETUP to enter the setup menu. Press and release UP/DNto select a menu, press
and release ENTER to enter the selected menu. Press and release ESC to leave a menu.
Standard microUSB socket for battery recharge
The receiver has a standard microUSB socket in the bottom end, to recharge the battery through a
mobile phone charger, computer USB, microUSB powerbank or car cigarette lighter plug. The red
LED ON indicates that charge is in progress, the green LED ON indicates that charge is complete.
PYXIS BEACON
Positioning the beacon
Position the beacon with the radio antenna wire leaning out of the top of the pylon. With
conductive pylons (e.g. made in carbon fiber), the top dent of the beacon (about 4.5mm high)
must completely lean out of the top of the pylon outline
Beacon power options and LED indications
•separate LiPo battery (1 cell, 3.7Vdc 170mAh 20C recommended) or shared e-timer battery
•direct connection to the TRACKER output of the Sidus e-Timer (adapter lead needed)
The GREEN and RED lights visible on the bottom side of the beacon have various flashing
patterns. The RED light goes ON during position transmission, the GREEN light indicates the status
of the GPS (flashing = GPS acquisition, solid = GPS locked, off = beacon sleeping)
Position transmission and power saving policy
A sophisticated power management scheme is implemented in the beacon. It transmits its current
position periodically, with a time interval that depends on the model attitude. If the model is laid
on the ground for some time, the beacon enters a sleep status but keeps transmitting its position
model position
OK
local position
Unknown
(flashing)
old/outdated
unknown
(flashing)
direction to model
OK
buzzer status
off
on
radio signal from model
position
beacon ID
distance to model

Page 3 of 5
at longer time intervals. The beacon is capable to wake up if the model is moved or lift, acquire the
new position and resume its cyclic transmission.
OPERATE THE SYSTEM
How model tracking works
With the model flying, the beacon transmits a position update every 10 seconds, the radio signal
from the beacon to the receiver has no obstacles and the range is very long. If the signal is lost
when the model lands (due to uneven terrain, tall grass, obstacles etc.) the receiver will head
towards the latest position received from the beacon. Anyhow the beacon keeps transmitting its
position at longer intervals even after landing, therefore the receiver will get updated about the
landing position as the model is approached during the retrieval. The receiver permanently stores
the last known coordinates when it is switched OFF and restores them when switched ON, that
makes it possible to complete the retrieval at a later time.
the accuracy of the coordinates provided by the GPS system is affected by numerous factors
that introduce a position jitter. In the worst conditions, the accuracy is limited to 15-20 meters.
For this reason, the distance counter on the receiver flashes for distances under 25 meters, as a
warning that distance and direction may only be indicative.
Compass calibration
the internal e-compass calibration is recommended the very first time the system is used.
Refer to the instructions given further on in this document
Quick retrieval instructions
the system is designed for outdoor operations only. Operating indoors will lead to a quick
discharge of the batteries.
•Switch the receiver ON and apply power to the beacon
•The local position icon will blink (crossed) for some time until the receiver gets valid signals
from the GPS satellite network. Similarly, the model position icon will blink (crossed) until
the beacon gets valid GPS signals, or it will be steady if the receiver has already stored an
outdated coordinate from the same model referring to a previous retrieval session
•Model tracking is possible if the local position icon is stable and the displayed model
position icon is (updated) or (outdated)
•The arrow on the receiver LCD will head to the last known model position and the meter
counter will indicate its distance in a straight line. Walk to the direction indicated by the arrow
and check that the indicated distance decreases as the model is approached
it is recommended to have the receiver working and displaying the stable icon before
launching the model. A fully charged receiver battery guarantees that it works continuously during
all one day.
How to hold the receiver during tracking
•Hold the receiver vertical and lift the arm to improve the reception of the radio signal from the
beacon when it is extremely far
•Hold the receiver horizontal for model location

Page 4 of 5
SYSTEM SETTINGS - MENU ITEMS
Press and hold SETUP to enter the setup menu. The following describes each available menu item.
Learn Beacon Id
Each beacon is manufactured with a unique identifier (beacon ID). This menu allows to bind a new
beacon to the receiver. Currently the receiver is capable to handle up to 30 beacons.
•Enter SETUP > LRN BEACON ID
•Choose a free slot in the displayed list of beacon identifiers (ID1, .., ID30)
•Confirm the desired slot with ENTER
•power ON the new beacon and accept or discard its beacon ID when it appears on the LCD
Set Beacon Id
The receiver can track one beacon a time. This menu allows to change the tracked beacon.
•Enter SETUP > SET BEACON ID
•Choose the desired beacon from the displayed list of beacon identifiers (ID1, .., ID30)
•Confirm with ENTER. The active beacon ID will be changed and displayed in the lower left
corner of the LCD
Compass Calibration
The calibration of the internal e-compass is needed by the receiver to determine the true North.
Calibrate the compass the very first time the receiver is used, and check/repeat calibration from
time to time. It is recommended to recalibrate the compass when moving to different fields.
The compass calibration must be performed in an open area outdoors, far from magnetic
fields or metal objects.
•Enter SETUP > COMPASS CALIB
•Turn the receiver 3 or 4 times for each x, y, z axis in any order as indicated in the drawing
below
The procedure ends automatically after about 15 seconds.

Page 5 of 5
Direction Adjustment
This menu allows a fine adjustment of the arrow direction to compensate for magnetic declination
(difference between true North and magnetic North in different places of the Earth). Usually this
adjustment is not needed, as the direction error decreases with the distance from the beacon.
•Enter SETUP > DIRECTION ADJ
•Aim the receiver to the model
•If the arrow does not point straight to the model move it by pressing/releasing UP or DN
•Confirm the adjustment with ENTER
Tracking
This menu opens the tracking submenu
•Enter SETUP > TRACKING
Set Home
This menu allows to store the current receiver location as HOME
•Enter SETUP > TRACKING
•Move to SET HOME with UP/DN and confirm with ENTER
•Accept or discard with UP/DN and ENTER, or ESC to discard directly
Go Home
This menu sets the HOME location as target location. It is useful to be driven back HOME after the
model has been retrieved, when the start location is hidden by hills, trees etc. or completely lost
•Enter SETUP > TRACKING
•Move to GO HOME with UP/DN and confirm with ENTER
•Direction and distance will refer now to the HOME location and the icon will be displayed
after reaching HOME do not forget to set the receiver to track the beacon again (SETUP >
TRACKING > TRACK BEACON)
Track Beacon
This menu allows to the track the beacon which identifier (ID) is the active ID
•Enter SETUP > TRACKING
•Choose TRACK BEACON with ENTER
SYSTEM BATTERIES DURATION
Receiver built-in battery : > 20 hours continuously
Beacon battery (170mAh 20C) : > 36-48 hours (estimated)
Table of contents
Other ffelectronics GPS manuals
