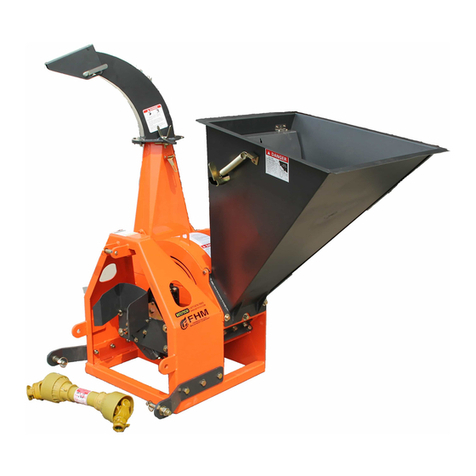
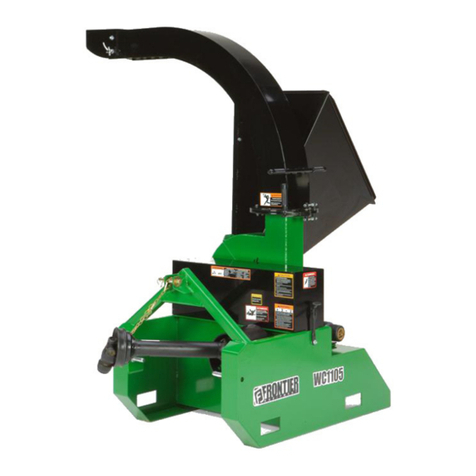
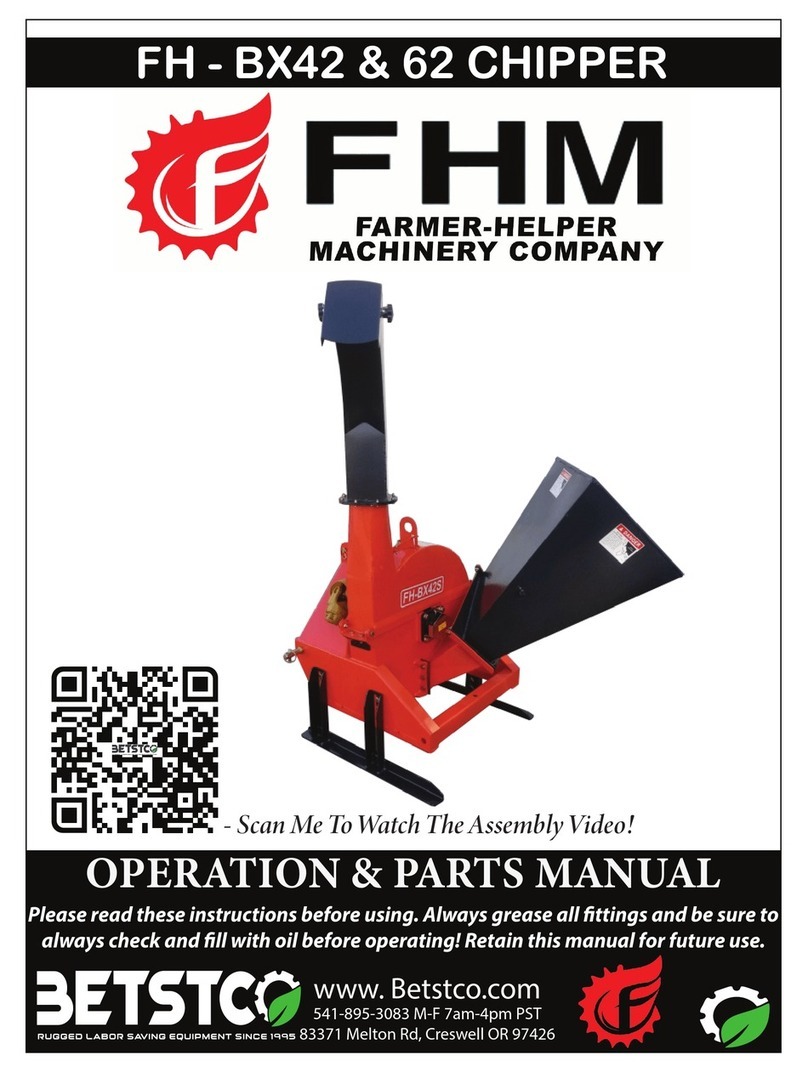
FHM WC8-PRO Application guide

Farmer-Helper WC PRO Chipper 1 10-19-2017
Please read these instructions carefully before using!
You must fill gear box with oil and grease all grease points before operating!
Check for items in feed chute & for Flywheel free spin before operation.
*Prices and Specifications subject to change without notice
Labor Saving Equipment Since 1995
www.Betstco.com
Toll Free: 877-876-7895, E-mail: [email protected]
83371 Melton Rd, Creswell OR 97426
WC8-PRO Power Feed Wood Chipper
OPERATION & PARTS MANUAL
Save This Manual for Future Reference

Farmer-Helper WC PRO Chipper 2 Revision 12-12-2017
The information contained in this operations manual is a general introduction only. The information
contained herein may be modified at any time, for any reason. Modification may affect the
details or specifications of the product described in this manual. Therefore, users –
dealers must include the manufacturing date and serial number when placing an order for spare
parts and components. Thanks.

Farmer-Helper WC PRO Chipper 3 Revision 9/22/16
Table of Contents
1. Introduction ……………………. 2
2. Setup and Assembly Instructions ……………………. 3
3. PTO Driveshaft Safety Tips ……………………. 6
4. Protective Guards and Shields ……………………. 6
5. Safety Instructions ……………………. 7
6. Operator Protective Gear ……………………. 8
7. Operation Checklist ……………………. 8
8. Chipper Operation ……………………. 9
9. Blade Replacement ……………………10
10. Lubrication Frequencies and Locations …………………….11
11. Preventive Maintenance …………………… 12
12. Parts and Fasteners ………………….... 13
13. Troubleshooting …………………… 14

Farmer-Helper WC PRO Chipper 4 Revision 9/22/16
1. INTRODUCTION
Before using your wood chipper, read and understand this operation
manual and the accompanying maintenance instructions. It contains
important information which will help you observe proper safety
precautions, get the most work from your wood chipper and help prolong
the life of your chipper.
2. SETUP and ASSEMBLY INSTRUCTIONS
Your chipper will arrive in a metal shipping frame. This frame can be
dismantled in minutes to allow access to all parts of your chipper.
The feed chute is located on top of the chipper; located at the bottom you
will find the PTO driveline, lower frame pieces, and discharge chute,
which contains the parts bag.
Remove and assemble the lower stand base, place chipper on stand and
bolt on, Attach the 2 hitch assemblies, Attach PTO Safety shield, Attach
the feed chute, Attach feed roller handle, Attach discharge chute, Adjust
safety shut-off cables.
Before Operation check all Bolts, Nuts, Set Screws and Zerks for
tightness. This will require removal of the Main Shaft Shield and the
Removal of Feed Roller Shield. While Main Shaft Shield is removed
observes all nuts and bolts for tightness and verify Pulley faces are
aligned well. Verify the tightness of all 3 blades. Check Fluid level of
Feed-Roller Gear-Box; Fluid Type TH22-Tractor Hydraulic Fluid

Farmer-Helper WC PRO Chipper 5 Revision 9/22/16

Farmer-Helper WC PRO Chipper 6 Revision 9/22/16
3. PTO DRIVESHAFT SAFETY TIPS
Your chipper is shipped with a PTO driveshaft. When using the PTO
driveshaft, keep your tractor adjusted as close to the chipper as possible.
Always ensure that the PTO shaft is no more than 15 degrees of
horizontal when operating.
-The following steps are recommended for safe operation of the
driveshaft under field conditions.
-Test hitch angle to prevent the driveshaft from:
Extending beyond the recommended maximum length.
Bottoming out
Reaching a position that allows joints to lock
Exceeding the maximum allowable angle for constant velocity
(CV) joints.
-Specify and test telescoping members to allow the lowest possible thrust
loads, considering the expected working conditions.
-Specify and test torque limiters to control excessive shock.
-Where necessary, specify and test overrun clutches to prevent inertial
loads from overpowering the tractor.
-Provide a means to support the drive shaft when it is disconnected from
the tractor, to prevent damage during storage or transportation.
-Provided drive shaft is of Shear design using a Grade 4 bolt, if replacing
this bolt do not use higher grade as this may cause damage to the PTO
driveshaft, Implement, or your tractor.
-On drive shafts with torque-limiting or overrun devices, be sure to
connect the device on the end of the drive shaft nearest the chipper.
-Provide a proper clearance zone for the operation of the driveshaft, to
avoid damage to the shielding components.
-It is not recommended to use PTO adaptors which may defeat the
purpose of the tractor’s master shield and/or adversely affect the
performance of the driveshaft.
4. PROTECTIVE GUARDS AND SHIELDS
Do not allow the chipper to be operated without the chip deflector
properly in place.

Farmer-Helper WC PRO Chipper 7 Revision 9/22/16
PTO driveshaft should consist of a PTO master shield, integral driveshaft
shield, and a chipper input connection shield.
1. Follow all chipper and tractor instruction labels and manuals. The
chipper should be used only with the tractor’s PTO master shield in
place.
2. Specify and test an integral driveshaft shield with end cones which
will overlap, but not interfere with the PTO master shield or chipper
input connection shield.
3. A chipper input connection shield should be used in addition to the
integral driveshaft shield, in order to guard the shaft coupling and any
torque limiting device installed on the driveshaft.
4. Check that all routine maintenance of the driveshaft can be done
without removal of the shields.
5. SAFETY INSTRUCTIONS
Do not attempt to operate the chipper until you have read and understood
this manual.
Always keep guards and chipper shields properly installed while
operating the chipper.
Keep the decals in place and verify they are understandable. New labels
can be ordered from Betst Power Equipment upon request. If your chipper
is repainted, be sure the labels and decals remain visible.
Never leave the chipper running unattended.
Do not attempt alterations, repairs or adjustments while chipper head is
turning. Always disconnect the PTO and stop the tractor motor, then put
keys in your pocket.
Keep hands, feet and other extremities out of and away from
the hopper. When checking blades or adjusting the cutting bar,
EXERCISE EXTREME CAUTION! If accidentally rotated,
the flywheel can contain enough residual energy to cause
serious injury.
Point the discharge chute away from doorways, sidewalks, or any areas
where your view is obstructed.
The chute should be pointed downwind when possible.

Farmer-Helper WC PRO Chipper 8 Revision 9/22/16
Keep everyone, especially children, away from the operation
area.
Anyone who has not read and understood this manual should not be in
the area.
6. OPERATOR PROTECTIVE GEAR
The following protective clothing and gear is recommended when using
your chipper:
EYES -- Wraparound Safety Glasses or Goggles
EARS -- Ear Plugs
HANDS -- Leather Gloves
FEET -- Steel-Toed Boots
LEGS -- Heavy Pants
ARMS -- Long-Sleeved Shirt
NO LOOSE CLOTHING SHOULD BE WORN AROUND THE
CHIPPER!
7. OPERATION CHECKLIST
CAUTION: Turn the chipper head over by hand before applying power
to make sure that the head is clear, all the bolts are clear, and the blades
clear the case and cutter bar.
Make sure that:
The feed roll drive-shaft and pivots are properly lubricated.
The feed roll clutch is properly lubricated, and the clutch releases
when handle or foot pedal is depressed.
The PTO shaft doesn’t come apart or bottom out during the normal
lifting range.
The discharge chute is pointed in a safe direction
During and after operation, check the chipper pile to see if the blades
need to be serviced. Long slivers in the chip pile are one of the best
indications of dull blades.

Farmer-Helper WC PRO Chipper 9 Revision 9/22/16
8. CHIPPER OPERATION
Remember that the chippers blades must be sharp to operate properly.
Dirt, rocks, nails, or other foreign material will shorten blade life.
Always review the manual before operating the chipper.
Locate chipper in a safe area with the discharge chute pointed away from
doorways, sidewalks, or any areas where your view is obstructed.
After rotating the chipper by hand and making sure there are no
obstructions in the head, attaching PTO driveshaft, start the motor of
tractor and elevate or lower the chipper until the PTO shaft is within 15
degrees of horizontal.
With the PTO engaged release the PTO clutch slowly. Gradually increase
speed until the tractor PTO speed is 540 rpm.
Do not move the unit while the flywheel is turning.
Block the wheels of the tractor and set the parking brake while running
the chipper.
Feed material into the head with the largest end first.
The feed roll will fold branches as they are pulled into the hopper.
Occasionally, a fork in the branch may have to be cut to feed properly.
If the material stops the feed roll, release the feed roll clutch by
depressing either upper handle or lower foot pedal. Hold the clutch in the
disengaged mode and pull the material out of the hopper. Release the feed
roll clutch and the feed roll will turn again.
If unit slows down noticeably, first shut off the PTO power, then the
tractor. Keep the keys in your pocket.
Unplug the head by turning it backwards by hand with the discharge
chute and top and lower section clean-out covers off.
Remove the chips from the top of the head, the upper and lower clean-
outs.

Farmer-Helper WC PRO Chipper 10 Revision 9/22/16
Replace the upper and lower clean-out covers.
Turn the head by hand to be sure it turns freely. If head fails to rotate
completely repeat steps above.
Once head turns freely again replace the discharge chute.
Be sure all shields and deflectors are replaced before operating again.
When you have finished working be sure there is nothing in the head or
feed roll.
After shutting down the unit rotate the head by hand backwards to
remove any small chips or debris.
9. BLADE REPLACEMENT
The best way to tell if the blades need replacing is to watch the chips
coming out of the discharge. If they are long and stringy, the blades need
to be serviced or replaced. Sometimes blades may feel sharp to the
fingers, but may be worn or rounded. The blades are all reversible.
Dull blades cause many problems, including:
Loss of cutting power
Jamming or Plugging of the discharge chute
Rough cutting with more vibration than usual
Broken feed roll shaft
Wear or Loosening of the main bearing causing the flywheel or
blades to come in contact with the case or bed blade.
Feed roll kicking out of gear
Lack of material feeding
To remove the blades, take the PTO shaft out of gear. Shut off the tractor
and keep the keys in your pocket. The blades are accessed by removing
the inspection plate on the side opposite the chute.
Unhook the feed roller springs, block the feed roll up, and with an Allen
Wrench on the chute side and a socket on the other, and remove the
attachment bolts. If necessary a small screwdriver can be used to clean

Farmer-Helper WC PRO Chipper 11 Revision 9/22/16
the allen wrench bolt heads. Be sure to note the position of the blade
before removing, to ensure new blade is placed in the same location.
Caution: Be Sure Not to Drop any Parts Inside. Remove the blade and
replace with new blade.
Blade installation is opposite of removal, being sure to position in same
relation to Bed blade as before.
Torque the blade attachment bolts to 50ft/lb, ensuring the bolts run
through the flywheel.
Replace the inspection plate and reattach the springs.
Rotate the cutting head by hand before applying power. The Bed Blade
should be adjusted to a distance of 0.10 to 0.30 inches from the blades by
loosing the bolts in the slotted holes at the bottom of the chute and
moving the blade on the slots. The more gap will cause a larger finished
chip.
Tighten the adjustment bolts to 35ft/lb of torque.
10. LUBRICATION FREQUENCIES AND LOCATIONS
PTO SHAFT – 2 zerks on Universal Once a day with Multipurpose
Grease.
SLIP JOINT – Lubricate with multipurpose grease.
FEED ROLL PIVOT – Is Lubricated during manufacturing, it may need
to be replaced after 200 ~ 400 hours of operation. Contact
support@betstco.com if you think this part may need to be replaced.
FEED ROLL DRIVESHAFT – Feed roll drive shaft should be lubricated
every 4 ~ 8 hours depending on the amount of fine particulates in the air.
lubricate both the sliding parts with multipurpose grease, particularly
before each use.
FEED ROLL CLUTCH – While feed roll shaft is off, lubricate the feed
roll clutch inside and outside with multi-purpose grease.

Farmer-Helper WC PRO Chipper 12 Revision 9/22/16
REDUCTION GEAR BOX – Check Oil Level every 12 to 16 hours of
operation.
FEED ROLLER PILLOW BLOCK BEARINGS – 2 zerks on either side
of shaft with multipurpose grease every 100 hours of operation.
DRIVE SHAFT & FLYWHEEL SHAFT PILLOW BLOCK BEARINGS
– 4 zerks on either side of shaft with multipurpose grease every 16 to 24
hours of operation.
11. PREVENTIVE MAITNANCE
Check all bolts, set screws and fasteners after 4 hours of operation, and
once per day thereafter.
Check for loose belts and broken pulleys, loose springs, dry slides, and
proper lubrication of both feed roll driveshaft and feed roll clutch.
The main drive belts on the chipper need to be checked every 8 hours of
operation;¼”to½”deflection.Totightenthesebelts,firstloosenthefour
bottom nuts that hold the jack shaft bearing. Loosen them 3 turns, and
then move the nuts on top of the bearings down an equal amount. Keep
the jack shaft parallel with the main shaft. Torque the bottom nuts to 80 ft
lbs.
The feed roll belt needs to be checked every 12 hours of operation. ¼” to ½”
deflection The feed roll belt can be adjusted by first loosing the 4 bolts that
hold the reduction gear box to the base, then moving the gear box and re
tightening the bolts to 40ft/lb of torque.
All decals and safety instructions should be kept with the chipper. It is
the operator’s responsibility to replace the decals as needed. In the event
that they become worn or illegible, replacements are available.
12.TROUBLESHOOTING
PROBLEM: Flywheel slows but tractor does not
Possible Causes Solution
Main drive belts slipping Tighten main drive belts

Farmer-Helper WC PRO Chipper 13 Revision 9/22/16
Blades Dull Reverse/Replace
PROBLEM: Feed Roll Clutch Kicking in and out of gear
Possible Causes Solution
Blades Dull Reverse/Replace
Material jammed in chute Release feed roll clutch and
remove material by pulling out
of chute, trim forks if necessary
PROBLEM: Chip Deflector Plugging; Chips too long or Stringy
Possible Causes Solution
Blades Dull Reverse/Replace
Bed Blade Rounded Reverse/Replace
Bed Blade not adjusted properly Adjust to Tolerance Level
Flywheel Turning to Slowly Ensure PTO speed 540 RPM
PROBLEM: Material Won’t Feed
Possible Causes Solution
Feed Roll Slide Dirty or Dry Clean & Lubricate
Fork in Material too wide Remove Material and trim fork
Feed Roll Gear Box Loose Tighten Feed RollGearBox Belt
FeedRoll TensionSprings Stretched ReplaceFeedRollTensionSpring
13.PARTS AND FASTENERS
Your chipper is designed for ease of maintenance. Replacement parts are
available from Betst Power Equipment at 1-541-895-3083 or
Support@Betstco.com Check the parts list for specification. Note: All
bolts on the flywheel, blades, and bed blade are grade 8 specifications.
All other bolts are grade 2 or 5.

Farmer-Helper WC PRO Chipper 14 Revision 9/22/16
Further Plugging Diagnostics
There are many variables that can cause the chipper to plug
The Input Speed From Tractor
The Vegetation Being Feed
Maintenance Needed
Mechanical Adjustment Needed
-If any modification has been made to chipper it may have affected the
output process ~ Any Modifications Made?
-Verify Tractor PTO Speed Setting at 540 RPM
-Verify Tractor Engine Speed between 1800 ~ 2200 RPM
-Main Pulley Belt Deflection ~ Should be between 1/2” – 3/4” If
Adjustment is needed follow steps as outlined in the manual or call
support/service at the number below with any questions.
-Main Pulley swellable Sleeve Loose ~ Check the retaining bolts of
swellable sleeve for tightness If Adjustment is needed follow the steps as
outlined in the manual or call service/support at the number below with
any questions.
-Verify Free Spin of Flywheel Before operations.
-Verify all cleanout covers have been re-installed before operations.
-Verify Chipping Blades are sharp ~ Dullness will affect the ability for
the chipper to work efficiently.
-Verify the Bed Blade has a squared edge ~ Roundness will affect the
ability for the chipper to work efficiently.
-Verify the Chipping Blade Spacing to the Bed Blade is within normal
tolerance 0.10” ~ 0.30” = 1/10th” ~ 1/3”

Farmer-Helper WC PRO Chipper 15 Revision 9/22/16
-During Operation be sure the Discharge Flap is adjust outward ~ If it is
pointed directly down it will limit the ability for air flow and reduce the
chippers efficiency.
-Do not force material into the chipper to increase its production rate ~
force feeding the chipper will cause it to plug.
-Vegetation should be clean of foreign debris and dry ~ dirt, grass, leaves
etc… will plug the machine immediately Wet materials will plug the
machine within moments.
-Vegetation should be branched material, if you have branched material
with leaves or needles be sure you are feed other branches at same time
as to mix the material as it is fed ~ wood chips are required to help move
a small amount of leaf/needle thru the chipper at the same time.
-Concentrated amounts of leaf, needle, dirt, grass, etc will plug the
chipper immediately.
-During operation if you notice the flywheel speed is reducing due to the
amount of material being fed and your tractors output ability to chip
and discharge the material ~ immediately raise the power feed roller by
the handle until the flywheel speed has increased again to its normal
speed.

Farmer-Helper WC PRO Chipper 16 Revision 9/22/16
Frame Assembly

Farmer-Helper WC PRO Chipper 17 10-19-2017

Farmer-Helper WC PRO Chipper 18 10-19-2017
Rotor Assembly

Farmer-Helper WC PRO Chipper 19 10-19-2017

Farmer-Helper WC PRO Chipper 20 10-19-2017
Drive Piece Assembly
Table of contents
Other FHM Chipper manuals
