a) Daily Cleaning
At the end of the day, before switching off the machine, you should clean each group, using the
blind filter that is provided with the machine, by making several supplies in each group
Clean the filter-holder guides with a cloth-sponge and wash the filters and filter-holders using a
small amount of detergent, in order to remove accumulated coffee fat
Clean the tray and the grid where the coffee falls, removing them from the machine To better
clean the grids and trays you may submerge them into water
b) Weekly Cleaning
Every week you should put a spoon of a specific detergent for coffee machines (contact the
distributor or manufacturer of the machine to learn what kind of detergent to use for cleaning), in
the blind filter, then put it in the group and switch it on Let the machine work for about 30
seconds and then switch it off Remove the filter-holder, pour out the water and repeat this
operation until the water in the filter is clean
Repeat this operation in all the groups
You should also remove the cup-holder grids, wash them and clean the tray thoroughly After
removing the grid and tray where the coffee falls, it is possible to see the plastic discharge tank
of the machine, which should be cleaned using a brush and some clean water not allowing that
coffee grounds become accumulated because they can block up the discharging outlet
The body should be cleaned with a wet cloth, always avoiding the use of abrasive or solvent
detergents
Every two weeks, you should restore the purifier according to the specific instructions supplied
with it
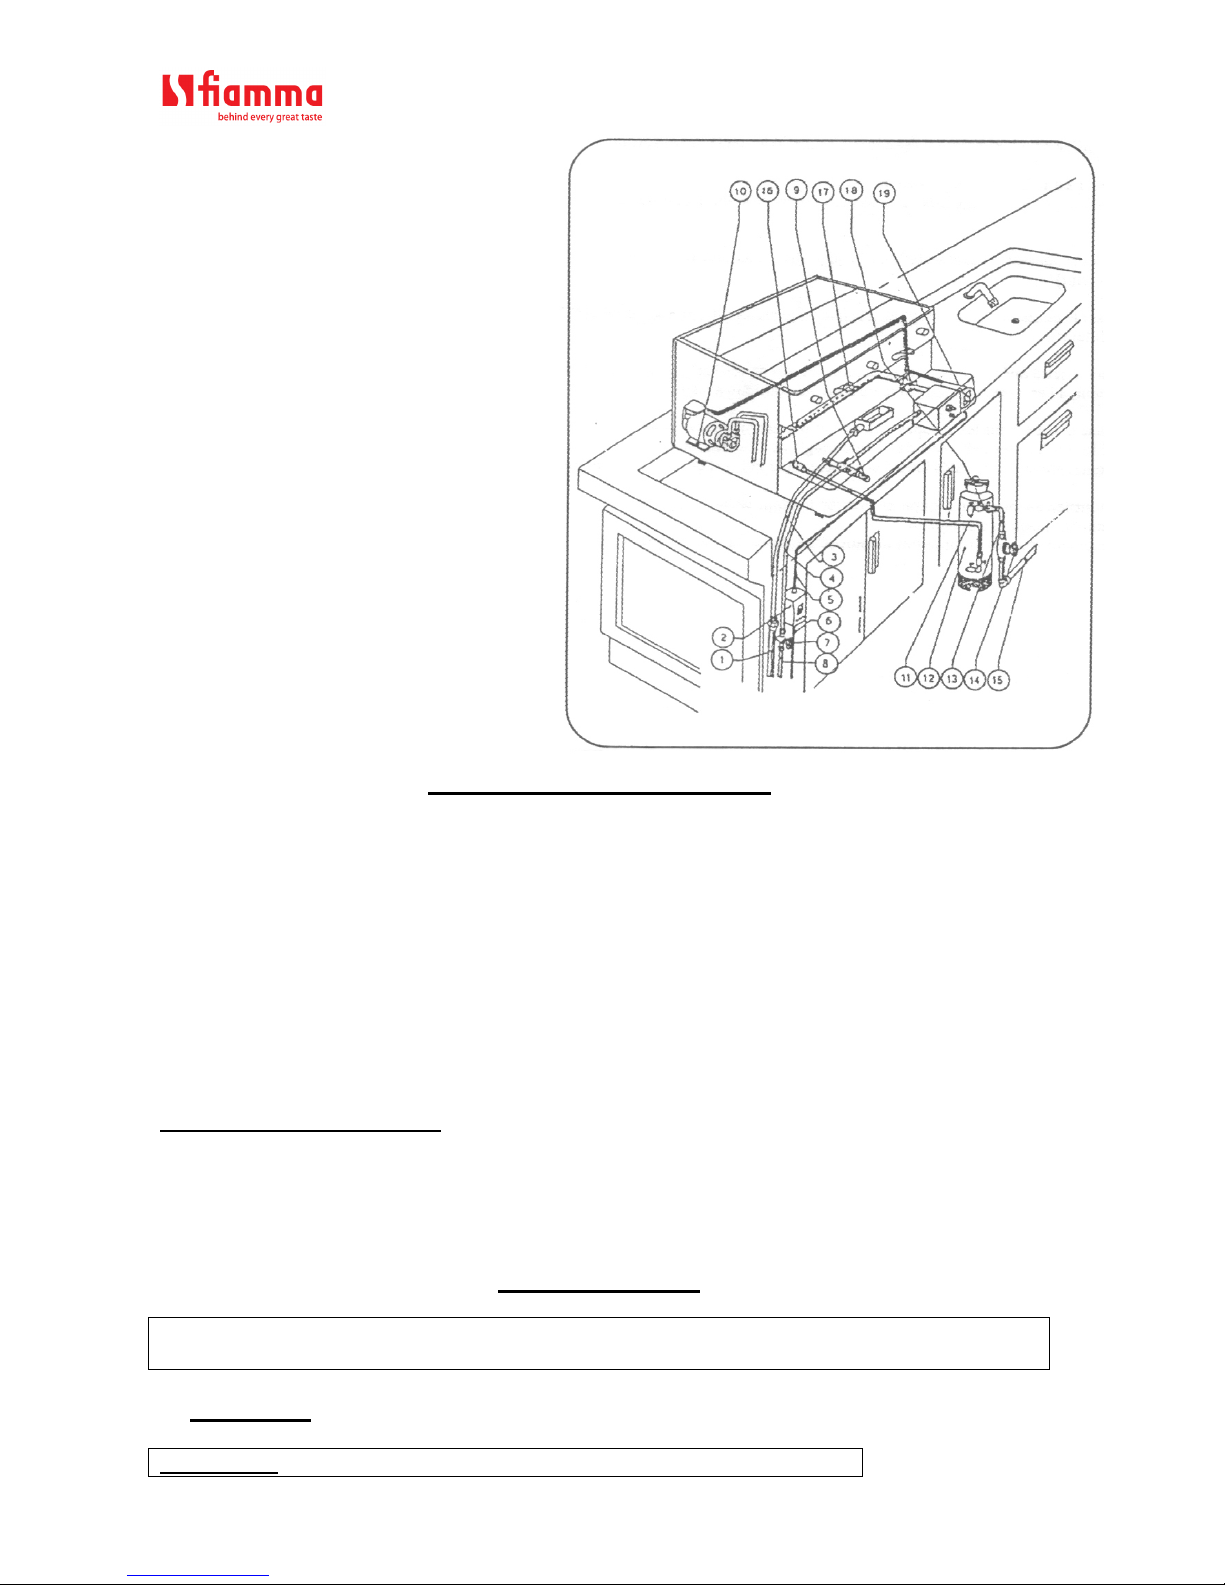
2 – REPAIR
To repair the machine, usually the technician must have access to its interior Depending
on the kind of repair, it’s necessary to remove the side panels or the upper or lower tray
To remove the side panels, unscrew the 2 screws located in the upper part of the panels
and detach the springs
On the right side, one can access the pressure switch, the safety thermostat and the heating
element On the left side, one can access the pressure gauge, the electronic unit or the
level detector, the motor and the pump
The lower trays can be freely removed and they give access to the water block, the main
switch and to the metering
The upper trays are attached by four screws that simultaneously hold the side panels
All servicing and repair operations should be carried out by qualified personnel duly authorized
by the manufacturer
Use only original servicing parts
NOTE: In case the machine is installed in locations where negative temperature degrees may occur
(possibility of freezing) it is advisable that during those periods the machine is not
turned off