Fiery KM-C3130 User manual

4025-7797-02
Printer Management Utility
Scanner Mode
for Fiery X3e 31C-M

i
Foreword
Welcome
This manual describes the application and the operations of Printer
Management Utility, which is built into the Fiery X3e 31C-M (printer
controller), and the scanner mode.
Trademark Acknowledgements
Apple and Macintosh are registered trademarks of Apple Computer, Inc.
Ethernet is a registered trademark of Xerox Corporation.
Microsoft, Windows, and Windows NT are either registered trademarks or
trademarks of Microsoft Corporation in the United States and/or other
countries.
Netscape Communications, Netscape Communications’ logo, Netscape
Navigator, Netscape Communicator, and the Netscape are trademarks of
Netscape Communications Corporation in the U.S. and other countries.
PCL is a registered trademark of Hewlett-Packard Company Limited.
PostScript is a registered trademark of Adobe Systems, Inc.
EFI, Fiery and the Fiery logo are registered trademarks of Electronics For
Imaging, Inc. in the U.S. Patent and Trademark Office and/or certain other
foreign jurisdictions.
The Electronics For Imaging logo, Fiery Scan, Fiery WebScan and Fiery
WebTools are trademarks of Electronics For Imaging, Inc.
All other product names are trademarks or registered trademarks of their
respective holders.
The contents of this manual are subject to change without prior notice
as a result of improvements to the product.

Contents
ii
CONTENTS
Chapter 1 Using Printer Management Utility
1.1 System Requirements ................................. 1-2
1.2 Access .......................................................... 1-3
1.2.1 Operation ..........................................................1-3
1.3 Screen Configuration .................................. 1-4
1.3.1 Logging in Using the Administrator Mode.....1-6
1.4 User Mode .................................................... 1-7
1.4.1 System Tab .......................................................1-7
1.4.2 File Tab............................................................1-16
1.4.3 Print Tab..........................................................1-18
1.4.4 Scan Tab..........................................................1-27
1.5 Administration Mode ................................. 1-32
1.5.1 System Tab .....................................................1-32
1.5.2 File Tab............................................................1-38
1.5.3 Print Tab..........................................................1-41
1.5.4 Scan Tab..........................................................1-42
1.5.5 Network Tab ....................................................1-44
Chapter 2 Using the Scanner Mode
2.1 Overview ...................................................... 2-2
2.1.1 Scan to E-mail...................................................2-3
2.1.2 Scan to FTP Server ..........................................2-4
2.1.3 Scan to Mailbox................................................2-5
2.1.4 Internet FAX ......................................................2-6
2.1.5 Environment Required for Sending Image
Data....................................................................2-8

Contents
iii
2.2 Controller Setup Items ................................ 2-9
2.2.1 Network Protocol Settings...............................2-9
2.2.2 Scan Settings....................................................2-9
2.3 Setup Items for Scanning ......................... 2-11
2.3.1 Entering the Setup Screen ............................2-11
2.3.2 Destination Tab...............................................2-12
2.3.3 Scan Mode Tab ...............................................2-13
2.3.4 Document Set Tab..........................................2-14
2.3.5 Checking the Settings on the Destination
Device..............................................................2-15
2.3.6 Registering the Scan Mode Default
Settings...........................................................2-15
2.4 E-Mail Notification ..................................... 2-16
2.4.1 Notified Information .......................................2-16
2.5 URL Notification ........................................ 2-17
2.6 Entering the Controller Setup Screen ..... 2-18
2.7 Setting the Error Notification
Destination ................................................. 2-18
2.8 Setting the Sender (From) Address ......... 2-19
2.9 Scan to E-Mail Function ............................ 2-20
2.9.1 Setting the Controller.....................................2-21
2.9.2 Retrieving Mails..............................................2-22
2.10 Scan to Mailbox Function ......................... 2-23
2.10.1 Setting the Controller.....................................2-24
2.10.2 Creating a Mailbox .........................................2-24
2.10.3 Downloading the Image Data to the
Computer ........................................................2-25

Contents
iv
2.11 Scan to FTP Server Function ................... 2-26
2.11.1 Enabling the FTP Transfer Function.............2-27
2.11.2 Proxy Settings ................................................2-27
2.11.3 Retrieving the Image Data .............................2-28
2.12 Internet FAX Transmission Function ....... 2-29
2.12.1 Setting the Controller.....................................2-29
2.13 Internet FAX Reception Function ............. 2-30
2.13.1 Setting the Controller.....................................2-30
2.14 Registering the One-Touch Key and
Temporary Registration Key ..................... 2-31
2.14.1 One-Touch Key Registration .........................2-31
2.14.2 Temporary Registration Key Registration....2-38
2.15 Image Data ................................................. 2-43
2.15.1 File Format......................................................2-43
2.15.2 File Name ........................................................2-44
2.16 Hold Period of the Image Data ................. 2-46

Using Printer Management Utility Chapter 1
Chapter 1
Using Printer Management Utility

1.1 System Requirements
1-2
Using Printer Management Utility Chapter 1
Printer Management Utility for Fiery X3e 31C-M is a device control utility
program provided by the HTTP server built into the Fiery X3e 31C-M (printer
controller). This utility can be used with a Web browser as an interface for
remotely controlling Fiery X3e 31C-M.
1.1 System Requirements
The following items are required to use this utility.
Computer
•Software
•Ethernet
• TCP/IP protocol
Digital Copier
Fiery X3e 31C-M printer controller
Operating System Web Browser
Windows 98/NT 4.0 Internet Explorer 4 or higher,
Netscape Navigator 4 or higher
Windows Me Internet Explorer 5.5 or higher,
Netscape Navigator 4 or higher
Windows 2000 Internet Explorer 5 or higher,
Netscape Navigator 4 or higher
Windows XP Internet Explorer 6 or higher,
Netscape Navigator 4 or higher
MacOS 9.x Internet Explorer 4.5 or higher
Netscape Navigator 4 or higher
MacOS X Internet Explorer 5.1 or higher
Netscape Navigator 4 or higher

1.2 Access
1-3
Using Printer Management Utility Chapter 1
1.2 Access
Printer Management Utility can be accessed directly from a Web browser.
1. Start the Web browser.
2. In the Address bar, enter the IP address of the printer controller as shown
below. Then, press [Enter].
http://<IP address of the printer controller>/
(Example) When the IP address of the printer controller is 192.168.0.10:
http://192.168.0.10/
3. The Printer Management Utility screen appears.
1.2.1 Operation
Printer Management Utility operation is identical to that for Internet Web
pages. You can click a link on the Web page to jump to the link destination or
click the [Back] or [Forward] button to display the previous or next page.
1.3 Screen Configuration
1-4
Using Printer Management Utility Chapter 1
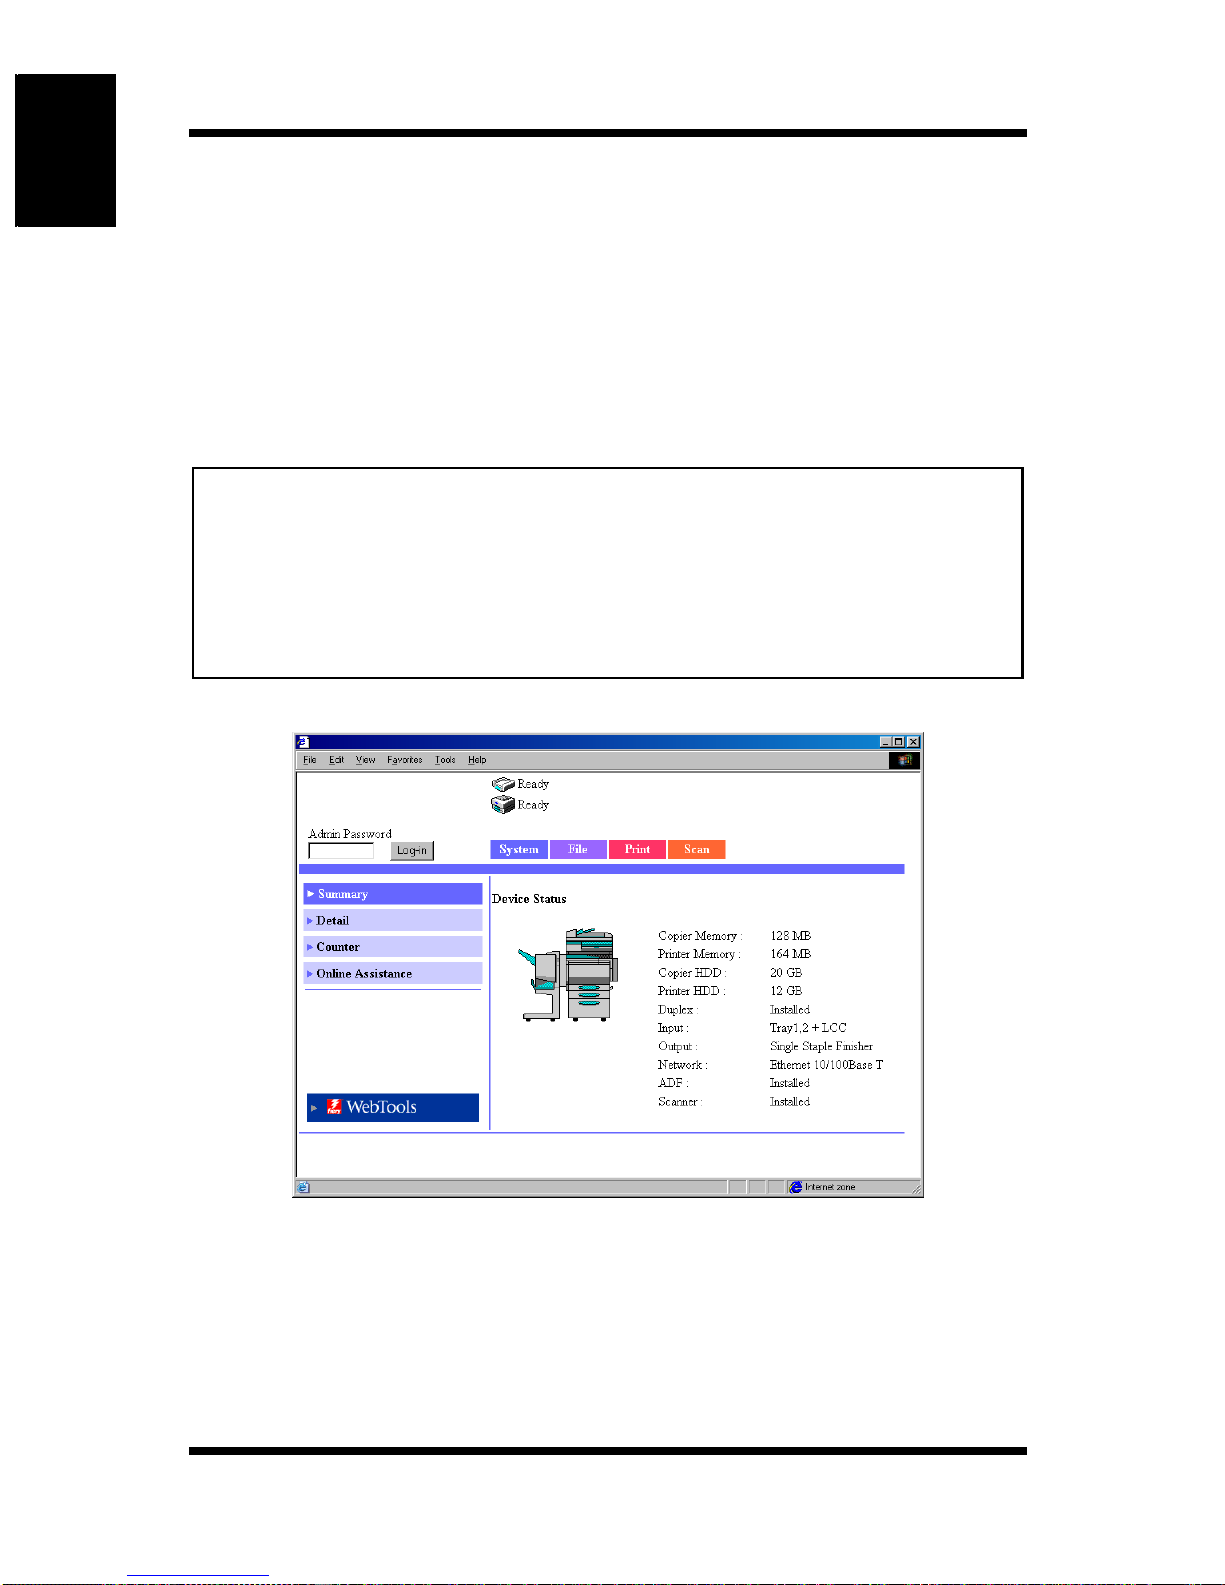
1.3 Screen Configuration
The screen shown below is called the User Mode screen; all users can view
this screen. By entering an appropriate password in the “Admin Password”
box on the User Mode screen, you can enter the Administrator Mode screen.
(See p. 1-6.)
The configuration of the Printer Management Utility screen is shown below.
Note
➀Status Display
The current status of the Digital Copier and the printer controller is
indicated by icons and text. The message “Ready” appears when the
Digital Copier and the printer controller are operating normally.
• Screen images shown in this manual may differ slightly from actual
ones. In addition, specifications are subject to change without prior
notice.
• If you wish to change the display language of Printer Management
Utility, log into the Administrator Mode, and change the setting using the
“Preference” menu.
➀
➀➀
➀
➁
➁➁
➁➂
➂➂
➂
➃
➃➃
➃
➅
➅➅
➅
➄
➄➄
➄

1.3 Screen Configuration
1-5
Using Printer Management Utility Chapter 1
➁Admin Password
Logs in using the Administrator Mode. (For details on the login
procedure in the Administrator Mode, see “Logging in Using the
Administrator Mode” on page 1-6.)
➂Tabs
Selects the category of items to be displayed.
•System
• File
•Print
• Scan
• Network (Administrator Mode only)
For details on each tab, see the following sections.
➃Menus
Selects the information or setup item to be displayed. The menus that
appear vary depending on the tab selection.
For details on each menu, see the following sections.
➄Information and Setting Details
Displays the details of the selected menu.
➅WebTools
Moves to the Fiery WebTools screen.
Other manuals for KM-C3130
7
This manual suits for next models
1
Table of contents
Other Fiery Printer Accessories manuals


