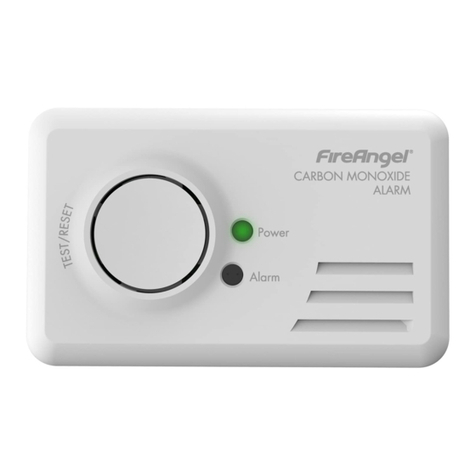
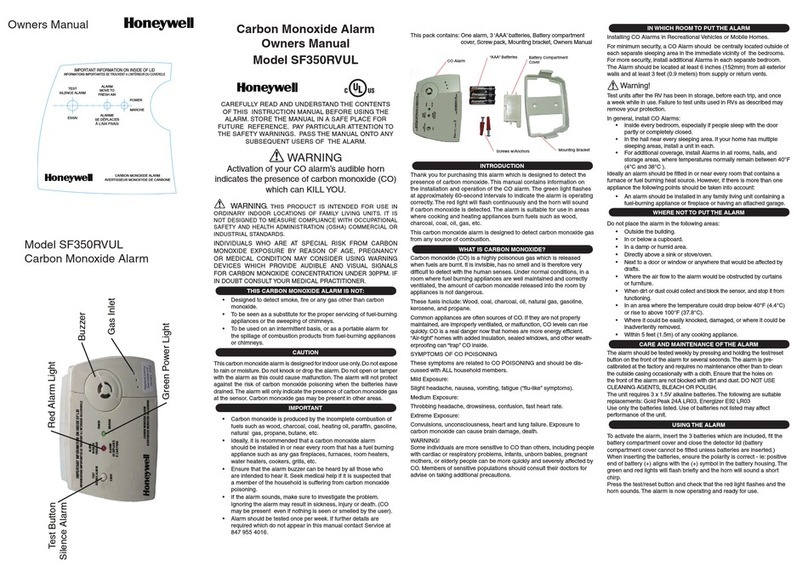
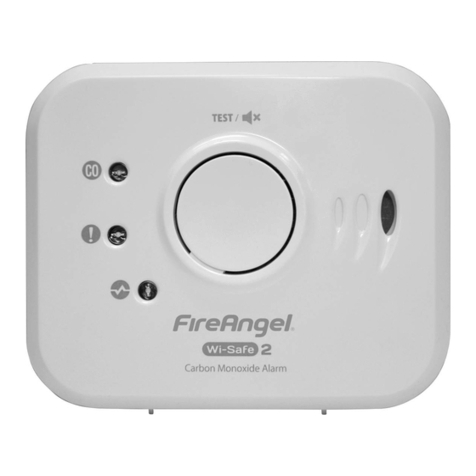
FireAngel CO-808 User manual

CO-808 User Manual
Carbon Monoxide
Poisonous Gas
Alarm

Contents
Page
Introducing your Carbon Monoxide Detector 1
Carbon Monoxide and how it can affect
you and your family 3
Where to install your detector 7
Battery installation/replacement 10
How to install your detector 12
Operating features 13
Understanding the product’s indicators 17
Alarm response times 17
ow battery warning 17
Error warning 17
Maintaining/testing your detector 18
What to do in the event of an alarm 19
Technical information 20
Disposal 21
Warranty information 22

Introducing Your FireAngel
Carbon Monoxide Detector
Congratulations! You've made a wise investment in an innovative product and your personal safety. The
FireAngel is one of a new generation of domestic life safety products from FireAngel Limited, which
combines the latest technology and innovative design to provide an aesthetically pleasing and effective
contribution to your home safety.
The FireAngel range of products is constantly being improved and expanded. Please visit
www.FireAngel.co.uk to find out about the latest additions to our product range.
FireAngel manufactures one of the most technologically advanced carbon monoxide detectors in the
world.
1

Features
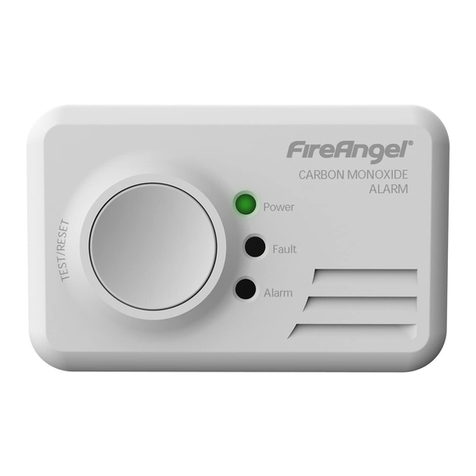
• an advanced electrochemical sensor designed to accurately measure low levels of carbon monoxide
(CO) providing an early warning of toxic CO levels in your home
• detects carbon monoxide continuously
• resistant to false alarms caused by normal household contaminants
• sounds a loud 85dB alarm (at 1 metre / 3 feet) to alert you in case of an emergency
• test/reset button
• simple to mount, portable, ideal for travelling
• certified to the British Standards Institute (BSI) Carbon Monoxide Standard BS EN 50291 : 2001
• 5 year warranty (batteries excluded)
2

Carbon Monoxide and How It Can
Affect You and Your Family
Carbon monoxide is a dangerous, poisonous gas that kills hundreds of people each year and injures many
more. It is often referred to as the silent killer because it has no odour or taste and cannot be seen. Like
oxygen, CO enters the body through the lungs during the normal breathing process. It competes with
oxygen by replacing it in the red blood cells, thereby reducing the flow of oxygen to the heart, brain and
other vital organs. In high concentrations, CO can kill in minutes.
Many cases of reported CARBON MONOXIDE POISONING indicate that while victims are aware they
are not feeling well, they become disorientated and unable to save themselves by either exiting the
building or calling for assistance. Exposure during sleep is particularly dangerous because the victim usually
does not wake up.
Symptoms of CO poisoning
The following symptoms may be related to CO poisoning which all household members should be made
aware of:
•Mild Exposure: Slight headache, nausea, vomiting, fatigue (often described as ‘flu-like’ symptoms).
•Medium Exposure: Severe throbbing headache, drowsiness, confusion, fast heart rate.
•Extreme Exposure: Unconsciousness, convulsions, cardiorespiratory failure, death.
3

4
Your FireAngel CO detector monitors the level of CO as parts per million (ppm) in the atmosphere of
your property.
35ppm - The maximum allowable concentration for continuous exposure for healthy adults in any 8
hour period, as recommended by the Occupational Safety and ealth Administration
(OS A).
200ppm - Slight headache, fatigue, dizziness, nausea after 2 - 3 hours.
400ppm - Frontal headaches within 1 - 2 hours, life threatening after 3 hours.
800ppm - Dizziness, nausea and convulsions within 45 minutes. Unconsciousness within 2 hours.
Death within 2 - 3 hours.
Should you suspect CO may be affecting you or your family, open the doors and windows of your
property to ventilate, turn off your appliances and evacuate the premises. At this time the authorities
should be contacted to locate the source of the carbon monoxide before re-entering the building. Medical
attention should be sought for anyone suffering the effects of CO poisoning (headache, nausea, see page
3).
Common Sources of CO
• Oil and gas boilers • Portable generators
• Oil or solid fuel cookers • Gas or kerosene heaters
• Barbecues • Clogged chimneys
• Wood or gas fireplaces • Cigarette smoke
• Gas appliances • Any fossil fuel burning appliance

WARNING: This FireAngel carbon monoxide detector is not a combustible gas detector, nor a smoke
detector. Please install the proper detectors to detect combustible gases, or smoke.
This CO detector should not be seen as a substitute for the proper servicing of fuel-burning appliances,
nor the sweeping of chimneys.
WARNING: Do not use this carbon monoxide detector on an intermittent basis, or as a portable
detector for trying to trace one source of the spillage of combustion products from fuel-burning
appliances or from chimneys.
DO NOT:
•IGNORE ANY WARNING FROMYOUR CO DETECTOR!
• burn charcoal inside your home, caravan, tent or cabin
• install, convert or service fuel-burning appliances without proper knowledge, skill and expertise
• use a gas cooker for heating
• operate unvented gas burning appliances using kerosene or natural gas in closed rooms
• operate petrol-powered engines indoors or in confined areas
• ignore a safety device when it shuts an appliance off
• use as a portable detector for the spillage of CO from fuel-burning appliances or chimneys
5

EDUCATEYOURSE F AND YOUR FAMI Y ON THE SOURCES AND SYMPTOMS OF
CO POISONING AND HOW TO USE YOUR CARBON MONOXIDE DETECTOR:
• buy appliances accepted by a recognised testing laboratory
• install appliances according to the manufacturer’s instructions
• have appliance installations done by professionals (CORGI registered for gas appliances)
• have your appliances checked regularly by a qualified service engineer
• clean chimneys and flues yearly
• make regular visual inspections of all fuel-burning appliances
• do not barbecue indoors, or in an attached garage
• open windows when a fireplace or oil/solid fuel cooker is in use
• install only CO detectors that meet the requirements of BS EN 50291 : 2001 in your home
• be aware of CO poisoning symptoms
6

Where To Install Your Detector
WARNING: This detector will only indicate the presence of carbon monoxide gas at the sensor. Carbon
monoxide gas may be present in other areas.
In which room should the detector be installed?
Ideally, an apparatus should be installed in every room containing a fuel burning appliance. Additional
apparatus may be installed to ensure that adequate warning is given for occupants in other rooms, by
locating apparatus in:
• remote rooms in which the occupant(s) spend considerable time whilst awake and from which they may
not be able hear an alarm from apparatus in another part of the premises, and
• every sleeping room.
owever, if there is a fuel burning appliance in more than one room and the number of apparatus is limited,
the following points should be considered when deciding where best to put the apparatus:
• locate the apparatus in a room containing a flueless or open-flued appliance, and
• locate apparatus in a room where the occupant(s) spend most time.
• If the domestic premises is a bedsit (a single room serving as both sitting and bedroom) then the
apparatus should be put as far from the cooking appliances as possible but near to where the person
sleeps.
• If the appliance is in a room not normally used (for example a boiler room), the apparatus should be
put just outside the room so that the alarm may be heard more easily. Alternatively, a remote alarm siren
may be connected to a type A apparatus located in a room(s) containing a fuel-burning appliance.
7
8
Where in the room should I place the detector?
Apparatus located in the same room as a fuel-burning appliance
If the apparatus is located on a wall:
a) it should be located close to the ceiling;
b) it should be located at a height greater than the height of any door or window.
And it should be at least 150mm from the ceiling.
The apparatus should be at a horizontal distance of between 1m and 3m from the potential
source.
If there is a partition in a room, the apparatus should be located on the same side of the partition
as the potential source.
Carbon Monoxide alarms in rooms with sloped ceilings should be located at the high side of the
room.
Apparatus located in sleeping rooms and in rooms remote from a fuel burning appliance
Apparatus located in sleeping rooms and in rooms remote from the fuel-burning appliance should
be located relatively close to the breathing zone of the occupants.

9
Do not put the detector
The apparatus should not be installed:
In an enclosed space (for example in a cupboard or behind a curtain).
Where it can be obstructed (for example by furniture).
• directly above a sink
• next to a door or window
• next to an extractor fan
• next to an air vent or other similar ventilation openings
• in an area where the temperature may drop below -10°C or exceed 40°C
• where dirt and dust may block the sensor
• in a damp or humid location
• in the immediate vicinity of the cooking appliance

How To Install Your Detector
NOTE:This Carbon Monoxide alarm must be installed by a competent person.
To install your unit, follow the illustration below.
We recommend that your detector is installed on the wall.
82.5mm
3 1/4"
1/16"
detector stand
1.75mm
10
To Mount on the Wall: Drill two 5mm (3/16”) holes into the wall 82.5mm (3 1/4”) apart. Insert the
plastic wall plugs and screw in the screws, ensuring that the screw heads are left sticking out 1.75mm
(1/16”) from the wall. Line up the detector mounting holes with the screws and hook the unit onto the
wall.
To Mount on a Shelf: Attach the enclosed detector stand to the 2 holes near the bottom edge at the
back of the detector.
Warning: When mounting on a shelf, please adhere to the recommendations on page 8 relating to the
position of the detector.

11
Battery Installation/Replacement
See diagram on page 11
a. If the detector is already wall mounted then unhook it from the mounting screws.
b. Remove the battery cover located on the back of the detector.
c. Replace the battery with an approved 9 volt alkaline battery (see page 20 for recommended batteries),
making sure the battery terminals align properly with the terminals on the battery clip and push the
battery into place. Use of a battery other than the battery recommended by FireAngel Ltd may have a
detrimental effect on the detector operation. Replace the battery cover and return the detector to the
original position.
d. When the battery is connected both LEDs will flash and the alarm will chirp.
e. Your advanced FireAngel detector requires a short ‘warm-up’ period before it is fully operational.
If you have followed all of the above steps correctly, your unit will begin monitoring for CO in
around 3 minutes.When the 3 minute warm-up period is complete, the Power LED will flash
green once per minute to indicate that the alarm is receiving power from the battery and is fully
operational (if your detector chirps or enters alarm following the 3 minute warm-up period then
please refer to page 17).
f. Test the horn, battery and circuitry by pressing the Test/Reset button to confirm that the detector is
operating properly.The horn should sound as soon as the button is pressed, and the LEDs will flash
indicating that the horn is working and the battery is providing power to the unit.This test for the horn,
battery and circuitry should be performed on a weekly basis.
Warning: Prolonged exposure to the horn in close proximity will damage your hearing.

12
Under normal operating conditions, the battery should last 1 year.
When the unit is in full alarm the battery life is 7 days (from full capacity).The detector will not protect
against the risk of CO poisoning when the battery has drained.
Warning: Constant exposure to extreme high or low temperatures may reduce battery life.

13
Operating Features
Your FireAngel detector offers many features which set it apart from other CO detectors on the market
today.
Test/Reset Button Feature
This button will:
• test your horn, battery and circuitry
• silence the loud 85dB (at 1 metre / 3 feet) horn during an alarm (only for alarms due to levels of CO
of less than 50ppm)
• allows you to test the sensor by introducing a source of CO into the detector (see page 15).

Testing the Horn, Battery and Circuitry
Test the horn, battery and circuitry by pressing the Test/Reset button briefly to confirm that the detector is
operating properly.The horn should sound as soon as the button is pressed, and both the LEDs will flash
indicating that the horn is working and the battery is providing power to the unit.This test for the horn,
battery and circuitry should performed on a weekly basis.
vents
test / reset
button
14

15
vents
test / reset
button
Testing The Sensor
NOTE:We suggest the use of an incense stick or cigarette as the inefficient way in which these
products burn means the smoke contains a detectable localized amount of Carbon Monoxide.
Alternative sources of smoke, for example an extinguished candle or match, will not contain
sufficient levels of Carbon Monoxide to obtain a response from the alarm during this test.
Please note your CO alarm will not detect smoke.
If testing for the first time after installation, or replacing a battery, make sure that the alarm
has completed the initial 3 minute warm up period and the power ED is flashing green once
every minute.
CAUTION:All sensor testing should only be performed by a responsible adult.
This test should only be performed once a month. Excessive testing will cause the battery life
to be shortened.
NOTE: CO test kits may be used in order to avoid having to burn cigarettes, incense sticks etc.
• Read all steps thoroughly before attempting to test your alarm
Step 1: If alarm is wall mounted remove by unhooking unit from wall
fixing screws.
Step 2: Place left thumb/finger over the sounder vent. old the
Test/Reset button down with right thumb/finger until the green
LED stops flashing and only the red LED flashes once per
second (this should happen after around 5 seconds). Upon
releasing the Test/Reset button the green LED will begin to
flash twice in quick succession every 5 seconds.This indicates
that the detector is now monitoring for CO every second

16
and may be tested using a known source of CO.
Step 3: Light a cigarette or an incense stick using a match or lighter. Extinguish
the lighter, or put out the match and place it into a dish of water.
Step 4: Turn the alarm on its side so that the vents nearest the
Test/Reset button on the side of the alarm are pointing downward
(see diagram opposite). old the burning cigarette or incense stick
15 - 20 cm (6 - 8 inches) below the detector, so that the smoke
moves towards the holes in the sides of the detector.
An increase in the Carbon Monoxide level to more than 100ppm will cause the
horn to sound momentarily and the green LED to illuminate continuously for a short
time and then flash rapidly. Now move the source of CO away from the alarm (Note -
It may take up to 2 minutes of exposure to the smoke for the Carbon Monoxide levels
to reach over 100 ppm. In addition please note that the full alarm will only sound if
excessive amounts of CO are detected during this short test).
Step 5: After step 4, put out the incense stick or cigarette by placing it into a dish of
water. Ensure that all flames have been extinguished. As the level of CO falls the green
LED will stop flashing and will again continuously illuminate for a short time.The unit will
then return to sensor test mode with the green LED flashing twice every 5 seconds.
Step 6: After around four minutes the detector will return to normal monitoring mode
and the green LED will flash once per minute.

17
Understanding the Product’s Indicators
The higher the concentration of CO detected by the alarm, the quicker it will respond. When sufficient
carbon monoxide is detected a loud audible signal (85 dB at 1m) will be emitted and the red alarm LED
will flash 4 times every second.
The Alarm will sound:
• When concentrations of CO of more than 30ppm but not more than 50ppm have been detected for
more than 2 hours.
• Between 60 and 90 minutes when exposed to 50ppm of CO.
• Between 10 and 40 minutes when exposed to 100ppm of CO.
• Within 3 minutes when exposed to 300ppm of CO.
ow Battery/Error Signal
When your battery needs replacing, the detector will emit a single chirp for up to 30 days. Replace the
battery immediately!
The unit continuously checks the settings of its sensor and circuitry. If any of these settings are found to be
incorrect the unit emits a double chirp every minute, indicating that a fault has developed. Note: This
does NOT mean that the alarm has detected Carbon Monoxide.
On discovering an error signal please contact the FireAngel Technical Support Line between
9.00am – 5.00pm, Monday – Friday.

Maintaining/Testing your Detector
Maintenance
Your detector will alert you to potentially hazardous CO concentrations in your home when maintained
properly.To maintain your FireAngel detector in proper working order, and to ensure that your sensor will
maintain its 6 year life, it is recommended that you:
• Test the horn, battery and circuitry of your detector at least once per week by pressing the
Test/Reset button briefly (see page 14).
• Perform the Sensor Test once every month (see page 15).
• Keep the detector free of dust by gently vacuuming the case with a soft brush attachment
once per month.
To prevent the possibility of contaminating the sensor in your alarm and thus affecting its
reliability:-
• Never use cleaning solutions on your detector. Simply wipe with a slightly damp cloth.
• Do not paint the detector.
• Do not spray aerosols on or near the detector.
• Do not use any solvent based products near the detector.
• Move the detector to a safe location and store in a plastic bag before painting, wall papering,
using or performing any other activities that use materials that emit strong fumes. Remember
to remove it from the bag and replace the detector when these activities are finished.
18
Table of contents
Other FireAngel Carbon Monoxide Alarm manuals

FireAngel
FireAngel NM-CO-10X-INT User manual

FireAngel
FireAngel CO-808S User manual

FireAngel
FireAngel CO-9B-NEU User manual

FireAngel
FireAngel CO-9B User manual

FireAngel
FireAngel FP1820W2-R User manual

FireAngel
FireAngel CO-828 User manual

FireAngel
FireAngel CO-9D User manual

FireAngel
FireAngel NM-CO-10X User manual

FireAngel
FireAngel CO-9X User manual

FireAngel
FireAngel CO-9X-10 User manual