FIREPITS Brightstar Quick guide
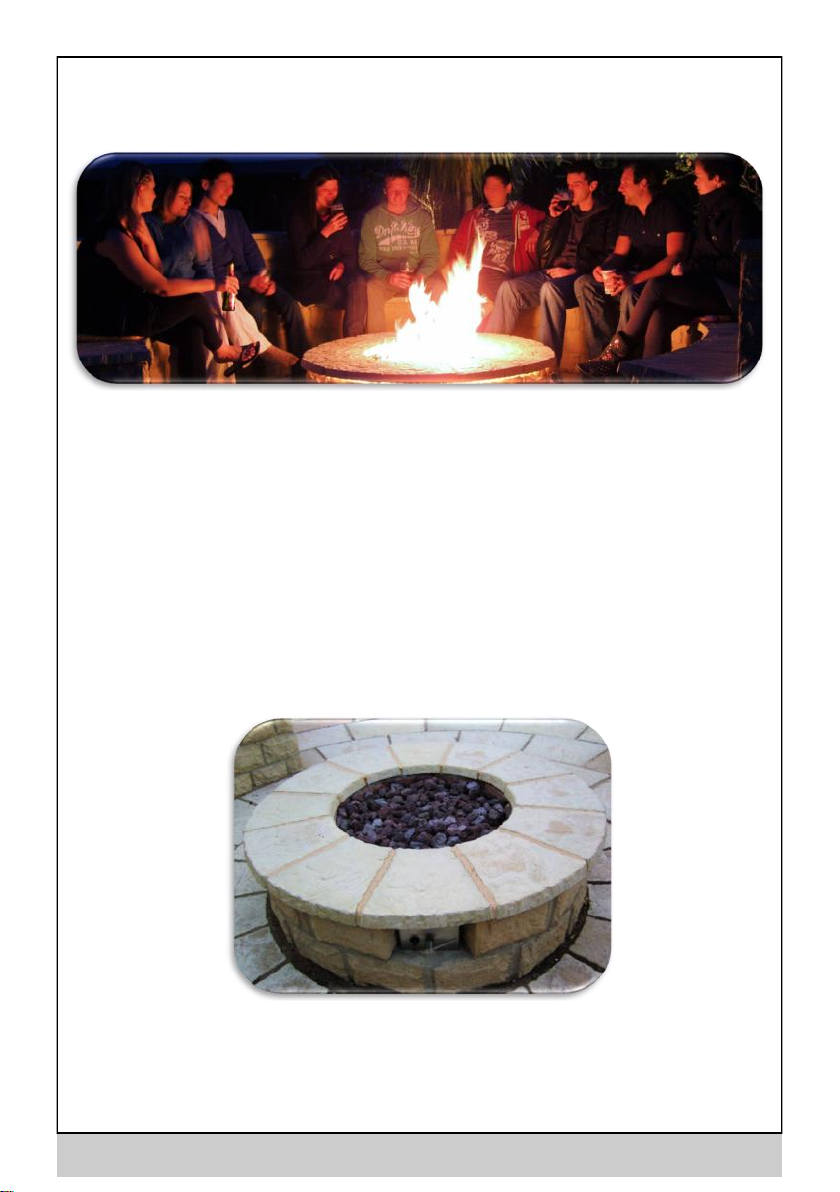
Gas Firepit Burner
Installation
and
Instruction Manual
Please read the ‘getting started’ section of this manual,
BEFORE you unpack the burner

2
Getting Started 3
Safety Instructions 4
What’s Included 5
Installation 6
Operating Instructions 11
Maintenance 13
Troubleshooting 13
Parts List 14
Warranty Information 15
Contact Information 16
Contents
Gas Type Natural Gas
G20 Methane
LPG
G31 Propane
LPG
G30 Butane
Appliance Category I 2H I 3+ I 3+
Supply Pressure 20 mbar 37 mbar 28-30 mbar
Heat Input 11.5 kW - 18 kW 9 kW - 18 kW 9 kW - 18 kW
Maximum Flow Rate 1.7 m3/hr 1.3 kg/hr 1.3 kg/hr
The Gas Firepit Burner is designed to work with the following Gas Types
Specification

3
Unpacking the Box
Care should be taken when removing the Firepit burner from its packag-
ing. The main burner and mounting plate are connected to the control box
with two flexible gas pipes, a copper thermocouple lead, and a thin wire
Piezo lead.
If the copper thermocouple lead becomes kinked or damage this will ren-
der the burner inoperative.
Extreme care should be taken when handling the assembly, to ensure the
main gas and pilot connections are not loosened, or become kinked. If
these are damaged before or during installation, it could render the
burner inoperative or dangerous This ‘flexibility’ allows for easier installa-
tion in different sized pits. It also allows the burner and mounting plate
to be lifted clear of the pit during maintenance, whilst still being con-
nected to the control box.
Factory Burn Test
Please note: ALL Firepit Burners have been burn tested prior to leaving
the factory. Although each unit is cleaned, there may be the odd scorch
mark around the pilot and main burner gas jets.
Getting Started

4
Safety Instructions
Please read before installing and operating your new Gas Firepit Burner.
This appliance must only be used outdoors.
WARNING Accessible parts may be very hot, Keep children away.
Any modification to this appliance may be dangerous and is not permitted.
The gas valve has been set by the manufacturer. Valve adjustment screws
must not be altered by the user.
DO NOT connect the Gas Firepit Burner to any form of gas supply, until it has
been fully installed.
DO NOT attempt to light the burner, if you can smell gas. Immediately shut off
the gas supply either at the bottle, or at the isolating valve inside your house.
Contact your installer.
DO NOT use the Gas Firepit for cooking.
DO NOT throw anything into the Firepit.
DO NOT use the Firepit in windy conditions.
DO NOT leave the Firepit unattended when in use.
DO NOT allow small children near the Firepit.
DO isolate the gas supply either at the bottle, or inside your house, when not in
use.
DO follow all instruction regarding the care and use of LPG gas bottles. (Contact
your local LPG supplier for advice)
For LPG version, DO ensure the bottle is located a safe distance from the firepit.
For LPG version, DO ensure the gas control lever is in the OFF position, when
changing the bottle.
Warning. Flames from the firepit burner are almost invisible in direct sunlight.
For further safety advice refer to the Operating Instructions within this manual.

5
What’s Included
Gas Firepit
Burner
Assembly
Volcanic Lava
Rocks
Allen Key
LPG Version Only
4mtrs of LPG
Gas Hose
2 off
Hose Clips

6
Installation
For the Natural version, a registered gas safety engineer should be used to connect the
gas supply.
For the LPG version, this can be connected by whoever is installing the Firepit burner.
(Just like connecting your barbeque) Unless you are running the pipe work under-
ground, in which case a gas safety engineer should be used.
There are five stages to complete before you can use your Firepit Burner:
Design Design your garden layout, Firepit location, Gas pipe runs etc.
Build Build the ‘pit’ that will house the Firepit Burner. Run gas pipes.
Install Install the Firepit Burner. Connect to gas supply. Test for leaks
Test Test the burner before completing any permanent work.
Finish Finish building/Installing. Cover burner with lava rock, Test again.
Select a Suitable Location
Gas Firepits must be located at a safe distance from your house, or any combustible
structure, such as a shed, or wooden fence etc. Never install a gas fire pit close to a
power source, or overhanging power cables. Also, before you decide on the installation
spot, make sure that there are no electric cables or other services under the ground.
Generally, a distance of at least 3 meters from nearby structures is recommended. Do
not install under any form of roof covering, or near overhanging trees etc. Never use a
gas Firepit inside your home. Fire pits are meant for outdoor use only.
Apart from the safety aspect, you also have to consider the aesthetics and functional
use of your Firepit. It needs to ‘blend in’ and ‘stand out’, as it will quickly become the
main focal point of your garden. Gas Firepits are usually installed in some form of con-
crete or brick structure, to match the surrounding patio area. You will also need some
form of seating surrounding your Firepit. This can either be a permanent structure as
part of your landscaping, or simply use your existing outdoor patio furniture. If using
permanent seating you must consider the ideal distance from seat to Firepit, so you
keep safe, as well as keep warm. A typical distance from the centre of the firepit, to the
edge of the seating would be around 1.3 metres.
Design
7
What you build will depend on the type, size and shape of your Firepit and the design
of your garden. We cannot cover all conceivable designs and options, but have in-
cluded some ‘generic’ installation ideas, and tips.
WARNING… All Firepits will need ventilation holes at the base of the Firepit. We rec-
ommend either some form of airbrick, or a minimum of 100cms2 area. These air vents
should be positioned at ground level. There are FOUR very good reasons to provide
these.
The Firepit Burner assembly will become a permanent feature built into some form of
permanent structure. However, it would be best to design the ‘pit’ so that the Burner
can be removed without too much effort at a later date. Your Gas Firepit Burner
should last for many years, but like all gas appliances it may need servicing at some
point in time, it would be annoying to have to demolish half the pit, or take up the
patio, in order to fix the problem.
They allow rainwater to escape from inside the pit, to the surrounding patio
area. Without them, you pit would quickly fill with water, which could cause
damage to your Firepit Burner and invalidate the warranty.
They allow air to be drawn in, under the Firepit burner. This aids combustion,
and produce larger flames.
The area under the burner can become extremely hot. Air vents will allow this
excess heat to dissipate.
LPG Gas is heavier then air, and any un-burnt gas will collect inside the base of
your Firepit. Without ventilation holes to allow this gas to escape, gas will
gradually build up, until it reaches an ignition source, where it will explode
with great force. This could cause serious injury.
Build

8
A screw on Propane regulator having a capacity of 4kg/h at a supply pressure of 37
mbar must be used. Clip on regulators cannot provide adequate gas flow.
You will also require a minimum 19kg sized propane bottle, as the smaller capacity
bottles cannot provide adequate gas flow.
LPG gas hose should be checked annually to ensure it is in good condition. It is recom-
mended that it is replaced in accordance with standard practices
When the appliance is not being used for prolonged periods the hose should be discon-
nected from the appliance and the regulator disconnected from the cylinder. The as-
sembly should then be stored to avoid adverse effects that may result from weather-
ing. The cylinder should be stored in accordance with recommended practices.
The hose should be located so that it is not a trip hazard, it is not subjected to undue
strain or placed where is could be damaged. The hose must not be buried underground
and there should be a good flow of air around the hose.
LPG Installation
Your local Gas Safety Engineer will know how to run underground gas pipes. We rec-
ommend taking the feed from as near to the meter as practical. There will need to be a
main isolating valve close to this feed, which should be easily accessible. This will be
used to cut off the gas supply to the Firepit when it’s not being used OR in an EMER-
GENCY.
WARNING… Failure to install this correctly could cause serious injury. If the installa-
tion does not conform to local gas regulations, it may invalidate your home insur-
ance, and could also be illegal.
Natural Gas Installation
9
Our Firepit Burner has been manufactured, very accurately. However, building a brick
or concrete ‘pit’ to house the burner assembly may not be so accurate. Therefore
building the pit and installing the burner, should be carried out at the same time.
The installation should also allow room for connecting up the gas supply.
The main valve housed inside its stainless steel control box, has to be pushed in quite
hard when lighting the pilot light. Therefore the box must be secured quite rigidly in
the surrounding pit. The Burner assembly complete with backing plate, should be
supported in some way, but not fixed permanently. This will allow for easy removal
to connect the gas supply and for maintenance at a later date.
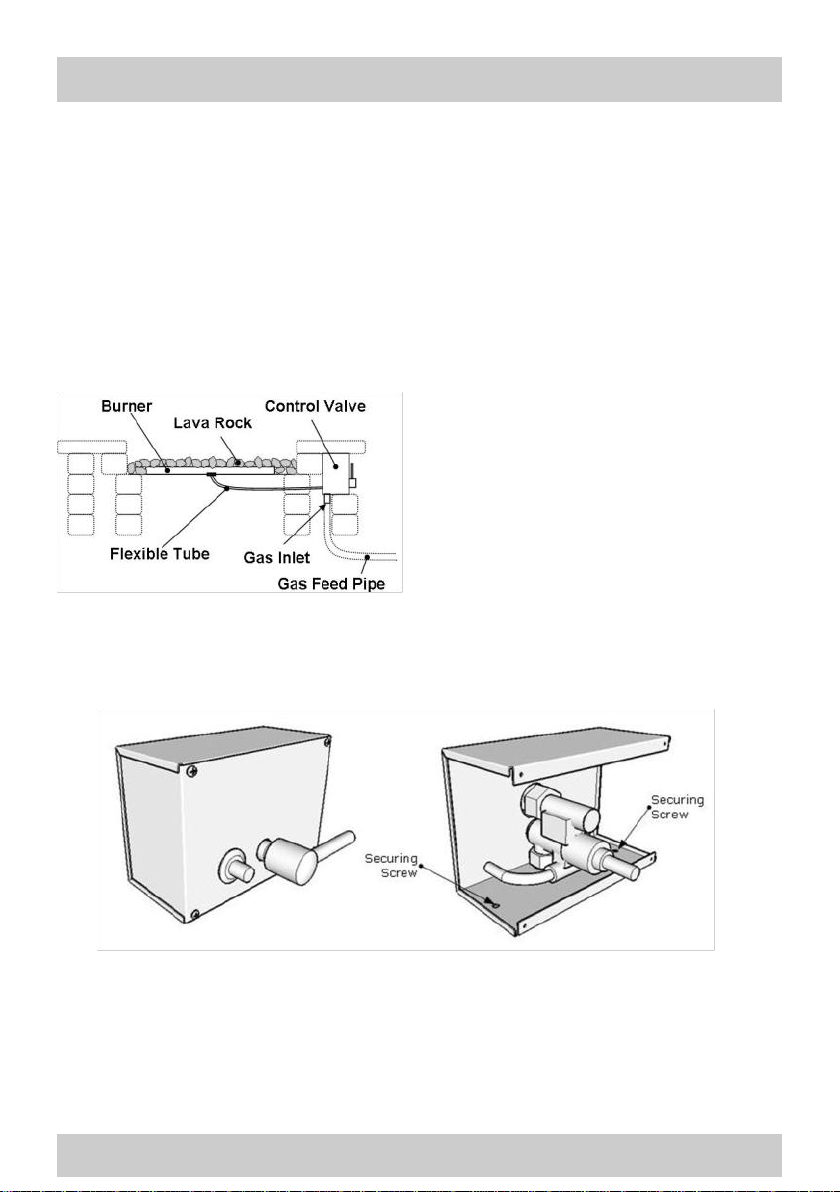
Set the valve lever to the off position. Loosen the grub screws and remove the lever.
Remove the four retaining screws and carefully slide out the front of the control box.
Note, ensure the piezo lead does not become disconnected or damaged. There are
two holes in the base of the control box, which can be used to secure the box into the
surrounding brickwork. Once the box is secure, slide the front cover back into place,
ensuring the piezo lead is still attached and undamaged. Replace the retaining
screws. Replace the valve lever in the off position and tighten the grub screws.
To secure the control box to the surrounding structure, there are two mounting holes
inside the base of the control box. You will need to disassemble the control box in
order to access the securing holes.
Install
NOTE: The metal tray that the burner is
mounted onto will warp and bend due to
the heat. This does not affect the safe op-
eration of the burner and is purely cos-
metic. We recommend setting the burner
down around 75mm below the top surface
of your pit, so any warping won’t show

10
Once the gas feed pipe is connected and tested for leaks, the Firepit burner can be lit
for the first time. This may take several attempts before the pipes are purged of air.
Note, the burner is designed to operate with Lava Rock covering the burner. This
helps to dissipate the gas whilst adding air to the mixture. DO NOT operate your
firepit burner for too long without the lava rock.
Note, with the LPG version without the lava rocks, you might notice black smoke
coming from the flames. This is quite normal. Once the lava rocks are in place, this
smoke will disappear. You will also notice a build up of soot on the burner arms.
Again, this is due to the lack of air due to running without lava rock. After you’ve
finished testing and the burner has cooled, simply clean the burner with a damp
cloth.
WARNING.. The flames coming from your Firepit burner are almost INVISIBLE during
the day, so don’t assume it’s not working just because you can’t see anything. Once
you are happy everything is working safely, then it’s time to finish the details.
There may be some building work that needs finishing off, but by now the Firepit
should be in and working.
The final part is to cover the burner with lava rock. DO NOT simply tip the bags of
lava rock onto the Burner, as the bags usually contain some fine dust which could
clog the burner jets. It’s best to empty the bags into a suitable container and then
place the rocks by hand around the burner.
Place the rocks only one layer deep, and do not cover the pilot cage. Too much
lava rock can cause the burner to overheat
Once you’ve arranged the lava rock, test again. Warning, Lava Rocks become very
hot, but don’t glow red so they look cold when the flames are out. Let them cool
down before you touch them again.
As placement of the lava rock is pretty random, this can effect the ‘look’ of the flame
pattern. Sometimes moving the rocks around can produce a more desirable affect.
Test
Finish

11
Operating Instructions
Although the operation of the Firepit is relatively simple, this section mainly relates
to the safety aspect.
Before use
Ensure there are no gas leaks. If you smell gas, DO NOT USE. See Safety Instruc-
tions.
Check the burner area for any combustible material that may have fallen into the
pit, such as leaves, twigs, paper, or anything that does not belong. Remove and
dispose of.
Check and sweep the immediate surrounding area for anything combustible,
which might get blown into the pit.
WARNING - Ensure all pit air vents are clear.(See Installation Manual)
Consider the Wind factor. A strong wind can quickly lead to huge flames, which
could be difficult to control. It is best to wait till the wind has subsided, before you
light the Firepit.
How to operate
Turn the gas supply on. (At the bottle, or at the isolator valve)
Ensure there are no gas leaks. If you smell gas, turn the gas off immediately. DO
NOT USE.
Turn lever to pilot position.
Push lever hard, and hold. Press ignition, Repeat until pilot light is lit. Note, this
can initially take some considerable time to purge the air in the pipes, particularly
after disconnecting and reconnecting the gas bottle.
Keep lever pressed in for a further 10 seconds, then release. If pilot goes out, try
again.
Once pilot is lit turn lever to full on position. Main burner will light.
Adjust lever between high and low position as required.
During Use
Adjust lever between high and low position as required
A supervising adult must always be present around a gas Firepit.
Children must never be left alone or unsupervised around the Firepit.
Do not throw anything into the Firepit
Do not run when approaching the Firepit, in case you trip and fall in.
Do not attempt to jump across the Firepit.

12
After Use
Turn lever to ‘Pilot’ position. The main burner will go out.
Turn lever to ‘Off’ position. The pilot light will go out.
Do not leave the area before the flames are completely out.
Even after you turn it off, the Firepit will be considerably hot for some time. If
there is a chance anything flammable could get blown onto the Firepit, DO NOT
leave it unattended until it has cooled sufficiently.
Children must never be left alone or unsupervised while the Firepit is still hot.
Turn gas supply off, at the bottle, or inside your house.
Special Note: Using your Firepit after it’s been raining.
Rain will not damage the Firepit Burner, but will make the Lava Rock wet. The burner
will still work, but as the lava rocks heat up, they can give out some steam. The wet
conditions can also render the piezo spark igniter inoperative until it dries out. In ex-
tremely wet conditions, the pilot burner jets can become temporarily blocked. We
recommend you allow your Firepit burner to dry before using again.
Operating Instructions

13
Ensure the Burner area is kept clean and clear of dirt and especially anything com-
bustible.
Ensure the Air Vents at the base of your pit are clear at all times.
Its recommended the Firepit is covered when not being used, to stop leaves etc
falling in.
The lava rocks might eventually show signs of soot, which will not harm the rocks,
but could build up and block the Burner jets. Simply remove the rocks and wash
and scrub with a stiff brush to remove the soot.
If you haven’t used the Firepit for some time, it might attract spiders and other
insects. It’s recommended you remove the lava rocks. Clear the burner area of
anything that doesn’t belong and then replace the lava rocks.
The control box and valve lever can be cleaned with a suitable stainless steel
cleaning product.
Maintenance
Pilot fails to light.
Make sure the main gas supply is turned on. (Check bottle is not empty)
Try pressing the ignition button several times. Make sure you are keeping the main
gas lever pressed in for at least 10 seconds. It’s quite a strong spring.
If the ignition button stays in, lubricate with WD40 with the burner not lit.
Keep trying as it can take quite some time to purge all the air from the pipes.
Move the lava rocks from above the pilot cage, and ensure cage area is clear. Try
relighting.
Try lighting the pilot with a match or lighter, as the spark electrode might be wet
and inoperative.
Main Burner fails to Light
If the pilot is lit, there is no reason the main burner would not light.
If the pilot is not lit, the flame failure device has cut off the gas supply. Wait 2 min-
utes, then try relighting the pilot.
Main Burner suddenly goes out.
If the pilot is extinguished for any reason, ie a sudden gust of wind, or it started
raining, then the main gas supply is automatically cut. Turn the control lever to the
off position, and leave for 2 minutes before relighting the pilot. Once the pilot is lit,
the main burner will work.
For bottled gas, your bottle is empty. Replace the bottle for a full one.
Troubleshooting
14
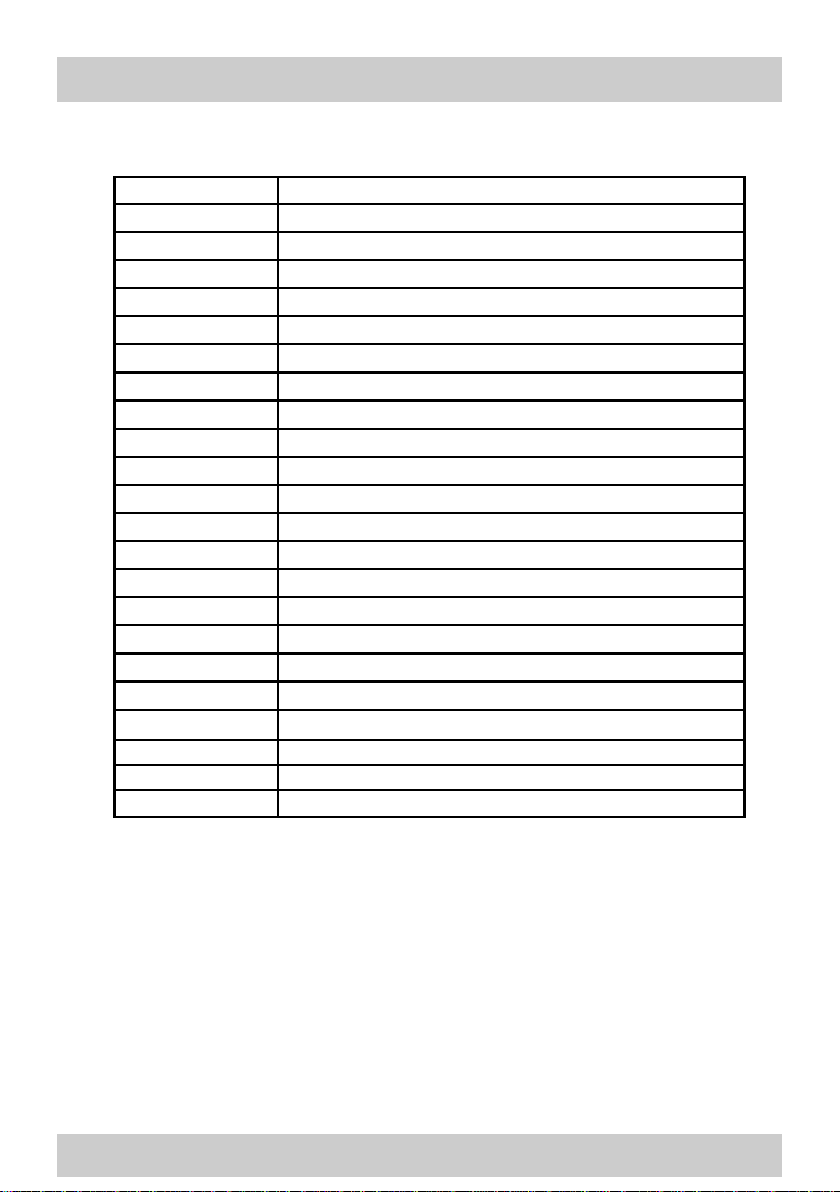
Part No Part Description
FP01-01 Control Box
FP01-01C Control Box Screws x 4
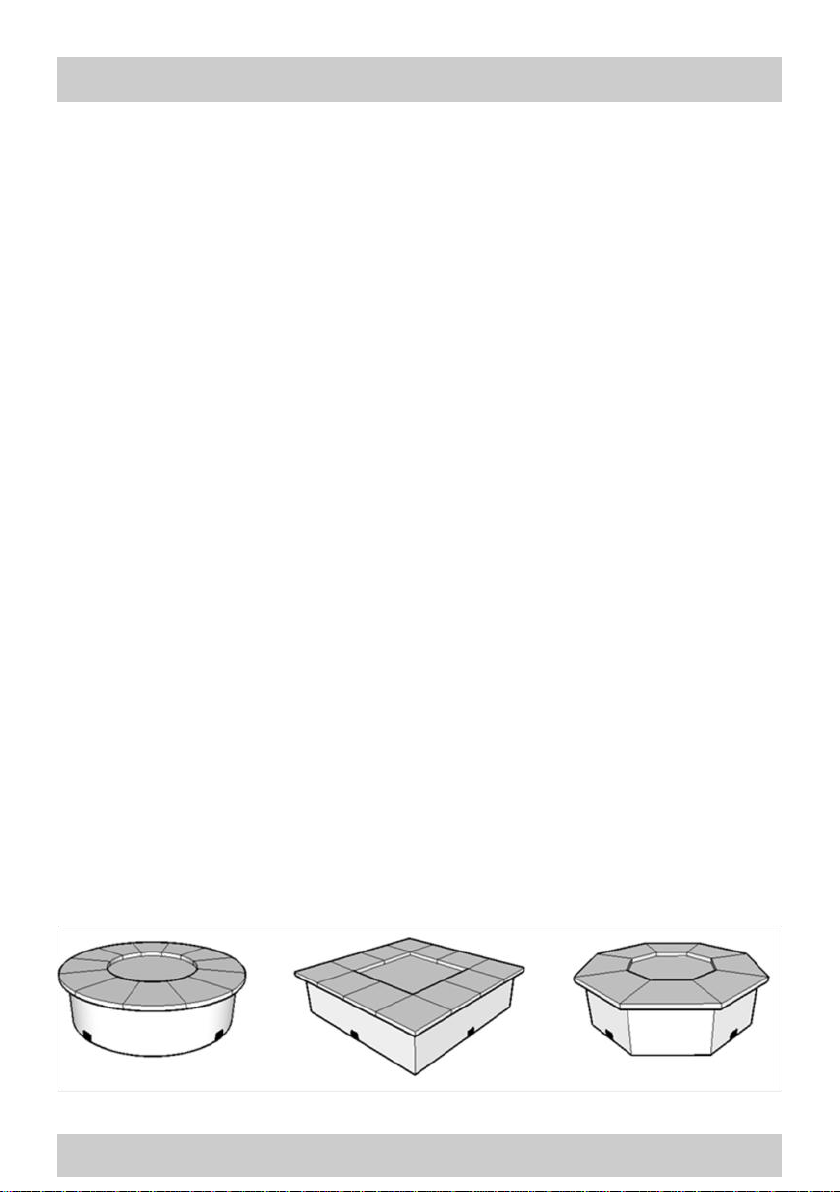
FP01-02 Burner & Round Base
FP02-03 Burner & Square Base
FP03-03 Burner & Octagonal Base
FP01-06 Pilot Cage
FP01-A02/1 Pilot Support Bracket + 2 Screw
FP01-A02/2 Pilot Thermocouple
FP01-A02/3 Piezo Electrode
FP01-A02/4 Piezo HT Lead
FP01-A02/5 Pilot Mounting Bracket
FP01-A02/7 Pilot Flexible Gas Pipe
FP01-A03/1 Gas Control Valve
FP01-A03/2 Gas Control Valve Lever
FP01-A03/3 Gas Control Valve Lever Grub Screw
FP01-A03/4 Piezo Unit
FP01-A03/5 Main Flexible Gas Pipe
FP01-A03/6 Fulham Hose Nozzle (LPG Version)
FP01-A04/1 Lava Rock (5kg bag)
FP01-A04/2 LPG Hose 4mtr (LPG Version
FP01-A04/3 Hose Clips x 2 (LPG Version
FP01-AK Allen Key
Parts List

15
Return to Base Manufacturers’ Warranty
All Gas Firepit Burner delivered to a UK mainland address are covered by our 12 month return to
base limited warranty. Should you have any problems, please use the contact details at the back of
this manual. Please quote your invoice number and serial number, (which can be found on the label
on the control box). Also, if purchased through a dealer or installer, his name and contact details.
Firepits UK Ltd make every effort to ensure all firepit burners leaving our factory are in perfect work-
ing order. Each burner is ‘burn tested’, to ensure it functions safely and correctly. Due to the nature
of the product, problems can be caused during the installation process, which are not covered by the
manufacturers’ warranty.
To return your firepit burner, you must first contact us explaining the reason for the return
1. Return to Base warranty warrants the firepit burner to the end user, against defects in materials
and workmanship for the period of one year, which begins on the date of purchase by the cus-
tomer.
2. Under a return to base warranty the end user is responsible for the cost of packaging and ship-
ping the unit to us. We are not liable if the burner is improperly packed resulting in damage dur-
ing transit. Please retain all original packaging together with manuals, as this will assist in return-
ing the product in the correct packaging.
3. We will rectify the fault within a reasonable amount of time from the point or receipt at our fac-
tory.
4. The Return to Base warranty covers only those defects which arise as a result of normal use of
product, and do not apply to any: Improper & inadequate maintenance or modification. Repairs
carried out by non-authorised persons. Damage caused by improper handling or installa-
tion. Operation outside the product specifications. Physical damage, accidental damage, ne-
glect, or user abuse. Normal wear and tear.
5. If there is no fault found or the problem has been caused by third party installer, user error or
physical damage and any of the reasons stated in section 4, a no fault found charge may be
applied, you will be emailed and phoned to confirm this charge within 7 days of the item being
tested, you will also be charged return carriage for return of your goods.
6. The warranty applies to the original owner of the firepit burner and is non transferable.
7. We reserve the right to repair or replace any faulty components. Faulty goods may be replaced
with factory-refurbished products.
8. The warranty is void if, there is any attempt made to repair the system by a non-authorised third
party, or if the system is inadequately or improperly maintained or modified All repairs and re-
placements will carry a 90 days warranty or the original warranty balance, whichever is greater.
9. We reserve the right to replace discontinued products that are still under warranty with the near-
est equivalent specification product.
10. This document is not proof of purchase or proof of warranty,
Non-Faulty Returns Conditions
For non-faulty returns purchased directly from Firepits UK Ltd, please contact us before returning the
burner. All non-faulty returns must be returned within one month of purchase. They must be re-
turned undamaged in their original undamaged packaging, along with all accessories and manuals
etc. If any returned item is damaged or parts missing, including the original packaging and manuals
etc, we reserve the right to charge a 15% restocking fee. Goods returned after one month of pur-
chase will be liable for a 15% restocking fee. Any goods found to be damaged upon receipt at our
factory, may be subject to a repair fee of up to 50%.
Goods Damaged in Transit:
If goods are visibly damaged on receipt, it's very important to sign for the goods as damaged on
arrival with the courier and then contact us immediately.

16
Contact Details
Gas Firepit Burner Assembly
Name Firepits UK Ltd
Phone 01425 626171
email [email protected]
Address
10 Shirley Road
Southampton
Hampshire
SO15 3EU
Make a note of the person/company that built and installed your new Firepit.
For natural gas installations, make a note of the Gas Safety Engineer that connected
your Firepit. Also, record your serial no. here. (See front of control box)
Installer
Name
Phone
email
Address
Gas Safety Engineer
Name
Phone
email
Address
Serial Number: S/N _______________________
Other manuals for Brightstar
1
Table of contents
Other FIREPITS Outdoor Fireplace manuals

Popular Outdoor Fireplace manuals by other brands


The Fireplace
The Fireplace JETMASTER 700 D installation instructions

Superior
Superior VRE4543EN Installation and operation instructions

Napoleon
Napoleon PATIOFLAME GPFN Installation and operation instructions

Endless Summer
Endless Summer Dakota GAD19101ES owner's manual

Vermont Castings
Vermont Castings ODGSR36A Homeowner's installation and operating manual

FEUERHAND
FEUERHAND PYRON user manual