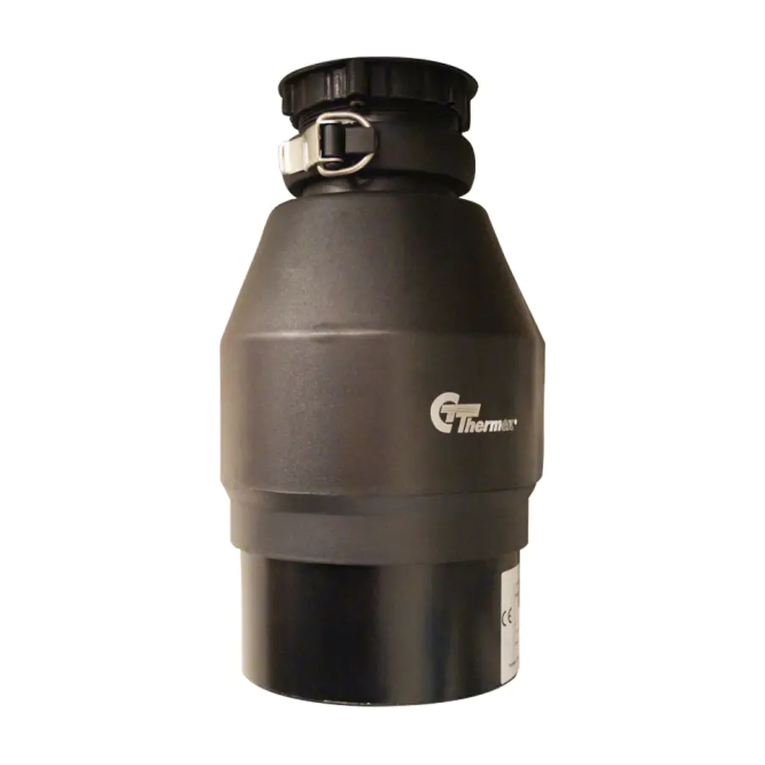
Fisher & Paykel GD75IA1 User manual

Installation instructions
Before you begin
Please read these installation instructions completely and carefully.
• The following installation instructions are intended as a general guide.
• Please ensure that the waste disposal unit is installed according to local building codes for your area.
• Installation is recommended to be done by a qualified plumber or installer.
• Product failure due to improper installation is not covered under the Warranty.
Preparation
Removing an existing waste disposer, if installed
1. Disconnect electrical power supply to existing disposer.
2. Remove old disposer or sink flange assembly.
3. Inspect drain line. If it is heavily coated with hardened grease and accumulations, clear out the build-up using a
plumber’s rod or auger.
4. Remove old sealing materials and gaskets from sink opening, both top and bottom.
https://producthelp.fisherpaykel.com/nz/Clean/Dishwashing_Accessories/GD75IA1/User_Guide_GD75IA1/02_Installation_instructions
Updated: Fri, 01 Mar 2019 07:04:48 GMT
Powered by
1

What you will need
• Phillips screwdriver
• Flat blade screwdriver
• Steel Punch or wooden dowel Petroleum jelly or liquid soap
• Plumber’s Putty
Top and bottom of sink and sink flange surfaces must be free of any materials to prevent
leaks.
Unpacking your waste disposer
1. Remove the waste disposer from the packaging.
2. Identify and check that all components are
included in the carton before beginning
the installation (fig. 1).
3. Take care not to misplace any of the components.
Components
1. Stopper
2. Sink flange
3. Rubber gasket
4. Flange ring
5. Protector ring
6. Mount ring
7. Screw clamp
8. Hopper with splash guard
9. Dishwasher discharge inlet
10. Drain housing
https://producthelp.fisherpaykel.com/nz/Clean/Dishwashing_Accessories/GD75IA1/User_Guide_GD75IA1/02_Installation_instructions
Updated: Fri, 01 Mar 2019 07:04:48 GMT
Powered by
2

11. Reset button
12. Built in air-switch
13. Lower shell
14. End Bell (Electrical Connections)
15. Power cord
Fig 1. 3-801t Mount System
https://producthelp.fisherpaykel.com/nz/Clean/Dishwashing_Accessories/GD75IA1/User_Guide_GD75IA1/02_Installation_instructions
Updated: Fri, 01 Mar 2019 07:04:48 GMT
Powered by
3

16. Outlet gasket
17. Discharge waste elbow
18. Waste elbow flange nut
Fig 1.2. Elbow
Installing the waste disposer
1. Loosen the clamp screw to allow the mounting system to
be removed from the unit (fig.2).
Fig. 2 Removing the mounting system from
the waste disposer
2. Turn the mounting assembly over and remove the flange
ring from the track on the sink flange. Undo the three
screws holding it together. This will allow the sink flange,
mount ring, and protector ring to separate (fig 3).
Use the flat blade screwdriver as a lever if required.
Fig. 3 Disassembling the mounting system
https://producthelp.fisherpaykel.com/nz/Clean/Dishwashing_Accessories/GD75IA1/User_Guide_GD75IA1/02_Installation_instructions
Updated: Fri, 01 Mar 2019 07:04:48 GMT
Powered by
4

3. Apply a small amount of plumbers putty to the lip of the sink
flange and position the sink flange into the sink drain hole
ensuring that the rubber gasket on the underside of the
sink flange is firmly in place (fig.4).
Fig. 4 Fitting the flange into the sink drain hole
4. Approaching from under the sink, slide the protector ring
and mount ring onto the underside of the sink flange. Fit
the flange ring into the track on the sink flange, then tighten
the 3 mounting screws evenly and securely (fig.5).
Ensure that the mounting assembly
connection is fixed securely and
tightly.
No dishwasher connection required
If a dishwasher is not being connected to the waste disposer,
please proceed to step 7.
Connecting to a dishwasher
If you are connecting to a dishwasher, please continue with steps
5 & 6.
Fig. 5 Fixing the mounting system to the
underside of the sink
5. Using a blunt instrument (steel punch or wooden dowel),
knock out the entire plug at the end of the dishwasher drain
inlet (as shown in fig.6). Do not use a screwdriver or sharp
instrument. When the knockout plug falls into disposer, you
may remove it or simply grind it up when the disposer is
used. This will not damage the disposer in any way, but
may take some time to grind, over the course of several
uses.
https://producthelp.fisherpaykel.com/nz/Clean/Dishwashing_Accessories/GD75IA1/User_Guide_GD75IA1/02_Installation_instructions
Updated: Fri, 01 Mar 2019 07:04:48 GMT
Powered by
5

6. Connect the dishwasher drain hose to the dishwasher inlet
pipe on the waste disposer (fig. 6). Use a clamp to ensure a
tight seal. A stepped rubber adaptor (not supplied with the
product) may be required if the diameter of the drain hose
is larger than the diameter of the waste disposer’s inlet
connection.
Fig. 6 Connecting to a dishwasher (if required)
7. Connect the discharge elbow to the lower outlet on the
waste disposer (fig. 7).
8. Prior to connecting the waste disposer to the mounting
assembly, press firmly down on the rubber splash guard to
check that is firmly fitted onto the neck of the hopper.
9. Lubricate the top lip and angled surface of the rubber
splash guard with liquid soap or petroleum jelly (fig. 8 ).
Please do not remove clamp and
splash guard from hopper. Both
parts are factory installed and
installation ready.
Fig. 7 Connecting the discharge elbow
Fig. 8 Lubricate the rubber splash guard
https://producthelp.fisherpaykel.com/nz/Clean/Dishwashing_Accessories/GD75IA1/User_Guide_GD75IA1/02_Installation_instructions
Updated: Fri, 01 Mar 2019 07:04:48 GMT
Powered by
6

10. Align the discharge elbow up with the waste pipe (refer to
fig.11) so that the waste disposer is correctly positioned,
prior to engaging with the mounting assembly.
11. Guide the waste disposer up to the sink flange (fig. 9).
Engage the groove of the splash guard around the ridge at
the bottom of the sink flange. A slight rocking motion may
be required to help ensure a proper fit.
Fig. 9 Engage the waste disposer
12. While still supporting the body of the waste disposer,
tighten the screw clamp around the rubber splash guard
(fig.10). The waste disposer will now hang by itself.
13. Connect the discharge elbow up with the waste pipe
(fig.11) and tighten the slip nut on the drain pipe.
If you need to rotate the waste
disposer to connect with the waste
pipe, it is important to make sure
the sink flange does not turn.
Movement of the sink flange will
break the seal created when
installed. If this occurs, disengage
the waste disposer from the
discharge elbow and mounting
assembly Return to step 10 to
realign the waste disposer before
repeating steps 11-13.
Ensure that the reset button is
readily accessible after installation
of the waste disposer.
Fig. 10 Tightening the clamp
Fig. 11 Connecting the drain outlet
https://producthelp.fisherpaykel.com/nz/Clean/Dishwashing_Accessories/GD75IA1/User_Guide_GD75IA1/02_Installation_instructions
Updated: Fri, 01 Mar 2019 07:04:48 GMT
Powered by
7
Installing the air-switch (optional)
1. Select a location on the bench top for the air switch to be
positioned (recommended position is near the sink). Mark
and cut a hole, 33mm in diameter, in the bench top.
2. Remove the nut from the thread of the air switch (fig.12).
3. Feed one end of the PVC tubing up through the cutout,
from the underside of the bench top, and attach to the
underside of the push button.
4. Insert the push button into the bench top cut out (fig.12).
Feed the PVC tube through the nut. Screw the nut onto the
thread tightly (fig.13), securing the push button tightly onto
the bench top.
Do not use a wrench to tighten the
nut.
5. Connect the other end of the PVC tubing to the air switch
outlet, located on the underside of the waste disposer
(fig.14).
Fig. 12 Fitting the air switch
Fig. 13 Securing to the bench top
Fig. 14 Connecting tube to air switch outlet
https://producthelp.fisherpaykel.com/nz/Clean/Dishwashing_Accessories/GD75IA1/User_Guide_GD75IA1/02_Installation_instructions
Updated: Fri, 01 Mar 2019 07:04:48 GMT
Powered by
8

Controlling the waste disposer by a wall mounted switch
The waste disposer can be controlled by means of a wall mounted switch rather than the bench mounted air switch
supplied with the product.
To use an existing wall mounted switch:
1. Connect one end of the PVC tubing to the underside of the air switch button.
2. Connect the other end of the PVC tubing to the air switch outlet on the underside of the waste disposer (as
shown in fig.14).
3. Press the button on the air switch to activate the waste disposer.
4. Whilst the waste disposer is running, disconnect the PVC tubing from the air switch outlet on the underside of
the waste disposer.
5. Turn the waste disposer off using the wall mounted switch. The waste disposer can now be turned on and off
using the wall mounted switch.
https://producthelp.fisherpaykel.com/nz/Clean/Dishwashing_Accessories/GD75IA1/User_Guide_GD75IA1/02_Installation_instructions
Updated: Fri, 01 Mar 2019 07:04:48 GMT
Powered by
9
Other manuals for GD75IA1
2
Table of contents
Other Fisher & Paykel Garbage Disposal manuals
Popular Garbage Disposal manuals by other brands

Teka
Teka TR 750 Installation, care & use manual

JNF
JNF IN.60.567 quick start guide

InSinkErator
InSinkErator Badger 1 owner's manual

Green Power
Green Power TDM 00500 instruction manual

Z.I.P.P.ER MASCHINEN
Z.I.P.P.ER MASCHINEN 9120039233376 user manual

InSinkErator
InSinkErator Evolution Series installation manual