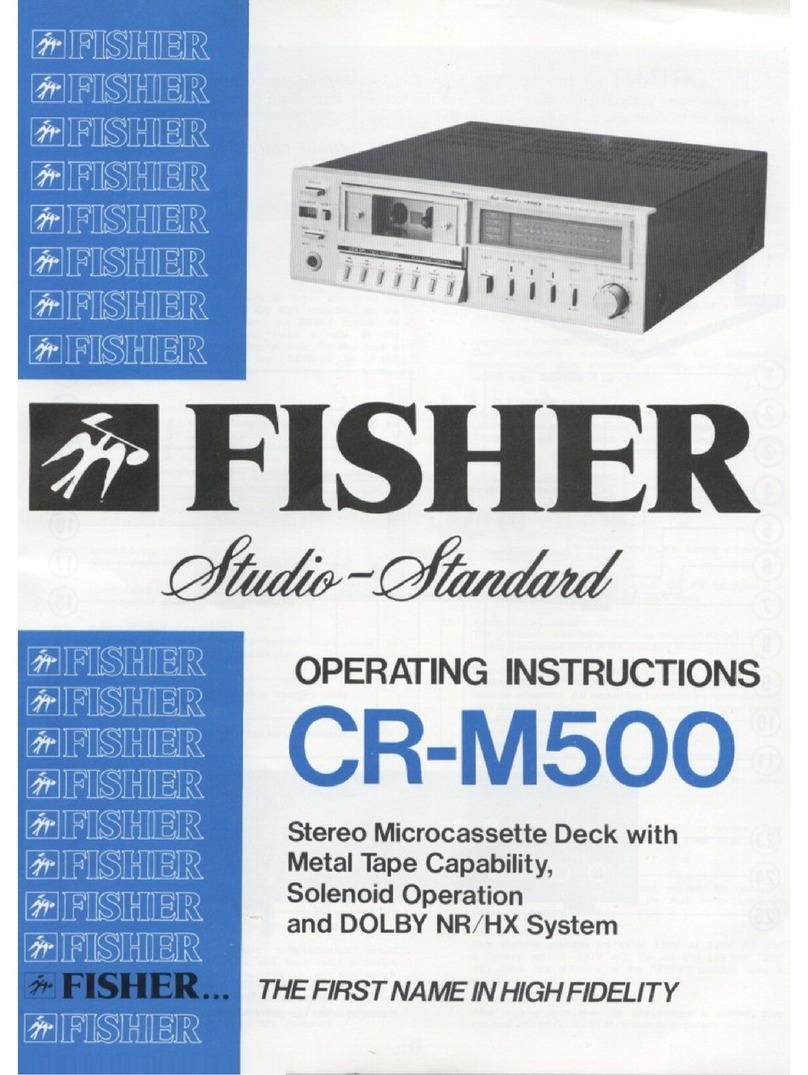
Fisher Studio-Standard CR-W50 User manual

[1i]
IFITs)[HJIEill.
[1i]
IFlls)IHJIEill.
[1i]
]FI1)OOIEill.
[1i]
IFlls)IHJIEill.
[1i]
IFllS)]]lIEill.
[1i]
IFilS)OOIEill.
[1i]
IFllS9IHJIEill.
[1i]
IFTIs)OOIEill.
[1i]
IFITs)IHJIEill.
-.
tm
IFITs)IHJIEill.
[1i]
IFTIs)IHJIEill.
[1i]
IFTIs)IHJIEill.
[1i]
,
IFTIs)OOIEill.
'
[1i]
IFITs)IHJrnill.
.
".
[1i]
IFITS)IH]rnru
[1i]
IFlls)IHJIEill.
. .
[EIFllS)OOrnm
OPERATING
INSTRUCTIONS
-
S
EREO
DOI:JBtE
CASSETTE
DECK
THE
FIRST NAME IN HIGH FIDELITY
NOTE:
Locate
serial
number
(shown on rear
panel of unit)
and
record
it here •
------

--
~
RISK
OF
ElECTRIC
Ij\
~
SHOCK.
DO
NOT
OPEN!
~
CAUTION:
TO
REDUCE
THE
RISK
OF
ELECTRIC
SHOCK,
DO
NOT
REMOVE
COVER.
NO
USER-SERVICEABLE
PARTS
INSIDE
.
REFER
SERVICING
TO
QUALIFIED
SERVICE
PERSONNEL.
This
symbol
indicales
that
dangerous
volt-
age
constituting
a
risk
of
electric
shock
is
present
within
this
unit.
This
symbol
indicates
that
there
are
impor-
tant
operating
and
maintenance
instructions
in the
literature
accompanying
this
unit.
.
~
NOTE:
The photograph on the
cover
shows the unit
with
a
SILVER front panel.
The BLACK version is
identical
in all respects.
WARNING:
UNAUTHORIZED RECORDING OF
APPLICABLE
COPYRIGHT
LAWS.
c
-W50
SPECIFICATIONS
Motor
(2) DC
Governor
Cassette
Loading
(2)
Front
Drive
System
(2)
Capstan
Number
of
Heads
2/2
Head
Material
Hard
Permalloy/Ferrite
Operation
(2)
Powered
Mechanism
Wow
and
Flutter
Signal-to
-
Noise
Ratio (CCIR
Weighted)
Dolby'
NR OFF
Dolby'
NR ON B
Dolby'
NR
ON
C
Erase
RatiO
Channel
Separation
Signal
Crosstalk
Frequency
Response
1-
71SIPS
Normal
Tape
(±3
dB)
Cr02
Equivatent
Tape
(±3
dB)
Metal
Tape
(±3
dB)
Total
Harmonic
Distortion
at 0 VU
Fast
Forward/Rewind
Time
(C
-
60)
Level
Indicators
Inputs
(Sensitivity/Impedance)
Outputs
(Level
at
0
VU/lmpedance)
0.
06%WRMS
51dB
61
dB
70dB
70dB
40dB
70
dB
40
Hz-13
kHz
40
Hz -
14
kHz
40
Hz
-15
kHz
1.2
%
110
sec.
(2) LED
Meters
(2)
Line
100
mV/50
kfl
(2)
Line
500
mV/3.3
kfl
Tape
Selector
Switch
Normal,
Cr02
,
Metal
Tape
Counter
Mechanical
GENERAL
Power
Requirements
120VAC
±10%
(50/60
Hz)
15
Watts
Dimensions
(WxHxD)
17
.
33
"x4.
SS"xl
0.
25
"
Weight
(approx.)
101bs
.
'Dolby
is
a
registered
trademark
of
Dotby
Laboratories
Licensing
Corporation
.
Because
i
ts
products
are
subject
to
continuous
im-
provement,
Fisher
Corporation
reserves
the
right
to
modify
product
designs
and
specifications
without
notice
and
without
incurring
any
obligation
.
COPYRIGHTED MATERIAL MAY VIOLATE
FISHER CORPORATION
ASSUMES
NO
RESPONSIBILITY FOR THE UNAUTHORIZED DUPLICATION, USE
OR
OTHER ACTS
WHICH INFRINGE UPON THE RIGHTS OF COPYRIGHT OWNERS.
WARNING:
TO
AVOID THE
HAZARDS
OF
FIRE OR
ELECTRICAL
SHOCK, DO
NOT
EXPOSE THIS
APPLIANCE
TO
RAIN
OR OTHER MOISTURE.
2

PO
'A
T
...
This
Stereo Double Cassette
Deck
was developed by FISHER to give you many
years
of
enjoyment. Please read the
following
instructions
carefully. They have been prepared to
assist
you
during
the
initial
set-up
procedure
and to
assure
you of
optimum
performance
at all times.
THE
WARRANTY
ON
THIS UNITDOES NOT COVER DAMAGE CAUSED
BY
MISHANDLING OR MISUSE.
CONNECTING THE
DaUB E CASSETTE
DECK
CAUTION:
• Do not
plug
the
power
cord
of
the
amplifier
into an
AC
wall
outlet
until
after
all
connections
have been made.
• Be
sure
to make the
correct
connections,
paying
atten-
tion to the L (left
channel)
and
R (right channel), and
LINE OUT
and
UNE
IN
marks. Plug in the
cables
securely.
Loose
connections
will
resu!lt in
unsatisfac-
tory
sound
reproduction
or
cause
noise problems.
Refer to Fig. 1 below.
o LINE
IN
(RECORD)
Jacks
...
Connection
of
recording
cables
between the
double
cassette
deck
and
the
amplifier
should
be made as
follows:
Connect
the LINE
IN
L
jack
of
the
double
eassette
deck
to the
TAPE
REC OUT LEFT
output
jack
of
the
amplifier.
Connect
the LINE
IN
R
jack
of
the
double
cassette
deck
to the TAPE REC OUT RIGHT
output
jack
of
the amplifier.
w
rz.
LINE OUT (PLAYBACK)
Jacks
...
Connection
of
playback
cables
between the
double
cassette
deck
and the ampll
ifier
should
be made as
follows:
Connect
the LINE OUT L
jack
of
the
double
cassette
deck
to the
TAPE
PB LEFT
input
jack
of the amplifier.
Connect
the LINE OUT R
jack
of
the
double
cassette
deck
to the
TAPE
PB RIGHT
input
jack
of
the amplifier.
8
AC
(Power Cord)
...
After
completing
installation
and all
connections,
make
sure
that
the POWER
switch
on the
front
panel of
the
double
cassette
deck
is
set
to OFF. Then
plug
the
powe
cord
into
an
AC
wall outlet.
,
00000000000
00000000000
00000000000
00000000000
00000000000
000000000000
000000000000
000000000000
000000000000
000000000000
000000000000
---.
AC
000000000000
000000000000
INTEGRATED
STEREO
AMPLIFIER
Fig. 1
3

co
TRO
A o
OPERATION
This
section
describes
the
double
cassette
deck's
controls
in
the
order
in
which
you wouild
normally
use
them.
Follow
the
instructions
in a
step-by-step
sequence
and
in a very
short
time
you
will
master
complete
operation
of
the
unit.
clt~
.
-
;
1'-*
......
•'
~
FISHER
EJ
a
DECK 1
..............................
PLAYBACK
ONLY
DECK 2
.........................
RECORD/PLAYBACK
o POWER
Switch
(DECKS 1, 2)
...
Set
the
VOLUME
control
of
your
amplifier
to
the
posi-
tion
marked
"0"
(minimum)
before
switching
on
the
power.
By
gently
depressing
the
POWER
switch,
the
unit
is
swilched
on.
Simultaneously,
the
POWER
indicator
will
light
up.
To
switch
the
power
off,
release
the
switch
by
depressing
it
again.
o POWER
Indicator
(DECKS
1,2)
...
Lights
up
when
the
POWER
switch
is
depressed.
8
STOP/EJECT
Button
(DECK 1
only)
...
Stops
tape
movement
of DECK 1.
When
depressed
once,
it
unlocks
all
other
buttons
(except
the
PAUSE
button)
of DECK 1 and
stops
the
tape movement.
When
depressed
a
second
time,
the
cassette
compartment
of
DECK 1
will
open
and
eject
the
cassette.
o
Cassette
Compartment
Lid (DECK 1
only)
...
Depress
the
STOP/EJECT
button
of
DECK 1 to
open
the
cassette
compartment.
To
close
the
compartment,
gently
push
the
compartment
lid.
In
case
the
compart-
ment
does
not
close,
check
if
the
cassette
is
inserted
properly.
DO NOT
use
force.
9 PLAY
Button
(DECK 1
only)
...
For
playback
of
recorded
cassettes.
To
stop
tape
transport
temporarily
during
playback,
depress
the
PAUSE
button
of DECK 1.
I
[][]IOCII.JTH"'"
r-~llllIItllIl!!!!IIII
_
~
IUI~
I.UI
!!!!!!
III
~IlI
t.U1Jljl
I
...-...
T
L(;vn.
Ii •• I - '0 I
-a
I
00
I
+'
I
.~
I
".
L--
Itl
Go-<T
til t
tl
tm r I - t - .1 I - 'lItlllll j
Fig. 2
o REW
(Rewind)
Button
(DECK 1
only)
...
Rewinds
tape
rapidly
to
the
left
hand
reel. If
depressed
while
the
PLAY
button
of DECK 1 is
depressed,
DECK
1
wiH
rewind
to
the
previous
silent
unrecorded
space
on N1e tape
and
then
play
back
automatically.
O F-FWD (Fast
Forward)
Button
(DECK 1
only)
...
Moves
tape
rapidly
to
the
right
hand
reel. If
depressed
while
the
PLAY
button
of DECK 1 is
depressed,
the
tape
will
advance
to
the
next
silent
unrecorded
space
and
then
play
the
n
ext
se
'
lection.
o PAUSE
Button
(DECK 1
only)
...
Instantly
stops
tape
movement
while
DECK 1 i,s in
play-
back
mode.
When
the
button
is
depressed
a
second
time,
operation
is
resumed.
NOTE:
When
the
PAUSE
button
of DECK 1 is
depressed,
while
DECK 1 is in
the
fast
forward
or
rewind
mode,
the
tape
does
not
stop
running
until
fast
forward
or
rewind
operation
is
completed.
STOP/EJECT
Button
(DECK 2
only)
...
Stops
tape
movement
of
DECK 2.
When
depressed
once,
it
unlocks
all
other
buttons
(except
the
PAUSE
button)
of DECK 2
and
stops
the
tape
movement.
When
depressed
a
second
time,
the
cassette
compartment
of
DECK 2
will
open
and
eject
the
cassette.
m
Cassette
Compartment
Lid
(DECK 2
only)
...
Depress
the
STOP/EJECT
button
of DECK 2 to
open
the
cassette
compartment.
To
close
the
compartment,
gently
push
the
compartment
lid. In
case
the
compart-
ment
does
not
close,
check
if
the
cassette
is
inserted
properly.
DO NOT
use
force.
4
i

PLAY
Button
(DECK 2
only)
..
.
For
playback
of
recorded
cassettes.
To
stop
tape
transport
temporarily
during
playback,
depress
the
PAUSE
button
of
DECK
2.
Playback
can
also
be
started
by
a
connected
audio
timer
. See page 10.
414
REC (Record)
Button
(DECK 2 only) .
..
Depress
the REC
button
and
while
holding
it,
depress
the PLAY
button
of
DECK 2 to record.
The
REC
button
will
remain
locked
if no
cassette
or
one
with
erase
guard
tabs removed is
inserted,
or
while
DECK 2 is in
the
playback
mode
with
the PLAY
button
depressed.
Never
force
this
button
.
To
stop
recording
temporarily
,
depress
the PAUSE
button
of
DECK 2.
When
recording
with
an
external
audio
timer,
depress
the POWER
switch
on
the
double
cassette
deck
to the
ON
position
and
depress
the
REC
button
and
while
holding
it,
depress
the PLAY
button
. The
connected
audio
timer
will
switch
the
power
on. For
details
see
page
10
.
4J)
REW (Rewind)
Button
(DECK 2 only)
...
Rewinds
tape
rapidly
to the
left
hand reel.
4J)
F-FWD (Fast Forward)
Button
(DECK 2
only)
...
Moves
tape
rapidly
to the
right
hand reel.
4»
PAUSE
Button
(DECK 2
only)
..
.
InstanHy
stops
tape movement
while
DECK 2 is in
either
recording
or
playback
mode. When the
button
is
depressed
a
second
time,
operation
is resumed.
NOTE:
~
When the PAUSE
button
of
DECK 2 is
depressed
,
while
DECK 2 is in the
fast
forward
or
rewind
mode, the
tape
does
not
stop
running
until
fast forward
or
rewind
operation
is
completed
.
4D
SYNCHRO START
Switch
(DECKS
1,2)
...
For
synchro
dubbing
from DECK 1 to DECK 2
or
for
recording
from
line
input
to DECK 2. Set
according
to
the
input
source
to be
recorded.
Also
to
select
sequen-
tial
playback
or
playback
from
both
DECK 1 and DECK
2.
SEQ.
PLAY
position
(button out): For
sequential
playback
from DECK 1 to DECK 2
or
from DECK 2 to
DECK
1,
or
for
record
i,ng from the
amplifier
through
LINE IN
jacks
to DECK 2.
DUBBING
position
(button
in): For
synchro
dubbing
from DECK 1 to DECK
2,
or
for
playback
from
both
DECK 1 and DECK 2.
4D
INPUT LEVEL
Indicators
(DECKS 1, 2)
...
Aid in
adjusting
optimum
recording
levels
with
the
SYNCHRO START
switch
released to the SEQ. PLAY
position
on
DECK 2.
They
may be
used
for
continuous
monitoring
to
provide
an
instantaneous
indication
of
channel
output
for DECK 1
and/or
DECK 2.
4D
INPUT LEVEL
Controls
(DECK 2 only)
...
For
independent
adjustment
of
each
channel's
record-
ing level for
precise
balancing
of
stereo
signals
with
the SYNCHRO START
switch
released to the SEQ.
PLAY
position
on DECK 2.
With
the SYNCHRO START
switch
depressed
to the
DUBBING
position
,
recording
level
cannot
be
adjusted
by the INPUT LEVEL
controls.
Signals
to be
dubbed
from DECK 1 to DECK 2 are
directly
recorded
on DECK
2.
41>
COUNTER
Numbers
(DECK 2 only)
...
Used as a
reference
when
recording
or
playing
back
tapes.
W RESET
Button
(DECK 2
only)
...
Resets tape
counter
to
"000
."
f])
DECK-2
TAPE SELECTOR
Switches
(DECK 2
only)
. . .
Select
proper
recording
bias
and
also
the
recording
or
playback
equalization
for
the type
of
tape being used.
-For METAL tapes,
depress
both
switches
.
For
Cr02
(chromium
dioxide
or
equivalent)
tapes,
depress
left-hand
switch,
and release
right-hand
switch
.
-For
NORMAL
(low noise,
ferric
oxide) tapes, release
both
switches.
NOTE:
Operation
of
tape
selector
for DECK is
automatic,
with no
external
setting
required
.
o
DOLBY'
NR
Switches
(DECKS 1, 2) .
..
The
DOLBY
ON/OFF
switch
activates
the
DOLBY
Noise
Reduction
System
dur
ing
recording
(DECK 2)
and
playback
(DECKS 1, 2).
Depress
to the ON
position
when
playing
back
a tape
recorded
with
Dolby NR.
The
DOLBY
B/C
switch
selects
either
the
DOLBY
B-
or
C-type
NR
with
the
DOLBY
ON/OFF
switch
in the
ON
position
.
To
select
Dolby
B,
depress
the
DOLBY
NR
sw
i,
tch
to
ON and release the
DOLBY
B/C
switch
to B
position
.
To
select
Dolby
C,
depress
the
DOLBY
NR
switch
to
ON and
depress
the
DOLBY
B/C
switch
to C
position.
The
DOLBY-C
indicator
will
light
up
when
Dolby
C po-
sition is
selected
.
NOTE:
When
dubbing
from DECK 1 to DECK
2,
the
Dolby
NR
circuits
are
automatically
set in the OFF
position
even
with
the
left-hand
DOLBY
NR
switch
depressed
to the
ON
position
or
both
DOLBY
NR
switches
depressed
.
• 'Dolby' and the
double-D
symbol
are
trademarks
of
Dolby
Laboratories
Licensing
Corporation
.
Noise I
Reduction
System
manufactured
under
license
from Dolby
Laboratories
Licensing
Corporation.
@)
DOLBY-C
Indicator
(DECKS
1,2)
...
Lights
up when both
DOLBY
NR
switches
are
de-
pressed
.
NOTE:
When
dubbing
from DECK 1 to DECK
2,
the
DOLBY-C
i
ndicator
will
go
out
even
with
both
DOLBY
NR
switches
depressed
.
fZ)
PHONES
Jack
(DECKS
1,
2) .
..
Provides for
headphone
monitoring
during
recording
(DECK 2) as well
as
listening
during
playback
(DECKS
1, 2).
5

CASSETTE TAPES
CHECKING THE CASSETTES
Before
inserting
a
cassette
into
either
deck,
make
sure
that
the tape has no
slack
. If the tape is
slack,
use
a
pencil
or
similar
object
to
take
it up on one
of
the reels. (Fig. 3)
TO INSERT A CASSETTE INTO EITHER DECK
Depress
the
STOP/EJECT
button
of
that
deck
.
Depress
it
again if
any
of the
other
buttons
were
in the
depressed
po-
sition.
Insert
the
cassette
with
the
full reel to the left
and
with
tape slots at bottom.
The
cassette
will
fit
into
the
cassette
compartment
only
in the
correct
position
.
Close
the
cassette
compartment
by
gently pressing
in on the lid
at top center.
TO
EJECT A CASSETTE FROM EITHER DECK
Depress
the STOP/EJECT
button
of
that
deck
. i2epress it
again if
any
of
the
other
buttons
were
in the
depressed
po
-
sition
and
eject
the cassette.
To
use the
other
side
of the
cassette,
turn
it over and
reinsert
it
into
the
cassette
com-
partment. "
;,.
RECOMMENDED CASSETTE TAPES
In
order
to
obtain
optimum
performance,
it is
essential
that
you
use
only
high
quality
cassette
tapes
.
The
bias
(DECK
2)
and
equalization
(DECKS
1,
2)
of
your
double
cassette
deck
are
adjusted
to
yield
excellent
results
if
used
with
brand
name tapes,
such
as
TDK, BASF,
Maxell
,
Scotch
,
Memorex, Ampex and Fuji. Use
C-30
,
C-60
and
C-90
cassettes
only
.
We
do not
recommend
the
C-120
cassettes
because
they
are
subject
to
mechanical
instability
and
proper
and
constant
tape
tension
cannot
be
controlled.
DOUBl CASS
TTE
FULL AUTOMATIC STOP SYSTEMS
Both
decks
have full
automatic
stop
systems.
After
one
side
of
a tape has
played
to the end, the PLAY
button
of
DECK 1
or
2 is released
by
the
automatic
stop
mechanism
and
the tape
stops
automatically
.
The
automatic
stop
mechanism
operates
in the RECORD mode (DECK 2),
PLAY,
REW
or
F-FWD modes (DECKS
1,
2).
TO STOP THE TAPE ON EITHER DECK
Depress
the
STOP/EJECT
button
of
DECK 1
or
2
once
in
any
mode: RECORD (DECK 2),
PLAY,
REW, F-FWD
(DECKS
1,2)
.
Fig. 3
SAFEGUARD AGAINST ACCIDENTAL ERASURE
Every time a
recording
is made on DECK
2,
the
previous
recording
on the tape is erased
automatically
.
To
prolect
valuable
recordings
from
accidental
erasure,
both
the
cassette
and
DECK 2
are
equipped
with
special
safe-
guards.
Cassettes
have two
tabs
on the back. If you
wish
to
pre-
serve the
recording
on a cassette,
break
out
the
tabs
with
a
knife
or
key. Remove tab A
at
the
right
to preserve
sound
on SIDE 1 and tab B for SIDE 2. (Fig. 4)
The
resulting
opening
interlocks
with
the REC
button
of
DECK 2.
The
REC
button
cannot
be
depressed
when
a
cassette
that
has
no
erase
guard
tabs
is
inserted
. If you
want
to
re-record
the tape, cover the
opening
with
adhesive
tape.
TABA Fig. 4
N
NOTE:
To
prevent damage to the
pinch
rollers,
always
depress
the
STOP/EJECT
button
before
switching
the
power
off
when
in the
recording
mode (DECK
2)
or
playback
mode (DECKS
1
and
2).
PAUSE BUTTONS
Both
decks
have
convenient
PAUSE
buttons
which
stop
the tape temporarily.
While
preparing
your
next
selection
or
program,
depress
the PAUSE button. When you
want
to
continue
recording
(DECK 2)
and/or
playback
(DECK 1
or
2),
depress
the PAUSE
button
again to release it.
When
the
tape
movement
has
to be
interrupted
for a longer
period
of
time,
depress
the
STOP/EJECT
button
to
prevent
tape
damage.
6

FAST FORWARD AND REWI'ND (DECKS 1 and
2)
To
skip
a
selection
on the tape,
depress
the
F-FWD
or
REW
button.
The
tape wi'" then
run
faster
than normal speed.
After
winding
or
rewinding
to
the
desired
program,
depress
the
STOP/EJECT
button.
When
the
beginning
or end
of
the
tape is l eached, the F-FWD
or
REW
button
will
release au-
tomatically
. .
3-DIGIT
TAPE COUN,TER (DECK
2)
This
counter
assists
you in
identifying
the
beginning
and
end of
each
recorded
selection
and
in
locating
a
specific
selection
quickly
. When
recording,
observe
the reading on
the
counter
at
the
start
and
finish
of
each
recording
and
note
this
on the
cassette
. To
set
the tape
counter
to
"000,"
push
the
RESET
button
.
AUTO
TAP"E
SELECT MECHANISM ON DECK 1
When a
cassette
is
inserted,
the
auto
tape
select
mecha-
nism is
activated
and
the
type
of
tape is
identified
by the
sensing
holes
of
the
cassette
.
Simultaneously,
the
optimum
equalization
for
the
inserted
tape is
adjusted
automatically
.
DECK-2
TAPE SELECTOR SWITCHES
This
double
cassette
deck
has two TAPE SELECTOR
switches
for METAL,
Cr02
and
NORMAL
tapes when
using
DECK 2. They
select
the
proper
recording
bias
and
also
the
recording
and
playback
equalization
for the type of
tape
being
used. For
best
results,
set to
correspond
to the
type
of
tape being used before
recording
or
playback
.
For METAL tapes
...
depress
both
switches.
For
Cr02
(chromium
dioxide
or
equivalent)
tapes ...
depress
left-hand
switch,
release righ,t-hand
switch
.
For
NORMAL
(low noise,
ferric
oxide)
tapes
..
.
\.
release
both
switches.
DOLBY·
NR SWITCHES (DECKS 1,
2)
Depress
to
the
ON
posHion for
recording
(DECK 2) and
playback
(DECKS
1,2)
to
improve
signal-to-noise
ratio.
The
Dolby
Noise
Reduction
system
consists
of
switchable
recording
(DECK
2)
and
playback
(DECKS 1, 2) Dolby NR
circuits
. If the
switches
are set
incorrectly,
optimum
perfor-
mance
will
not be obtained. For
instance,
if a tape
recorded
with
the Dolby NR
circuit
is
played
back
with
the
DOLBY
NR
switch
in the OFF position,
the
treble
will
be
excessively
emphasized, a'nd the
resulting
sound
will
not be
pleasing
;
or
if a tape
recorded
without
the
Dolby
NR
circuit
is played
back
with
the
DOLBY
NR
switch
in
the
ON
position, then
the
treble
will
be
suppressed
and
the
resulting
sound
will
be
unsatisfactory
.
This
unit
is
equipped
with t,he
Dolby
B-type
NR
system
for
decoding
and
playback
of
recorded
Dolby
B-type
NR
encoded
tapes.
In
addition
to Dolby
B-type
NR,
this
unit
also has
Dolby
C-type
NR. With a noise
reduction
capability
of
up
to
20
dB, Dolby
C-type
NR
virtually
eliminates
all tape
noise
.
Dolby
C-type
also
extends
the
dynamic
range and
frequen-
cy
response
for
noise-free
playback.
NOTE:
When
dubbing
from DECK 1 to DECK 2, the Dolby NR
cir-
cuits
are
automatically
set in the OFF
position
even
with
the
left-hand
DOLBY
NR
switch
depressed
to the ON
posi-
tion
or
both
DOLBY
NR
switches
depressed.
•
Dolby
is a registered
trademark
of Dolby
Laboratories
Licensing
Corporation.
ASF (Auto Search Function) System (DECK 1)
The
ASF logic
automatically
locates
program
selections
on
a tape by
detect
,ing the
silent
unrecorded
spaces
between
program
selections
on
the
tape. The
automatic
program
search
operation
differs
according
to the
direction
in
which
the ASF
mechanism
is made to
work
(fast forward
or
rewind).
• To
skip
the program you are
now
listening
to and move
onto
the
next
program:
Depress
the
F-FWO
button
w
~
th
the PLAY button
de-
pressed. When
the
ASF
mechanism
detects
a
silent
unrecorded
space, the F-FWD
button
releases
auto-
matically
and
play
begins.
To
s'
kip
several programs,
repeat
the
operation
.
•
To
listen
to the
same
program again:
Depress
the
REW
button
with
the PLAY
button
de-
pressed. When
the
ASF
mechanism
detects
a
silent
unrecorded
space, the REW
button
releases
automati-
cally
and
play
begins
.
• To
stop
the tape
temporarily
after
a program has been
located:
Depress
the
PAUSE
button
and
then
the
F-FWD
or
REW
button
with
the
PLAY
button
depressed
. When
the ASF
mechanism
detects
a
silent
unrecorded
space, the F-FWD
or
REW
button
will
release
automati-
cally
and the tape
will
stop.
Depress
the PAUSE button
again to resume
playback.
The ASF
cannot
detect
silent
spaces
less
than 4
seconds
long
and
t'herefore
will
not
operate
properly
in some
situa-
tions
.
For
example
:
When
the
spaces
between
selections
are too short.
When a high level of
noise
has been
recorded
between
selections.
When
music
with
extremely
quiet
passages is
record-
ed.
When
conversa
,
tions
wit
lh long
pauses
are
recorded
.
LISTENING TO CASSETTE TAPES WITH EITHER
DECK 1 OR DECK 2
First,
depress
the TAPE MONITOR
switch
of
the
amplifier
.
Make
sure
that
you turn
down
the
VOLUME
control
on
the
amplifier
before
operating
either
deck.
1.
Depress
the POWER
switch
of
the
amplifier
to
switch
on the
power
.
2.
Depress
the POWER
switch
of the
double
cassette
deck
to
switch
on the power.
3.
Depress
the
STOP/EJECT
button of DECK 1
or
2.
4. Insert a
pre-recorded
cassette
into
the
conlPartment
with
the
side
to be played
facing
you.
Close
the
com-
partment
lid.
5. When DECK 2 is used,
set
the
DECK-2
TAPE
SELECTOR
switches
according
to the
type
of
tape
being used (METAL,
Cr02
or
NORMAL). .
6.
Depress
the
left-hand
DOLBY
NR
switch
to the ON po-
sition
for
pre-recorded
cassettes
recorded
with
Dolby
Noise
Reduction
system.
If
playing
a tape
recorded
with
Dolby
C-type
NR,
depress
the
right-hand
DOLBY
NR
switch
to
the
C position. The
DOLBY-C
indicator
will
light
up. For all
other
pre-recorded
cassettes,
release the
left-hand
DOLBY
NR
switch
to
the
OFF po-
sition.
7. Depress
the
PLAY
button.
Playback
will
begin.
8.
Adjust
the
amplifier's
VOLUME, BALANCE and
GRAPHIC EQUALIZER
controls
to
your
preference.
7

9.
When
you
want
to
use
the ASF
system,
depress
the
F-FWD or REW
button
of
DECK 1. Refer to "ASF (Auto
Search
Function)
System."
1O.
To
stop
the
playback
temporarily,
depress
the
PAUSE
button.
Depress
it again to
resume
playback.
11. When
playback
of
one
side
is completed, the
deck
will
stop
automatically
.
Depress
the
STOP/EJECT
button,
turn
the
cassette
over and
reinsert
it to
play-the
other
side.
12. Release the POWER
switch
to
the
OFF
position
.
NOTE:
Be
sure
to release
the
TAPE MONITOR
switch
of
the
amplifier
after
playback
is
completed.
When DECK 1
and
DECK 2 are both in
the
playback
mode
with
the
SYNCHRO START
switch
depressed
to
the
DUBBING position,
recorded
material from DECK 1
and
DECK 2
will
be
reproduced
simultaneously;
how-
ever, the
sound
heard
will
be a
mixture
of DECK 1
and
DECK 2
programs
.
IMPORTANT NOTE:
During
playback
from both DECK 1 and DECK
2,
the
SYNCHRO START
switch
must
be in
the
DUBBING
position.
Do not release
the
SYNCHRO
START
switch
to
the
SEQ. PLAY
position
.
If
the
SYNCHRO START
switch
is released,
this
will
cause
the
motor
mechanism
on DECK 2 to
stop
and there is a
possibility
that
the
tape
may be
damaged
.
Also
, if the
STOP/EJECT
button
is
depressed
in
the above
condition
with
the
motor
mechanism
stopped,
the
cassette
compartment
lid
will
not
open. In
this
case, immediateloy
depress
the
SYNCHRO START
switch
to
the
DUBBING
p~si
tion.
SEQUENTIAL PLAYBACK
First,
depress
the
TAPE MONITOR
switch
of
the
amplifier
.
Make
sure
that
you
turn
down
the
VOLUME
control
on
the
amplifier
before
operating
both
decks
.
1.
Depress
the POWER
switch
of
the
amplifier
to
switch
on
the
power.
2.
Depress
the
POWER
switch
of
the
double
cassette
deck
to
switch
on
the
power.
3.
Depress
both
STOP/EJECT
buttons
.
4.
Insert
a
pre-recorded
cassette
into
each
compartment
with
the
side
to be played
facing
you.
Close
each
com-
partment
lid.
5. Set the
DECK-2
TAPE SELECTOR
switches
according
to the type of tape
being
used (METAL,
Cr02
or
NORMAL).
6.
Depress
the
left-hand
DOLBY
NR
switch
to
the
ON
po-
sition
for
pre-recorded
cassettes
recorded
with
Dolby
Noise
Reduction
system
. If
playing
a tape
recorded
with
Dolby
C-type
NR,
depress
the
right-hand
DOLBY
NR
switch
to
the
C position. The
DOLBY
-C
indicator
will
light
up. For all
other
pre-recorded
cassettes,
release the
left-hand
DOLBY
NR
switch
to the OFF
po-
sition
.
7. Be
sure
to release
the
SYNCHRO
START
switch
to
the
SEQ. PLAY position.
8.
Depress
the PLAY
button
on
either
deck.
For example,
depress
the PLAY
button
of DECK
1.
DECK 1
begins
playing
back.
9.
During
playback
on
PECK
1,
depress
the PLAY
button
of
DECK 2 to set to
standby
mode for
playback.
10.
Adjust
the
amplifier's
VOLUME, BALANCE and
GRAPHIC EQUALIZER
controls
to
your
preference
.
11
. To
stop
the
playback
temporarily,
depress
the
PAUSE
button
of
DECK 1.
Depress
it again to
resume
play-
back.
12. When
the
tape on DECK 1 is
wound
completely
to the
right hand reel, DECK 1
will
stop
automatically
and
DECK 2
will
begin
playing
back.
13.
After
DECK 2 has
started
playing
back,
depress
the
STOP/EJECT
button
of DECK 1,
turn
the
cassette
over
and
reinsert
it to
play
the
other
side
. Then
depress
the
PLAY
button
of DECK 1 to
set
to
standby
mode for
playback.
14. If you
want
to
play
back
the
same
side
of
the
tape on
DECK 1 again
during
playback
on DECK 2,
depress
the
SYNCHRO START
switch
to the DUBBING
position
and
depress
the
HEW
button
of DECK 1.
After
rewind-
ing
the
tape
completely,
DECK 1
will
stop
automatical-
ly. Then release the SYNCHRO START
switch
to the
SEQ. PLAY
position
again and
depress
the PLAY
button
of
DECK 1 to
set
to
standby
mode for
playback.
15. If the PLAY
button
of DECK 2
is
depressed
first, the
op-
eration
will
be reversed
(substitute
2 for 1 in the above
explanation)
.
To
play
back
sequentially
, repeat
steps
9 to
13
.
16.
To
stop
the
playback
completely,
depress
the
STOP/
EJECT
button
during
playback
.
17. Release
the
POWER
switch
to
the
OFF position.
RECORDING LEVEL ADJUSTMENT (DECK 2)
The
adjustments
of the
recording
level
with
the SYNCHRO
START
switch
released
to
the
SEQ. PLAY
position
on
DECK 2 have a great
effect
on the
recording
result. It is
im-
portant
that ,t'he level be set
as
high
as
possible
so
that
it is
very
close
to
the
saturation
level if
you
want
to
make
a
recording
with
minimal
distortion
and
tape hiss.
While
observing
the INPUT LEVEL
indicators,
adjust
the
recording
level
with
the INPUT LEVEL
controls
as
follows:
•
Optimum
Recording
Level:
Adjust
the
recording
level so
that
all
the
indicators
up
to
"0
dB"
light
during
the
loudest
portion
of
your
recording. (No
practical
problems
are posed even if all
the
indicators
up to
"+3
dB"
light
momentarily.)
•
Excessively
High
Recording
Level:
If all
the
indicators
up
to
"+6
dB"
light,
this
may
result
in
distorted
sound
being
recorded
on
the
tape.
•
Excessively
Low
Recording
Level:
If all the
indicators
up to
"-10
dB"
light
momentarily,
this
may
result
in
excessive
nOise being
recorded
on
the
tape.
CASSETTERECORDING WITH DECK 2
1.
Switch
the
power
on to all
components
being used.
2. Set
the
function
switch
on the
amplifier
to the program
source
you
want
to
record
: PHONO, TUNER, CD
or
AUX.
3. If
recording
from a tuner,
set
the
tuner's
band
button
to
FM
or
AM.
4. Release
the
SYNCHRO START
switch
to the SEQ.
PLAY pOSition.
5.
Depress
the
STOP/EJECT
button
of
DECK 2.
Insert
a
cassette
into
the
compartment
with
the
side
to be
recorded
facing
you. When
using
an
unrecorded
cassette,
the full reel
will
.be on the left
side
.
Close
the
compartment
lid.
8

6.
Set
the
DECK-2
TAPE SELECTOR
switches
according
to
the
type
of tape
being
used (METAL,
Cr02
or
NORMAL).
7.
Depress
the
r
eft-hand
DOLBY
NR
sw
i
tch
if you
wish
to
record
with
the noise
reduction
system. If you
wish
to
record
with the Dolby
C-type,
depress
the
right-hand
DOLBY
NR
switch
too. The
DOLBY-C
ir:!dicator
will
light
up.
8. Push the RESET
button
of
the tape
cou
nter
to
reset
to
"000."
9.
Depress
the
PAUSE
button
of
DECK 2.
10
.
Depress
the REC
button
and
while
holding
.it,
depress
the PLAY
button.
DECK 2 is now
ready
for
recording
.
11
. Adj,
ust
the
recording
level
with
the INPUT LEVEL
con-
trols
so
that
the
"a
dB"
INPUT LEVEL
indicators
are
il-
luminated
. Refer to RECORDING LEVEL ADJUST-
MENT
section
.
12
.
After
setting
the
proper
recording
levels,
start
record-
ing by
depressing
the PAUSE
button
a
second
time.
You are now
recording.
If you wish to
stop
record
ing
temporarily
without
resetting
the REC
and
PLAY
but-
tons,
depress
the
PAUSE button.
Depress
the PAUSE
button
again to
resume
recording
.
13
.
When
recording
is
finished,
depress
the
STOP/EJECT
button
once. If the tape
is
wound
completely
to
the
right
hand
reel
while
recording
, DECK 2 will
stop
auto-
matically
.
14. To
record
side
2 of the tape,
depress
the
STOP/EJECT
button
twice
to
eject
the
cassette.
Turn the
cassette
over,
reinsert
it and
close
the
compartment
lid. To
begin
recording
again,
repeat
steps
6 to 13.
15
. Release
the
POWER
switch
to the OFF
position
.
ERASURE (DECK
2)
During
recording
with
DECK
2,
all·
previously
~ecorded
material is
erased
automatically
. If you
wish
to erase
with-
out
recording
new
material,
follow
this
procedure:
1.
Insert
the
cassette
property
with
the s,ide to be
erased
facing
you.
2. Release the SYNCHRO START
switch
to the SEQ.
PLAY
position
.
3.
Slide
the
LEFT
and
RIGHT INPUT LEVEL
controls
to
the
"a"
position
.
4.
Set
the
DECK-2
TAPE SELECTOR
switches
according
to
the
type of tape
being
used (METAL,
Cr02
or
NORMAL).
5.
Depress
the REC
button
and
while
holding
it.
depress
the PLAY
button
of DECK
2.
The
side
of the tape
facing
you
will
be
erased
.
6.
To
stop
tape
transport
,
depress
the
STOP/EJECT
button
of
DECK 2.
7.
To
erase
the
other
side,
turn
the
cassette
over
and
repeat
steps
1
through
6.
SVNCHRO DUBBING F,ROM DECK 1
TO
DECK 2
First.
depress
the
TAPE MONITOR
switch
of
the
amplifier
.
Make
sure
that
you turn
down
the VOLUME
control
on the
amplifier
before
operating
both
decks
.
1.
Depress
the
POWER
switch
to
the
ON position.
2.
Depress
the
SYNCHRO
START
switch
to the
DUBBING
position
.
3.
Depress
the
STOP/EJECT
button
of
DECK 1.
Inse
rt a
pre
-
recorded
cassette
into
the
compartment
with
the
side
to be'
played
facing
you.
Close
the
compartment
lid
of
DECK 1.
4. Depress the
STOP/EJECT
button
of
DECK 2.
Insert
a
cassette
into
the
compartment
with
the
side
to be
recorded
facing
you. When
using
an
unrecorded
cassette, t'he
fu
II
reel
will
be on
the
left
side
. Close the
compartment
,lid
of
DECK 2.
5. Set the
DECK-2
TAPE SELECTOR
switches
according
to the type
of
tape
being
used
(METAL,
Cr02
or
NORMAL).
6. Push
the
RESET
button
of
the tape
counter
to
reset
to
"
000."
7. To set to
standby
mode for
synchro
dubbing,
depress
the REC
button
and
while
hold
ing it,
depress
the
PLAY
button
of
DECK 2.
8.
Start
synchro
dubbing
by
depressing
the PLAY
button
of
DECK 1. You
are
now
dubbing.
9. To
stop
dubbing
temporarily,
depress
the PAUSE
button
of
DECK 1. DECK 1
and
DECK 2
will
stop
simul-
taneously
.
Depress
the
PAUSE
button
of
DECK 1 again
to
resume
dubbing.
10
.
During
dubbing,
to
use
the ASF
system
on DECK
1,
depress
the
F-FWD
or
REW
button
of
DECK
1.
During
ASF program
search
operation,
DECK 2 is
set
auto-
matically
to the
standby
mode.
After
program
search
is
completed
, DECK 2
starts
automatically
and
synchro
dubbing
will
resume
.
11
. When
dubbing
is
finished
,
depress
the
STOP/EJECT
buttons
of
DECKS
1
and
2 once. If the tape is
wound
completely
to
the
right
hand
reel
while
dubbing,
DECKS 1
and
2
will
stop
automatically
.
12
.
To
dub
side
2 of
the
tape,
depress
the
STOP/EJECT
buUons of DECKS 1
and
2
twice
to
eject
the
cassettes.
Turn
the
cassettes
over,
reinsert
them
and
close
the
compartment
lids. To begin
dubbing
again,
repeat
steps
5 to 11.
13. Release the POWER
switch
to the
O~F
position
.
NOTE:
When
dubbing
from DECK 1 to DECK
2,
the
Dolby
NR
circuits
are
automatically
set
in
the
OFF
position
even
with
the
left-hand
DOLBY
NR
switch
depressed
to
the
ON
position
or both
DOLBY
NR
switches
depressed.
When
a tape
recorded
with
the
Dolby
NR
system
is
played
back
with
DECK
1,
the
Dolbyized
sounds
are
directly
dubbed
into
DECK 2. However,
the
sounds
reproduced
through
the
speakers
connected
to
the
amplifier
and PHONES
jack
will be
excessively
empha-
sized in the
treble
range
while
the
dubbing
process
is
in
progress
.
The INPUT LEVEL
indicators
show
the
playback
level
of
DECK 1
during
dubbing.
IMPORTANT NOTE:
In case
the
length
of
the
tape
inserted
in DECK 1 is
shorter
than
that
of
the tape
inserted
in DECK 2,
the PLAY
button
of
DECK 1
is
released
automati-
cally
at
the
end
of
the
tape
and
the
recording
oper-
ation
will
stop
simultaneously.
To
stop
DECK
2,
depress
the
STOP/EJECT
button
of
DECK
2.
If the length or the tape
inserted
in DECK 2
is
shorter
than that
of
the tape
inserted
in DECK 1,
the RECORD and
PLAY
buttons
of
DECK 2
will
be
released
automatically
at
the
end
of
the tape.
But
DECK 1
will
continue
to
play
back
until
it
reaches
its
end.
9

OPIERATING DECK 2 WITH AN EXTERNAL AUDIO ·
TIMER
1.
Switch
the
power
on to all
components
being used.
2. Set the SYNCHRO START
switch
to the SEQ. PLAY po-
sition
.
3.
Insert
a
cassette
with
the full reel on
the
left
side
.
4.
Depress
the PAUSE
button
of
DECK 2.
The"
depress
the REC
button
and
while
holding
it,
depress
the PLAY
button
of
DECK 2.
5.
Select
the program to be
recorded
and
adjust
the
recording
level. See CASSETTE RECORDING WITH
DECK 2
section
for
details
on
recording
procedure
.
6.
Depress
the STOP/EJECT
button
of DECK 2
after
set-
ting
the
recording
level.
Depress
the PAUSE
button
a
second
time, and then release the POWER
sw
i
tch
to
the OFF
posit
ion. Then
depress
the REC
button
and
while
holding
it,
depress
the
PLAY
button.
7. When you play
!b
ack
a
pre-reco
rded
cassette
using
'an
audio
timer,
insert
the
cassette,
release
the
POWER
switch
to the OFF position, and then
depress
the PLAY
button
of
DECK
2.
8. Refer to the
operating
instructions
manual
supplied
with
the
audio
timer.
9. Set
the
start
and
end
times on
the
audio
timer for
recording
or
playback
operation.
NOTE:
If you
use
a
C-60
cassette
you have
approximately
30
minutes
of
recording
time per side. The timer time
in-
terval
should
be set for more than
30
minutes
in
order
to
fully
recor
d the
30
minute
tape
.
After
the tape has
been
fully
recorded,
the
deck
will
switch
off
automati-
cally
.
10
. Set
the
timer
to
standby
mode (no
power
supplied
to
switched
AC
outlets)
.
11.
Connect
the
amplifier
to
the
switched
AC
outlet
on the
timer.
12
.
Depress
the
POWER
switch
on
the
double
cassette
deck
to
the
ON
position
.
NOTE:
The
power
to the
double
cassette
deck
will
now be
sup-
plied by the timer, and
the
double
cassette
deck
will
start
to
operate
once
the
timer
has
switched
on at
the
preset
time.
Before
the
double
cassette
decK is
prepared
for
timer
play-
back
or
timer
record
operation,
make
certain
that
the timer
sw
i
tch
is in the
standby
mode.
MAl
TENANCE
Please
remember
that
your
double
cassette
de
ck
is a These
particles
may be removed
with
a
cotton
swab
sensitive
electro-mechanical
device
which
needs
occa-
moistened
with
isopropyl
alcohol
or
special
head-
sional maintenance.
cleaning
fluid.
To
do
this
properly,
depress
the STOP/EJECT
buttons
of DECKS 1 and 2 to open the
cassette
compartments
.
Remove
any
cassettes
still
in the
compartments
and
WARNING:
switch
off
the deck.
Carefully
rub
the face
of
the heads
with
alcohol.
Also
clean
the
surfaces
of
the
capstans
FOR YOUR PERSONAL SAFETY DISCONNECT and
pinch
rollers
. (Fig. 5)
THE UNIT FROM THE AC POWER LINE BEFORE
PROCEEDING WITH CLEANING
OR
LUBRICA- 2.
Cleaning
the
cabinet
and viSible metal
parts
...
TION. Use a
clean
soft
cloth
moistened
with
.plain
lukewarm
water. Never use benzol,
benzine
or
other
strong
chemical
cleaners
since
these
could
damage the
1.
Cleaning
the heads,
pinch
rollers
and
capstans
...
finish
of
your
uni,
t.
It is
important
that
no
liquid
reaches
To
assure
continued
high
performance
from
your
the
inSides of the
double
cassette
deck
.
double
cassette
deck
,
periodically
clean
the heads,
pinch
rollers and
capstans
whenever
an
accumulation
of
dust
and
red-brown
oxide
particles
is
noticed
.
DUMMY
HEAD
DECK 1
DECK2
PLAYBACK HEAD PINCH ROLLER RECORD/PLAYBACK HEAD PINCH ROLLER
Fig.S
10

OUBLE HOOTI G
GU
DE
If you have followed the
instructions
in the CONNECTING and CONTROLS sections, and have
difficulty
operating
your
double
cassette deck, locate the SYMPTOM in the left column below.
Check
the
corresponding
POSSIBLE CAUSE and
CORRECTIVE ACTION
columns
to locate
and
remedy the problem.
SYMPTOM POSSIBLE CAUSE
No tape transport. The double
cassette
deck
is not plugged in
properly.
Cassette
is not inserted
properly
.
PAUSE button Is
depressed
.
No
playback
. The double
cassette
deck
is not
connected
properly.
The
amplifier
is not
set
properly
.
Recording
is
not
possible. Erase guard tabs on the
cassette
have been
removed.
The
double
cassette
~ck
is not
connected
properly.
INPUT LEVEL
controls
are
at
minimum
position
when
uSiFlg
wnh DECK ?
Tape heads are dirty.
SYNCHRO START
switch
is not
set
properly.
Playback
distorted.
Input
level too high.
DECK-2
TAPE SELECTOR
switches
In
the
wrong position when using with DECK
2.
Using the wrong type of tape for
this
double
cassette
deck.
Poor high
frequency
DECK-2
TAPE SELECTOR
switches
in the
reproduc
tion.
wrong
position when using with DECK
2.
Wrong type
of
tape.
Tape heads are dirty.
PreviOUS
recorded
material Tape heads are
dirty
.
is not
or
only
partly erased.
Recordings
have Tape heads are dirty.
background
noise.
CORRECTIVE ACTION
Check
if the power
cord
is plugged in properly.
Insert
the
cassette
properly.
Depress the PAUSE button again.
Check
cables
between the double
cassette
deck
and
amplifier.
Depress the TAPE MONITOR
switch
on amplifier.
Use another cassette,
or
cover the opening with
adhesive tape.
Check
connections
between the
double
cassette
deck
and amplifier.
Slide INPUT LEVEL
controls
to the
correct
level.
Clean the heads.
Set SYNCHRO START
switch
to the
correct
position
.
Re-record
at
proper
level.
Set to the
correct
type
of
tape.
Change over to the proper type of tape.
Set to the
correct
type
of
tape.
Change to the
proper
type of tape.
Clean the heads.
Clean the heads.
Clean the heads.
11

IPS FOR SAFE OPERATION...
1. Location:
For safe operation and
satisfactory
performa-n.ce of the
double
cassette
deck, keep the
following
,in mind
when
selecting
a
place
for its installation.
•
Shelter
it from
direct
sunlight
and keep
it
away from
sources
of
intense
heat.
• Avoid
dusty
and
humid places.
• Avoid
places
where
there is not enough ventilation
for heat
dissipation.
2. When handling the
power
cord:
• Do not handle the power
cord
with
wet
hands.
• Do not pull on the
power
cord
when
disconnecting
it
from the AC wall outlet.
Grasp
it at the plug.
3.
Avoiding the hazards of
electrical
shock
or fire:
If,
by
accident,
water
is
spilled
on the
double
cassette
deck,
unplug
the power
cord
immediately and have the
unit
serviced by FISHER-authorized personnel. See
Item 5.
4. Cleaning:
Wipe the
front
panel and other
exterior
surfaces
of the
double
cassette
deck
with
a soft,
dry
cloth.
Stains
should
be removed
by
wiping
the
surfaces
with
a soft cloth immersed in lukewarm water and
wrung
dry.
Never
use
a
solvent
or alcohol. Do not
spray
insecticide
liquid near the
double
cassette
deck.
Such
chemicals
may
cause
surface
discoloration
and
cracking.
5. Servicing:
Should
this
double
cassette
deck
require service,
refer to the Fisher
service
station
list
supplied
with
the
unit.
If you
do
not have a
convenient
Fisher
service
station
nearby,
write
to the
Fisher
dealer
where
you
purchased
the unit. Be
sure
to give the model
number
and
explain
the problem. The
dealer
will
advise you how to obta1in
service.
~FISHER
®
THE
FIRST NAME IN HIGH FIDELITY
efOub-eftomlad®
FISHER CORPORATION,
21314
LASSEN ST,
REET.
CHATSWORTH CALIFORNIA
91311
Copyright
1984.
Fisher
Corporation. All
Rights
Reserved.
Printed
in
Japan
1426-4119-32162
CR-W50.
Issue
Number
1.
Table of contents
Other Fisher Cassette Player manuals