Fitbug FB929 User manual

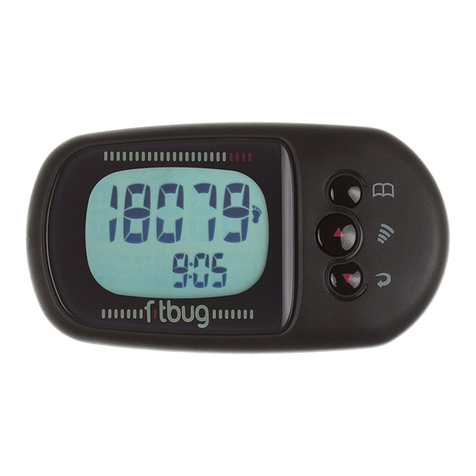
Fitbug FB929
User Manual
EN
Introduction
Thank you for selecting the Fitbug FB929 pedometer. The FB929 pedometer is a sensor-type that
can detect steps in any dimension it is carried. It comes equipped with internal clock, 14-day
memory, step counter, distance counter and calorie counter functions, which are all displayed on
the screen of a compatible Bluetooth Smart device.
Control Buttons
1. SET: The Setup button found on the front of the FB929 is used to pair the pedometer with a
compatible Bluetooth Smart device.
Getting Started
Activate Pedometer (First-time use only)
Once you have inserted the battery, hold the button on the front of the Orb for five seconds. An
orange light indicates that the Orb is working.
Pair your Orb with your Fitbug account via the Fitbug app, which you can download from iTunes
Please see https://www.fitbug.com/setup/orb for more setup details.
Carrying the Pedometer
The FB929 pedometer can be carried on the waist, worn on the wrist, around the neck, discreetly
attached to your underwear using a clip, in a pocket/handbag by using the various accessories
available.
Set time and user data
To effectively use the pedometer for calculating calories burned (based on step count and user body
weight) and distance walked (based on step count and length of user’s stride), you are advised to set
your user data in the Setting Mode of the app. Refer to https://www.fitbug.com/setup/orb for more
details.

Battery replacement
The pedometer uses a CR2032 3V battery, which you need to install prior to use. Insert into the back
of the FB929, replace the lid and twist back into place using a small coin.
A red light flashing three times after you have pressed the button to start a mode indicates battery
power is low. A low battery is also indicated on the app in the Device Setup tab.
To replace battery:
1. Use a small coin to remove the battery compartment lid at the back of the pedometer.
2. Remove the old battery and insert the new one, matching the polarities.
3. Replace the lid by twisting it back into place using a small coin.
NOTE: When the battery compartment is opened or battery is replaced, that day’s steps and all the
setting mode data in the pedometer will be reset. The device will not have to be paired again but all
the setting modes e.g. date, time, stride length will have to be reset within the Fitbug app.
Operation modes
The FB929 has 3 modes of operation. The Main Mode is displayed on the front page of the app. The
current step count and time are displayed on the app. To enter other modes, select the Settings tab
on the Fitbug app.
Main Mode
Once data has been sent from the FB929, in the Main Mode you can:
View the time and step count, calories burned, distance walked and walking speed.
To view the current total steps, aerobic steps, total time, aerobic time, calories burned and distance
walked, swipe between the two screens in the Today tab.
Setting Mode
In the Setting Mode - Device Setup on the app –you can set the stride length, weight, stride
extender ON/OFF, beaconing ON/OFF, beaconing interval.
Refer to https://www.fitbug.com/setup/orb for more information on how to pair and setup the
FB929.
REMARK
When the stride extender is turned on the device will adjust your stride length according to your
steps per minute rate.

When beaconing is turned on the device will attempt to transmit step data to a receiving station
within range. You can set how often the device will do this on the Fitbug app.
Memory Mode
The Memory Mode is displayed on the Fitbug app. You can send up to 14-days of steps and calories
burned to Fitbug app. Tap on the History tab of the Fitbug app to view all your aerobic steps and
total steps.
To reset records:
You cannot reset the records manually. The pedometer is designed to automatically reset the
records.
Data Transfer
To help users keep track of the results, all the measurements recorded by the FB929 are uploaded to
the Fitbug app and network for viewing and analysis.
There are three ways to send data from the FB929:
On-demand Mode
Click the button once so the light goes green, which indicates the data has been pushed to the app.
The light will switch off once all the data has been sent.
Stream Mode
Click the button twice and the green light will blink every five seconds to indicate that the steps are
being streamed in real-time to the Fitbug app.
Beacon Mode
Sends steps to your app at regular intervals (every 15, 30, 45 minutes). Select Beacon Mode on the
Device Setup page after choosing the Orb from the paired devices list on Devices page.
Sleep Mode
Click three times on the button, the green light will blink every second for five seconds to indicate
sleep mode is on. Please use inserted into the wristband and wear on your wrist. Turn Sleep Mode
off when you wake up by pushing the button and holding until the green light blinks every second
for five seconds.
Note: Sleep Mode will turn off automatically once it has registered that you have walked 50 steps.
Refer to https://www.fitbug.com/setup/orb for more information.
Important
There is a 14-day limit for memory. To prevent records being erased before being uploaded to the
network, users are reminded to send data every few days.

Specifications
Real time clock
12 / 24 format with hour/minute
Step measurement range
0 –99,999 steps
Distance measurement range
0 –999.99 km / miles
User adjustable stride length
28 –152 cm (11 –60 inches)
Calorie measurement range
0 –99,999 kcal
Body weight range
29 –250 kg (64 –553 pounds)
Power
1 x CR2032 3V battery
Operating temperature
-10C to 40C (14 F to 104F)
Storage temperature
-20C to 60C (-4F to 140F)
Precautions
To ensure you use your product correctly and safely, read these warnings before using the product:
Use a soft, slightly moistened cloth to clean. Do not use abrasive or corrosive cleaning agents, as
these may cause damage. Use lukewarm water and mild soap to clean the device. The FB929 is
splash-proof but do not use the product in hot water or store it when wet.
The FB929 is NOT waterproof.
Do not subject the FB929 to excessive force, shock, dust, temperature changes, or humidity. Never
expose the product to direct sunlight for extended periods. Such treatment may result in
malfunction.
Do not tamper with the internal components. Doing so will terminate the product’s warranty and
may cause damage.
Changes or modifications not expressly approved by the party responsible for compliance could void
the user’s authority to operate the equipment.
This equipment has been tested and found to comply with the limits for a Class B digital device,
pursuant to Part 15 of the FCC Rules. These limits are designed to provide reasonable protection
against harmful interference in a residential installation. This equipment generates, uses and can
radiate radio frequency energy and, if not installed and used in accordance with the instructions,
may cause harmful interference to radio communications. However, there is no guarantee that
interference will not occur in a particular installation.
If this equipment does cause harmful interference to radio or television reception, which can be
determined by turning the equipment off and on, the user is encouraged to try to correct the
interference by one or more of the following measures:
-- Reorient or relocate the receiving antenna.
-- Increase the separation between the equipment and receiver.
-- Connect the equipment into an outlet on a circuit different from that to which the receiver is
connected.

--Consult the dealer or an experienced radio/TV technician for help.
This device complies with Part 15 of the FCC Rules. Operation is subject to the following two
conditions: (1) this device may not cause harmful interference, and (2) this device must accept any
interference received, including interference that may cause undesired operation.”
Table of contents
Other Fitbug Pedometer manuals
Popular Pedometer manuals by other brands
Accusplit
Accusplit Eagle AE1590M12 operating instructions

Sportline
Sportline Walking Advantage 350 instruction manual
Golden Smart Home Technology
Golden Smart Home Technology LS405-B user manual
HighGear
HighGear Fitware Series Care and maintenance
Jula
Jula 950-123 operating instructions

Weight Watchers
Weight Watchers PointsPlus user guide
