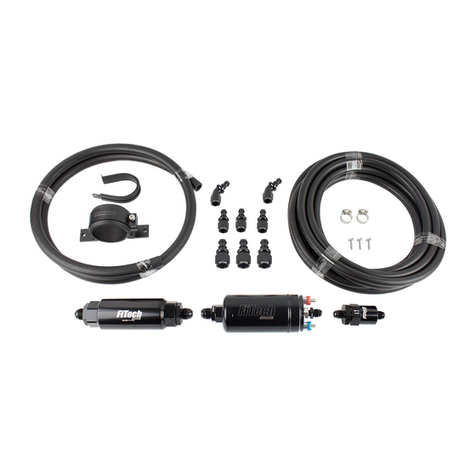
FiTech 50019 User manual

1
Instructions # 50019/50020
Go Fuel In-Tank Retrofit Kit
NOTE: This In-Tank Fuel Pump Kit can be used with any EFI or carbureted
application when the proper bypass regulator is used.
Warning: Caution must be observed when
installing any product involving fuel system parts
or gas tank modifications. Work in a well-
ventilated area with an approved fire extinguisher
readily available. Eye protection and other safety
apparel should be worn to protect against debris
and sprayed gasoline. We recommend having
this installation performed by an experienced,
qualified, and FiTech approved automotive
technician. The finished installation must be
thoroughly checked for any fuel system leaks.
The fuel system is under pressure, so be sure to
relieve the pressure before opening the fuel
system. All safety precautions must be observed
when working with fuel.
Caution: Before starting this installation be sure
the negative terminal is disconnected from the
battery, you have proper eye protection, a fire
extinguisher handy, and that you are working with
a clean and free of combustible fumes fuel tank.
The installation of fuel related components should
be done in a well-ventilated area free of any
possible fire hazards. Gasoline fumes are toxic
and highly flammable. Drilling and grinding can
be a potential ignition source. Smoking is
prohibited and extinguish any open flames. Start
with a new fuel tank or have the fuel tank
professionally cleaned for the safest install.
Failure to comply with these warnings could result
in injury or death.
This instruction manual isdesigned to get you upand running with your FiTech GoFuel In-Tank Fuel
Pump Kit. Please read thefull instruction manual before beginning your installation. For technical
assistance with your FiTech GoFuel In-Tank Kit, call 951-340-2624 or email techmail@fitechefi.com
Kit Contents
1. Pump Main Assembly
2. Thin Foam Gasket
3. Thick Foam Gasket
4. C-Ring
5. High Flow Fuel Pump (qty
2 in 50020 Kit)
6. (12) #14 Sealing washer
7. (12) 1/4-20 x 1.5" allen bolt
8. (2) 1/4-20 x 3" threaded
stud
9. (2) 1/4-20 nut
10. Fuel Hose Clamp (qty 2
in 50020 Kit)
11. (2) Electrical connectors
(qty 4 in 50020 Kit)
12. (2) Rubber Boots (qty 4
in 50020 Kit)
13. Filter Sock V1 (qty 2 in
50020 Kit)
14. Pump mounting clamp
(qty 2 in 50020 Kit)
15. Filter Sock V2 (qty 2 in
50020 Kit)
Unpack the kit
Carefully unpack the components of your # 50019/50020 kit. Lay parts
out on table and compare with Kit contents above to confirm all parts are
in kit.

2
Recommended Tools
•Slow Speed Drill Motor
•4 1/4"DiameterHole Saw
•Round fine file
•Shop Vacuum
•3/16 Allen Wrench
•Screwdriver: Flat Head
•Hack Saw
•3/8 and 5/16 Wrench
•9/32"Diameter Drill Bit
(Optional)
IMPORTANT Special Instructions
•For extended fuel pump life never let car go below 1/8th tank of gas.
•If using hard fuel lines make sure to use high pressure EFI rated lines and flared
fittings.
•Make sure that you remove ALL low-pressure flex joints on factory fuel lines and
replace them with EFI rated fuel hose and use proper flared connections and
clamps. Be careful not to mix 45° SAE fitting and 37° AN fittings, they look similar
but will not work together. 45° SAE fittings usually come from a hardware store or
auto parts store while 37° AN fittings are the ones supplied by FiTech and most
speed shops.
• Use at least a 3/8" ID hose for a return line.
•FiTech does not recommend aluminum fuel lines EVER! Use EFI high pressure
fuel hose on any plumbing in your system where high pressure is present.
•If using Push-Lok style hose and fittings in your fuel system, make sure all parts
come from the same manufacturer. Mixing brands of hose ends and hose could
cause leaks.
•FiTech's EFI systems are designed for use with unleaded pump gasoline. Leaded
gasoline is not recommended for safe operation.
•Relieve the pressure from within the system before opening the fuel system.
•Very important note: Your fuel tank must have a vent or use a vented cap to
prevent pressure building up inside the tank!
Features
The FiTech Go-Fuel In-Tank Pump Module isdesigned for almost any fuel tank
depending on depth. By mounting the fuel pump in the appropriate position on the
return tube, itcan be installed in tanks ranging from 7to 15 inches in depth. Note that
these instructions and this kit address installation in baffled fuel tanks (Sock Version
#1) as well as stock fuel tanks (Sock Version #2).The system comes with a high flow
fuel pump or pumps.These pump flow 340 LPH which is good for up to 800 HP in
naturally aspirated applications. Properly mount fuel pump with proper fuel tank sock to
ensure clean fuel, extended fuel pump life, and a steady pickup to the pump. If
necessary, replacement parts are available from: www.FiTechEFI.com

3
Caution: Wear eye protection and ensure tank is free of
combustible fumes!! Have a radiator shop boil out the
tank.
If installing into Fuel Cell with 12 Bolt Flange already drilled
skip to Installing the C-Ring on next page.
Drilling the hole:
1. The In-Tankassembly must be installed into the top side of the fuel tank.
2. Before beginning to cut the 4 1/4"diameter hole, determine a location to drill the
hole in a central position on the fuel tank. Use the C-ring to help choose the
location. Try tofind a flat area of the tank. If this isnot possible due to ribs in the
tank, the supplied thick foam gasket will be required for the installation.
3. In selecting your hole location, be
sure to avoid the stock fuel level
sending unit assembly and stock
fuel pump pickup.
4. With the C-ring in position, mark a
spot in the center of the ring.
Using a scribe, you can scribe a
circle around the inside of the C-
ring and then measure from the
scribed line to find the center
point.
5. Now, you are ready to begin your
cut, drill a 1⁄4" pilot hole in the
center of the X spot. (Figure 1)
6. Then using a slow speed drill with
a 4 1/4"hole saw, cut a hole in the
tank. (Figure 2) Caution edges will
be sharp once hole iscut through
the fuel tank.
7. Remove the cut piece and use a
file to deburr the sharp edges.
Figure 1
Figure 2

4
Installing C Ring
1. Place and center C-Ring on top
of recently cut hole. Use the C-
ring as a template, to mark the
(12) 9/32" holes in the tank. Set
C-ring aside, drill and deburr the
holes. (Figure 3)
2. Thoroughly clean the tank to
remove all ofthe metal chips and
debris inside and outside of the
tank. Prior to final installation, it is
important that the inside of the
tank istotally clean.
3. Screw the 2 threaded rods into
two holes opposite of each other
on the C-ring. Slide the C-Ring
into the 4 1/2" diameter hole
(Figure 4 & 5) inserting the
threaded rods back up through
the drilled holes. Then install the
Foam Gasket
(Item 3) as shown in Figure 6.
See Figure 20 on page 9 for
proper assembly ofthese parts.
5. Snap the Filter Sock (Item #14) onto the end of the Fuel Pump.
Figure 3
Figure 4
Figure 6
Figure 5

5
6. Measure depth of tank and
determine where pump needs to
be positioned vertically (Figure 7.)
Once you have determined proper
pump location so that filter sock
will be within an 1/8" of the bottom
of the tank when installed, cut the
opaque hose and metal support
rod to the desired length (Figure 8
& 9.) Using a heat gun, heat the
end of the hose that will go onto
the fuel pump (Figure 14). Push
the heated hose onto the outlet
nipple of the pump. Note: Be sure
to push straight and evenly. Do
not force as pump nipple can
break. If hose is not fully on pump
nipple, reheat hose prior to
pushing further.(Figure 17)
Secure with a hose clamp. (Item
10)
7. Determine the correct length of
the black return hose. It should be
long enough to be about 1/4" off
the bottom of the tank. Cut hose
at a 45-degree angle.
8. Locate the pump against the
support bracket and secure into
position with two Tie Wraps (Items
15). Make sure Tie Wraps are
pulled tight. See Figure 16. Plug
the electrical connector onto the
fuel pump.
9. Insert Pump Assembly into tank. Lower down
over the threaded rods and use 1/4-20 nuts to hold
module into place.(Figure 10)
10. Install allen bolts with sealing washers into the
open 10 holes. Remove the two threaded rods and
install the last two allen bolts. Tighten securely
using a crisscross pattern to tighten module down
evenly.
Figure 7
Figure 8
Figure 9
Figure 10

3-Year Limited WarrantyonFiTechEFISystems
3-Year Limited Warranty on FiTech EFI Systems FiTech extends the following limited warranty to the original purchaser of a FiTech EFI system
purchased after November 1, 2022. FiTech warrants its products against defects in materials and workmanship, under normal use and service for 3 years
from the date of original purchase. This applies only to the original purchaser and the parts must remain installed on the original vehicle for which they
were purchased. This warranty is void if the product was improperly installed, was installed on a vehicle for which it was not designed, if it was modified in
any manner, or was removed from the original vehicle and reinstalled on another vehicle. Coolant temperature sensors and oxygen sensors are not
covered under this warranty. This warranty shall not apply to any product installed improperly, or contrary to FiTech's instructions, altered, misused,
repaired or damaged from an accident, collision, or willful or negligent act. To make a claim under the terms of this Warranty, the original purchaser must
contact FiTech tech support. If FiTech tech support deems the product in need of warranty service, proof of original purchase will be required. Purchaser
must call FiTech Technical Support
(951-340-2624) option 2 or email:[email protected], to obtain a Returned Material Authorization (RMA). Proof of purchase must clearly show the
place of purchase, purchase price, product purchased, and date of purchase. Purchaser needs to register their product here: https://fitechefi.com/
warranty-registration or using the mail-in registration form found in the product box. FiTech's 3-Year Limited Warranty does not cover factory refurbished
parts, this warranty is only valid for new purchases from an authorized dealer. FiTech's liability is expressly limited to replacing or repairing the defective
part or parts (refunds are not covered under FiTech's 3- year Limited Warranty). FiTech will have no liability for the cost of installation or removal of the
defective product or for the cost of labor or any additional parts required to complete the installation of the replacement product. FiTech is not responsible
for any shipping charges accrued during the warranty process/claim. In no event will FiTech be liable for any indirect, special, incidental, or consequential
losses or damages (including but not limited to interruption of business or loss of business or profit) resulting from the use or inability to use the product,
any breach of warranty, or any defect in the product, even if FiTech shall have been advised of the possibility of such potential damages or losses. Some
states do not allow the exclusion or limitations of incidental or consequential damages, so the above limitation or exclusion may not apply to you. This
warranty gives you specific legal rights. You may also have other rights which vary from state to state. If the product is in the FiTech facility for repair, the
amount of time the product is in repair will be added to the existing warranty period. In the event that your EFI System that is under warranty is in for repair
and FiTech has authorized a replacement, and if that EFI System has been discontinued, FiTech will replace it with a similar product for the same
application. The replacement EFI System will maintain the existing warranty period of the original EFI System.
California Proposition 65 Warning: This product may contain one or more substances or chemicals known to the state of California to cause cancer, birth
defects, or other reproductive harm.
FiTech Fuel Injection •12370 Doherty Street • Suite A • Riverside, CA 92503
Phone: 951-340-2624 •Email: techmail@FiTechEFI.com • Website:
www.FiTechEFI.com
6
Filler Neck Extensions Available!
50019-2 2 Inch Extension
50019-3 3 Inch Barb
50019-4 4 Inch Extension
This manual suits for next models
1
Table of contents
Other FiTech Water Pump manuals
Popular Water Pump manuals by other brands
Clarke
Clarke MSP12 manual
PONDTEAM
PONDTEAM Superflow Techno Pro 10000S Instructions for use

Moog
Moog RKP-II user manual

Franklin Electric
Franklin Electric LittleGIANT VCMX Series owner's manual
MULTIQUIP
MULTIQUIP st41230 Operation and parts manual
ZDS
ZDS P O3 Series Installation - Operating Instructions - Safety
