FKI SDF-22 User manual
0
Instructions for use
Fryer STD
Type Code SDF-22
Version 1.0 –2022

1
Contents
1 Introduction............................................................................................................................................... 3
General .............................................................................................................................................. 4
Appliance description................................................................................................................ 4
Manufacturer............................................................................................................................. 4
Appliance label .......................................................................................................................... 4
Technical specifications and power consumption..................................................................... 4
Modification .............................................................................................................................. 5
2 Safety......................................................................................................................................................... 6
Personal safety equipment................................................................................................................ 6
Potential hazards............................................................................................................................... 6
Safety measures, integrated.............................................................................................................. 7
Safety functions................................................................................................................................. 7
Who may use the appliance .............................................................................................................. 7
Transport/installation/fixation.......................................................................................................... 8
Transport ................................................................................................................................... 8
Installation................................................................................................................................. 9
Fixation .................................................................................................................................... 10
Operation......................................................................................................................................... 10
Cleaning/maintenance .................................................................................................................... 10
Servicing........................................................................................................................................... 10
3 Operation................................................................................................................................................. 11
Before first use ................................................................................................................................ 11
Filling with oil................................................................................................................................... 11
Quick start instructions ................................................................................................................... 11
Start-up............................................................................................................................................ 12
Operation......................................................................................................................................... 12
Spare parts....................................................................................................................................... 13
Spare parts list......................................................................................................................... 14
Error codes....................................................................................................................................... 16
4 Electrical diagram .................................................................................................................................... 17
5 Cleaning ................................................................................................................................................... 29
General ............................................................................................................................................ 29
Cleaning during operation............................................................................................................... 29
Daily cleaning................................................................................................................................... 29

2
6 Service ..................................................................................................................................................... 32
7 Disposal.................................................................................................................................................... 34
Packaging......................................................................................................................................... 34
When the appliance is no longer required...................................................................................... 34
8 EU DECLARATION OF CONFORMITY........................................................................................................ 35

3
1Introduction
Original user instructions
These instructions are FKI Fast Food Teknik's original instructions for appliance Fryer STD.
The purpose of these instructions
These instructions are intended to ensure the correct installation, use, handling and maintenance of Fryer
STD.
Important! Read these instructions carefully before use and keep them safe for later use.
Storage of these instructions
You must retain these instructions and make sure that they are easily accessible to users and service techni-
cians.
Understanding these instructions
It is the responsibility of the Appliance's owner to ensure that anyone who will be operating, servicing,
maintaining or repairing FRYER STD has read these instructions and, by way of minimum, the sections that
are of relevance to the work they will perform.
Anyone who will be operating, servicing, maintaining or repairing FRYER STD is required to look up any rele-
vant information in these instructions.

4
General
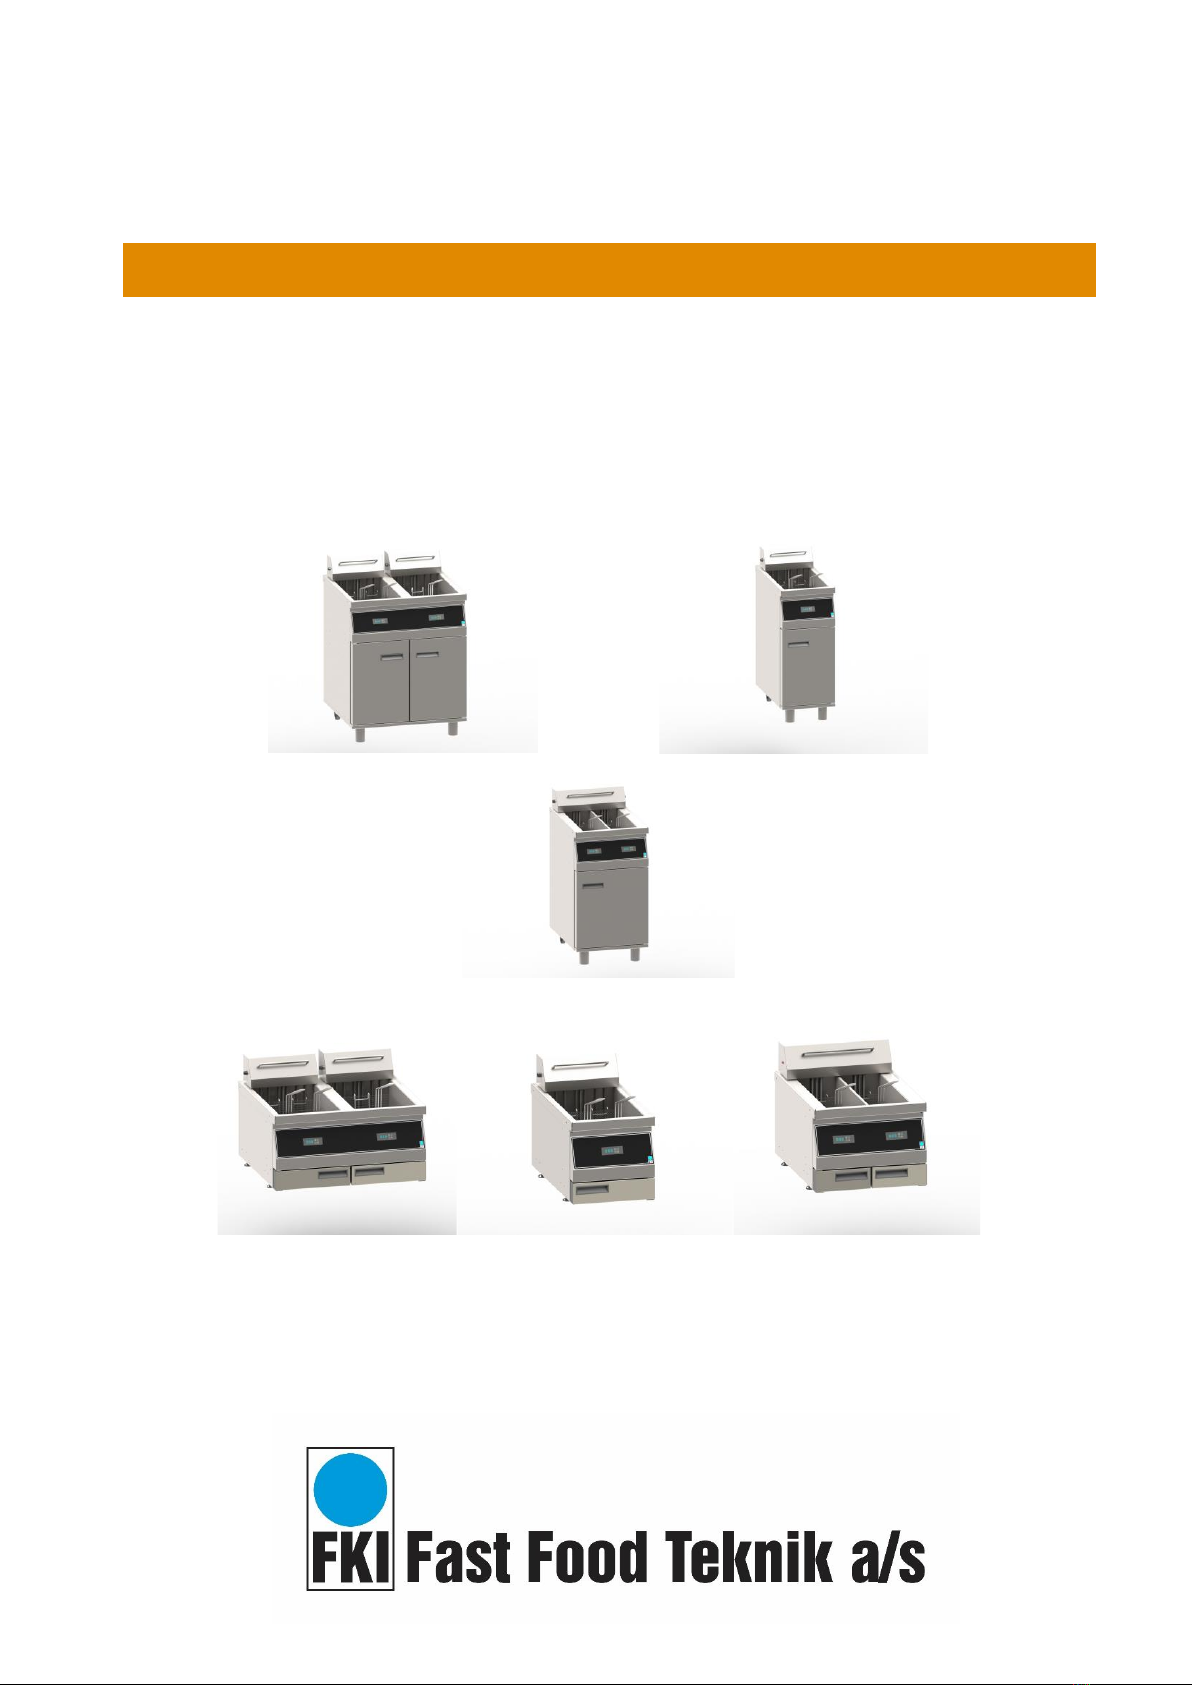
Appliance description
Fryer STD is an electronic fryer with electronic thermostat. The fryer is easy to maintain and operate. Fryer
STD has deep oil vats to minimize splashes. The powerful heating elements and electronic temperature sen-
sor heat the frying oil very quickly. Fryer STD is easy to clean. The temperature of the frying oil is shown on
a display and can be set in 5°C intervals from 100°C to 180°C.
Manufacturer
FKI Fast Food Teknik a/s
Byghøjvej 5, Verninge
DK-5690 Tommerup
www.fki.dk
Appliance label
Type code: ADF-21
Technical specifications and power consumption
1.1.4.1 Dimensions and weight
Description
Vat
Dimensions
(BxDxH)
Weight
Fryer STD
SINGLE TABLE
16L
352x655x370
32 kg
Fryer STD
SINGLE TABLE SPL
20L
470x655x370
41 kg
Fryer STD
DOUBLE TABLE
2 x 16L
705x655x370
60 kg
Fryer STD
SINGLE FLOOR
16L
352x655x880
44 kg
Fryer STD
SINGLE FLOOR SPL
20L
470x655x880
57 kg
Fryer STD
DOUBLE FLOOR
2 x 16L
705x655x880
99 kg

5
1.1.4.2 Power
Description
Vat
Voltage
Power
Current
MIN. fuse rating
for installation
Fryer STD
SINGLE FLOOR
16L
400V
9kW
13.0A
16A
Fryer STD
SINGLE FLOOR
16L
3x230V
9kW
22.6A
25A
Fryer STD
SINGLE FLOOR
16L
400V
15kW
21.6A
25A
Fryer STD
SINGLE FLOOR
16L
3x230V
15kW
37.6A
40A
Fryer STD
SINGLE FLOOR
16L
400V
21kW
30.3A
32A
Fryer STD
SINGLE FLOOR SPL
20L
400V
10kW
21.6A
25A
Fryer STD
SINGLE FLOOR SPL
20L
3x230V
10kW
37.6A
40A
Fryer STD
SINGLE FLOOR SPL
20L
400V
14kW
30.3A
32A
Fryer STD
DOUBLE FLOOR
2x16L
400V
2x9kW
13.0A
2x16A
Fryer STD
DOUBLE FLOOR
2x16L
3x230V
2x9kW
22.6A
2x25A
Fryer STD
DOUBLE FLOOR
2x16L
400V
2x15kW
21.6A
2x25A
Fryer STD
DOUBLE FLOOR
2x16L
3x230V
2x15kW
37.6A
2x40A
Fryer STD
DOUBLE FLOOR
2x16L
400V
2x21kW
30.3
2x32A
*Actual measured result can be expected to be lower.
The appliance should be connected to its own circuit.
1.1.4.3 Intended use
The fryer is intended for deep frying in oil/fat of defrosted and frozen
products that are suitable for deep frying.
The fryer must never be used for purposes other than deep frying food.
Modification
Fryer STD must never be modified or serviced by unauthorised persons. In the event of non-compliance, FKI
Fast Food Teknik a/s waivers any and all liability.
6
2Safety
General
Read these safety instructions before using the appliance. Keep them near to the appliance for later refer-
ence. These instructions and the appliance itself are provided with important safety information that must
always be read and observed at all times. FKI Fast Food Teknik a/s disclaims any and all liability for non-
compliance with these safety instructions, for inappropriate use of the appliance or the use of incorrect set-
tings.
Fryer STD is designed for continual deep frying of various food products. The appliance can also be used for
other foods that are suitable for frying. To determine optimum temperature and time, a test fry is always
recommended before commencing series production. Note that the nature of the food (thickness, temper-
ature, surface, etc.) will affect the frying result.
When running, the appliance must be continually monitored by staff who have been trained and instructed
in how to use it.
Personal safety equipment
It is recommended that gloves and goggles are worn when working with the fryer and
when emptying the vats as the fryer has hot surfaces and hot grease can be dangerous.
Potential hazards
Surfaces on the fryer’s tabletop and vats are hot and must not be touched when switched on.
Therefore, be careful not to touch them while operating the fryer.
During operation, only buttons on the front may be touched. The food for preparation should be placed in
the basket when it is in the basket retainer. The basket should then be carefully lowered into the oil.
Avoid touching the fryer’s hot surfaces.
7
Safety measures, integrated
The heating section has an integrated magnetic contact to cut power to the heating ele-
ments if the heating section is removed from the top panel. There is also a magnetic contact
that cuts off the current at the taps.
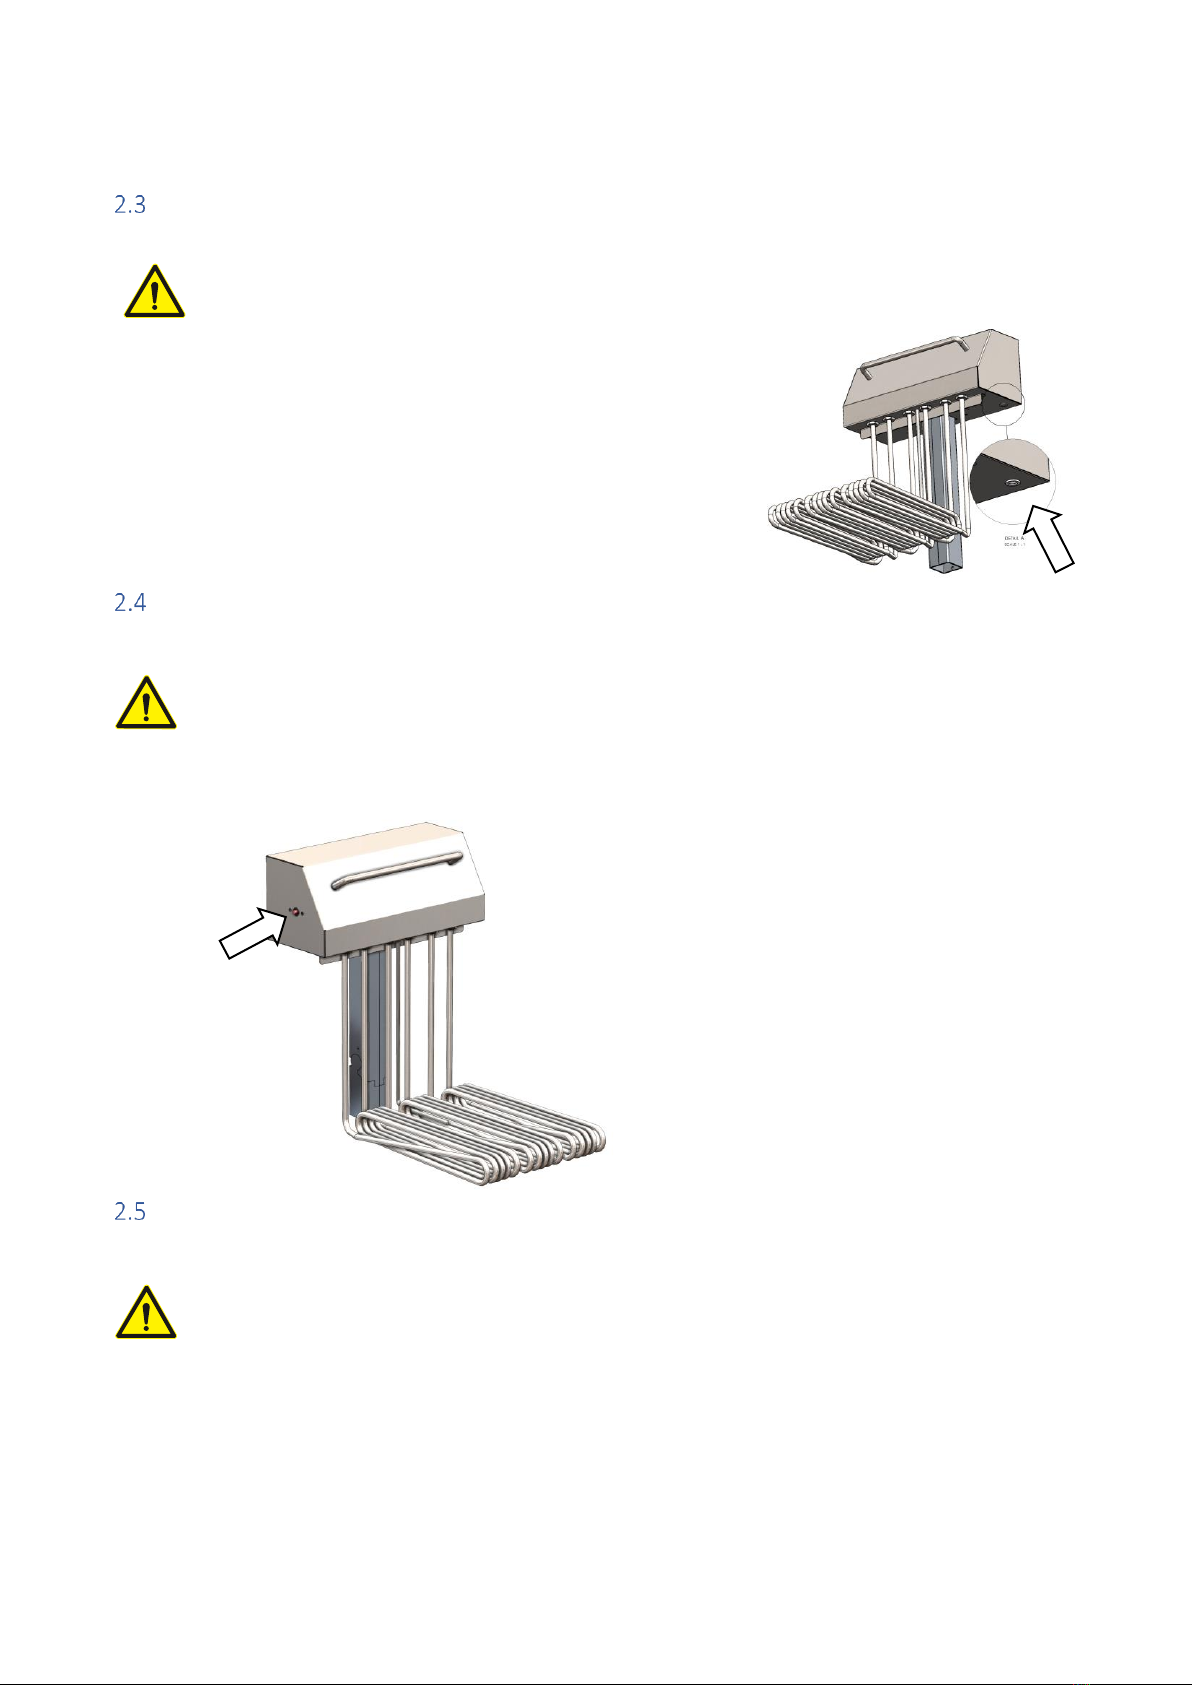
Safety functions
The heating section has an integrated safety thermostat that will cut power to the heating
elements if temperatures exceed 230°C. The thermostat can be reset and connected once
the temperature has fallen. To reset the thermostat, press the red button next to the heating
section under the protective cap.
We recommend that the fryer is serviced to find out why the safety thermostat was trig-
gered.
Who may use the appliance
This appliance is not intended for use by children! Neither should it be used by persons with
reduced physical or mental capacity, or who lack appropriate experience and knowledge un-
less they have been trained or instructed in the use of the appliance by someone with re-
sponsibility for their safety.

8
Transport/installation/fixation
Transport
The fryer is delivered secured to a transport pallet and should only be transported in the same way if
moved.
When lifting the appliance into position, lift carefully from the transport pallet by lifting at the front edge of
the table top, allowing it to be carefully rolled into position.
WARNING: Do not lift the appliance at the heating sections.
Moving and setting up the appliance must be performed by two or more peo-
ple due to RISK of injury!
Wear protective gloves and safety footwear during unpacking and installation.
Cut hazard.

9
Installation
The appliance must be connected to the mains by an authorised electrician.
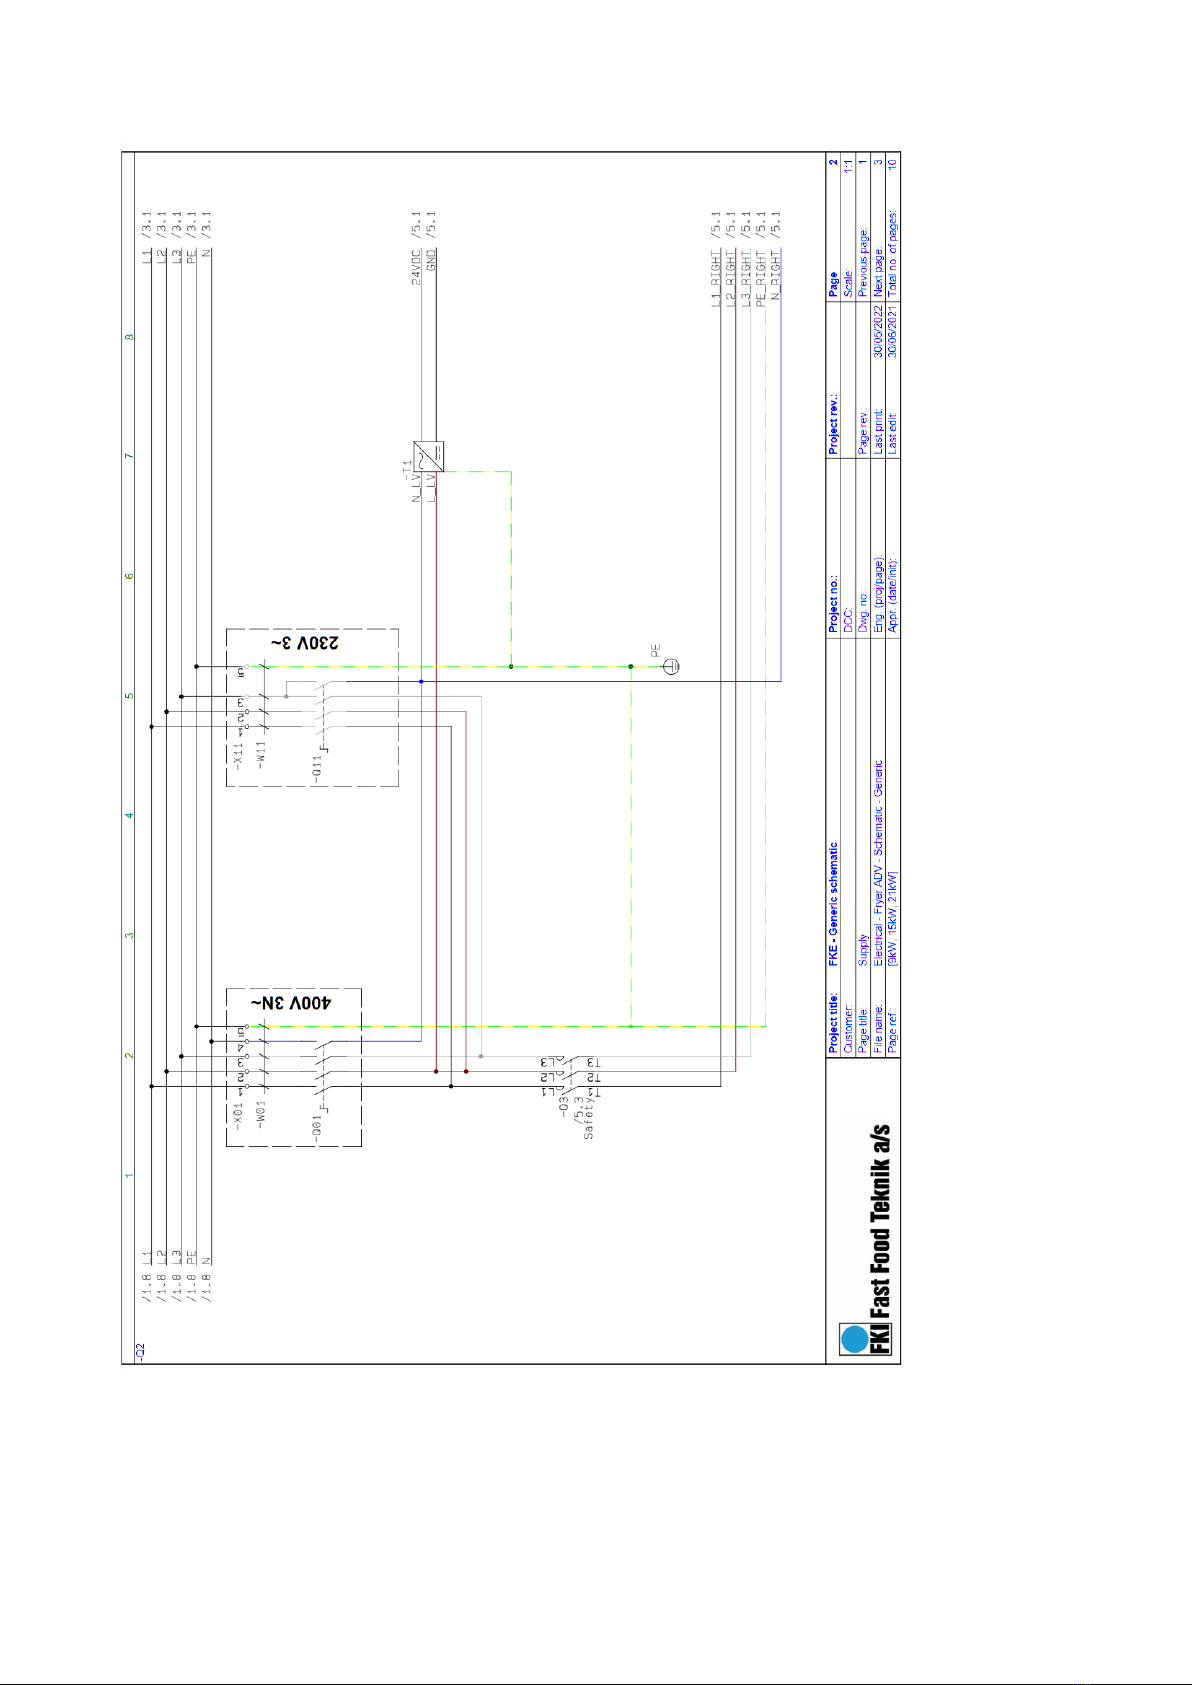
The fryer must always be connected to ground. Depending on variant, the fryer should be connected to ei-
ther 400V 3N~ or 230V 3~ via an approved supply isolator. Note that each heat section requires a separate
connection.
As standard, floor models are supplied with front legs and fixed wheels at the rear. Space should be left in
front of the fryer so it can be pulled away from the wall when cleaning or performing maintenance tasks.
The fryer must be connected by an authorised electrician and connected to an RCCB circuit
breaker.
See diagram for correct connection:
WARNING: This appliance must be earthed. Failure to do so may cause electric shock and serious
injury.
The appliance must be acclimatised before use. It should therefore not be started up until eight
hours have elapsed.
The power supply must be able to be disconnected, either by unplugging or by means of a freely
accessible multi-pole switch located before the power outlet in accordance with applicable elec-
tricity regulations. The appliance must be grounded in accordance with national safety standards
for electrical appliances.
Do not use extension cords or multi-socket outlets. After installation is completed there must be
no direct access to the electrical components. Never touch the appliance if you are wet or have
bare feet. Do not use this appliance if the power cord or plug is damaged, if the appliance is not
working properly, if it is damaged or if it has been dropped on the floor.
Any replacement of the power cord must be performed by an authorised technician to avoid the
risk of personal injury –RISK of electric shock. Only use oil-resistant cables!
10
Fixation
The appliance does not need to be secured. It is equipped with wheels and/or adjustable legs to
ensure stable and easy installation.
Operation
The appliance must be supervised during use and must be switched off at its main switch if left.
Fryer STD is intended for food preparation only. Never fill the appliance with oil or fat when it is
switched on. Oil/fat can ignite if it contacts the heating elements. It can also produce intense
smoke.
Cleaning/maintenance
CLEANING AND MAINTENANCE WARNING: Turn off the appliance and allow it to cool before per-
forming daily cleaning or maintenance tasks. Do not use products that contain acid as they may
damage the surface of the appliance.
Never use steam/foam cleaners due to RISK of electric shock.
Servicing
WARNING: The appliance has two supply connections, which must both be disconnected before
starting service work on the appliance!
The appliance must always be switched off and disconnected from the power source before com-
mencing repair work.

11
3Operation
Before first use
Before start-up, remove all packaging and protective plastic from the fryer and dispose of it in ac-
cordance with currently applicable regulations (see section 7.1). Carefully read section 2 about
safety before connecting the fryer.
Before start-up, clean the appliance as shown in section 5.
Filling with oil
Turn the fryer off. Never fill the appliance with oil or fat when it is switched on. Oil/fat can
ignite if it contacts the heating elements. It can also produce intense smoke.
Remove the basket. Now fill the fryer with oil/fat to the correct volume. The fryer must
never be switched on unless oil has been filled at least to the minimum level indicator on the
inner side of the vat (at the rear).
Quick start instructions
Before start-up, read section 5.1 under “cleaning”.
Set the desired set point between 100°C-180°C
Press “start” on the display and wait 30 minutes for the fryer to heat up and become ready for use.
The appliance must not be operated unattended.
Remember to use personal safety equipment, see 2.1

12
Start-up
Operation
Minimum set point is 100°C
Maximum set point is 180°C
New appliance starts at 100°C but saves the set point setting when power is cut.
When "+" is pressed, the set point will increase by 5°C. Similarly, when "-" is pressed, the set point will de-
crease by 5°C. However, you cannot go higher or lower than the minimum and maximum set point.
When "standby" is pressed, marked with a standby symbol the fryer will turn off the heat.
When "ECO" is pressed, marked with the machine will change the temperature to 100 °C until "ECO" is
pressed again, after which the machine will go back to the desired set point (it takes approx. 7 min from
100°C to 175°C in a fryer with 9 kW).
The display shows the set point, but if you want the current temperature, you can press "+" and "-" at the
same time, after which the current temperature will be displayed for five seconds.
The display flashes until the desired set point is reached.
Breaker
switch
Handle for ball valve (Draining)
Horizontal pos. = closed
Vertical pos. = open
The picture shows floor models, on
table models the handle must be
tilted out towards the user. (Open
state)
Display

13
Spare parts
14
Spare parts list
Fryer STD 400V 3N~
POS
PRODUCT NUMBER
QT
Y
QTY
QTY
DESCRIPTION
Double
Single
Single
Split
1
72-03615
2
1
2
THERMOSTAT LIMITER
2
83-10002
2
1
2
SENSOR PT 100 FLOOR
3
84-00056
6
3
-
Heating element 3 kW, 400V
3
84-00061
6
3
2
Heating element 5 kW, 400V
3
84-00072
6
3
2
Heating element 7 kW, 400V
4
83-41001 (9kW)
2
1
1
CONTACTOR LC1D09P7 9A 230VAC
4
83-41003 (15kW)
2
1
1
CONTACTOR LC1D25P7 25A 230VAC
4
83-41004 (10kW)
2
1
1
CONTACTOR LC1D32P7 32A 230VAC
4
83-41000 (10&14kW)
-
-
2
CONTACTOR B&J 2NO 40A AC1 230VAC
5
72-00143
2
1
1
POWER SUPPLY 240VAC-5VDC RS-15-5
6
72-01324
2
1
2
PRINT ELECTRONIC THERMOSTAT
8
83-10316
4
2
2
SOLID STATE RELAY SSR ctrl 48-660 vac 60A
10
83-41013 (10, 14, 15 &
21kW)
2
1
1
BREAKER, 4-POLE telux 50A, center fitting
10
83-41011 (9kW)
2
1
-
BREAKER, 4-POLE telux 20A, center fitting
11
*** 84-00622
2
1
2
BALL VALVE 1" M/M MS
11
**** 84-00058
2
1
2
BALL VALVE 3/4" WITH T-HANDLE
12
72-05518
1
-
-
FOIL FRYER STANDARD DOUBLE
12
72-05516
-
1
-
FOLIE FRYER STANDARD SINGLE
12
72-05517
-
-
1
FOLIE FRYER STANDARD SPLIT
13
84-00070
1
1*
-
FRY BASKET 1/1 FKE16-
14
84-00071
2
2*
2
FRY BASKET 1/2 FKE16-
* either 2 ½ baskets or 1 1/1 basket per
vat
***FLOOR STANDING
MODELS
***COUNTERTOP
MODELS

15
Fryer STD 230V 3~
POS
PRODUCT NUMBER
QT
Y
QTY
QTY
DESCRIPTION
Double
Single
Single
Split
1
72-03615
2
1
2
THERMOSTAT LIMITER
2
83-10002
2
1
2
SENSOR PT 100 FLOOR
3
84-00057
6
3
-
Heating element 3 kW, 230V
3
84-00062
6
3
2
Heating element 5 kW, 230V
4
83-41003 (9kW)
2
1
1
CONTACTOR LC1D25P7 25A 230VAC
4
83-41004 (15kW)
2
1
1
CONTACTOR LC1D32P7 32A 230VAC
4
83-41000 (10kW)
-
-
2
CONTACTOR B&J 2NO 40A AC1 230VAC
5
72-00143
2
1
1
POWER SUPPLY 240VAC-5VDC RS-15-5
6
72-01324
2
1
2
PRINT ELECTRONIC THERMOSTAT
8
83-10316
4
2
2
SOLID STATE RELAY SSR ctrl 48-660 vac 60A
10
83-41013
2
1
1
BREAKER, 4-POLE telux 50A, center fitting
11
*** 84-00622
2
1
2
BALL VALVE 1" M/M MS
11
****84-00058
2
1
2
BALL VALVE 3/4" WITH T-HANDLE
12
72-05518
1
-
-
FOIL FRYER STANDARD DOUBLE
12
72-05516
-
1
-
FOLIE FRYER STANDARD SINGLE
12
72-05517
-
-
1
FOLIE FRYER STANDARD SPLIT
13
84-00070
1
1*
-
FRY BASKET 1/1 FKE16-
14
84-00071
2
2*
2
FRY BASKET 1/2 FKE16-
* either 2 ½ baskets or 1 1/1 basket
per vat
***FLOOR STAND-
ING MODELS
***COUNTERTOP
MODELS

16
Error codes
ERROR
CODE
ERROR
CAUSE
REMEDY
E00
Undefined error
Unknown
Contact service.
E01
Temperature sensor
error
The measured values
are too low com-
pared to those ex-
pected.
The surroundings are
either too cold or the
sensor is short-cir-
cuited. In the latter
case, service must be
contacted
E02
Temperature sensor
error
The measured values
are too high com-
pared to those ex-
pected.
Sensor is not con-
nected or is defec-
tive.
Contact service.
E88
Oil overheated
The solid state relay
may have short-cir-
cuited.
Contact service.

17
4Electrical diagram

18
19
Table of contents
Other FKI Fryer manuals


Popular Fryer manuals by other brands


Henny Penny
Henny Penny Frontier UHC 600 Quick reference card

SEVERIN
SEVERIN FR-2439 Instructions for use

Elba
Elba EDF-D2518 owner's manual

TriStar
TriStar TSHEF-15Si Installation and operating instructions

Cosori
Cosori Helio 4-Quart user manual

Tower Hobbies
Tower Hobbies T17006 Safety and instruction manual