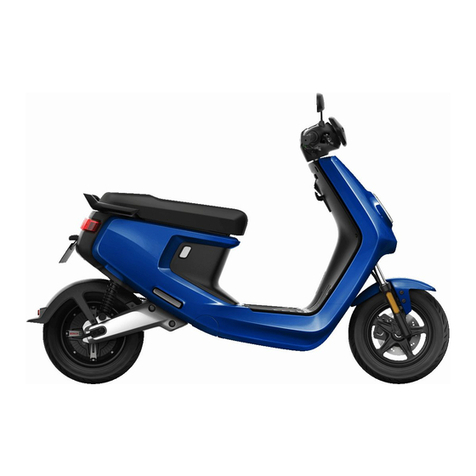
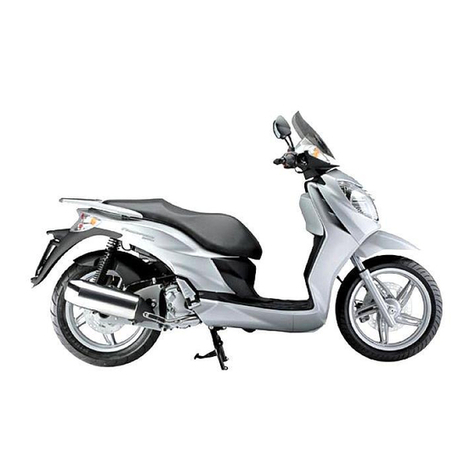
FlexTech X1 User manual

USER’S GUIDE

Preface ...............................................3
Important Information..........................4
Assembly Instructions
Assembly of the Hand Protectors .................5
Assembly of the back wheel cover .................5
Assembly of the Top Case .......................6
First Steps with your new Vehicle ..................7
Guarantee Conditions ...........................5
Engine and Frame Numbers. . . . . . . . . . . . . . . . . . . . . . . 8
Overview. . . . . . . . . . . . . . . . . . . . . . . . . . . . . . . . . . . . . 9
Operating Elements
Brake Lever Rear-Wheel Brake ..................10
Left-Hand Combi Switch ....................... 10
Instrument Reading and Indicator Display .........10
Brake Lever Front-Wheel Brake.................. 11
Right-Hand Combi Switch...................... 11
Ignition Lock ............................... 11
Steering Column............................. 11
Gas Handle ................................. 11
Kick Starter ................................12
Fuel Tank ..................................12
Starting the Engine
Starting with Elektric Starter ...................13
Starting with Kick Starter......................13
Reference for Operation, Maintenance and Driving Safety
Running in .................................14
Brakes ....................................14
Tires......................................14
Exhaust ...................................14
Protective Clothing...........................14
Cleaning and Maintenance .....................15
Carburettor, Idling Adjustment..................16
Air Filter...................................16
Battery.................................... 16
Spark Plug ................................. 17
Fuel ...................................... 17
Check Engine Oil............................. 17
Brakes ....................................18
Tires......................................18
Troubleshooting..............................19
Technical Specifications . . . . . . . . . . . . . . . . . . . . .20 - 21
Electric Scheme ..............................22
Inspection and Maintenance Plan .................25
Service Intervals .............................26
Table of Contents

3
Flex Tech X1 – USER’S GUIDE
Preface
Welcome to the Club of FlexTech X1 drivers. We are sure that you will have a lot of fun with and enjoy your new engine
scooter.
This manual provides you with an overview on the function, maintenance, servicing and operation of your new vehicle.
Please read it carefully. Please follow the instructions exactly, in order to guarantee a long service life to your engine scooter
and enable you a safe way of driving.
Absolutely observe the running in instructions, as they help you avoid damages to your vehicle and considerably increase
the service life of your vehicle.
All specifications are based on the technical status at the time of printing. Modifications and additions can have been
carried out since then and do not find any mention therefore.
You will find a current version at our website under www.flex-tech.info.
You will find a list of the authorized repair shops in your proximity in the accompanying document “Spare Parts Overview /
Authorized Repair Shops” or at our website.
We would like to assist you in case of questions or problems.
Telephone: 0 180 5 / 88 08 08
(per minute 0.14 Euro from the network of the Dt. Telekom AG)
Email: service@flex-tech.info
Internet: www.flex-tech.info
Status: 08-2007
Competition!
Please send us back the filled in full guarantee coupon immediately after purchase! Among all replies, which reach us 14
days after the purchase date, valuable prizes will be drawn every month. Helmets, scooter garages, free inspections and
many other fantastic prizes area waiting for you. With a little luck, you are the winner!
The winners are informed in writing. Legal action is excluded.

4
Flex Tech X1 – USER’S GUIDE
• The road traffic regulations must be carefully followed at
any time.
• When using this vehicle, make sure you carry the follow-
ing cards and documents with yourself:
- identity card
- third-party insurance
- number plate
- registration book
• The scooter is designed for the operation with driver and
co-driver for use in road traffic.
• The vehicle is permitted for the general road traffic and
may be moved with the driving licences of the classes B,
M, A1, A, in the official road traffic.
• The not-as-agreed use of the vehicle results in the expira-
tion of the guarantee.
• All interventions for increase of the cubic capacity, the
performance, speed and which in general lead to the
modification of the scooter characteristics, are punish-
able and are pursued by law. They lead to the expiration
of the guarantee. To the punishments belong the collec-
tion of the scooter, a new driving test by the responsible
authorities and/or the new-car registration.
• The change or modification of the number plate carrier,
the illumination sets, acoustic displays and of the rear
mirror are punishable and lead to the expiration of the
guarantee and the insurance coverage.
• The modification of the vehicle frame number is punish-
able in the criminal and administrative sector, and the
owner will be made liable.
• The basic vehicle numbers of the scooter are
the following:
- frame number
- engine number
- number plate
• Please note down at once the basic vehicle numbers in
the accompanying document "Spare Parts Overview / Au-
thorized Repair Shops" and in this manual on page 8, as
well as on the rear page of the cover. Then you may be
looked after faster in the case of service.
Important Information

5
Flex Tech X1 – USER’S GUIDE
Hand Protectors
Please take hand protectors carefully out of the packing and
assign via the form of the correct scooter side. (The longer
edge is above. Seen from inside, the upper recession shows a
little bit further to the outside).
Carefully insert the protectors into the corresponding groove
and tighten with two screws enclosed (do not fasten too
tightly – risk of fracture). Finished!
Rear Mirror
Please take rear mirrors carefully out of the packing and
assign via the designation on the rear mirror side to the
correct scooter side.
NOTE:
• L = left mirror / R = right mirror
• Both rear mirrors have a right-hand thread!
Carefully screw in clockwise the rear mirrors and adjust the
position. Then fix the lower locknut with the 14 open-end
wrench located in the toolkit and pull down the rubber cover.
Finished!
Back Wheel Cover
1) If necessary, unscrew already screwed in sheet steel recess
head screws (3 mm x 10 mm) on the rear side of the upper
back wheel cover.
2) Insert the lower back wheel cover in an angle of about 45
degrees with the groove in the seat of the upper wheel
cover.
3) Push the end of the lower wheel cover down, until it locks
into place.
4) Then fix on the rear side with the two unscrewed or
enclosed sheet steel recess head screws, the lower part
into the rough-drilled borings. (Do not fasten too tight –
risk of fracture). Finished!
Assembly Instruction
4Insert screws
1If necessary,
remove screws
2Place skirt in an angle
of 45 degrees
3Push down, until it
locks into place lower wheel cover
upper wheel
cover

6
Flex Tech X1 – USER’S GUIDE
Top Case
Parts list:
1) Place the retaining plate on the rack and fix it with the 3
enclosed screws M6x20 and the nuts M6 at the rack.
2) Fix the 4 rubber shock absorbers at the positions provided
of the retaining plate.
3) Place the top case on the retaining plate and fix it with
the remaining 4 screws M6x20 at the retaining plate.
4) Insert the rubber stoppers into the remaining holes at the
top case, in order to prevent humidity to penetrate into
the top case.
5) Place the rubber mat on the floor of the top case.
ATTENTION:
The maximum load on the top case amounts to 3 kg.
rubber stoppers
top case
rack
nut M6
retaining plate
rubber stoppers
washers
screw M6x20
Assembly Instruction
1 x top case
1 x rubber plate
1 x retaining plate
3 x nuts M6
4 x rubber shock absorbers
7 x screws M6x20
4 x rubber stoppers
4 x washers

7
Flex Tech X1 – USER’S GUIDE
First Steps with your new Vehicle
Before the first operation of your vehicle, please
observe the following steps:
1) The vehicle may only be started with completely up-
ward tilted side stand.
2) Check the tire pressure:
in front 2.0 – at the rear 2.2 bar.
3) Tank only Premium unleaded.
4) Check the vehicle lighting (before each trip)
5) Only drive with an adequate protective clothing. In
Germany, the wearing of a helmet is compulsory for
this vehicle!
6) Observe the inspection intervals on page 26. These
must be met, in order to guarantee a safe way of driv-
ing. Apart from that, they are a basic prerequisite for
the reception of the guarantee.
7) This vehicle is tax-free. You merely need a third-party
insurance for the registration. You will acquire the
latter against production of the vehicle documents at
many banks and insurances.
8) Only use this vehicle on public roads. This vehicle is not
designed for racing or area activities.
Warranty Conditions
• The warranty period is 24 months from the purchase
date.
• In case of commercial use, the warranty period is 12
months from the purchase date.
• The warranty does not include all defects, which can be
explained by outer influences, incorrect use or lacking
maintenance. This incorporates among others defects
caused by falling rocks, oxidation, corrosion, etc.
• Excluded from the warranty are the following items:
- starter worm gear
- driving belt
- exhaust
- battery
- illumination lamps
- brake and gas pull bar
- filter elements
- main stand
- bearings
- friction linings
- tires
- starter pinion Variomatic
- shock absorber
- speedometer drive
- spark plugs
• If you raise guarantee claims, the purchase voucher is to
be produced and the prescribed inspections are to be evi-
denced.

8
Flex Tech X1 – USER’S GUIDE
Engine and Frame Numbers
The engine number and frame number is located at the engine or at the frame of your engine scooters according to the fig-
ures. These are required, in order to register your vehicle.
Frame number: ............................................................
Engine number: ...........................................................
Engine number

9
Flex Tech X1 – USER’S GUIDE
Overview
1 marker light in front
2 side spot
3 headlight
4 brake lever at the rear
5 rear mirror
6 brake lever in front
7 seat lock
8 indicator at the rear left
9 kick starter
10 exhaust
11 indicator at the rear right
12 tail light (stop light)
13 top case sustainer
14 helmet sustainer
15 ignition lock
16 instruments
17 gas handle
18 indicator in front right
1 2 3 4

10
Flex Tech X1 – USER’S GUIDE
Operating Elements
Brake Lever Rear-Wheel Brake
Pull constantly, in order to acti-
vate rear-wheel brake
Left-hand Switch Combination
Ahooter
Bindicator switch left and right
Chigh beam and low beam
Instrument Reading and
Indicator Display
Afuel display
Bspeedometer displays speed in
kilometres per hour
Ckilometres display
Dindicator display
Emain beam display
Ftachometer
F D E C B ABA C

11
Flex Tech X1 – USER’S GUIDE
Brake Lever Front-Wheel Brake
Pull constantly, in order to activate
the front-wheel brake
Ignition Lock (without Figure)
OFF: Complete electric circuit is inter-
rupted, engine and lights may
not be switched on. The key can
be removed.
ON: Engine can be started, lights can
be switched on. The key cannot
be removed.
Steering Column (without Figure)
Lock:Turn steering column completely
to the left, slightly press in key
and move into the lock position.
Steering lock has engaged. The
key can be removed.
Gas Handle (without Figure)
To accelerate, turn on gas handle
evenly.
Right-hand Switch Combination
Aheadlight switch – move to the left,
in order to switch on headlight and
tail light.
Cparking light
D headlight
B start button – press shortly, in or-
der to start the engine. Make sure
that the ignition key is in the ON
position. When you start, the rear-
wheel brake must be pulled.
B D C A
Operating Elements
ATTENTION:
Activate start button max. 5 seconds. Wait for 10 seconds between each activa-
tion of the start button. Release start button, as soon as the engine is running.
Never activate the start button, when the engine is running.

12
Flex Tech X1 – USER’S GUIDE
Kick Starter
In case of a weak battery, the vehicle can be started using
the kick starter.
Fuel Tank
The fuel tank lid is located below the bench at the rear to
the left.
ATTENTION:
• Switch off engine during refuelling.
Remove lid slowly. Never fill fuel tank above marking. Never
mix additives to the fuel.
Open out kick starter and step on strongly.
At the same time, pull rear-wheel brake.
(see also page 11)
Fuel: Use regular or premium gasoline (unleaded),
90 Octane or higher. Impurities in the fuel may
damage or destroy the engine.
Engine Oil: 4-stroke engine oil 15W-40
Kick Starter
Operating Elements

13
Flex Tech X1 – USER’S GUIDE
Starting the Engine
Starting with Electric Starter
1. Check fuel and engine oil level
2. Put vehicle on main stand
3. Lateral stand must be upward tilted,
when you start the engine
4. Set ignition key to ON
5. Pull rear-wheel brake
6. Starting: press starter button
ATTENTION:
• When starting, always activate the rear-wheel brake,
since otherwise the vehicle can move.
• Activate the start button for 5 seconds as a maximum.
• Wait for 10 seconds between each activation of the start
button, since otherwise the starter engine and the bat-
tery may be damaged.
• Release the start button, as soon as the engine is run-
ning.
• Never activate the start button, when the engine is run-
ning.
• When the engine is cold, let it heat up in the idling posi-
tion for about 3 minutes.
• Only start engine at places ventilated well, since CO2
emissions are unhealthy.
Starting with Kick Starter
1. Check fuel and engine oil level
2. Put vehicle on main stand
3. Lateral stand must be upward tilted,
when you start the engine
4. Set ignition key to ON
5. Pull rear-wheel brake
6. Upward tilt kick starter lever
7. Strongly step on kick starter.
Repeat process, until the engine is running.
NOTE: Before you release the rear-wheel brake, the gas handle must be in the zero position (idling).

14
Flex Tech X1 – USER’S GUIDE
Running in
For a maximum service life of your new engine, please ob-
serve the following table for running in:
distance
(kms)
Max. Speed
(km/h)
000 - 500 35
500 - 1000 40
Brakes
A motorized two-wheel bike has a brake effort proportion-
ing of 80% on the front-wheel axle and 20% on the rear-
wheel axle. The vehicle is therefore slowed down with both
brakes at the same time in principle. Never brake only with
the rear-wheel brakes!
Tires
An inadequate air pressure decreases the service life of the
tires, reduces the driving stability and thus considerably
endangers the diving safety. Ensure a sufficient air pres-
sure and profile depth.
Tire pressure in front: ........ 2.0 bar
Tire pressure at the rear: .... 2.2 bar
It is recommended to replace the tires, if the profile depth
falls below 2 mm. Also observe the legal regulations in this
case!
Exhaust
The exhaust becomes hot during the driving operations! It
is to be noted that the vehicle is only driven with suitable
protective clothing, in order to avoid possible burnings.
ATTENTION:
• The exhaust still remains hot for some time after park-
ing of the vehicle.
• Do not touch!
Protective Clothing
For this vehicle, there is a helmet obligation all over Europe!
Only drive with helmet and adequate protective clothing!
Reference for Operation, Maintenance and Driving Safety

15
Flex Tech X1 – USER’S GUIDE
Cleaning and Maintenance
To reliably prevent the vehicle from rusting, it is recom-
mended to thoroughly clean and let dry the vehicle after
trips in rainy weather.
•Use a shampoo for cleaning the vehicle body.
• Use a soft sponge.
• Under no circumstances use a solvent.
• Never turn a direct jet of water on the following compo-
nents:
- headlight
- switch on the steering wheel
- brake lever
- steering-wheel lock
- tire or bearing wheel hub in front
- air filter
- carburettor
- exhaust outlet
- brake drum at the rear
• After cleaning, rerinse with clear water, in order to
remove possible cleaning rests.
• Dry using a leather cloth.
• Start the engine and let it run in the idling position for
some minutes.
• In case of temperatures below the freezing point, the
freezing up of components, such as gas and brake pull
bars as well as the formation of ice on the carburettor
may cause technical troubles on the vehicle.
AFTER CLEANING:
Carry out some brake tests with extreme care at a road-
worthy location. The water on the braking area reduces
the braking power at short notice.

16
Flex Tech X1 – USER’S GUIDE
Carburettor, Idling Adjustments
Start the engine and warm up for about 2-3 minutes.
Set the engine speed to about 1800 revs/min by means of
an idling screw.
Air Filter
1) Dip air filter into a non-combustible oil cleaner and wash
out
2) Press out air filter element.
3) Never wring out air filter element.
4) Moisten air filter element evenly with engine oil.
5) Press out surplus engine oil.
Battery
12V 6 Ah
1) With a battery off-load voltage of below 11.5 V, the bat-
tery must be reloaded or replaced. Do not use the electric
starter any longer.
2) To replace the battery, set ignition to the OFF position.
3) Red line + (positive pole),
black line – (negative pole)
4) In case of longer downtimes of the scooter, the battery
must be separated from the electric circuit of the scooter,
in order to avoid a depth unloading.
Note: Troubles of the battery are excluded from the guar-
antee.

17
Flex Tech X1 – USER’S GUIDE
Spark Plug
Clean electrode from fouling by means of a wire brush.
Set sparking distance to 0.6 – 0.7 mm by means of a feeler
gauge.
Spark plug type: (NGK) C7HSA
Fuel
Regular or premium unleaded gasoline from 90 octane on-
wards.
Gasoline must be refuelled, if the needle is in the red area
of the fuel display.
Do not overload tank.
In case of longer downtimes, it should be noted that the
tank has completely been refuelled, since corrosion dam-
ages could arise. These damages are excluded by the guar-
antee.
Gasoline Consumption
The consumption specified of approximately. 2.5 liters per
100 km can deviate upwards according to area of operation,
way of driving, maintenance and additional load and has to
be understood as an optimal value.
Engine Oil Check
1) Unscrew oil cap with fuel level plunger on the right
scooter side.
2) Remove oil from fuel level plunger with a clean rag.
3) Place on (not screw in) oil cap with fuel level plunger.
4) Take out vertically oil cap with fuel level plunger.
5) Check oil-level (see figure below).
6) Screw in again oil cap with fuel level plunger.
max.
min.

18
Flex Tech X1 – USER’S GUIDE
Brakes
The clearance on the brake lever (a) is 10 - 20 mm.
Adjust set screw such that the clearance on the brake lever
be correct.
ATTENTION:
Clearance denotes the distance from the normal position
of the lever up to the tensile point of the brake (the brake
begins to lock into place).
Tires
An insufficient air pressure decreases the service life of the
tires and reduces the driving stability. Make sure there is a
sufficient air pressure and tire profile depth.
1) Tire pressure in front: 2.0 bar
Tire pressure at the rear: 2.2 bar
2) It is recommended to replace the tires with a profile
depth of less than 2 mm. To do this, observe the legal
regulations.
3) In case of a 2-person operation it is recommended to
increase the tire pressure at the rear by 0.2 – 0.3 bar.
a = 10 - 20 mm

19
Flex Tech X1 – USER’S GUIDE
Problem / Error Correction
Vehicle does not start.
Lateral stand above?
Ignition key to ON?
Pulled brake?
Gasoline available?
E-Starter without function,
but vehicle starts via kick starter.
Battery unloaded. Never open the battery for loading! The battery contains
acid! We recommend you to use our battery charger for maintenance-free bat-
teries to load the battery. This is also suitable for conservation charging with
longer downtimes. Thus you avoid defects by means of depth unloading.
Vague road performance
No precise steering performance
Check tire pressure!
In front 2.0 bar – at the rear 2.2 bar
In case of a too low tire pressure, there is the danger that the tire detaches itself
from the wheel rim during the drive. It is best to control the air pressure before
each drive.
Troubleshooting

20
Flex Tech X1 – USER’S GUIDE
Technical Specifications
Model: X1
Engine Type 4–stroke engine
Cylinder 1
Boring and stroke 39 x 41.5 mm
Cylinder volume 49.5 cm³
Compression ratio 10.5 : 1
Max. performance 2.3 kW / 7500 revs/min
Max. torque 3,0 Nm / 6000 revs/min
Carburettor
Air filter
Polyurethane element
Ignition CDI
Starter Electr. / Kick starter
Cooling Air-cooled
Lubrication Pressure-feed / drip-feed lubrication
Drive Variomatic continuously variable
Frames Steel tube
Chassis Fork
MacPherson strut unit
with shock absorbing leg and hydraulic support
Central MacPherson strut unit with hydraulic support
Brakes Disk in front
Drum at the rear
Tires 3.5 – 10 – 4 PR
Cubic capacity Engine oil / filling quantity 15 W 40 / 1.0 ltr.
Gear oil / filling quantity 80 W 90 / 0.12 ltr.
Capacity Max. speed 45 km/h
Min. speed ≤ 1.81 km/h
Max. ascent angle 12°
This manual suits for next models
1
Table of contents
Other FlexTech Scooter manuals
