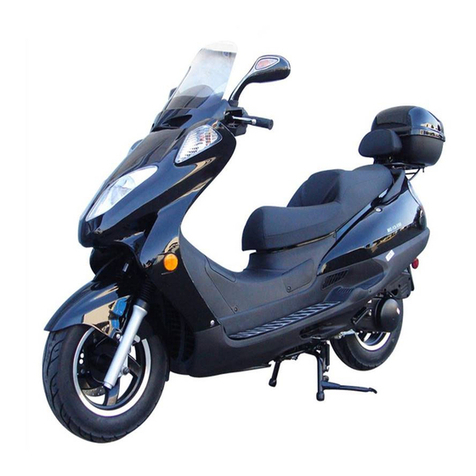
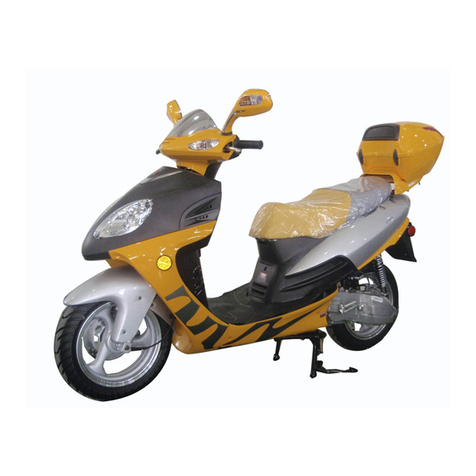
Roketa Moto Fino MF125QT-7 User manual

MF125QT-7 / MF150QT-7
www.motofino.com

I. VARIOUS PART NAMES:--------------------------------------
-
11.L:----------------------------------------------------------------------------
-
7
II: OPERATION DESCRIPTIONS OF SYSTEMS:----------- 3 2.R:---------------------------------------------------------------------------- 7
A. INSTRUMENT PANEL COMPONENTS:---------------
-
3H. UNDER SEAT STORAGE BOX: ------------------------------------
-
8
1.Speedometer: ----------------------------------------------- 3I. STEERING HANDLE LOCK:---------------------------------------
-
9
2.Odometer:---------------------------------------------------- 31.Locking: ------------------------------------------------------------------
-
9
3.Turn Signal Indicator:-------------------------------------- 32.Unlocking: ----------------------------------------------------------------
-
9
4.High Beam Indicator ---------------------------------------- 3III. HOW TO START ENGINE :-------------------------------------------
-
9
5.Fuel Gage:--------------------------------------------------- 3A. STARTING ENGINE WITH
B. MAIN SWITCH:---------------------------------------- 4ELECTRIC STARTER:----------------------------------------------
-
10
1.OFF:------------------------------------------------------------ 4B. STARTING ENGINE WITH KICK
2.ON:-------------------------------------------------------------- 4STARTER:--------------------------------------------------------------
-
11
3.Lock:--------------------------------------------------------- 4IV. BASIC MOTORCYCLE OPERATIONS:---------------------------
-
12
4.Unlocking Under Seat Storage Box:---- 4A. TO START RIDING:--------------------------------------------------- 12
C. STARTER SWITCH BUTTON:----------------- 5B. SPEED ADJUSTMENT:----------------------------------------------- 12
D. HEADLIGHT SWITCH:----------------------------- 6C. PROPER BREAK IN AND RIDING TO
E. DIMMER SWITCH: --------------------------------- 6LENGTHEN THE LIFE OF THE MOTORCYCLE:-----------
-
13
F. HORN SWITCH BUTTON:-------------------------------
-
7D. DO NOT APPLY BRAKES AND
G. TURN SIGNAL SWITCH:--------------------------------
-
7MAKE SHARP TURNS:----------------------------------------------
-
14

E. BE EXTREMELY CAUTIOUS K.BACK MIRROR INSPECTION:-------------------
-
21
ON WET SURFACES:---------------------------------
-
14 VII.PERIODICAL INSPECTOION:----------------------
-
21
V.HOW TO STOP:---------------------------------------------- 14 A.OIL AND FILTER:------------------------------------
-
22
A. PARKING THE SCOOTER:------------------------
-
15 1.Air cleaner replacement:------------------------------
-
22
B. CHOOSE A FLAT PLACE:-------------------------- 15 2.Oil change and filter cleaning:-----------------------
-
22
VI. INSPECTION BEFORE RIDING:-------------------- 16 3.How to change oil and clean filter:------------------
-
22
A. GASOLINE:---------------------------------------------
-
16 B. GEAR OIL CHANGE:-------------------------------- 23
1.Check Fuel:------------------------------------------- 16 1.How to change gear oil:-------------------------------
-
24
B. HANDLE BAR INSPECTION:----------------------
-
17 C. REPLENISHMENT OF BRAKE OIL:
C. BRAKE INSPECTION:-------------------------------
-
17 (DISK BRAKE)------------------------------------------
-
24
1.Drum brake series:---------------------------------------
-
17 D. SPARK PLUG INSPECTION:---------------------- 25
2.Disk brake series:----------------------------------------
-
18 1.Cleaning:------------------------------------------------
-
25
D. BRAKE LIGHT INSPECTION:---------------------
-
19 2.Adjustment ---------------------------------------------
-
25
E. TURN SIGNAL LIGHT INSPECTION:-----------
-
19 3.Recommended spark plug:---------------------------- 25
F.TIRE INSPECTION:------------------------------------
-
20 E.BATTERY AND ELECTROLYTE
G. SHOCK ABSORBER INSPECTION:--------------
-
20 INSPECTION:------------------------------------------ 26
H.HEADLIGHT AND TAIL LIGHT F.FUSE REPLACEMENT:------------------------------ 26
INSPECTION:-------------------------------------------
-
20 VIII.WHEN ENGINE CAN NOT START:---------------
-
26
I.HORN INSPECTION:----------------------------------
-
20
J.INSPECT SPEEDOMETER:--------------------------
-
21

I
. VARIOUS PART NAMES
:
AIR FILTER
BATTERY
COMPARTMEN
T
CENTER STAND
HELMET HOOK
HEADLIGHT
TURN SIGNAL, HORN, AND
HEADLIGHT SWITCHES
KICK STARTER

MAIN STAND
IGNITION
FRONT BRAKE LEVER
UNDER SEAT STORAGE BOX
TAIL LIGHT
TURN SIGNAL LIGHT
MUFFLER

that the remaining fuel is about 0.25 gallons.
Fill with gasoline as soon as possible. (91 octane or above.)
●When headlights are bright dashboard indicator will glow
5. Fuel Gage:
1. Speedometer:
2. Odometer :
●Total forward distance is indicated in miles
II. Operation Descriptions of Systems
A. Instrument panel components :
●Turn signal indicator will blink if turn signal
4. High beam indicator:
The black number with white background
switch is in operation
●MPH and / or KPH (miles and kilometers per hour)
3. Turn signal indicator:
indicates tenth of miles.
Typical dashboard display
●Indicates the fuel volume in the fuel ta
n
(ignition switch must be on)
●If the needle points at the red section, it
UNLEADED FUEL ONLY
1
2
34
5

1.OFF:
B. MAIN SWTTCH: ●All systems are off.
●Remove or insert key in this position.
2.ON:
●The electric power is connected
●Starter switch is functional.
●You cannot remove the key.
3.LOCK:
●The handle bars are locked.
●You can remove the key.
HINT:
●After locking, turn handle bars gently to
make sure handle bars are locked.
●Turning handle bars gently will facilitate unlocking also.
4. Unlocking under seat storage box
●Turn key far right to open position.
HINT:
●Applying gentle pressure (up and down) to seat will facilitate
opening.

●Hold brake and press starter switch to engage electric starter.
●After engine starts, release the starter button at once.
Doing so will damage the electric starter.
C. STARTER SWITCH BUTTON:
●Do not engage the starter for more than 4 seconds at a time.
●When engine is in operation, do not press the starter button .

E.DIMMER SWITCH:
2. Headlight switch has three positions to accommodate
with this switch. instrument panel will light.
D.HEADLIGHT SWITCH:
Headlights and Tail Lights Switch
1.Headlights should remain in the on position
at all times while operating your scooter.
optional lighting features. Please take time to familiarize yourself ●When the high beam is on, indicator on
1. High
B
2. Low Beam

Turning switch to the left will cause left signals to illuminate.
2.R. →
G. TURN SIGNAL SWITCHF. HORN SWITCH BUTTON
●When key is on, pressing button will sound horn.
1.L. ←
Turning switch to the right will cause right signals to illuminate.
*When signals are on, symbol on instrument panel will illuminate.
3. Press center (white) to cancel turn signals.
Signals will not cancel automatically.

Unlocking under seat storage box:
●Turn key (on main switch) to far right. (Open position.)
HINT:
●Applying gentle pressure (up and down) to seat will facilitate opening.
Interior of box can be very hot. DO NOT
put flammable objects inside case.
Storage box is not waterproof.
H. Under Seat Storage Box
NOTICE:
Carrying capacity should not exceed 6 pounds.
CAUTION:

I. STEERING HANDLE LOCK:
●To prevent theft, a locking handle bar has been installed. NOTICE:
Park in legal parking spaces only.
HINTS:
●After locking, turn handle bars gently to
make sure handle bars are locked.
●Turning handle bars gently will facilitate unlocking also.
1. Locking
●Turn handle bars to full left and turn key
counter clock-wise to the lock position.
2. Unlocking:
●Turn the key clock-wise to unlock.

A. STARTING ENGINE USING
ELECTRIC STARTER:
●Turn main switch to "ON".
be difficult to start, turn throttle grip 1/8-1/4 turn and start engine again.
●Turn secondary emergency cut off switch to the run/on position.**
III. HOW TO START ENGINE
There are two ways to start your engine.
●Hold brake and press starter switch to engage electric starter.
●Do not turn throttle grip, just press starter switch button to start engine.
●Do not engage the starter for more than 4 seconds at a time.
●After engine starts, release the starter button at once.
●When engine is in operation, do not press the starter button.
Doing so will damage electric starter.
** Most models have a switch with a circle meaning on
and a circle with an X and/or a line through it meaning off.
●If motorcycle has not been used for a long time it may
●Warm up engine for 2-3 minutes before operation.

REMINDER:
●After using kick starter pedal, fold it back to its
original position.
●Carbon dioxide exhaust from engine is
harmful. Vehicle is for exterior use only.
●Place scooter/motorcycle on center stand.
●Turn main switch to "ON".
be difficult to start, turn throttle grip 1/8-1/4 turn and start engine again.
B. STARTING ENGINE WITH KICK STARTER:
** Most models have a switch with a circle meaning on
and a circle with an X and/or a line in it meaning off.
●Turn secondary emergency cut off switch to the run/on position.**
●Hold brake and kick down on starter pedal.
●If motorcycle has not been used for a long time it may
●Warm up engine for 2-3 minutes before operation.

IV. BASIC MOTORCYCLE OPERATIONS:
A. TO START RIDING:
●Inspect vehicle before operation.
●Turn on turn lights before moving.
●Make sure it is safe behind and ahead before moving forward.
B.SPEED ADJUSTMENT:
●Speed is adjusted by turning the throttle grip.
●Speed is increased by rolling the throttle towards yourself.
●Release brake levers. ●Speed is decreased by rolling the throttle away from yourself.
●Add throttle slowly by twisting throttle grip towards you and then ●Always accelerate slowly.
motorcycle will move forward.
We recommend all beginners take lessons from experienced riders.
Some States have motorcycle schools.
Contact your local State Department of Vehicle and Motor safety.

P
ROPER BREAK IN AND RIDING WILL LENGTHEN THE
LIFE OF THE MOTORCYCLE:
WARNING:
●Release throttle before applying brakes.
●Failure to use both brakes may cause skidding.
●Hard and sudden stops cause premature brake wearing.
●Always check brakes for proper function before accelerating
to high speeds.
●During the initial 250 miles refrain from top speed.
●Do not accelerate abruptly.
●Do not operate engine at high RPM while on center stand.
●Change engine oil after the first 250 miles and every 700 miles thereafter.
●We recommend Castrol 10W-40 synthetic blend oil.
●Use unleaded 91 octane or above gasoline.

D. DO NOT APPLY BRAKES AND MAKE SHARP TURNS
Turning while braking can cause falls, skidding, and
E. Be Extremely Cautious on Wet Surfaces.
●The road surface in rain is different from dry surfaces.
●Increase braking distance and reduce speeds.
●Drive Cautiously.
V. HOW TO STOP:
●Be aware of vehicles behind and in front of you.
●Never make sudden stops.
●When braking, use both brake levers.
●Increase presure evenly, as needed.
●Avoid sudden, abrupt stops.
●WARNING:
serious injury.
●Return throttle grip to idle position.
●Apply pressure on brake levers evenly.
FRONT BRAKE REAR BRAKE LEVER

A. PARKING THE SCOTER. B. CHOOSE A FLAT PLACE:
●Turn the signal switch off. ●Choose a flat surface not blocking traffic and
●Turn main switch to "OFF". push down the center stand. Scooter will fall down
or tip over if placed on unlevel ground.
●Grasp left handle with left hand to make
scooter straight. Hold side handrail below
seat with right hand. Step down on main stand.
Push with right foot and pull back on scooter
with right hand with strength.
●To prevent stealing, lock the steering handle
WARNING: when parked and take out the keys.
●Turn off main switch only when vehicle is not in use.
●Turning off switch will turn off all lights making it difficult to see.

VI. INSPECTION BEFORE RIDING:
●Always inspect before riding.
●Turn main switch to "OFF".
a pre-check up is necessary before each ride.
●Periodic Inspections every 1,000 miles by a trained professional
or Service Center is recommended.
NOTICE: NOTICE:
●Check oil and brake fluidbefore each operation. ●Turn off engine when refilling with gasoline.
●Use unleaded 91 octaine and above.
A. GASOLINE: ●Turn off the key from main switch and insert it
1.CHECK FUEL: into fuel tank cap. Turn the key clock-wise and
●When the pointer on the gas gage is close to the red open fuel tank cap.
section, the effective residual gasoline is about .25
gallons. WARNING:
●Keep gasoline level a full inch and 1/2 from the
top of fuel tank when refilling. If gasoline
is overfilled it is easy to splash outand leak out which
can be dangerous.

B. HANDLE BAR INSPECTION: C. BRAKE INSPECTION:
●Check steering bar. Applying pressure up and down, forward 1.Drum brake series:
●Turn main switch to "OFF".
●Check steering functions. Check for rubbing or abnormal sounds. ●The brake levers should be properly adjusted.
●If any abnormalities, take the scooter to the distributor The free play* is about 1/4 inches maximum.
or service center for inspection and repair.
*Free play means the distance between loose
and tight positions of brake levers.
This manual suits for next models
1
Table of contents
Other Roketa Scooter manuals

Roketa
Roketa Bahama-50 User manual

Roketa
Roketa MC-17-50 SICILY-50 User manual

Roketa
Roketa bali 150 User manual

Roketa
Roketa Bahama User manual

Roketa
Roketa MC-46-150 User manual

Roketa
Roketa 2006 Tahiti-150 YY125T-12 User manual

Roketa
Roketa Fiji MC-04 User manual

Roketa
Roketa MC-37A-50 User manual

Roketa
Roketa MC-08-50 User manual