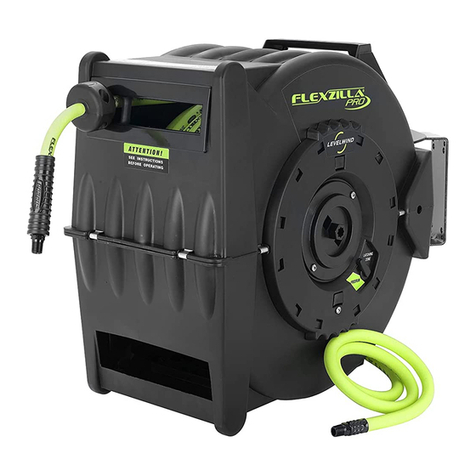
Flexzilla L8651FZ User manual

Flexzilla®Portable Manual Open Face Air Hose Reel
Part No. : L8651FZ & L8654FZ
CAUTION: Inspect hose before each use. Do not exceed 300 psi work-
ing pressure. Do not kink, twist, knot or abrade hose. Do not wrap hose
around body. Keep hose away from hot surfaces and/or chemicals. Keep
children away from work areas.
CAUTION: Read all instructions and warnings before operating this
product.
SAVE THESE INSTRUCTIONS! READ AND UNDERSTAND ALL
INSTRUCTIONS!
5. USING GROUND STAKES: (Stand-alone position)
• Four large holes are provided at the ends of the support legs
for use with ground stakes (not included) to reduce movement
when placing reel on ground.
CARTON CONTENTS:
• Hose Reel assembly
• Curved carry handle and grip (2 medium bolts/nuts)
• Support legs (4 long bolts/nuts)
• Flexzilla®air hose
• Lead-in hose
• Inlet swivel
• Swivel (to connect lead-in hose)
• Swivel handle (bolt & nut, for winding lever)
• Hose stopper (2 small bolts/nuts)
• Hose layering guide
• Hose layering bracket (4 small bolts/nuts)
ASSEMBLY:
SEE PAGE 2 for full assembly instructions
Carrying
Handle
Handle Arm
Support Legs
Mounting Bracket
Swivel Handle
Female inlet
swivel fitting
Hose Layering
Bracket
Hose
Layering
Guide
Bend
Restrictor Figure A
3. BENCH, WALL, OR TRUCK MOUNTING: For mounting to wall or
bench surface, mount reel using the four outer holes in the mounting
base. Mounting fasteners not included. Reel can be mounted to truck
with or without support legs.
4. MOBILE USE: Fasten the support legs so the shorter end of each leg
is toward the back of the reel.
• Use four short bolts (included). Insert bolts first through the
recesses on bottom of support legs, then through outer pair of
holes in reel mounting base. Secure with lock nuts.
• Use two long bolts (included). Insert bolts through handle bolt
holes and then through center holes in mounting base. Secure
with lock nuts.
• Fit cushion grip to free end of carry handle.
OPERATION:
HOSE LAYERING GUIDE: Using the hose layering guide will help
reduce hose tangles by distributing the hose evenly during hose
rewinding. Place one hand on the hose layering guide and slide it
back and forth while retracting the hose.
FOR WALL OR OVERHEAD INSTALLATION :
1. Change the layering guide bracket position by removing the two
bolts where the layering guide bracket bolts to the side of the
mounting base. (See figure above)
2. Reattach the layering guide bracket using the same bracket end
hole and the third hole in the side of the mounting base. Tighten
bolts securely.
The hose layering guide may be removed if desired by removing
the hose stopper and retracting hose through the layering guide.
Replace the hose stopper on the hose.
Repair Parts Description
L8654FZLI 5’ x 1/4” Lead-in hose for L8654FZ Reel
L8651FZLI 5’ x 3/8” Lead-in hose for L8651FZ Reel
RP004068 Swivel body assembly for hose
Owner’s Instructions
Legacy Manufacturing Company
Marion, IA 52302 USA
legacymfg.com
INS8651FZ
(Published 2014-12-02 Revised 2023-06-29)
FLEXZILLA, the color CHARTREUSE and the Flexzilla Stylized X are all registered trademarks of Weems Industries, Inc.
FLEXZILLA et la couleur CHARTREUSE et la Flexzilla Stylized X sont toutes des marques déposées de Weems Industries, Inc.

Assembly:
Small Component list
Inlet swivel
1 7/16 in. (#1) bolt
1 5/8 in. (#2) bolt
1 1/8 in. (#3)
phillips bolt
13/16 in. (#4) bolt
Figure 1Figure 2Figure 3Figure 4Figure 5
Tools suggested: 2 adjustable wrenches, 10mm wrench,
phillips screwdriver
1. Attach support legs to mounting base, requires 4 (#1) bolts and 4 large lock nuts & washers. See Figure 1, also refer
to Figure A & B illustration on page 1.
2. Attach hose layering bracket to mounting base, requires 4 (#4) bolts and 4 small lock nuts / washers. See Figure 2,
also refer to Figure A illustration on page 1.
3. Open the air hose assembly and remove 1 of the black bend restrictors from the end of the hose and discard.
4. Place the hose layering guide onto the hose layering bracket, see Figure 3, also refer to Figure A illustration on page 1.
5. Place end of hose through hose layering guide. See Figure 3
6. Apply thread tape on the hose end fitting that has the black bend restrictor removed. Now securely tighten the hose end
onto the 90º brass elbow fitting, see Figure 3.
7. Now attach the swivel handle. Place the threaded end of handle through hole on the handle arm. Refer to Figure A
illustration on page 1. Place lock nut washer on threaded end first, followed by a regular washer and small hexagon nut.
Tighten the lock nut until handle is secured.
DO NOT WIND UP HOSE ASSEMBLY YET.
8. Attach carrying handle to mounting base, flat part of carrying handle should be placed on top of mounting base as
shown in Figure 4. Requires 2 (#2) bolts and 2 large lock nuts / washers.
9. After carrying handle is assembled, use swivel handle to wind hose onto reel use layering guide to wind hose evenly
on reel.
10. Take both hose stopper halves and place around hose about 4-5 in. down the hose end that has bend restrictor on it.
Use 2 phillip screws and 2 small hexagon nuts. Locking nuts should go into the designated hexagon holes on the hose
stopper. Tighten hose stopper using phillips screwdriver to make hose stopper stay at the desired position.
11. Place thread tape on male end of inlet swivel. Now place male end of inlet swivel into the female end on the side of
the mounting base, see Figure 5. Tighten securely with wrench.
12. Apply thread tape to both ends of the 5 ft. lead-in hose. Tighten one of the male hose ends into the inlet swivel on the
side of the mounting base.
TWO YEAR LIMITED WARRANTY
For warranty information visit flexzilla.com/warranty or call 800-645-8258
This manual suits for next models
1
Other Flexzilla Tools manuals
