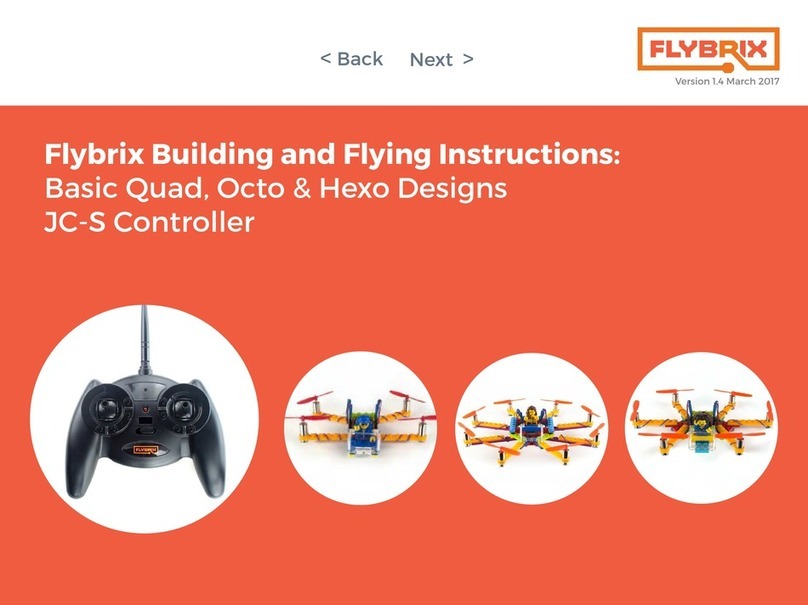
Flybrix JC-2 Instruction Manual

Version 1.4.2 November 2017
Flybrix Building and Flying Instructions:
Basic Quad, Octo & Hexo Designs
JC-2 Controller
< Back
Next >

Table of Contents
Build More, Learn More
Start with the Quad.
Learn the basics of building,
connecting motors and flying.
Try the Octo next.
Take what you’ve learned from the
quad build, apply your know-how to
the octo build.
Level up to the Hexo.
Now that you’re almost a pro, give the
Hex build a shot. Use the software to
change motor specs to fly your Hexo
build.
1.
2.
3.
< Back
Next >
4. Getting Started
5. Safety
6. Building a quadcopter
14. Flying
20. Troubleshooting
21. Configuration Software
36. Building a hexocopter
22. Building an octocopter
3. Introduction
45. Games

Introduction
Flybrix is designed for experimentation, creativity and learning. Trial and
error is the heart and soul of this kit. Why? That’s where the “a-ha” moments
happen, that’s where the learning happens, that’s where the lines between
fun and education get blurred. Flybrix is all about providing a safe, fun,
sometimes silly platform for asking and answering “how” and “why” ques-
tions that take us on the journey of understanding how things work.
In this manual is the first build (the basic quadcopter) of 3 designs that take
you on a learning arc that introduces all the aspects of your Flybrix kit. The Oc-
tocopter is the next build and finally the Hexocopter.
If you happen to get turned around in the process, we’re here for you! Visit the
forum on flybrix.com, or email support@flybrix.com for help.
Taking to the skies: Once you’ve built your airframe, it’s time to fly! Ask anyone
who flies drones, quads, hexo, and octocopters. They’ll tell you flying is “a thing”.
It takes practice to do well. Some people even go to special piloting schools to
learn how to do it! Flybrix is the perfect platform to learn how to become an
ace pilot because the drones you build are small, light and they collapse on
hard crashes. And, they go back together in a jiffy. The designs we’ve given you
are stable, balanced frames that fly well. Experiment with flying these designs
first to get a feel for how to fly Flybrix. Or not… You do you!
Exploring more: Once you’re ready, take your kit to the next level by visit-
ing the user forum on flybrix.com. You’ll see other ways to use the parts you
already have, plus see some exciting new ones, learn how to tweak your air-
frames, share schematics, and meet the Flybrix community. On the last page of
these instructions we have a few game ideas that are fun to play, even with just
two people!
Leveling up: Download the Flybrix Chrome extension from the Chrome Web
Store for access to our code, configuration tools, community, and more! The
Configurator visualizes the data that comes off your Flybrix and your controller.
Features like: sensor feedback, balance, thrust levels, motor positioning, bat-
tery output etc. When you start getting into new designs with different motor
placements and adding motors, The Configurator will be your go-to in order to
get your airframes adjusted to get them flying.
We love feedback! Email support@flybrix.com with any feedback you think
could help us improve the product.
< Back
Next >

Getting Started: know your kit
LEGO Bricks & Minifig
Propellers
Flight Control Board Propeller Wrench
Motors Boom-Arms
USB Cord Battery Charger
Receiver* Battery
Tweezer
Binding Cord
* If you ordered a kit that includes the R/C Controller, you will have the receiver board and joystick controller in your kit.
< Back
Next >

Getting Started: Know Your Kit
LEGO Bag: There are enough bricks in this kit to build a quadcopter, hexocopter and octocopter, plus several extra bricks to use for tweaking your design. Get cre-
ative later on by adding your own LEGO bricks! The color of your LEGO bricks will most likely be different from the instruction pictures. It’s important to reference
shape and size of LEGO while you’re building, not color matching.
RC Controller*: You’ll use the controller to fly your airframes. Take off the bubble wrap, and it’s ready to go. The controller uses four AA batteries and they’re al-
ready inside.
Battery: Pay close attention to the way the battery connector is keyed.
It’s dangerous to plug the battery in backwards to both the charger and the flight board.
Here are some additional resources so you can read up on battery safety:
http://www.rchelicopterfun.com/rc-lipo-batteries.html http://thedronegirl.com/2015/02/07/lipo-battery/ http://www.towerhobbies.com/help/ama_lipo/
http://www.rcgroups.com/forums/showthread.php?t=209187
Propeller wrench: Use this wrench to pop your propellers off to avoid damage to your motors.
Receiver, Binding Cord: These components are used when you’re flying with an external RC controller. The receiver attaches to the flight control board and the
biding cord is used to bind the controller to the flight control boar and receiver. We’ll cover this further in the flight instructions.
BEFORE YOU START BUILDING... UPDATE YOUR FIRMWARE. We are constantly updating the
software and firmware that improve the Flybrix experience.
https://flybrix.com/pages/upgrading-your-firmware
The battery has one side of the connector plain plastic and
the other side has metal connection points.
Connect the battery with the plain plastic side up.
Properly connected battery!
< Back
Next >

Let’s Build a Quadcopter! 1.
Attach (4) Boom-Arms to (2) 1x8 bricks.
*Notice the next few instruction pictures are in black and white. That’s
to remind you that the colors of your LEGO bricks don’t matter. Use the
shapes of your LEGO as your reference for which bricks to use.
< Back
Next >

2.
Attach the flight control board.
*The “front” of your airframe is where the cables attach to the flight con-
trol board. Orientation is important when you’re building!
Attach (1) 2x4 brick to the back of your airframe below the battery con-
nector cords, with one row of the brick sticking out past the 1x8 bricks.
Attach (1) 1x4 brick to the front of your airframe, flush with the 1x8 bricks.
3.
Front
Back
Front
Back
< Back
Next >

Design check-In 4.
Attach (1) 1x4 brick to the top of the flight board.
If you have an RC Controller, take a look at your flight control board and
notice where these 3 pins are located for the next step. If you’re using
the app to fly your airframe, these pins don’t matter.
Front
Back
Front
Back
< Back
Next >

5. Only if you are using an RC controller to fly your quad.
Line up the 3 pins on your receiver board with the 3 holes on your flight
control board and attach the two boards by pushing them together.
This illustration is meant to show where the R415x connects to your
board. Before you fly for the first time, you’ll remove this board and go
through a pairing sequence (later on in the instructions) for now you can
keep your R415x attached.
6.
Attach (1) tail fin.
Attach the flat brick that comes with your battery. It has velcro on it.
Front
Back
Front
Back
< Back
Next >

7.
Colors and placement really matter in the next few steps! Take two
motors that have black and white cables coming off the bottom. Gently
push the motors into the Boom Arms from the bottom to the top. Push
them in so they’re about even with the bottom edge of the Boom Arms.
Front
Back
8.
Now, get two more motors that have the red and blue cables coming
off the bottom. Gently push the motors into the Boom Arms from the
bottom to the top. Push them in so they’re about even with the bottom
edge of the Boom Arms.
* The difference between the red/blue motors and the black/white
motors is that the red/blue motors spin clockwise and the white/black
ones spin counter clockwise. This is important for generating lift.
Front
Back
< Back
Next >

9. Pay attention to this step, it can be tricky!
Time to add the props!
One color goes in the front and one color goes in the back. Notice the
red ones are in the back and the white ones are in the front.
Each propeller has a very small label on it. The circle in the picture
shows about where the label is located. The props are labeled A and
B. A props and B props are shaped differently. They match up with the
direction the motors spin in order to push the air in the right direction
to generate lift. B props go on the black/white motors and the A props
go on the red/blue -- always.
A
A
B
B
Design Check-in
It’s time to take a look at your motor connectors. On the very ends you
can see white marks. These marks will be used to line up the pins on
these connectors and your flight control board. Lining up these white
marks with marks on your flight control board takes a good set of eyes
and attention to detail.
Front
Back
< Back
Next >

Design Check-in
In the next step, we’ll show you how to connect your motors. For right
now, take a look at your airframe and find the 4 white marks on both
sides of the edge of your flight control board that you’ll use to line up
your motor connector pins. The red arrows show you where the white
marks are on the flight control board. The dotted line shows you how
to match up the marks on the flight control board and the motor con-
nectors. *NOTE The white marks on the motor connectors are on the
opposite side of the motors, so it may be that to get the correct align-
ment, the white marks on your motor connectors face inward, toward
the board.
10.
Let’s get the motors connected! One by one, wrap each motor cable around the boom
arm a few times so it stays out of the way of the spinning props and connect the motor
pins to the flight board. For your quad to fly, the motors need to be connected to the
correct ports on the flight control board. One way is to connect the motor to the ports
closest to it in each corner of the flight control board. Line up the white marks and
gently push the motor connector into the port. Another way to check to make sure
you have the right ports is to find the numbers on the ports on the opposite edge of
the motor ports from the white marks. Use ports 0 and 6 on one side and 1 and 7 on
the other.
Now, attach your pilot and windshield. If you’re a beginning pilot, its easeir to fly with
less weight on the quad. You can leave off the minifig and the windshield if you like.
FrontBack
< Back
Next >

11.
Connect your battery to the cable attached to the flight control board.
Remember battery safety! Plugging in the battery the wrong way can
heat up and short circuit your flight control board.
Now stick your battery with the velcro side down to the brick with the
veclro tab.
If your battery is properly charged, the LEDs on the flight control board
should be blinking. If not, it’s time to charge your battery!
12.
Once your battery is connected go to the flybrix app to get airborne.
The instructions are easy as 1, 2, 3!
If you’re using an RC controller, find the orange LED that is under the
receiver board. It’s a bit hard to see since it shines from beneath the re-
ceiver board. This light tells you that the boards are connected properly
and you are set up to start the flying sequence with your controller.
< Back
Next >
For a reminder, click here.

The app mimics the controls of an external joystick transmitter, so knowing how an external controller works, applies to how the app controls work as well.
Learning how to fly starts with understanding how your controller works. Flying takes practice to master. There are many resources available online that help
explain further how to fly. Here’s one of our video picks. If you’re new to being a pilot, be patient with yourself as you learn, flying a quadcopter is not like a toy
that has one joystick, for example a toy helicopter. Flying multirotors are much more involved. Stick with it, you’ll get it!
Here are some terms that can get you started:
Thrust creates a force that lifts your airframe up off the ground.
Pitch creates a torque that tilts the nose of your airframe either up toward the sky or down toward the ground.
Roll creates a torque that tilts your airframe side to side. Imagine wings on an airplane, they can tilt back and forth toward the ground or toward the sky.
Yaw creates a torque that spins your airframe while remaining flat in the sky with no tilting either forward, backward, or side to side.
Thrust
Yaw
Yaw
Thrust
Pitch
Roll
Roll
Pitch
Before You Fly: Overview
< Back
Next >

JC-2 Joystick Transmitter Controller
8. Transmitter LED indicator
6. Thrust Trim (+/-) buttons
1. Left Stick - Thrust /Yaw control
5. Yaw Trim (+/-) buttons
4. Pitch Trim (+/-) buttons
2. Right Stick Pitch/Roll control
7. On/Off switch
3. Roll/Trim buttons
Basic Stick Controls
Know Your Joystick Controller
“Up and Down”
“push the left stick up or down”
“Left or Right”
“push the left stick left or right”
“In”
“push the right stick in”
Part Function
1 Left Stick Controls Thrust and Yaw. Pushing stick forward will
increase thrust and generate lift. Pushing stick left
or right will create yaw torque and cause CCW or
CW rotation of your airframe.
2 Right Stick Controls pitch and roll. Pushing stick forward
will rotate the nose down and move the airframe
forward. Pushing the stick left will rotate the left
side of the airframe down and move the airframe to
the left.
PRESS IN AND RELEASE TO CHANGE BETWEEN
EXPERT AND BEGINNER MODES
3 Roll Trim Adjusts the roll level when the right stick is in the
neutral position. Use to compensate for drifting left
or right.
4 Pitch Trim Adjusts the pitch level when the right stick is in the
neutral position. Use to compensate for drifting
forward or backward.
5 Yaw Trim Adjusts the yaw level when the left stick is in the
neutral position. Use to compensate for uninten-
tional CW or CCW rotation.
6 Thrust Trim Adds a small bit of bias to the thrust level.
7 On/Off
Switch
Slide up to turn the joystick transmitter ON. Slide
down to turn it off.
Down
Up
Left Right
< Back
Next >

Receiver Board (Top View)
Receiver LED indicator light
Antenna
Know your receiver board
Receiver Board (Bottom View)
Pins
Receiver board LED indicator codes
Solid green - paired and receiving data
Blinking off / orange - looking for transmitter
Solid orange - weak signal
Transmitter (joystick controller) LED indicator codes
Solid green - paired and sending data in beginner mode
Blinking red - looking for receiver board
Blinking green / orange - paired and sending data in expert mode
Blinking green / red - calibration mode
< Back
Next >

1. 2.
PROPERLY ATTACHED RECIEVER BOARD
Once the flight control board is plugged into the battery, the reciever
board indicator LED will blink yellow/orange. This means the receiver is
looking for a signal from your transmitter (aka your joystick controller).
Insert the pins on the receiver board into the ports on the top of the flight
control board.
Getting ready to fly: Attaching the receiver board to the flight control board
< Back
Next >

Every time your transmitter is turned on, it will look for the receiver.
With the receiver installed and the flight board attached to a charged battery the
receiver will blink off/ orange.
Put the left stick all the way down (throttle off) and turn on the transmitter while
holding it within about 1 foot from the receiver board. You will hear one beep and
the transmitter LED indicator will turn solid green. The receiver indicator will also
turn solid green.
Now the receiver board is paired to the transmitter.
Troubleshooting this step:
* If the transmitter is too far away from the receiver, you will not hear a beep and the
transmitter LED will continue to flash red.
** If the left joystick is not all the way down when pairing, the reciever will refuse to
bind and will instead reset itself and flash yellow/orange. Put the left stick all the
way down and cycle the power on the transmitter.
We suggest reading all the way through these instructions before beginning.
There are 3 things you need to do to with either the app or the joystick control-
ler to fly:
Pairing (aka binding) the reciever board it to the flight control board - that
ensures the flight control board, reciver board and your joystick controller are
“talking”.
Arming - which means props are able to spin.
Disarming - stopping props from spinning.
If you’re flying with the app, go ahead and follow the 1, 2, 3 steps on the home-
screen to get airborne. It may be handy however, to read through the external
controller instructions to better understand how the app operates.!
Taking Flight 1. Pairing the receiver board to the transmitter
(joystick controller)
< Back
Next >

To arm the motors, push the left stick all the way down (throttle off) and hold down
the “Throttle Trim Button” (-) until you hear a beep. You will see the
flight control board complete the arming sequence. Once the arming sequence is
complete, you’ll see the lights on the flight control board flashing blue in a double
pulse pattern.
2. Arming the motors
-
To take off, increase the throttle by pushing the left stick up.
3. Taking flight
< Back
Next >

Once you land or crash, it’s somewhat important to stop your motors from spinning
(it will help avoid your motors from burning out if they’re attempting to spin, but are
stuck etc.)
To disarm or stop your motors from spinning, press and hold down the “throttle trim
(-) button until you hear a beep.
4. Disarming the motors
(stop motors from spinning)
-
If you’ve flown drones before, you’ll be able to fly your airframe just like a ready-to-
fly drone.
Flybrix is about experimenting and learning through trial and error. Here are some
tips and tricks for flying.
Take off from a flat surface. Every time your airframe turns on before you fly,
the flight control board calibrates to what it believes is “flat”, if you take off from
an uneven surface, the motors auto-tune in flight to keep your airframe level. This
means if you take off with a right tilt for example, your airframe will vere right.
It’s also important to remember when you build your airframes, make sure they
have a flat bottom.
Throttle-up for a clean takeoff rather than letting your airframe sit on the
ground with the motors spinning and gently increasing the throttle. After a few
tries, you’ll get a feel for how much to throttle-up for a clean takeoff.
Controls misbehaving? For example, if you’re trying to bank right using your
roll controls and your airframe goes left... Make sure your airframe is facing with
the battery connector leads on the flight control board facing you. If you have the
cords pointing away from you, the controls are flipped and you’re flying like it’s
“opposite day”.
Erratic flight? This is a little tricky, because erratic flight can be caused by a
number of things, like piloting skill, the weight and balance of your builds etc. But
let’s say you’ve built an airframe according to the instructions we gave you as an
example. You shouldn’t experience erratic flight. Check to make sure your battery
is fully charged and your software is completely up-to date. (We’re making im-
provements all the time).
Flying Tips / Troubleshooting
< Back
Next >
Table of contents
Other Flybrix Controllers manuals
Popular Controllers manuals by other brands
Honeywell
Honeywell WEB/CP-202-XPR installation instructions

BST
BST ekr CON 100 Installation and operating manual
V2
V2 TORQ-A manual
Sentera Controls
Sentera Controls ECMF8-EW Mounting and operating instructions
Toro
Toro OSMAC RDR Satellite Controller installation instructions
Danfoss
Danfoss Icon Master installation guide
